


Loopysue
Loopysue
About
- Username
- Loopysue
- Joined
- Visits
- 10,416
- Last Active
- Roles
- Member, ProFantasy
- Points
- 10,163
- Birthday
- June 29, 1966
- Location
- Dorset, England, UK
- Real Name
- Sue Daniel (aka 'Mouse')
- Rank
- Cartographer
- Badges
- 27
Latest Images


-
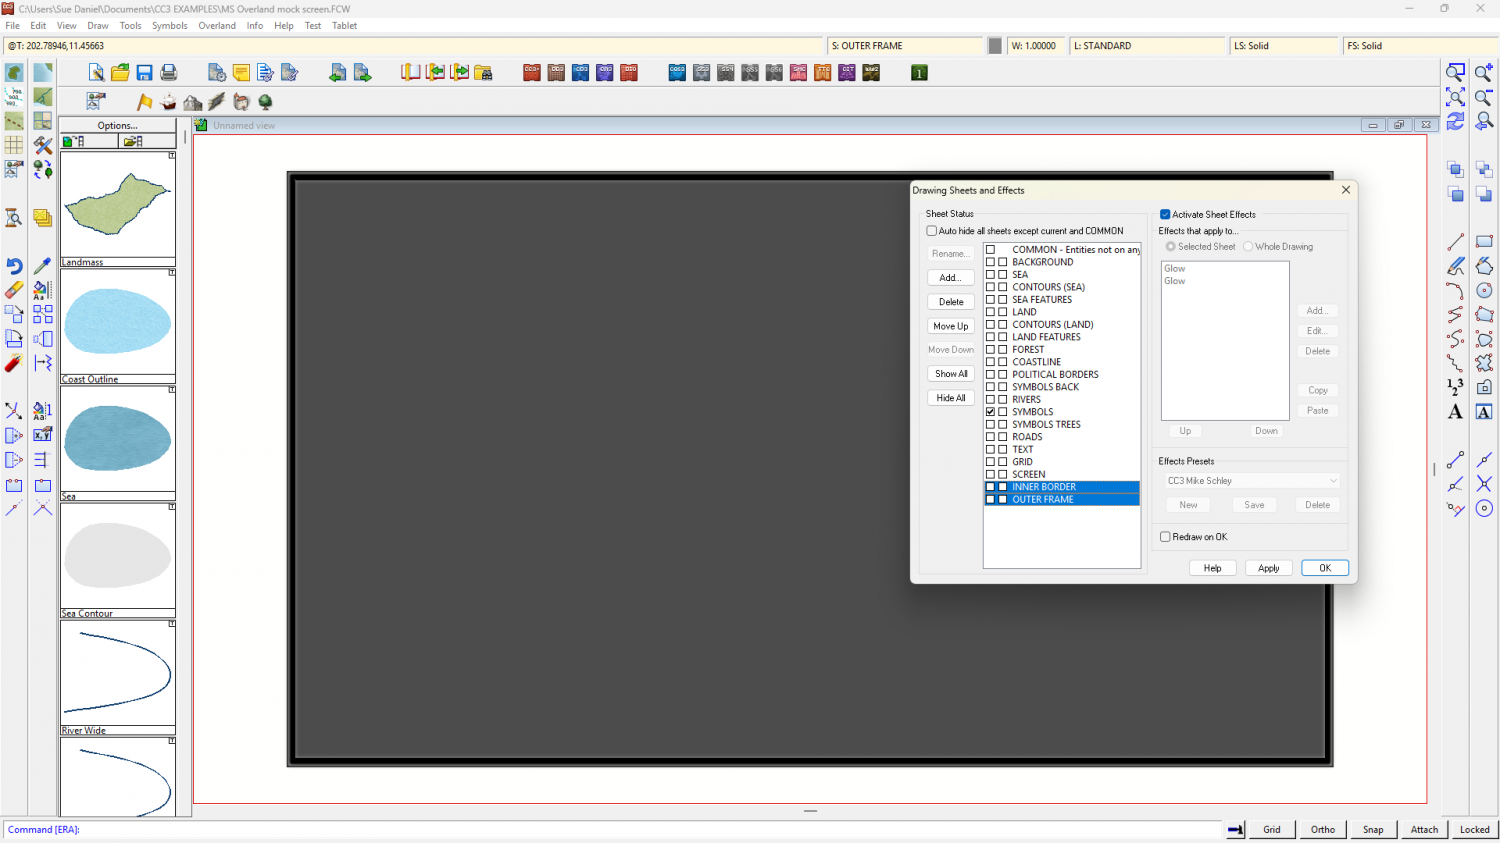
Border Templates
Thinking about the first look, and glancing at the edge of my current monitor a couple of additional sheets would do it. In this example (originally MS Overland which I know all users have) I have added an INNER BORDER and OUTER FRAME sheet setup and drawn a shape on each to represent those parts. Both are on the SCREEN layer.
The 'monitor off' background is just a grey polygon on the BACKGROUND sheet, which I moved to the MAP BORDER layer and resized to include the border and frame details for an automatic export of the whole. I then froze the MAP BORDER and SCREEN layers as is my habit.
I hope this gives you a few ideas.
I'm not sure what you are after with the second look.


-
Border Templates
You have to be a member of the Cartographer's Guild to see those, but I get what you are saying. It wouldn't be right to snatch them and paste them here either, I don't think.
So your second look is a very lose general description. I would experiment with various combinations of shapes, colours and effects and see what you come up with, using sheets above the SCREEN and being mindful of where the thin green line of the MAP BORDER lies to include the decoration.
-
Live Mapping: Fantasy Regional (July Annual)
It's the start of a new month, so Ralf will be showing off the latest Cartographer's Annual issue in the live mapping session tomorrow. We hope you can join us!
Come watch it live on YouTube and join in the chat to ask your own questions here:
https://www.youtube.com/watch?v=_L7cjQY2m2c
Or you can watch it at any time either on YouTube or here on the forum*
* This thread isn't monitored during the live mapping session, but is a place where you can discuss and comment on the show at any time.

-
What Are People Doing for Backups
Maybe we should inscribe everything on clay tablets. They seem to last the longest.


-
mirror of fire
This might help. The difference between a plateau, a mesa and a butte is one of scale alone, and mesas may be a huge range of sizes.
A plateau may be thousands of square miles in area and is usually flattish on top, while a mesa is an eroded section of a plateau that has cliffs all around it. Mesas are wider than they are tall. A butte is an eroded mesa, much smaller, and usually taller than it is wide.
-
Live Mapping: Roof Shading
You're welcome :)
There are a couple of other tips you might want to bear in mind that I don't think were mentioned in the live stream.
The biggest one is about the tone of the colours in the image part of the symbol. If you look at the PF assets you will see that the majority of roofs have mid tone colours. These work best with map files since the shading and highlighting will never take the colour past 0,0,0 (black), or 255, 255, 255 (white). Where there are black lines, such as the ink lines in the SS5 roof images, it's best to erase the map file to prevent strange side effects in the finished symbol. Ralf demonstrated how to do this using a selection mask in the video. The point of mentioning it again here is to say that very dark or very light roof images won't necessarily look as fabulous as you thought they would.
Another reasonably important tip is to try and give the image reasonably sharp edges if you can at the resolution you create them. This will reduce the likelihood of any ghosting around the edges in your maps.
-
Live Mapping: OSR Dungeons
Hi everyone! :)
I haven't been able to post the video link in this thread the usual way this time, but the live mapping session will still happen tomorrow. The unexpected upshot of this glitch is that I don't have to repeat Ralf's words:
Come along and join the show to ask your questions and make suggestions, or you can continue the discussion after the event in this thread.

-
Seeking: Feather, scale fills
It sounds like what you really need for those wings is a symbol rather than a texture. Feathers have a definite direction, so a fill would look wrong in all but one direction because you can't align a Texture Overblend effect.
As for scales...
I might have stopped work to spend a few hours churning out a few scale type fills that might or might not have been what you are looking for, but I'm on a time limit with CC4 Overland and a bit too busy to stop right now. Unless this is for a commercial map I would suggest searching for "Seamless scale texture" and seeing what comes up.
-
CC4 Overland Development Thread
Thanks Royal :)
I don't think I have, Ricko. Displace looks different at different zoom levels sometimes, but it's hard to remember if I changed a sheet effect or not over the several months since then.


-
Grid Lines
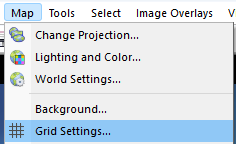
Pick Grid Settings... from the Map menu.
In the dialog, set the Latitude Polar Endcaps to zero.
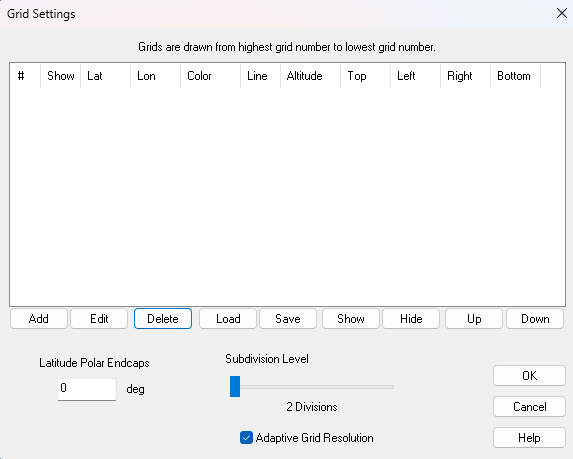
Click Add, and make sure you check Enable Grid in the dialog that appears (see below).
For the sub-tropic lines set the Latitude Spacing at 35 degrees and the Top and Bottom settings to 35 and -35 respectively. This tells FT to draw a grid line every 35 degrees, starting and stopping at 35 degrees north and south, so you only get one line at 35 degrees north, and one line at 35 degrees south. You will also get one one the equator but you wanted that anyway.
To make sure you don't get any longitudinal (north south) grid lines, set the Longitude Spacing to zero.
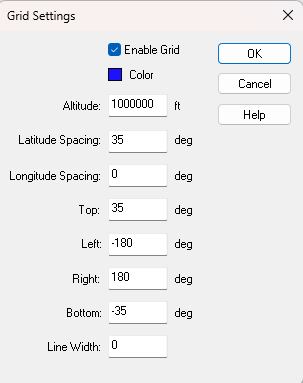
You can also chose the colour of the grid lines and the width of them.
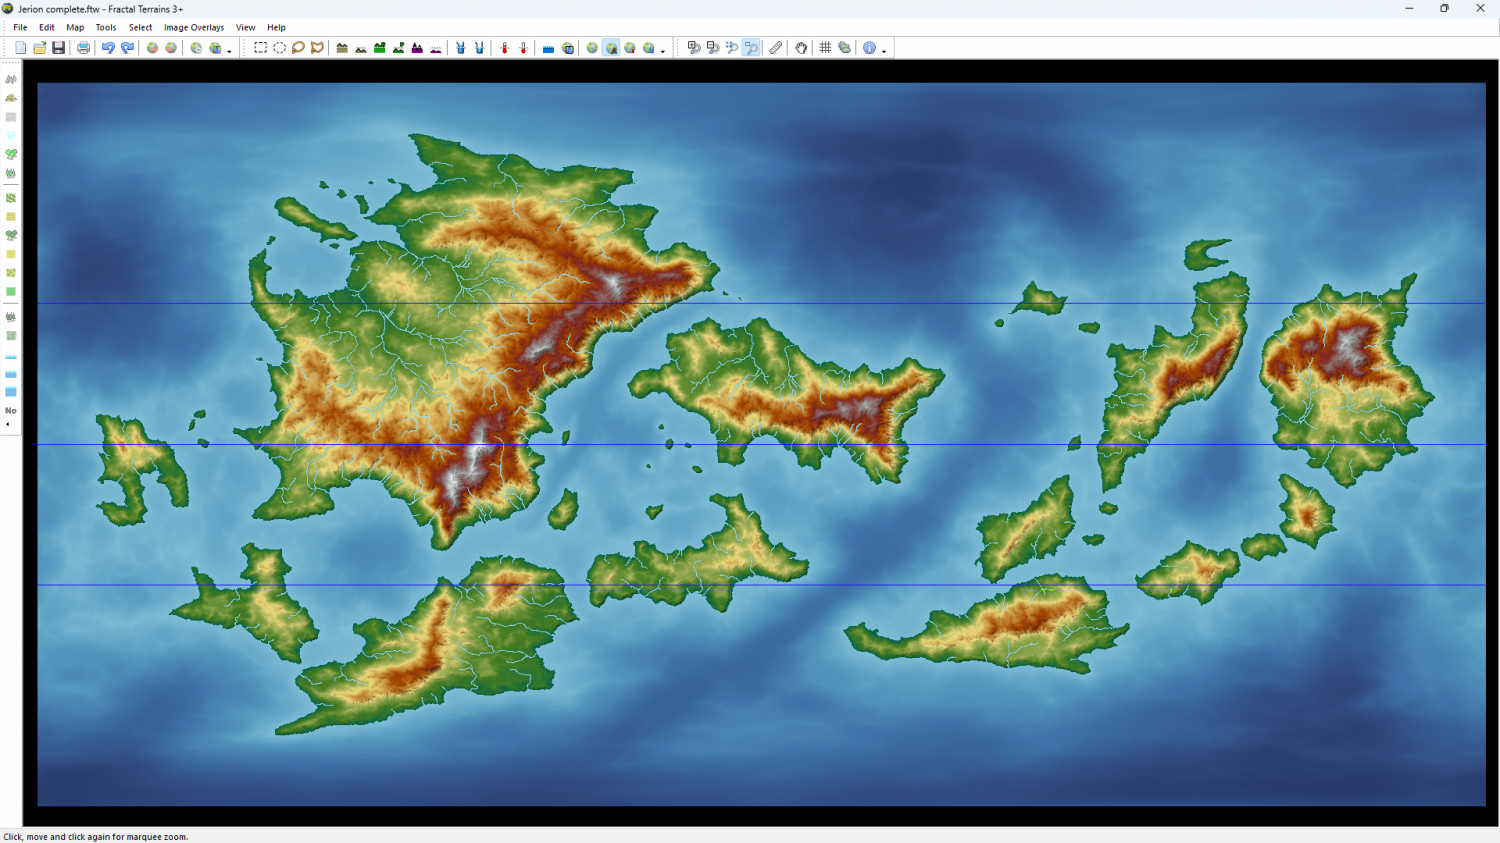
Ok both dialogs and you get this
Do the same for the tropics gridlines by adding a second grid and substituting 23.5 wherever you put 35 in the first grid. That should give you something like this. Here I have given the tropics lines a thicker red line. You will see that this second grid appears underneath the first one, but you can move it up to first position using the buttons under the table in that first dialog.
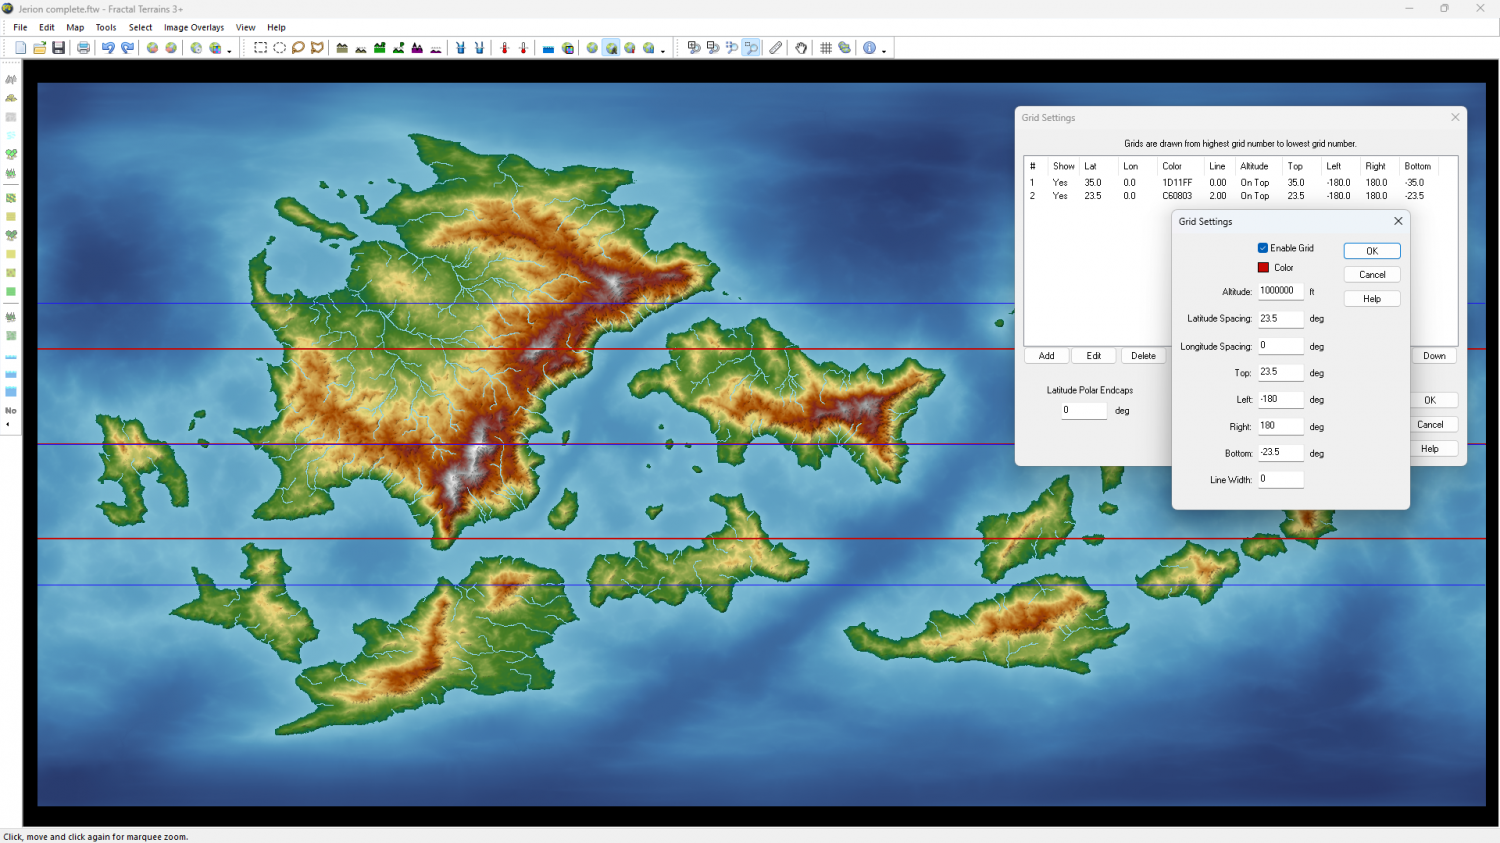
You can hide, show, edit or delete either grid.


