Loopysue
Loopysue
About
- Username
- Loopysue
- Joined
- Visits
- 10,414
- Last Active
- Roles
- Member, ProFantasy
- Points
- 10,161
- Birthday
- June 29, 1966
- Location
- Dorset, England, UK
- Real Name
- Sue Daniel (aka 'Mouse')
- Rank
- Cartographer
- Badges
- 27
Latest Images


-
Community Atlas - Berenur - Urtrah Desert
Ah, yes, the shadows are in the right direction, but being automatic they are peeping out where they shouldn't on the flat top of the outcrop like here.
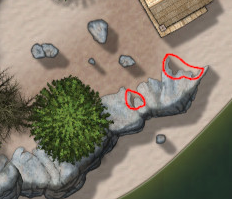
That is the flat top part of the outcrop and shouldn't really be casting a shadow. In the original style there were sheets designed to draw the shadows as black polygons.
To set one up for yourself, leave the shadow effect on whichever sheet the cliffs are one so you have a pattern to draw from, then make a new sheet underneath that one with a blur effect, followed by a Blend Mode effect. Set the blend mode to about 20% opacity. You will have to adjust the blur once you can see what looks right and what doesn't. On this new sheet pick the smooth polygon tool on the right, solid fill and black, then draw roughly the shape of the shadow, excluding the bits you don't want. Tuck the polygon well underneath the outcrops so that the blur doesn't separate the shadow from the outcrops. When you have done that you can switch off the shadow effect on the outcrop sheet.
If there are other things on the same sheet you may need to create a separate sheet for the cliffs that has no effects on it.
The sheet effects in CC3 are pretty good, but there are times when hand drawn is better.


-
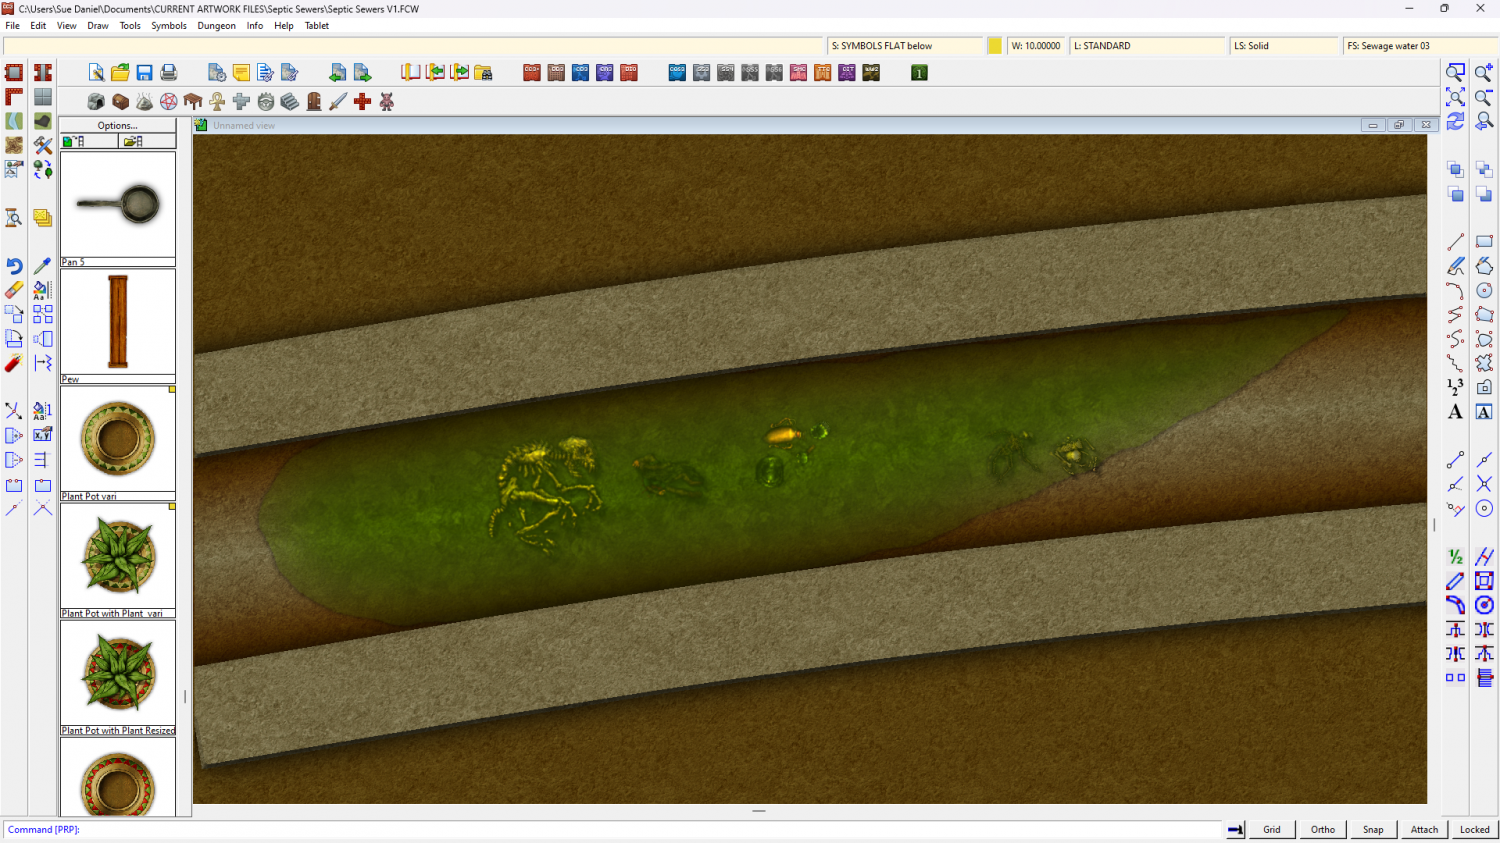
Sinister Sewers - Style Development Thread (CA207)
I'm thinking about the colour scheme here. What do you think of dirty oranges and browns with green liquid?
(The fills and symbols are placeholders)


-
Grimdark Fantasy (renamed "Darklands") - development thread
Well, I might and I might not. Let's see how it goes. Just changing the colours can make quite a dramatic difference, and that's easy because it's all controlled by the palette colours blended to a single parchment background, so you could have a range of palettes to suit your mood with the map. Here is a much darker, greyer version I tested this morning.

Or... I could just admit that I like it the way it is and call it something else - leaving the gap available for someone else to fill. I have a very flexible style, but as with all things there are limits. Maybe it would be better to leave this niche for someone else to fill, and call the style something else?
And then the next question is - what should I call it?
By the way - those settlements in the bottom left are meant to be orc ;)
As for the upside down geysers... it looks fine to me, and I wouldn't have known what it was if you hadn't told me.


-
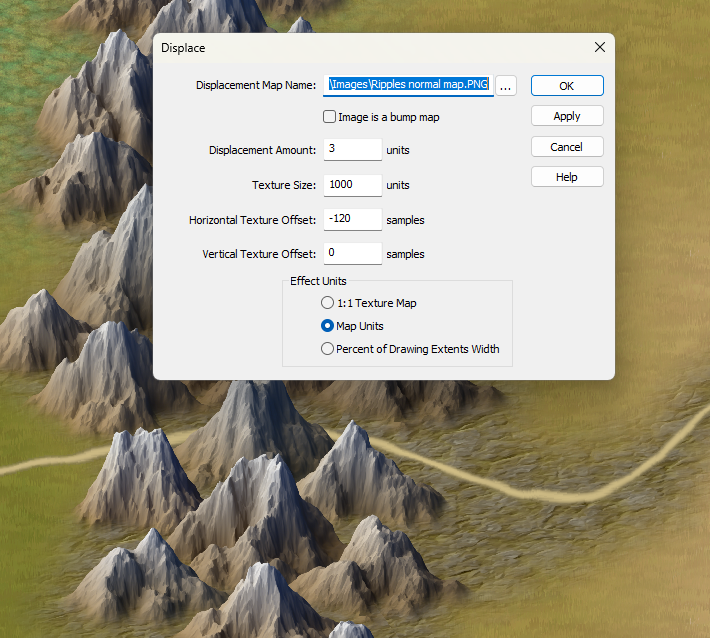
CC4 Overland Development Thread
I've added a Displace to the ROADS sheet. It may be a bit too much.
Take it off?


-
Torstan Holy Head Sewers
Connecting symbols with actual corner pieces have never worked in metric maps. This may change at some point in the future, but that is just the way it is for now.
Connecting symbols that have no actual corner pieces, like a fence or a hedge where the pieces are all straight sections, will work in metric templates as long as you use the set that has 'metric' in the symbol name.
Yes, you could make the map as an imperial map; sizing the map to be the same area as the metric map. Draw the drains using the connecting drain symbol in the imperial map, and then copy paste the resulting drains into your metric map. I'm not sure if you would have to scale them down during pasting, but the pattern and width of the drains would be correct.
One more thing - the corners or bends are done in 15 degree steps, so you may have to slightly modify your layout if you want to be able to connect everything smoothly.
-
There any master printable lists of symbols?
Hi :)
If you open the catalogue file (that's the [Foldername].FSC file usually visible in the parent folder of the [Foldername] containing the symbols), you can export an FCW file with all the symbols arranged neatly and ready for printing using the "Create catalog thumbnail file..." option.
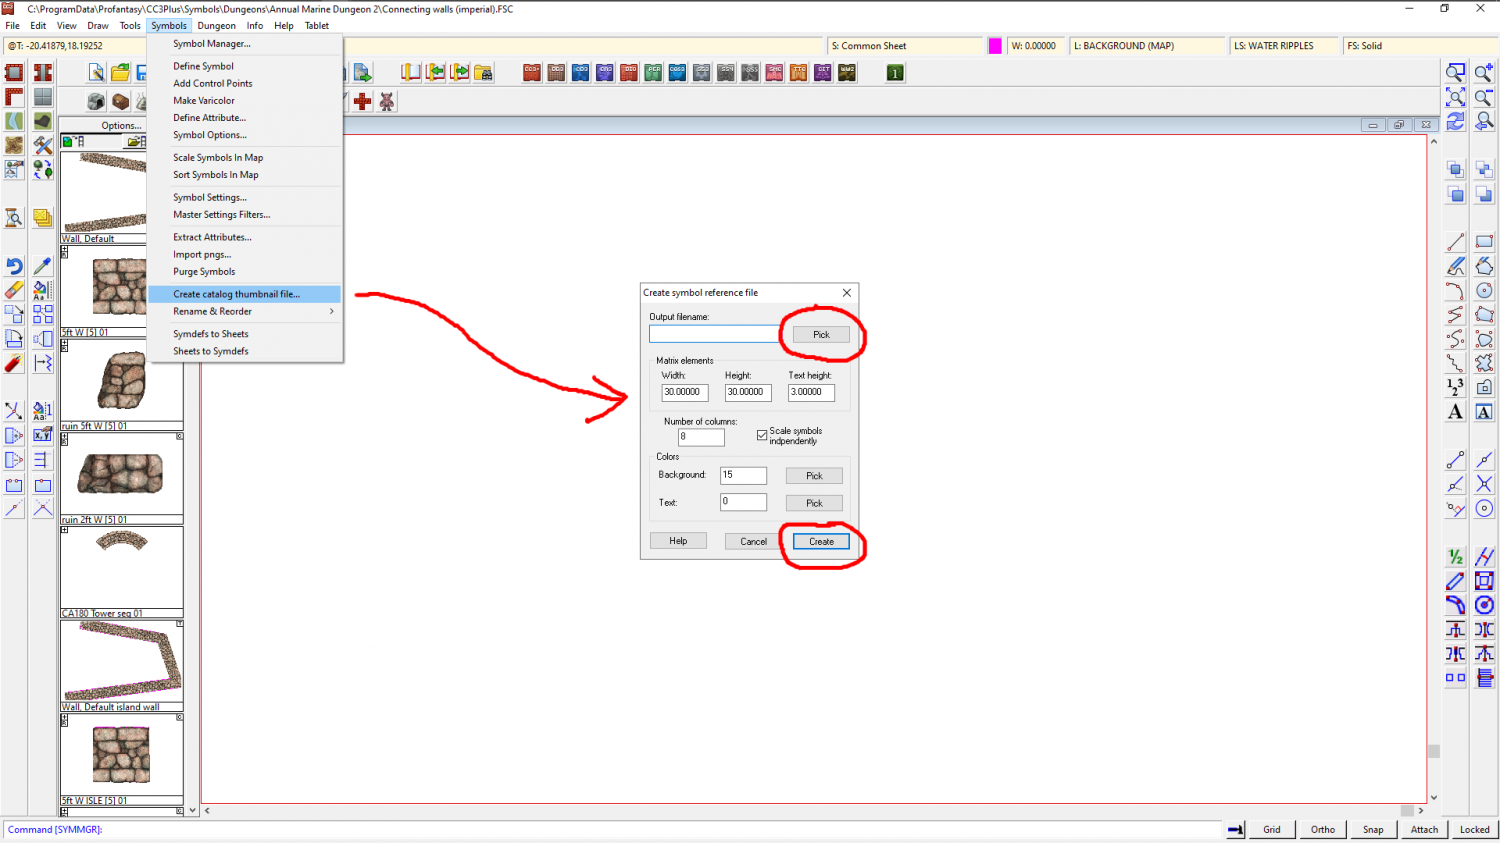
In this example I created a Test.FCW file on my desktop which looked like this when opened.
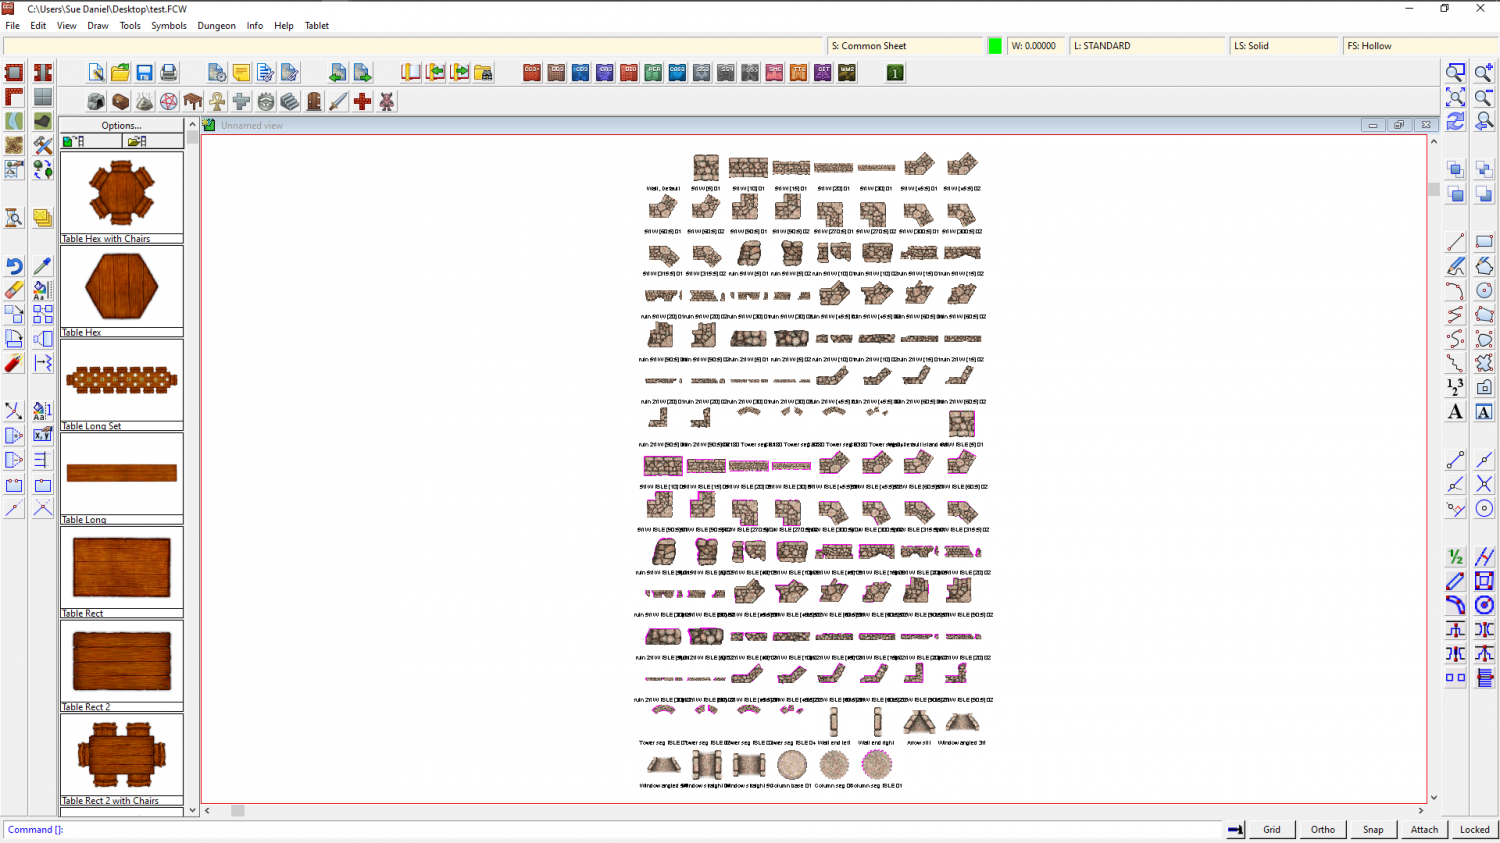
The blank space at the top left is a drawtool and not a symbol, so it's name is there but the sample line is not.
I then exported a jpg bitmap from this and got this result (this is only a 500 px export to preserve the copyright on these symbols on the forum, but you can set it any size you prefer using the Options button in the Save as dialog.
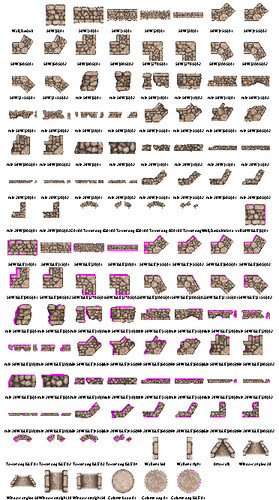
This works for each catalogue at a time, but it doesn't take too long to do, and if you print each one you can make a reference book of them for yourself.


-
ATLAS WIP: The Vale, Panaur
Thank you! :)
All the terrain colours are drawn on the same sheet and blurred into one another before they are blended to the parchment background. So the answer is kind of yes and no. Yes it matters if you suddenly cover all your mountain background with lots of green lowland grass colour, but no, because you can easily bring the mountain background polygons back to the front using the bring to front tool.
Similarly, if you wanted to put a general greenish background behind what you have already done to cover all the white (not saying you should, but just as an example), you could draw that map-wide extent and then send it to the back of that sheet.
![[Deleted User]](https://secure.gravatar.com/avatar/c75d9a245b74d9c59be0999ea81ca541/?default=https%3A%2F%2Fvanillicon.com%2F92add7f8c954488718110edc4896ad39_200.png&rating=g&size=200)

-
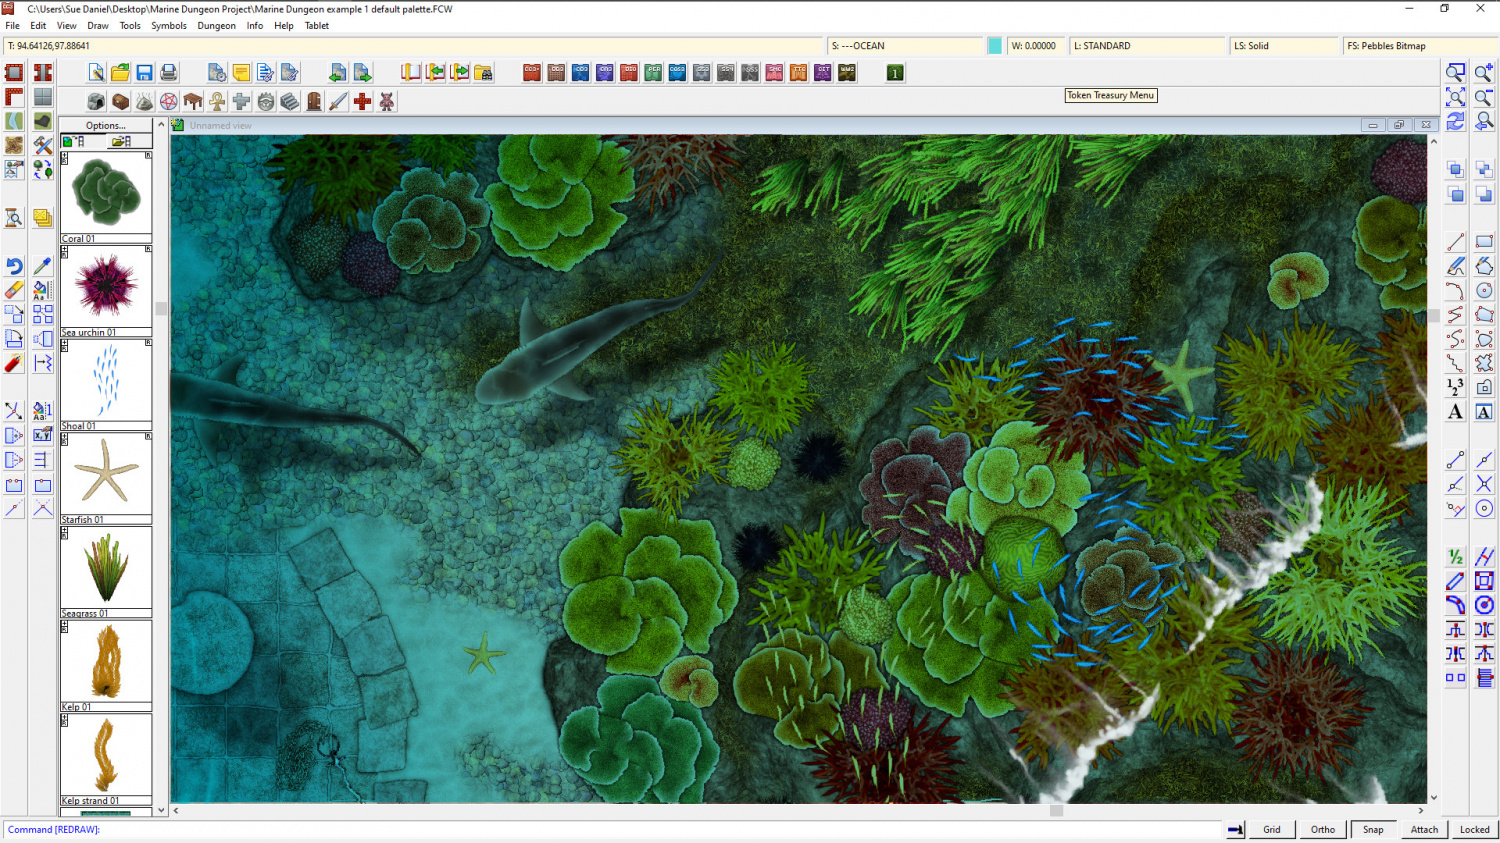
Style for underwater maps
@Merion - Well, we finally got around to sorting something out at Dungeon scale.
Marine Dungeon is due to be published as July's Cartographer's Annual issue if any of you are still interested in this.


-
Mouse Pointer Tooltips
Hi James :)
Go to Options in the Tools menu and check the little box called 'Display floating prompt'.

-
The Creepy Crypt project
Does this look better?
The snakes and the fungi are on the same SYMBOLS LOW sheet with the same effects. This is to try and cut down the sheer number of sheets in the template, but there is no reason why you can't put the snakes on a different SYMBOLS LOW sheet - SYMBOLS LOW snakes, for example.
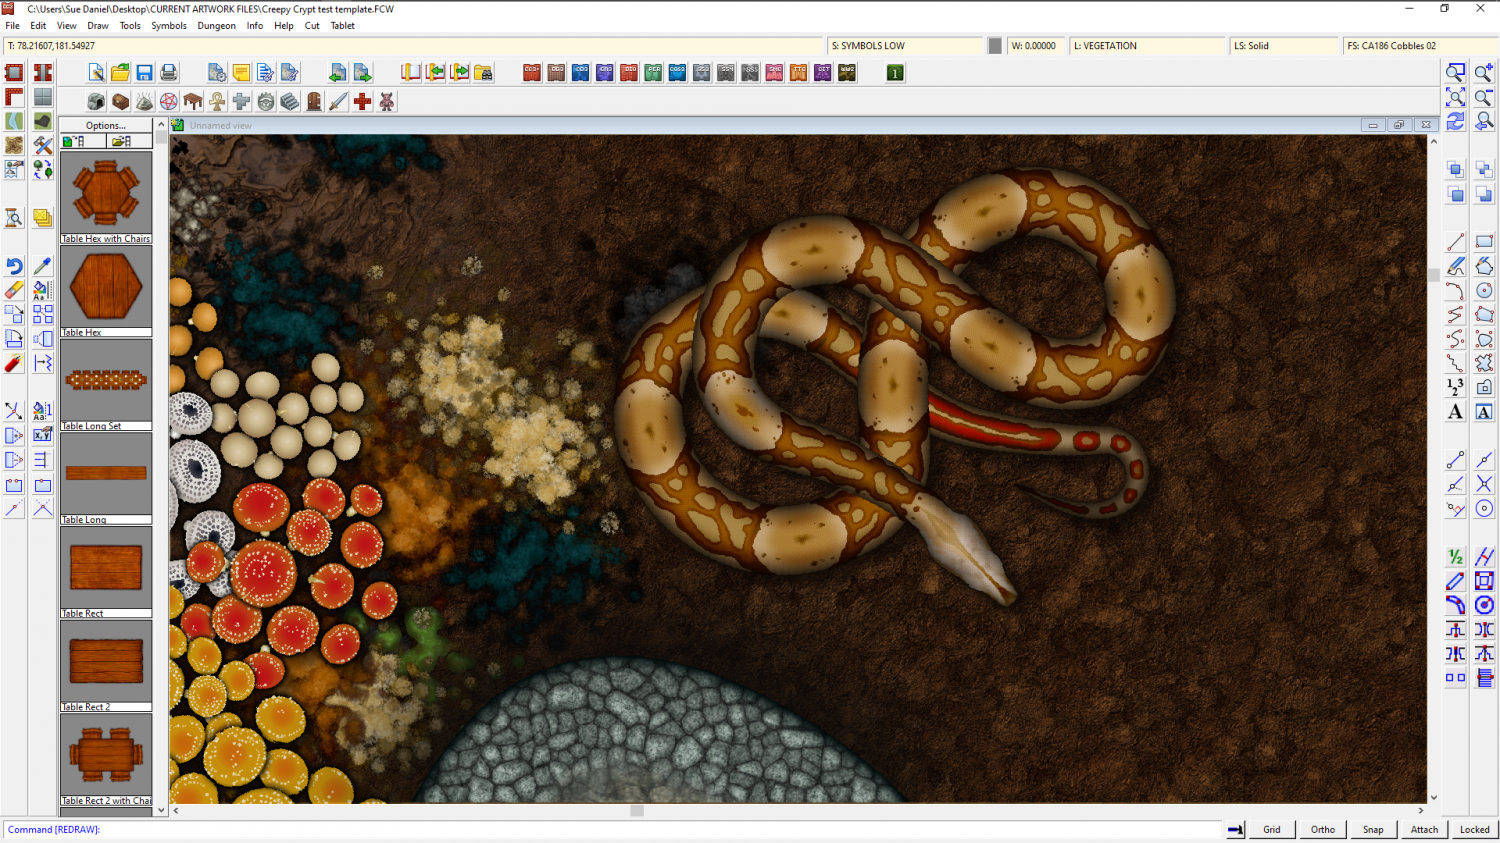
(I think I need to redo the pattern a bit - not a great first attempt at a boa)