Loopysue
Loopysue
About
- Username
- Loopysue
- Joined
- Visits
- 10,416
- Last Active
- Roles
- Member, ProFantasy
- Points
- 10,161
- Birthday
- June 29, 1966
- Location
- Dorset, England, UK
- Real Name
- Sue Daniel (aka 'Mouse')
- Rank
- Cartographer
- Badges
- 27
Latest Images


-
Hello
Hello Nevermet :)
Sounds like you have a nice clear view of what you want to achieve. I'm looking forward to it.
-
[WIP] Cliff City B&W
Thanks :)
I had a look at all the sheets you made to get the effect right, and where I've jumped in at the end of it all I decided it was probably easier if I did a fresh setup for myself, but making use of the symbols you pasted. So this is your map as you drew it, but with adjusted sheets and effects settings.
I'm hoping this was the effect you were after?
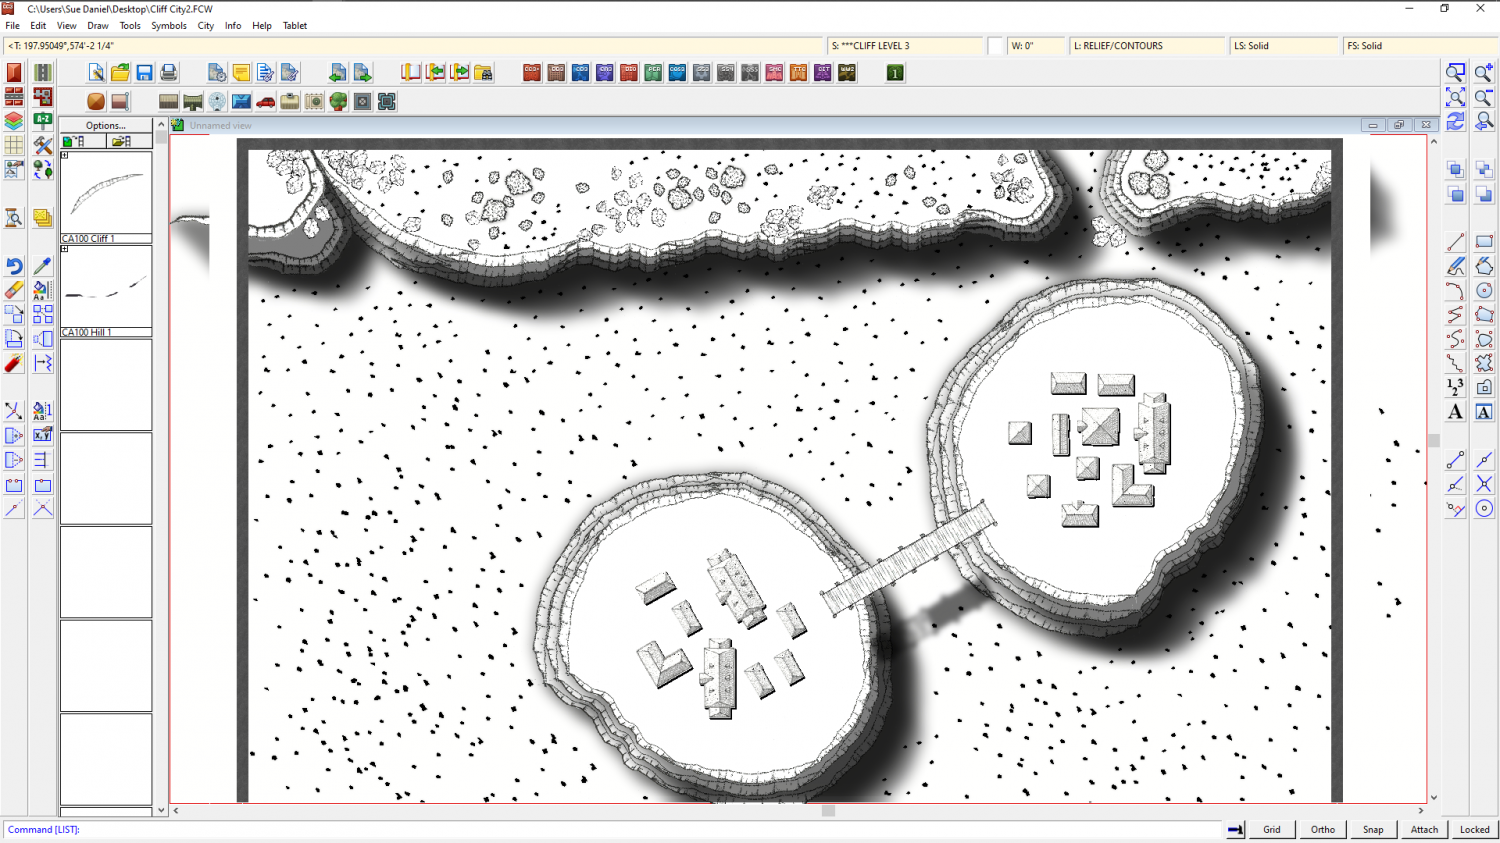
What I did to it is summed up by saying that I moved all the cliff symbols for the base of all the cliffs onto one sheet called CLIFF LEVEL 1, and drew a white polygon to cap the top of that level and stop the shadows showing on the inside of the cliffs on the same sheet. I then moved all the cliff symbols from all the map that represented the second level of the cliffs to a new sheet called CLIFF LEVEL 2, and drew a white polygon cap for that level too. Same for all the level 3 cliff symbols.
I moved the 3 new sheets down to the bottom of the map so that everything else appears on top of them and adjusted the shadow effects so that they blended better with each other (more blur). There are a couple of tree symbols I guess you wanted to put on the cliff itself, but which now appear to be floating because they are no longer under the shadow of the cliff 'above' them, but you can make a new SYMBOLS LEVEL X sheet (where X is the level number of the cliff they are supposed to be sat on), and move them there if you prefer.
I hope this has helped. You were nearly there. Things will get easier with sheets and effects as you go on.


-
Recommendations for a mapping set/settings to use for a large snow-covered city?
The fills associated with any particular style only usually load automatically with that style, so you would not expect to be able to access DD3 fills when you have created a map in one of the CD3 styles.
Remy Monsen shows how to import specific fills from other styles into your current map individually in this Live Mapping Session here:
There are other ways of importing fills too. If you just want the whole set from another style into your current map you can either import a map in the other style and press ESC at the moment you are invited to paste it, or you can use Import Bitmap Fill Styles in the Tools menu. The first option is faster if you only want to import the fills from one other style. The second option is faster if you want to import all the fills from several different other styles.
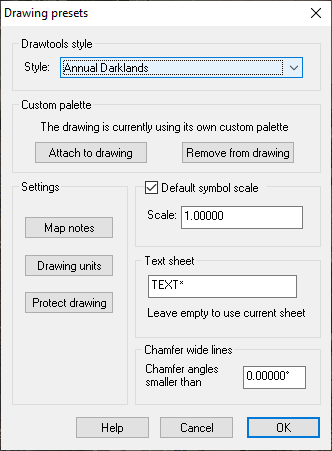
An important thing to note here is that importing the fills only gets you the fills, not the drawing tools of the other style. If you also want the drawing tools to go with your imported fills you will need to pick them from the Drawtools style dropdown box at the top of the Drawing presets dialog (which opens when you click the Drawing Properties button |CC2PRESETS|on the top toolbar)
EDIT: Ninjad by Remy, but we seem to have worked together without realising it :)

-
[WIP] Cliff City B&W
That looks better.
The new cliffs seem to be needing some kind of cap to them, like the rocks the city is on, to stop the shadows showing where they should not. I would treat them just the same as the rocks the city is on in all respects.
-
Live Mapping: Sailing Ships
Hi Everyone! :D
Tomorrow, Ralf will be using dungeon and floorplan tools to create a sailing ship deck plan, revisiting an old Annual issue from 2008.
Please feel free to come along and join in the fun.


![[Deleted User]](https://secure.gravatar.com/avatar/c75d9a245b74d9c59be0999ea81ca541/?default=https%3A%2F%2Fvanillicon.com%2F92add7f8c954488718110edc4896ad39_200.png&rating=g&size=200)