


Royal Scribe
Royal Scribe
About
- Username
- Royal Scribe
- Joined
- Visits
- 9,942
- Last Active
- Roles
- Member
- Points
- 3,476
- Birthday
- February 5, 1968
- Location
- San Francisco, California
- Website
- https://legacy.drivethrurpg.com/browse/pub/31814/Royal-Scribe-Imaginarium
- Real Name
- Kevin
- Rank
- Mapmaker
- Badges
- 16
Latest Images
Reactions
-
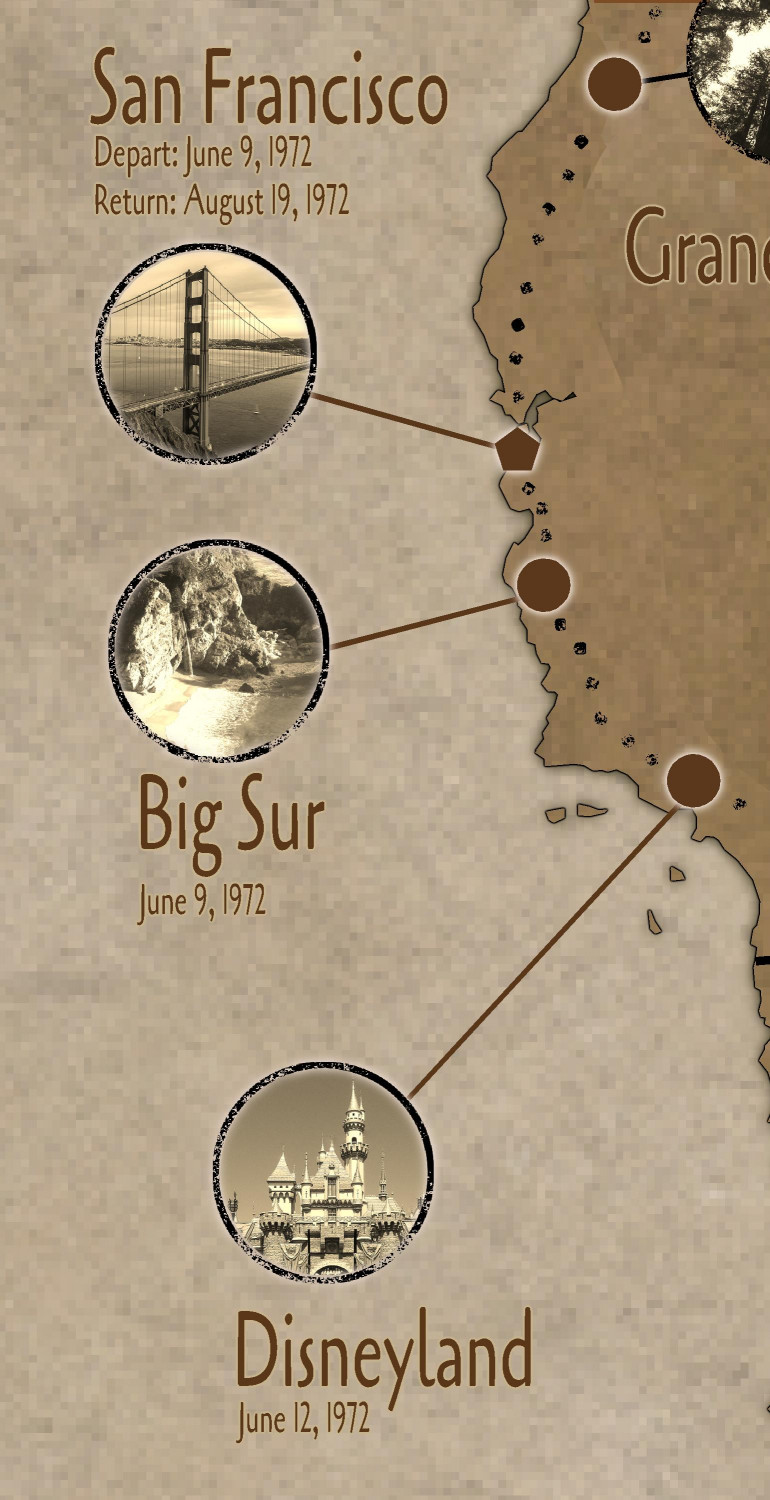
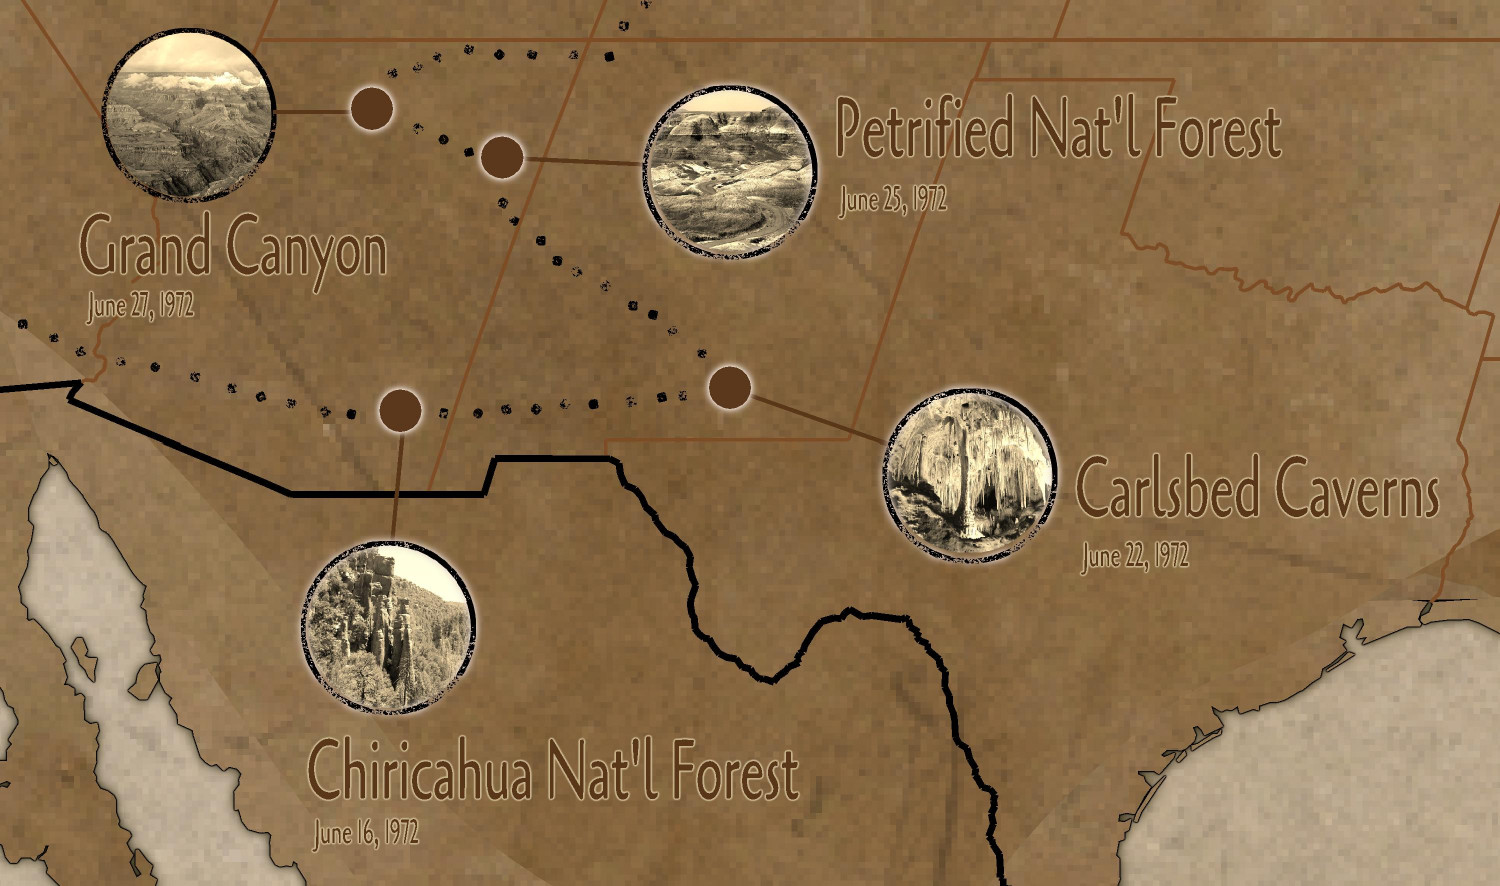
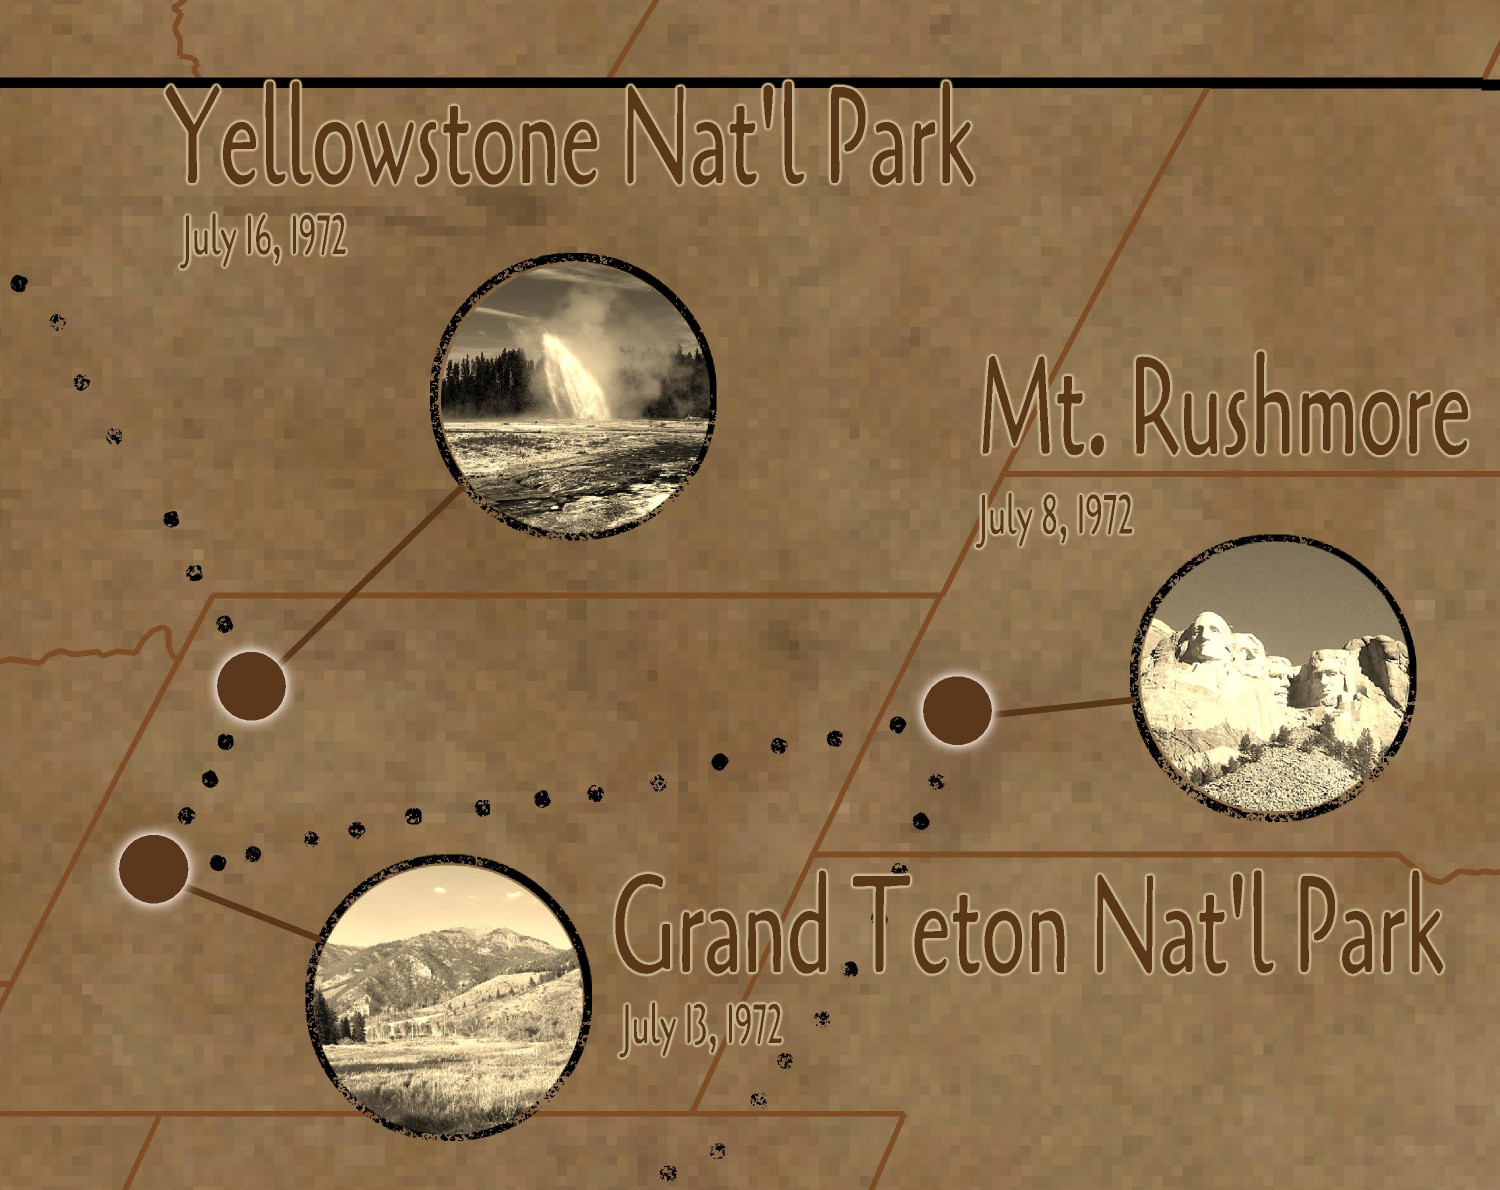
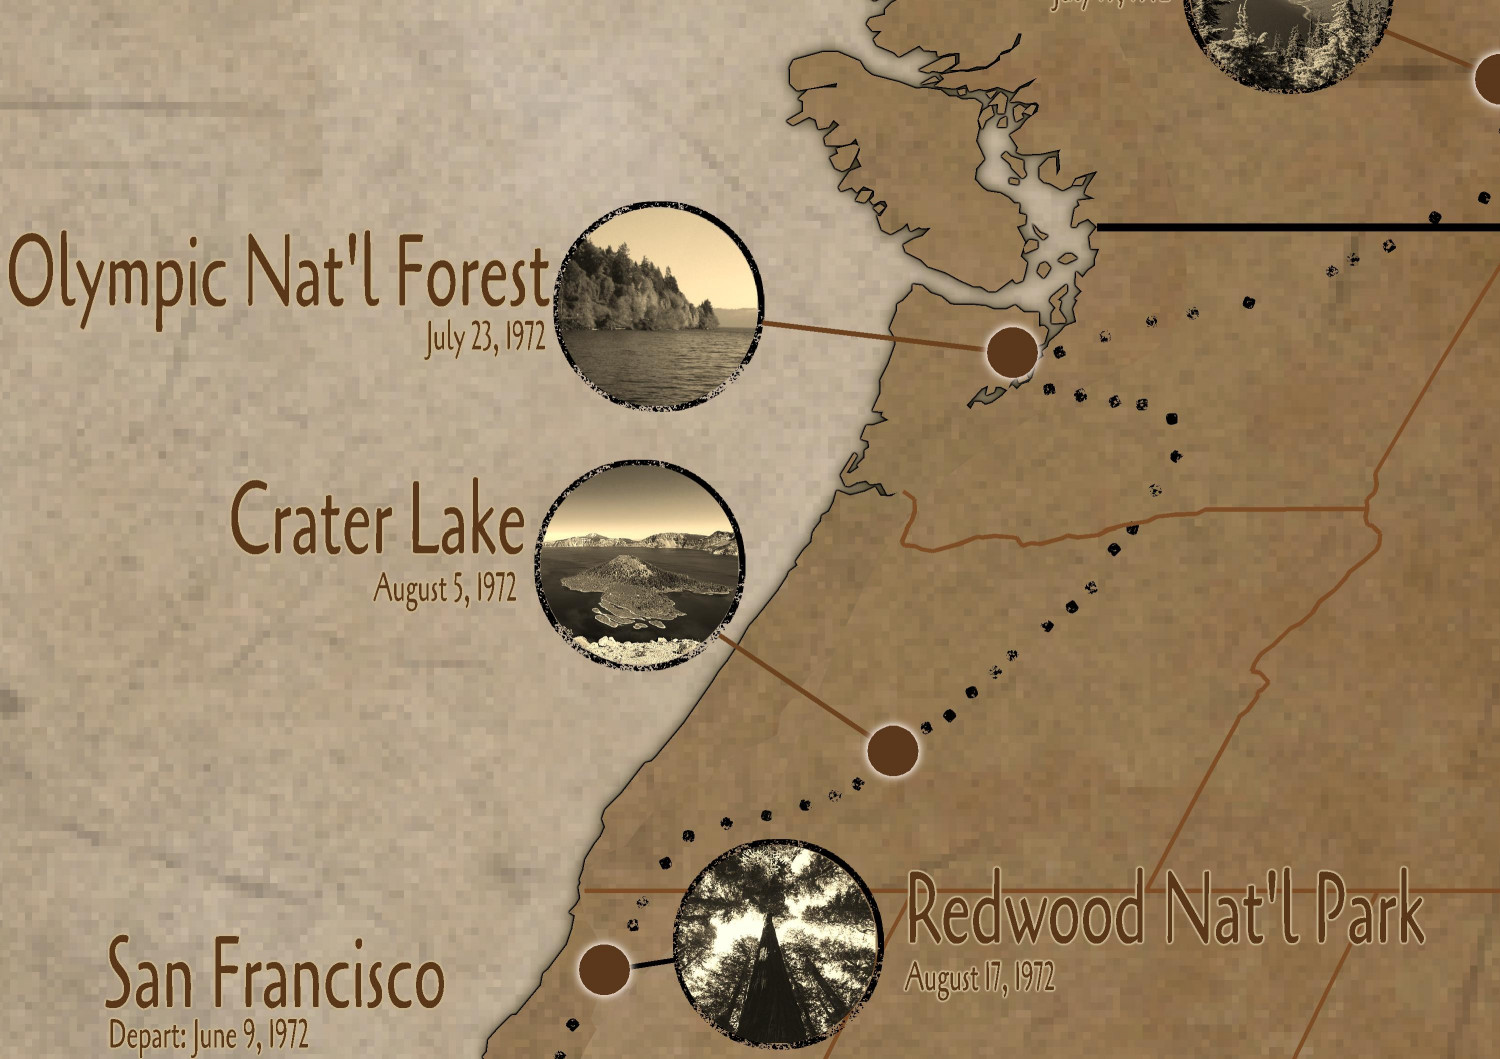
[WIP] 1972 Travelogue (CA93 Modern Journeys)
And here are some zoomed-in closeups:


-
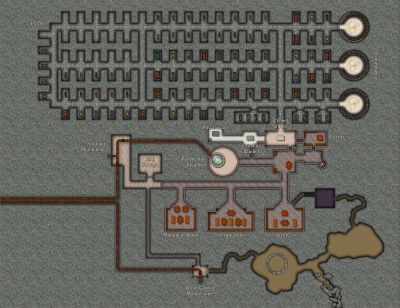
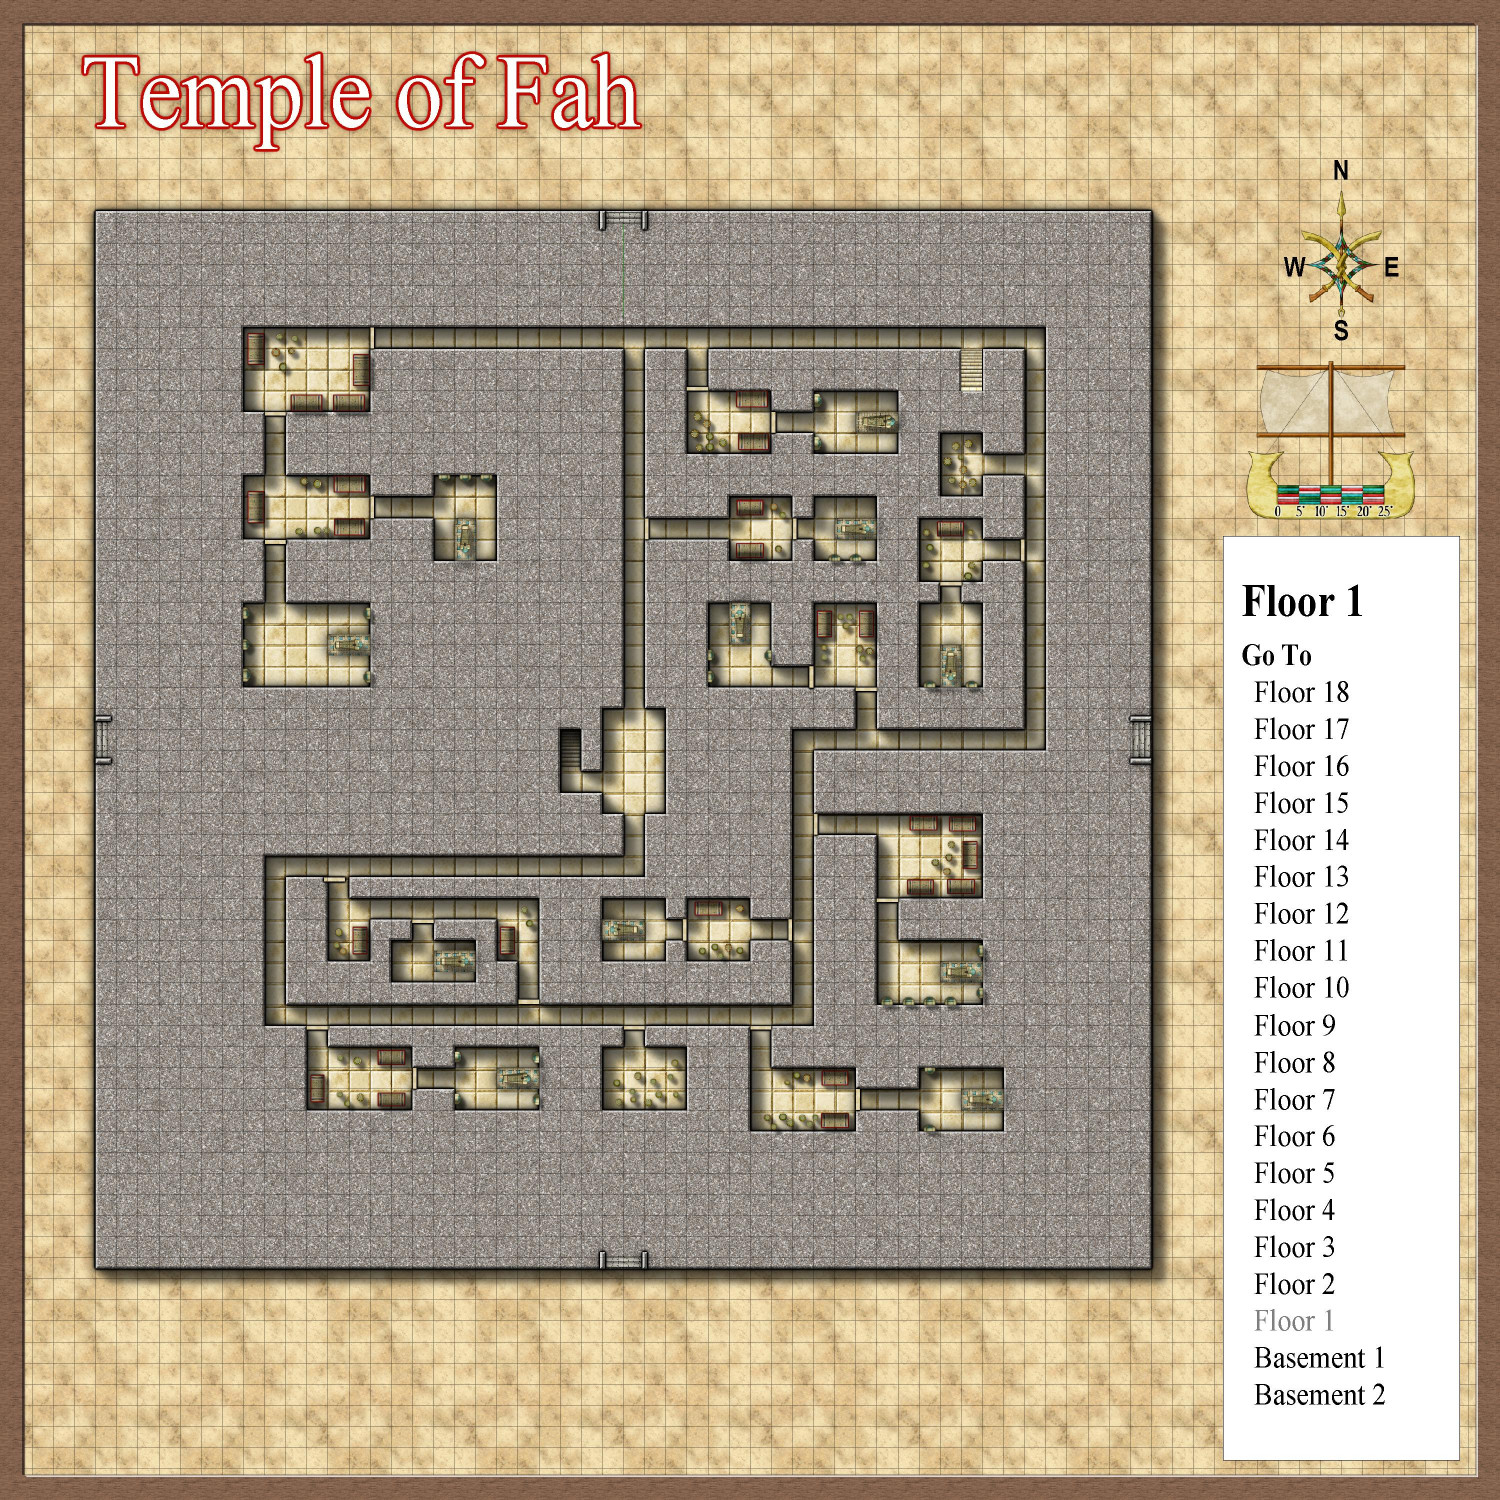
[WIP] Inside the Temple of Fah
Level 6
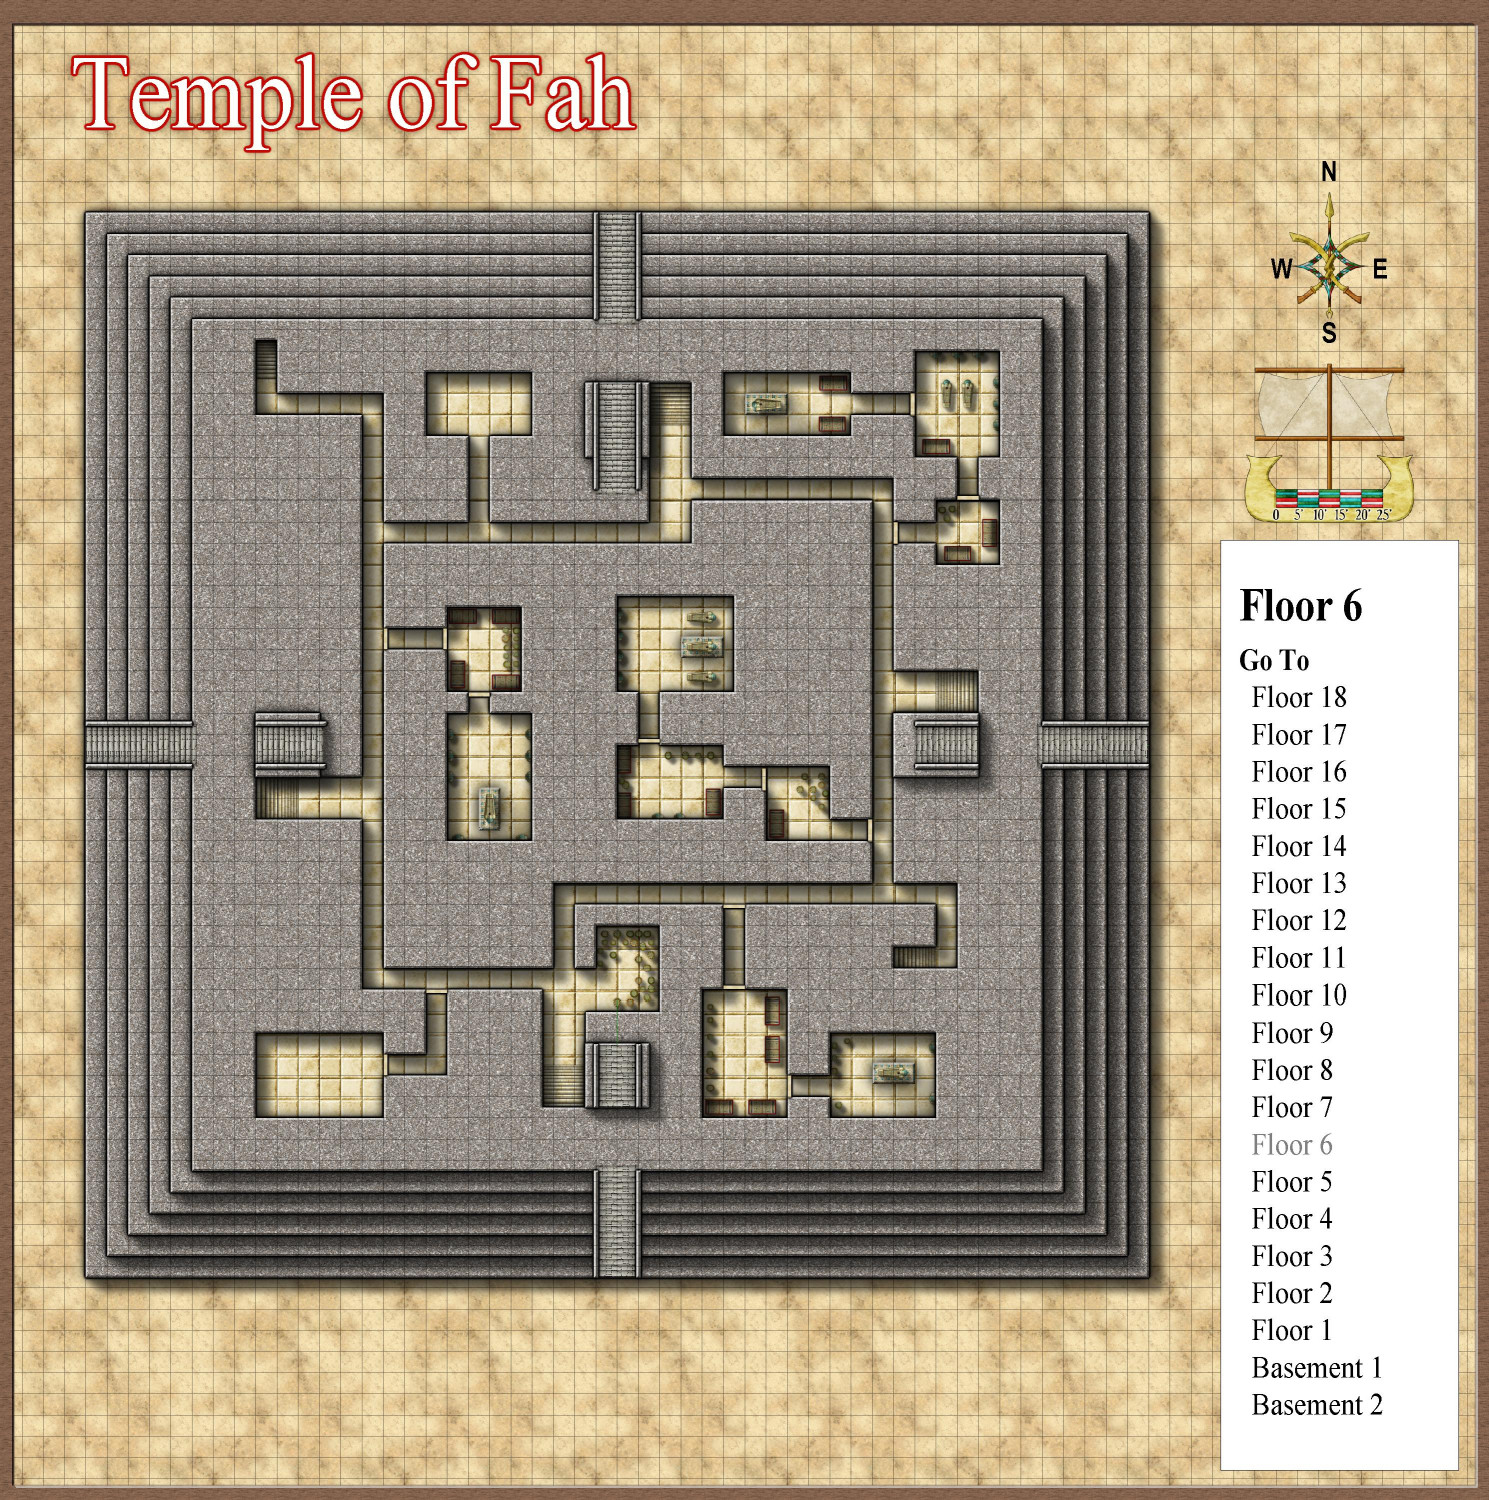
We are now in the lowest of the three sections of the temple. Most of the tombs contain two chambers: a treasure room and a burial chamber. A few will have multiple treasure chambers, and occasionally there may be more than one burial chamber in the suite.
Great pharaohs used to be buried with their wealth, but centuries ago, a new pharaoh decided to keep his father’s wealth, and instead buried his father with colored glass replicas of his jewelry. The pharaohs are generally entombed in a sarcophagus on a raised platform. Other sarcophagi in the room will usually be upright along the walls, but may be occasionally laid flat on the floor, a sign of great honor to the decedent. These are for the final resting places for people important to the pharaoh: spouses, valued concubines, children who did not themselves become a pharaoh, and occasionally even favorite servants like nannies who are treated as family. Those who predecease the pharaoh are reinterned at the time of pharaoh’s internment. For those who live after the pharaoh’s death, the tombs are opened to admit their remains, sometimes decades after the pharaoh’s internment.
Also of note: in this section, the stairs up and stairs down are generally far from each other, perhaps as a way to confuse and confound intruders intending to loot the tombs.
Level 5
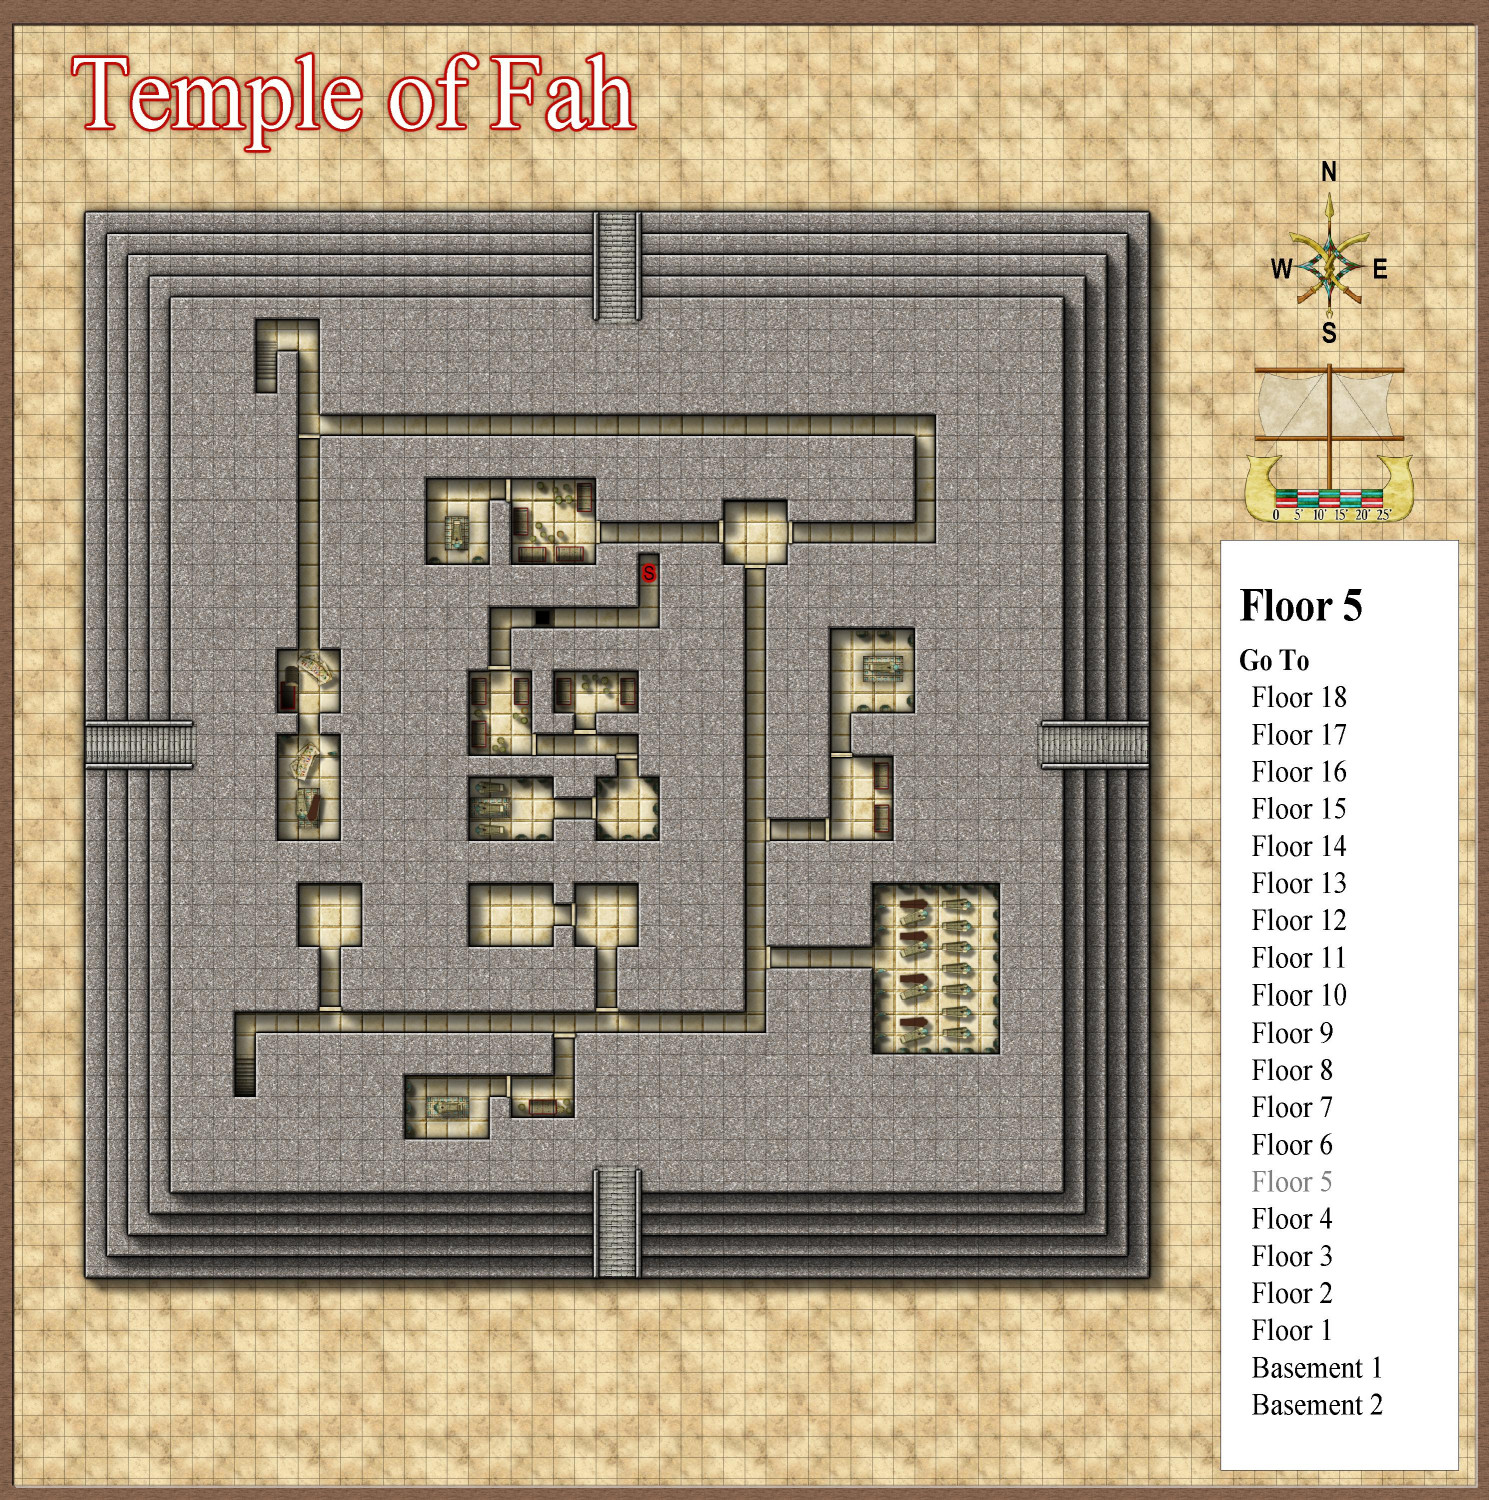
This level has more tombs, but there are a few things of note.
On the west side, there is a burial chamber where the entrance to the treasure chamber and burial chamber have been destroyed, and the treasures and sarcophagus have been looted. The passageway to this section has been sealed but otherwise left untouched. It is the only looted section in this active temple.
Another burial suite is empty, waiting for a future pharaoh.
In the southeast corner, there’s a chamber with a great number of sarcophagi, some still empty. This room is the final resting place for high priests who have been honored to lay at rest near the great pharaohs.
One mad pharaoh had his burial chamber and three treasure rooms hidden behind a trapped secret door. The passageway also contains a covered pit that drops unwary intruders 20 feet to Level 3.
Level 4

More burial chambers. (Note the shaft for the pit from Level 5 that descends to Level 3.)
Level 3
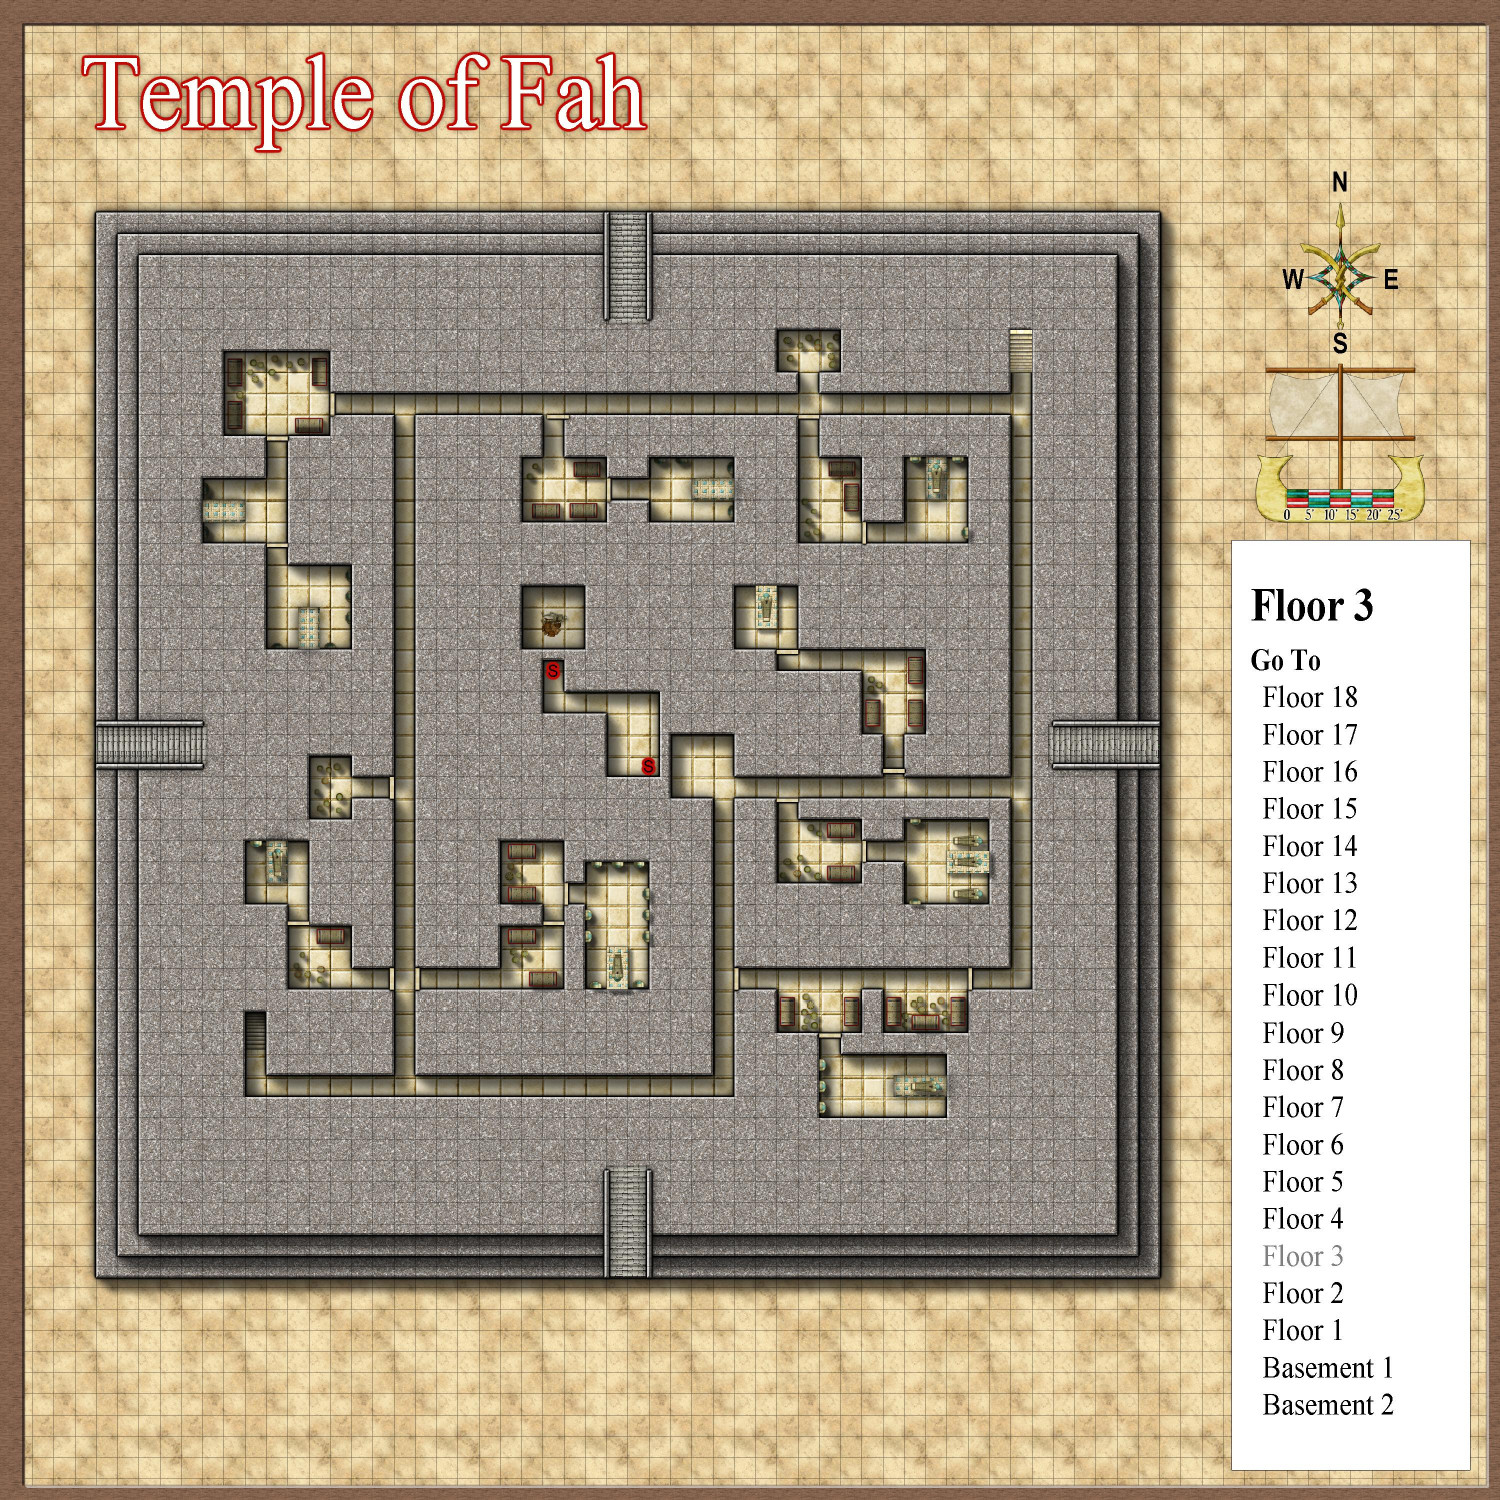
More tombs. (I noticed that some of the raised platforms don’t have a sarcophagus on them. Not sure if I forgot to place them, or if I placed them on the wrong sheet. I guess one of them might be for the reigning Pharaoh, and already contains the remains of predeceased loved ones, but that would only make sense for one of these tombs. Maybe the mummies just walked away?)
The pit trap from Level 5 ends here. Those who survive the 20-foot drop may discover a secret door that leads to another hidden chamber, where another secret door allows escape to the rest of the temple. The skeletal remains suggest that one poor soul either didn’t survive the fall or never found the secret door to allow their escape.
Level 2
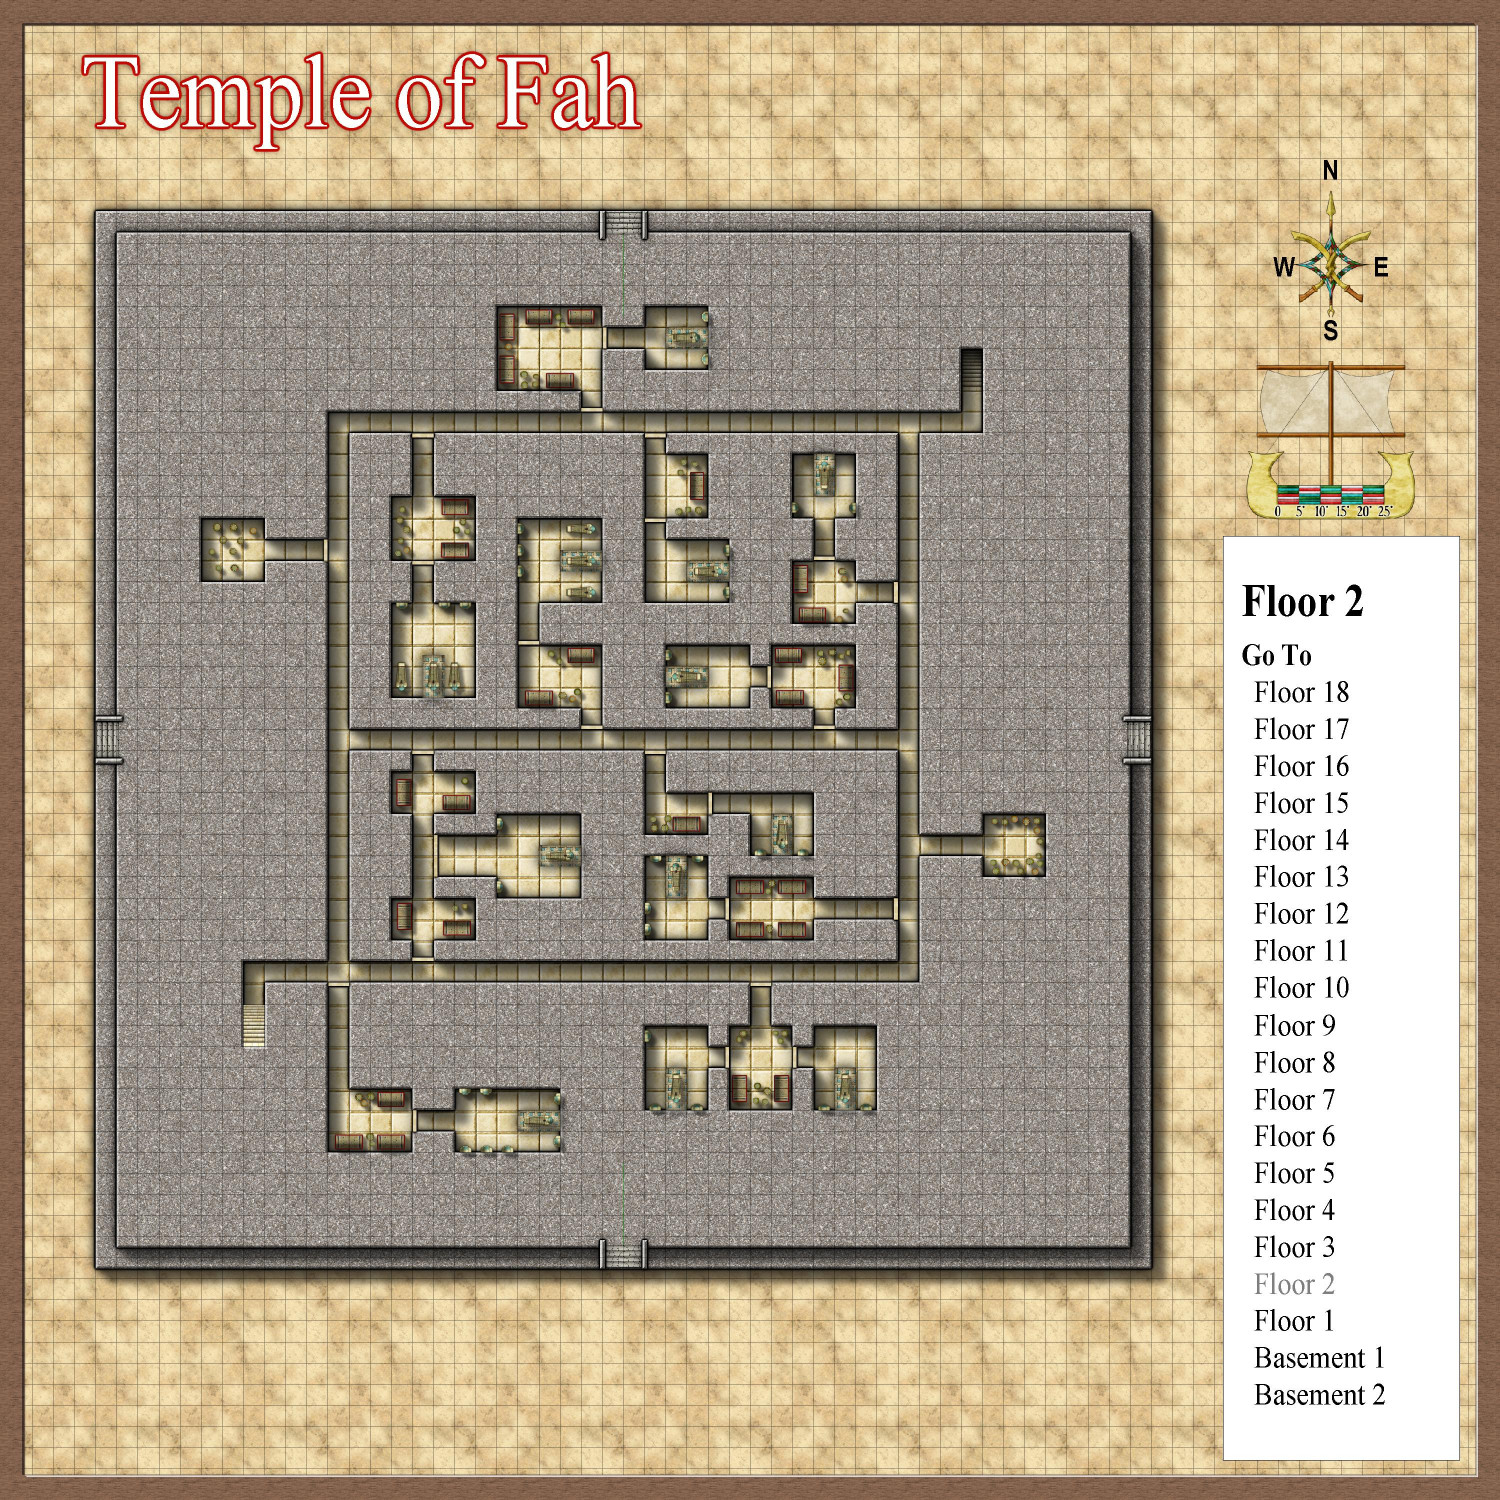
More burial suites, along with some storage rooms for unused pots and urns.
Level 1
More tombs, along with stairs that descend to subterranean levels of the temple. (What, more levels?)


-
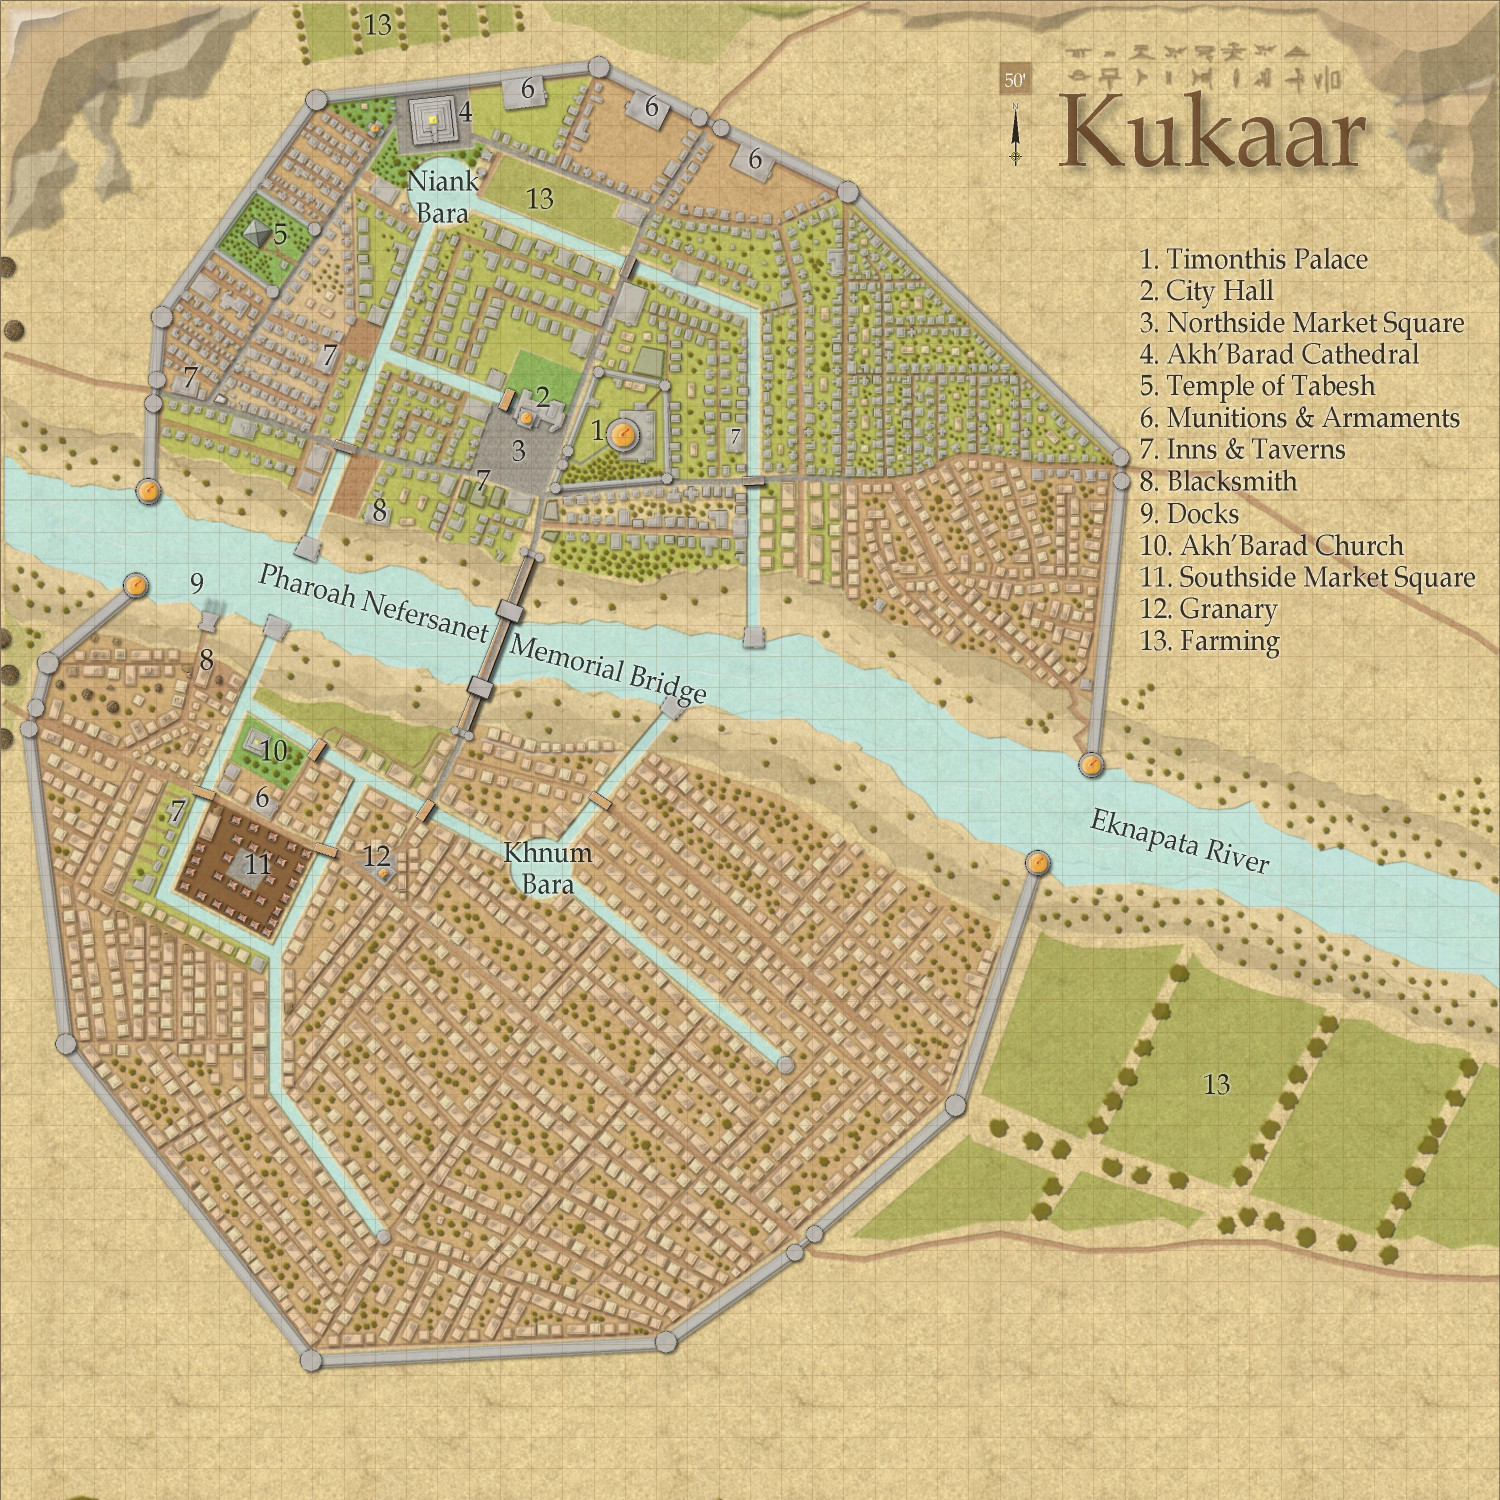
[WIP] Town of Kukaar (Ancient Cities Annual)
Finally had a chance today to add some names and some trees.


-
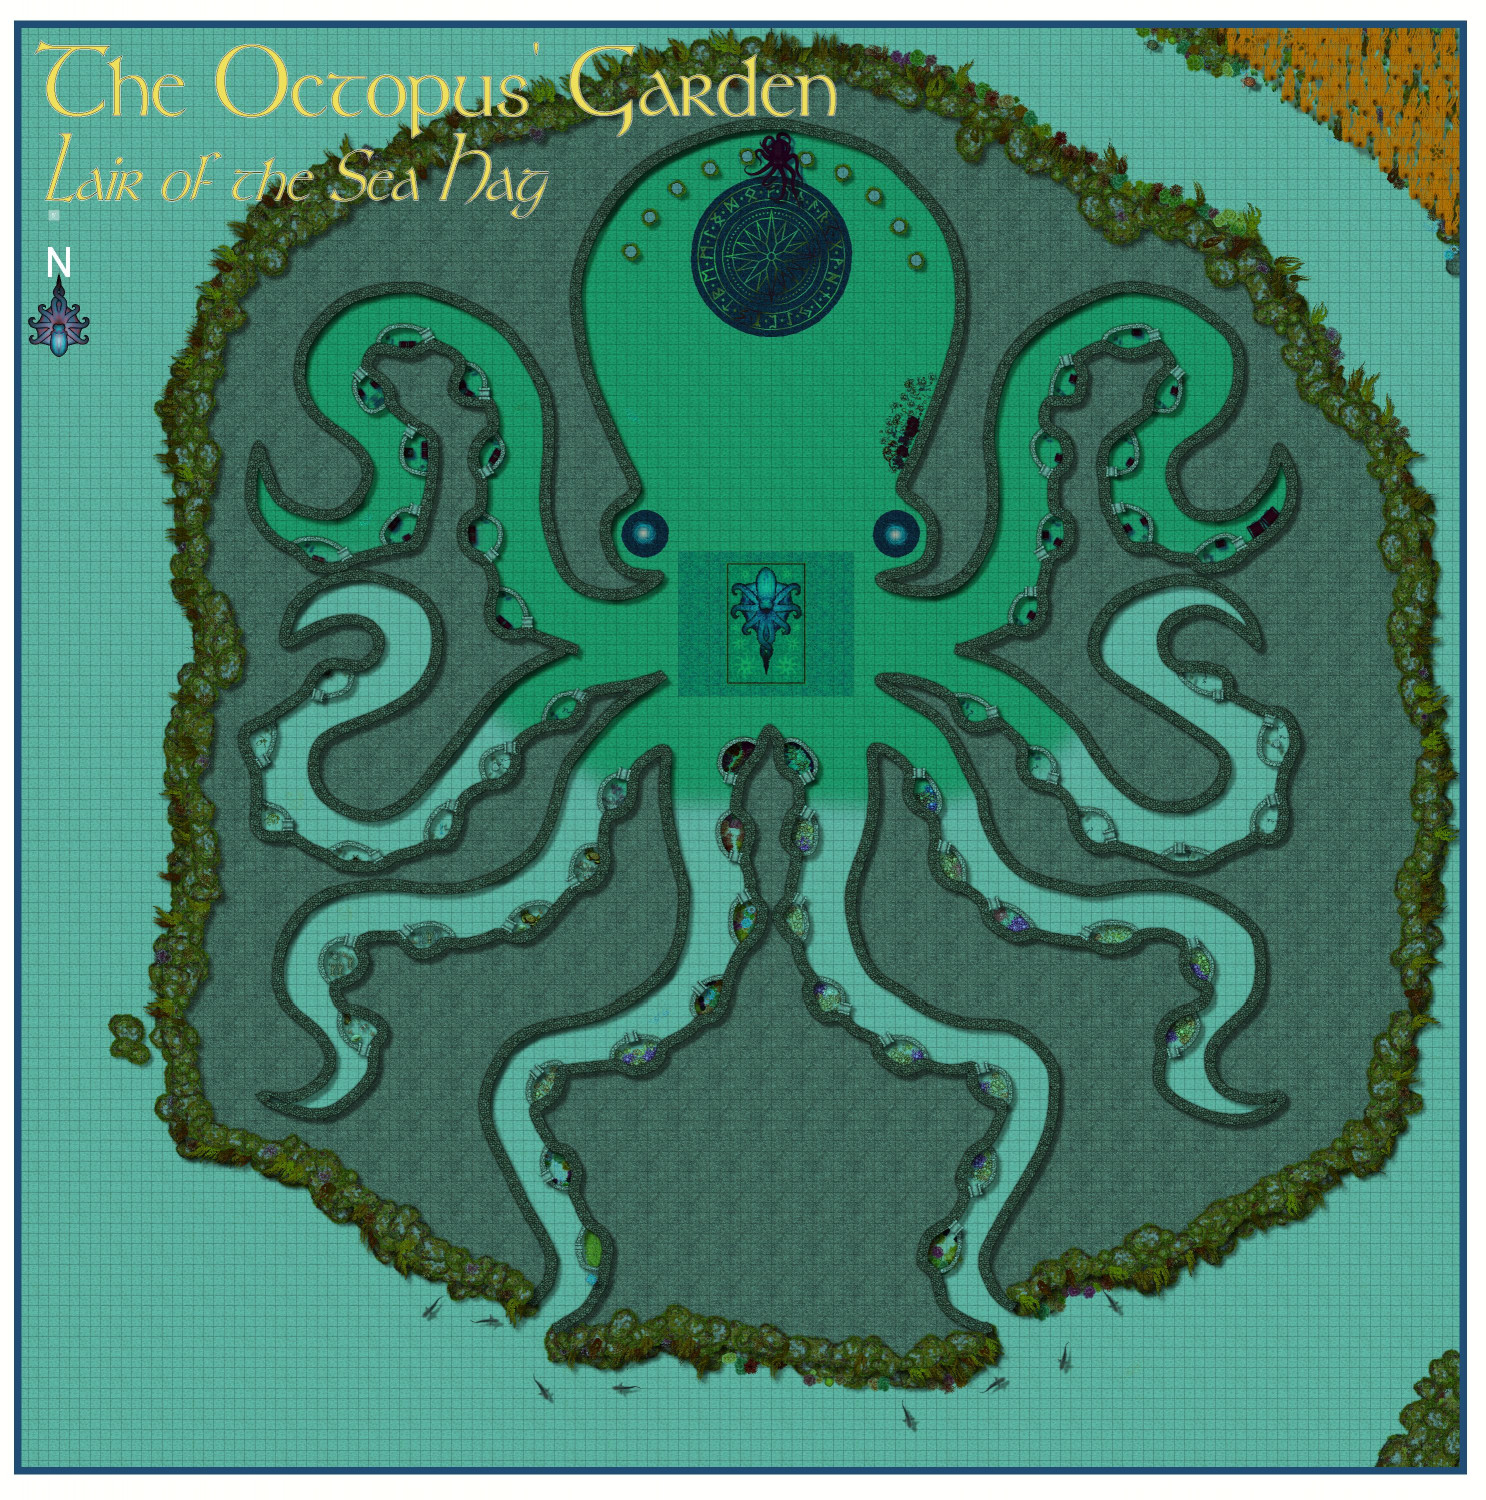
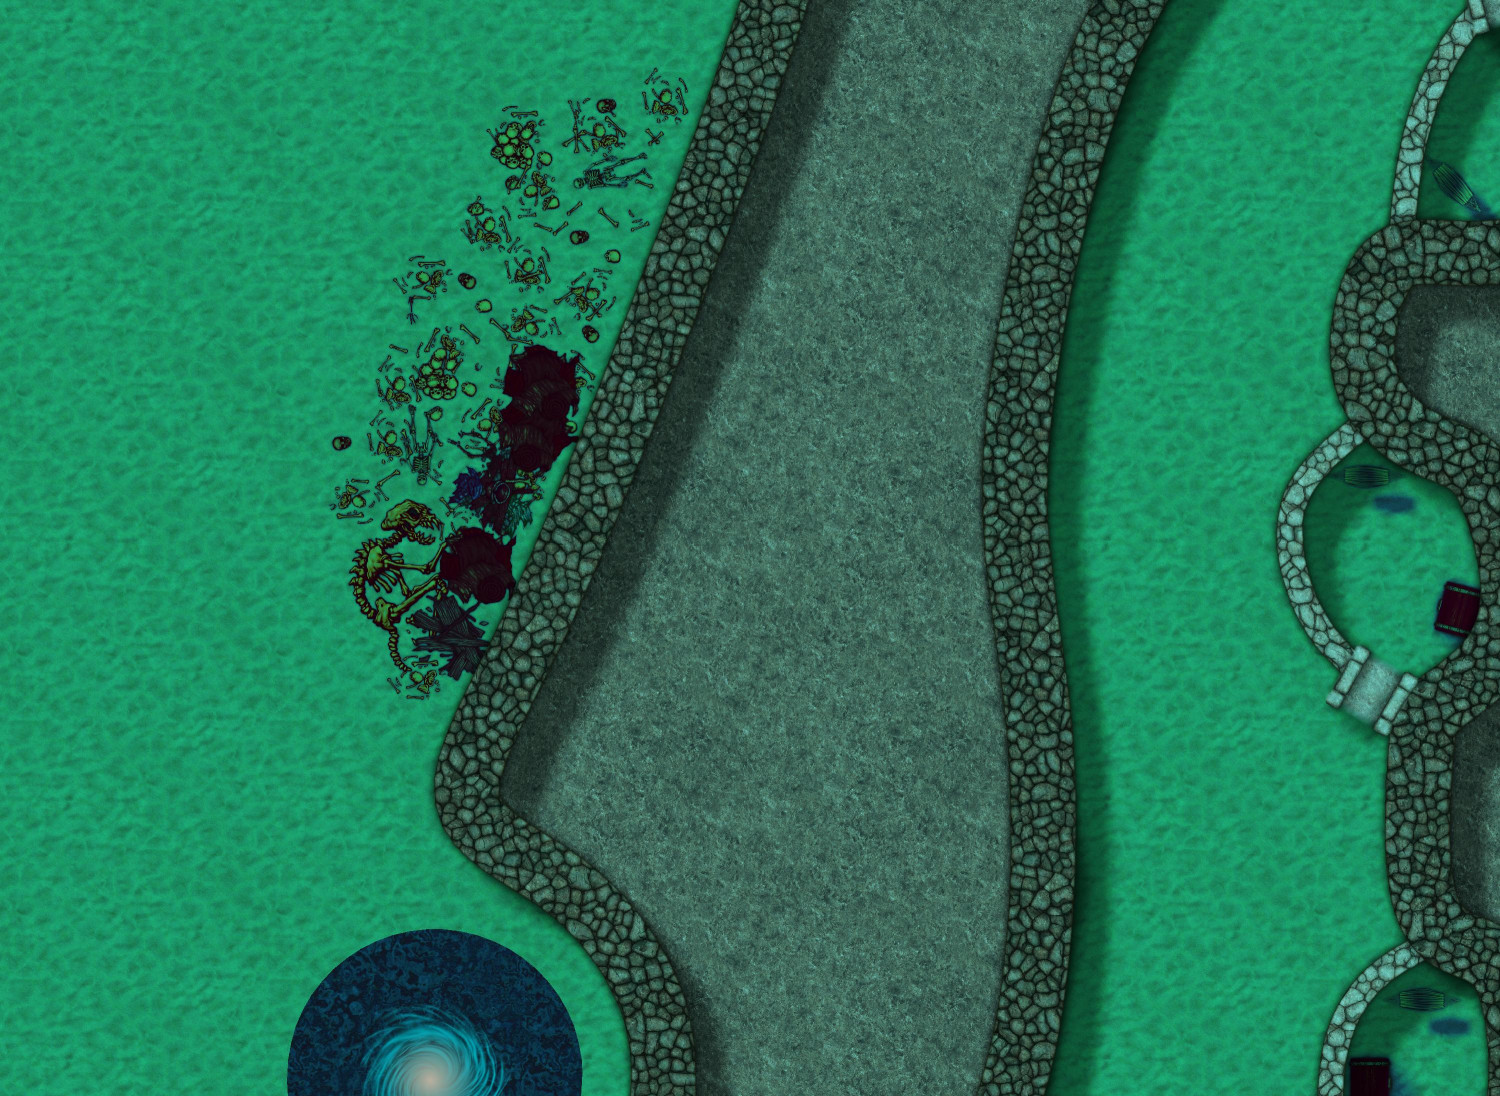
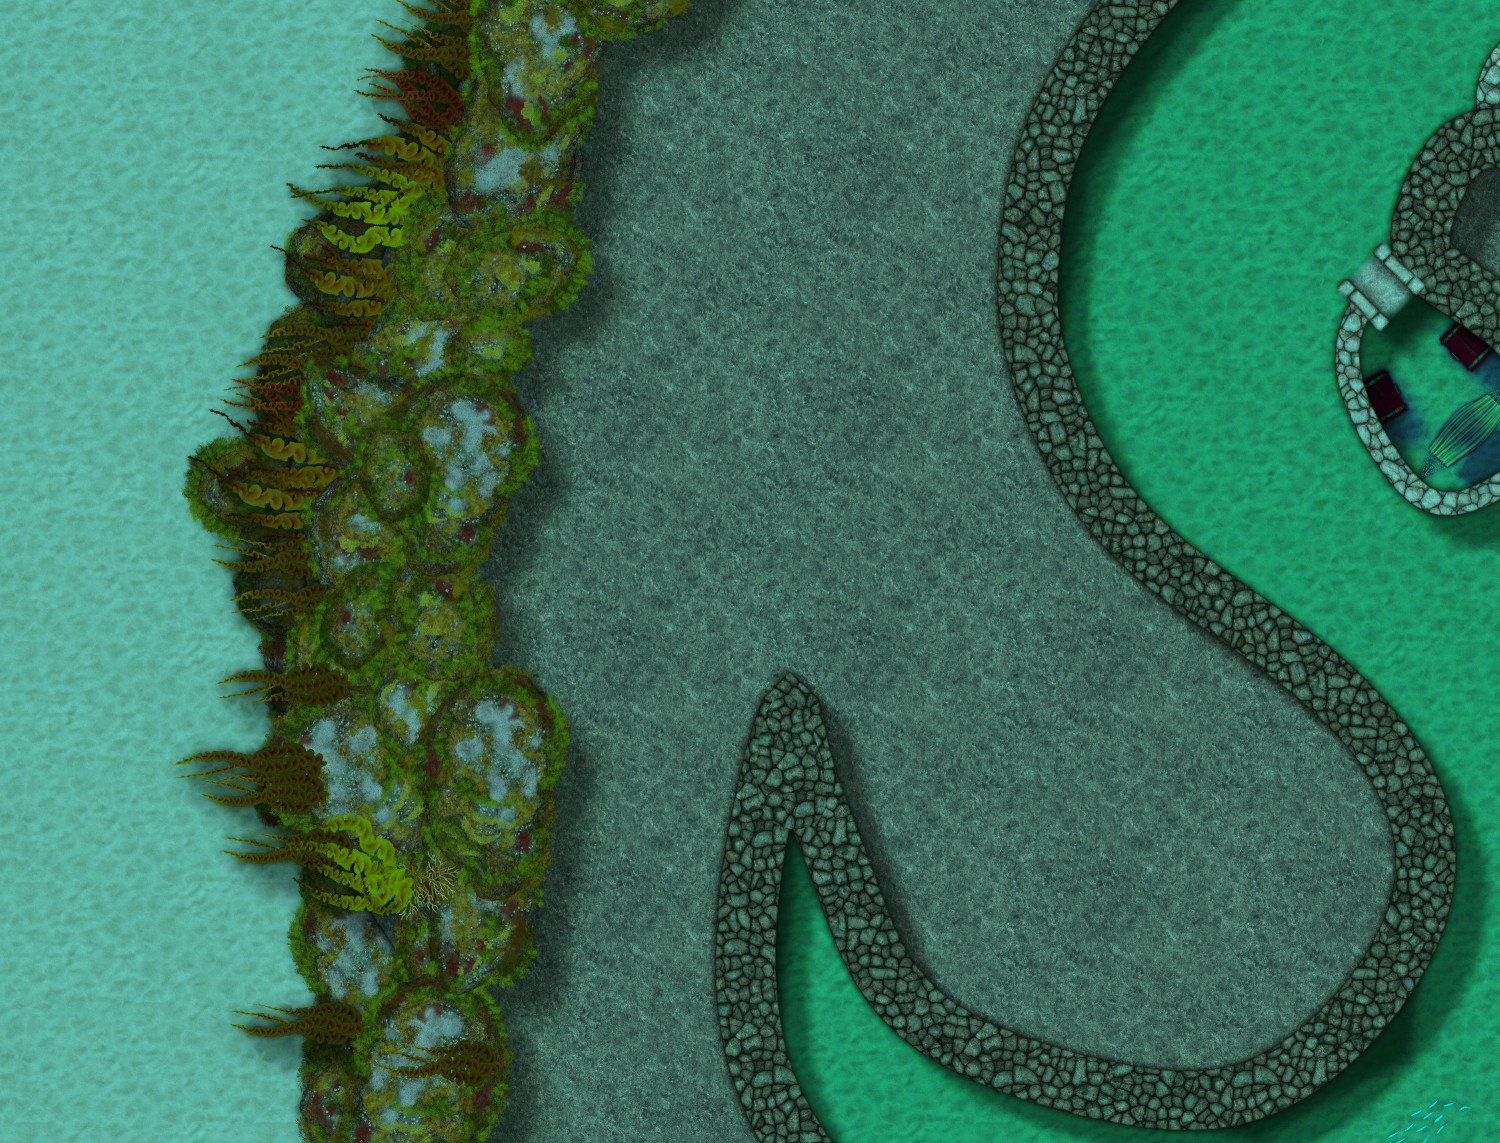
[WIP] The Octopus' Garden
Thank you! I definitely plan to submit this one to the Atlas. Nothing would please me more than to get a message from a stranger saying they used it in their campaign, and all of the antics that ensued.
Here's what I've done with adding murkiness to the heart of the Sea Hag's lair, and softening the cliff edges with weeds and rocks and weedy rocks. Oh, and a pile of bones and other debris.

-
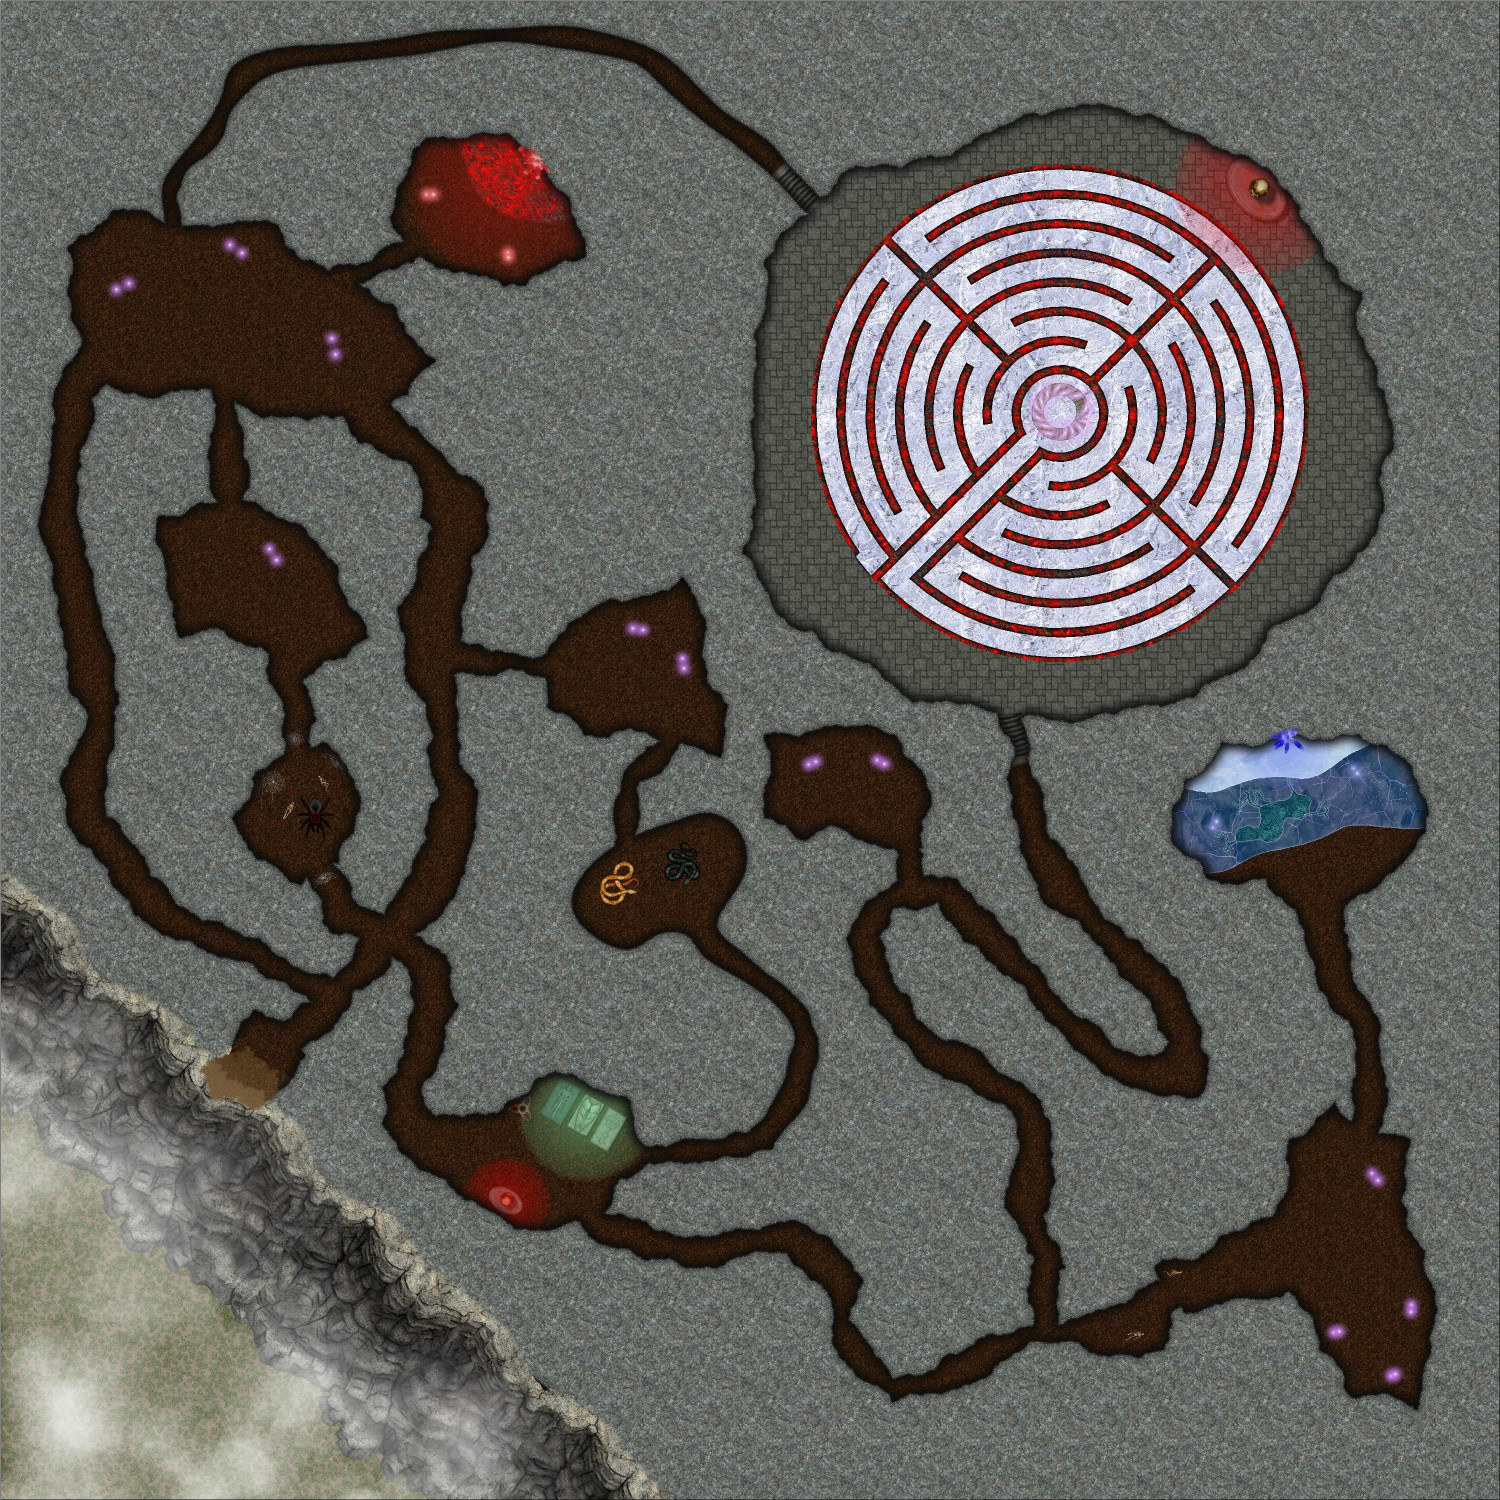
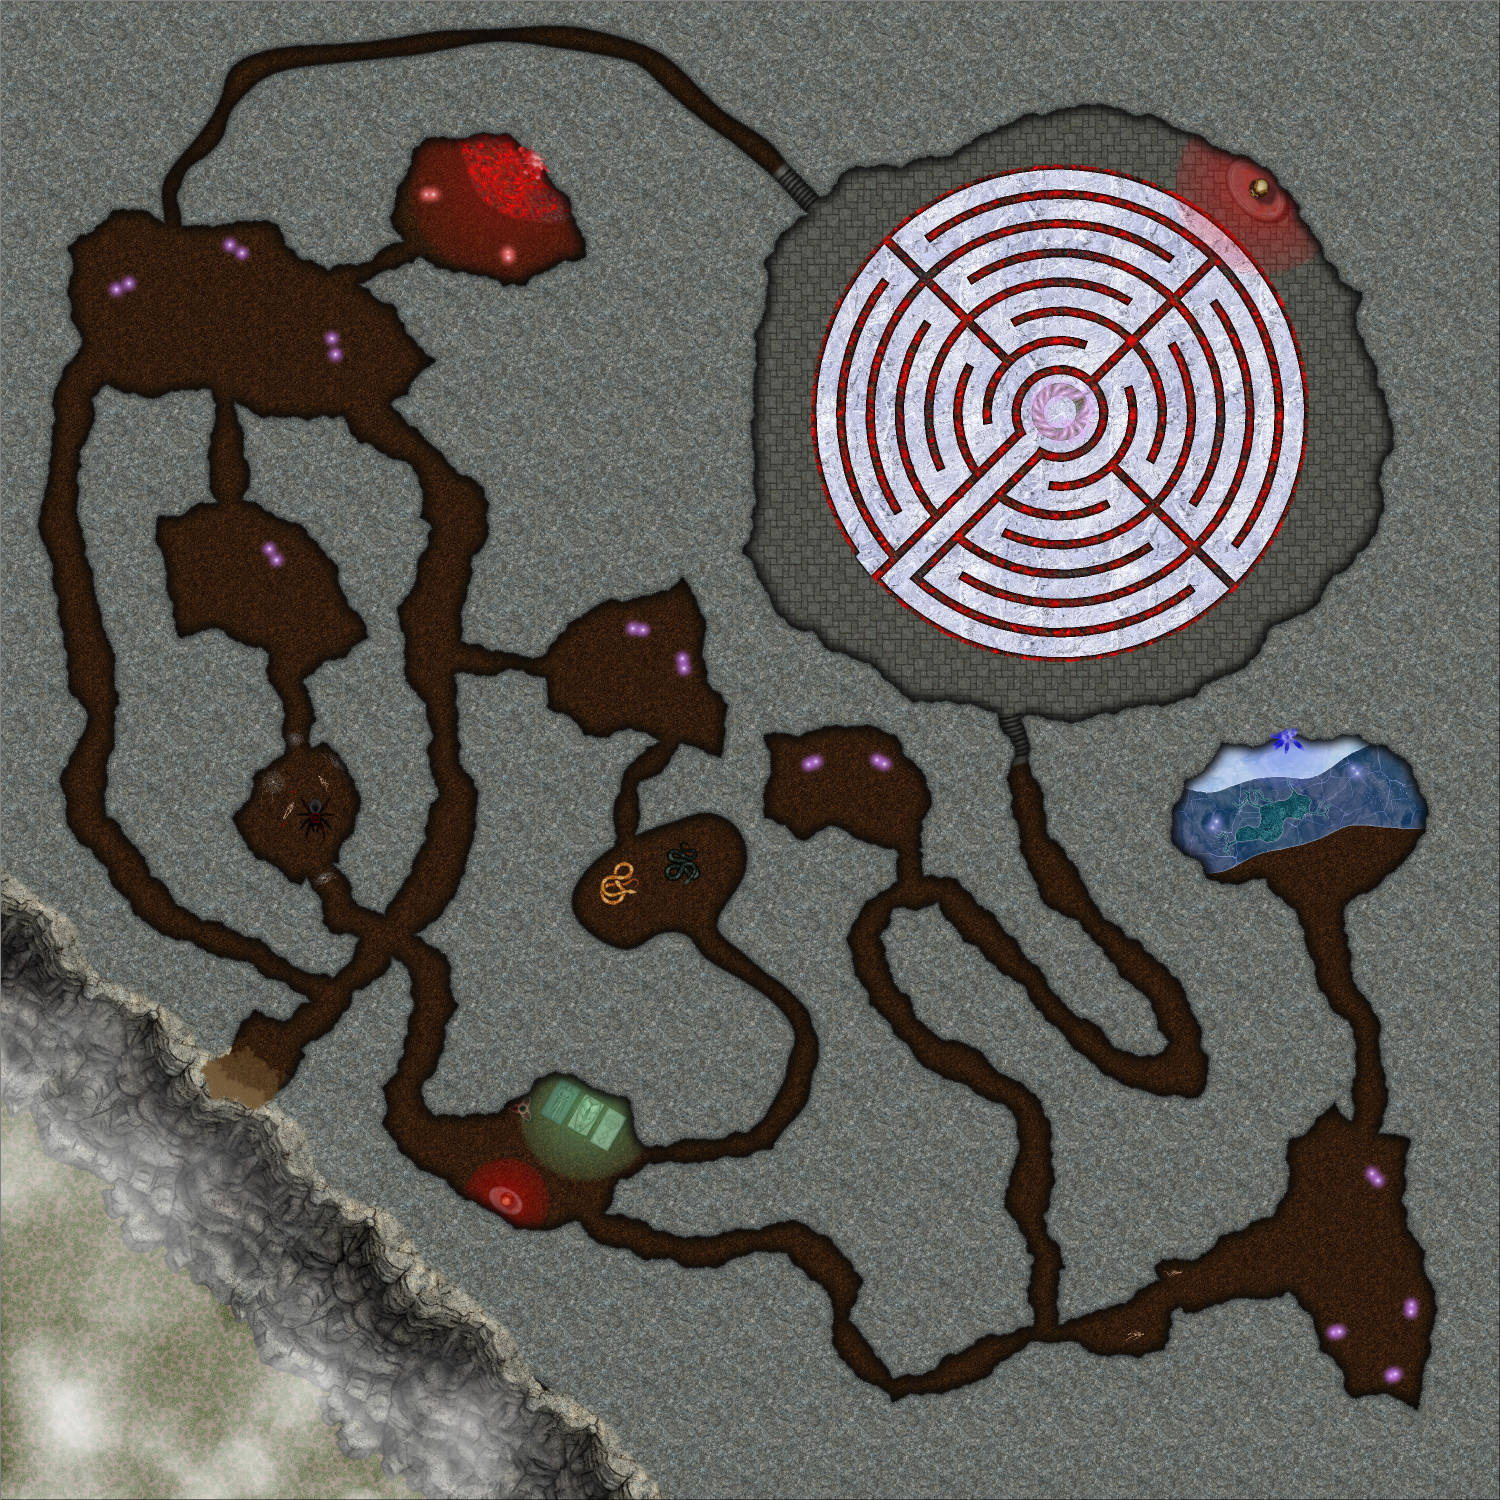
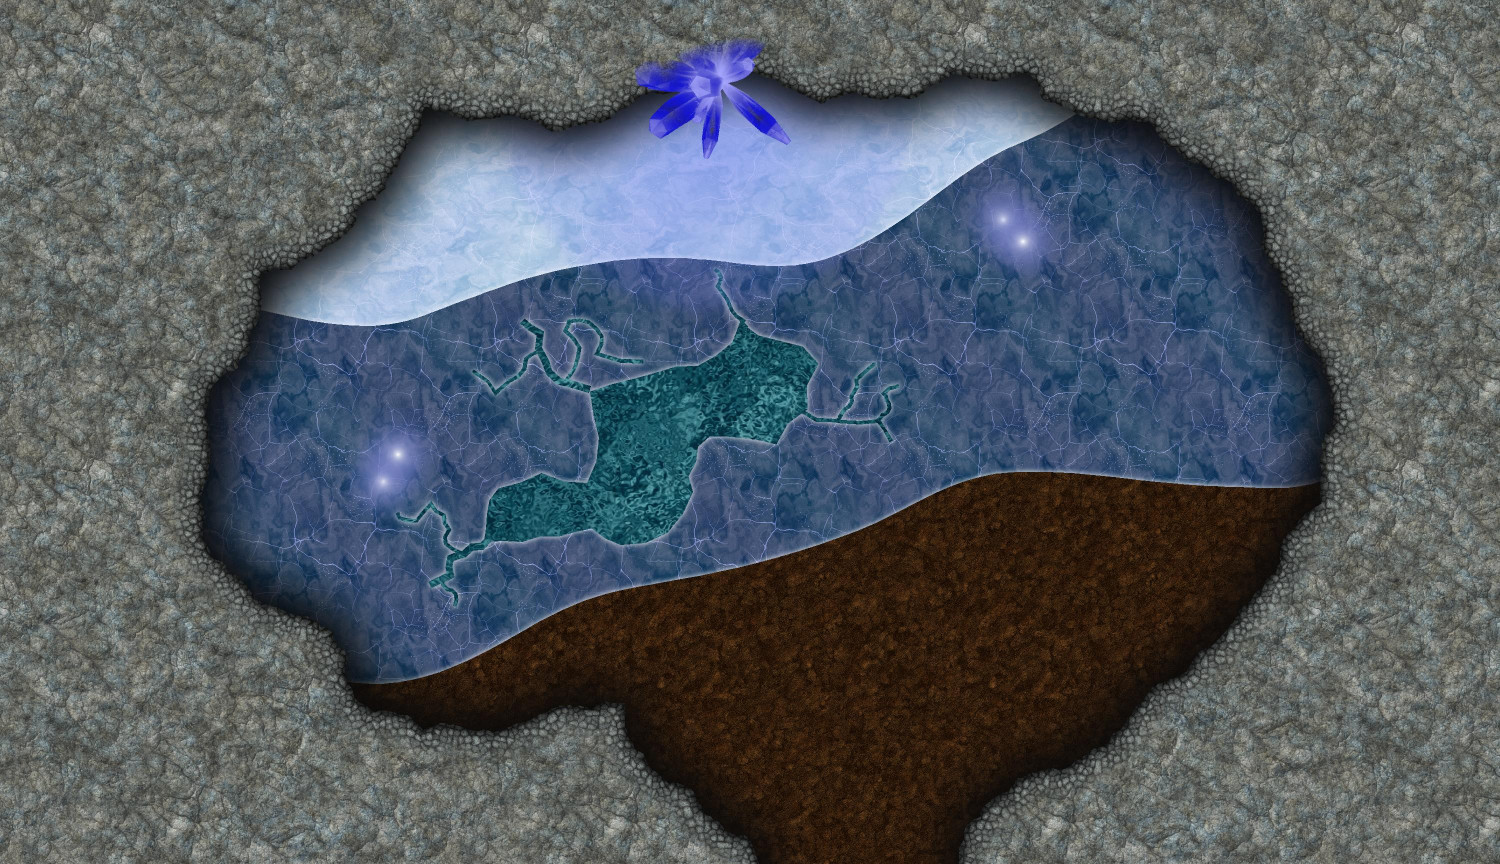
[WIP] Community Atlas: Kumarikandam - SE Tiantang Region
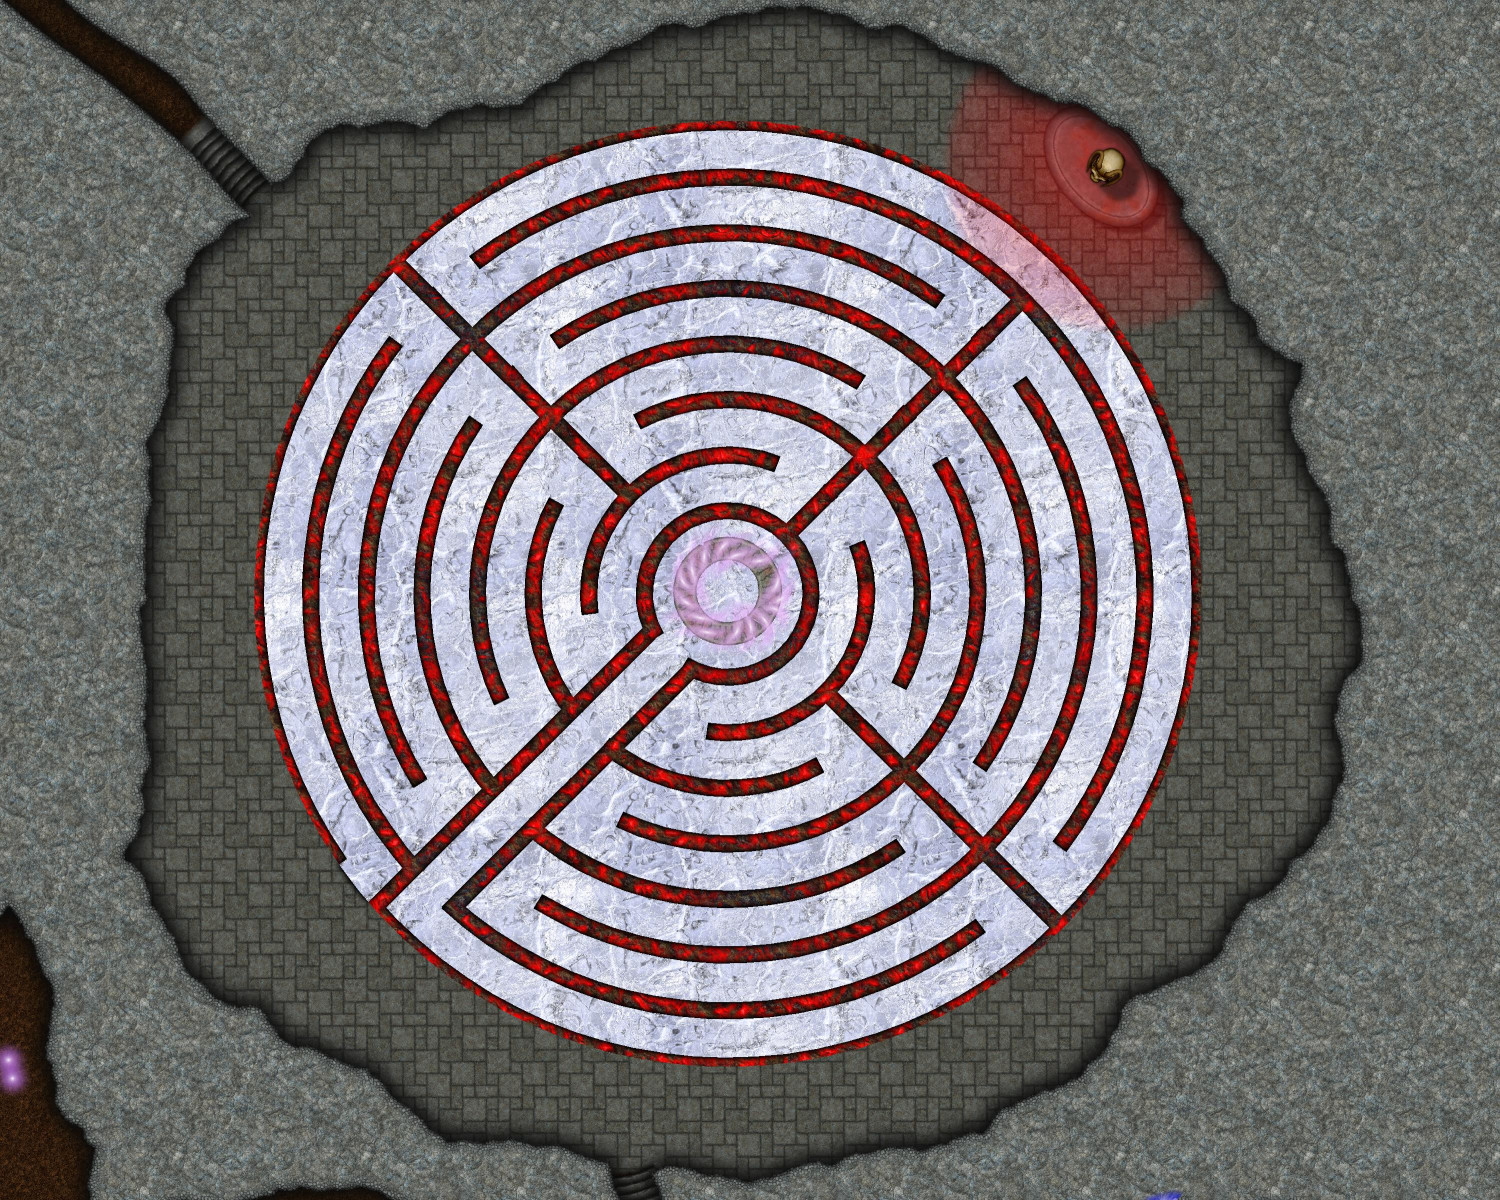
This is the Huo Yu Bing Caverns, which is accessed though a cave entrance on the cliffs of the main map:
No toggles. The teleportation portal in the center of the labyrinth can be linked to the Trial of the Elements (coming next):
Description
Huo Yu Bing Caverns
The Trial of Fire and Ice
Whether drawn by desperation or greed or malice, prospective monks risk everything, even their very lives, to study the mysterious Path of the Morning Glow at the Zhao Guang Si monastery. There, apprentices learn the art of killing.
They climb cliffs without ropes, traverse fields filled with deadly traps, and duel to exhaustion, all to strengthen their bodies and reflexes. They are taught to hide emotions, manipulate the minds of their targets, and plan assassinations with surgical precision. And they study ancient grimoires containing magics that grant temporary invisibility, silencing voices, and even cursing the senses. These spells demand sacrifices, often blood, making the price of power high
Those who survive the training – and most do not – must pass two deadly trials to graduate and join the ranks of the the Zhao Guang Si monks.
The first of these trials is the Trial of Fire and Ice, which they must complete before embarking on the Trial of the Elements.
A Perilous Climb
To reach the entrance of the Huo Yu Bing Caverns, apprentices must scale the side of a cliff without benefit of rope or other tools. Those who fall may make the attempt another day…if they survive. Many do not.
Haunted and Infested Caverns
The caverns are infested with giant spiders and venomous snakes, but they are not the only peril in the caverns. When trainees perish in the caverns, their remains are not retrieved. Instead, a baleful magic infuses their bones while worms feast on their softer tissues. In about a month, those bones will reanimate, and these skeletons will attack the next trainee to brave the caverns. In addition, the spirits of those who die in the caverns are bound to them, haunting as a Spector and attacking the living who dare to enter.
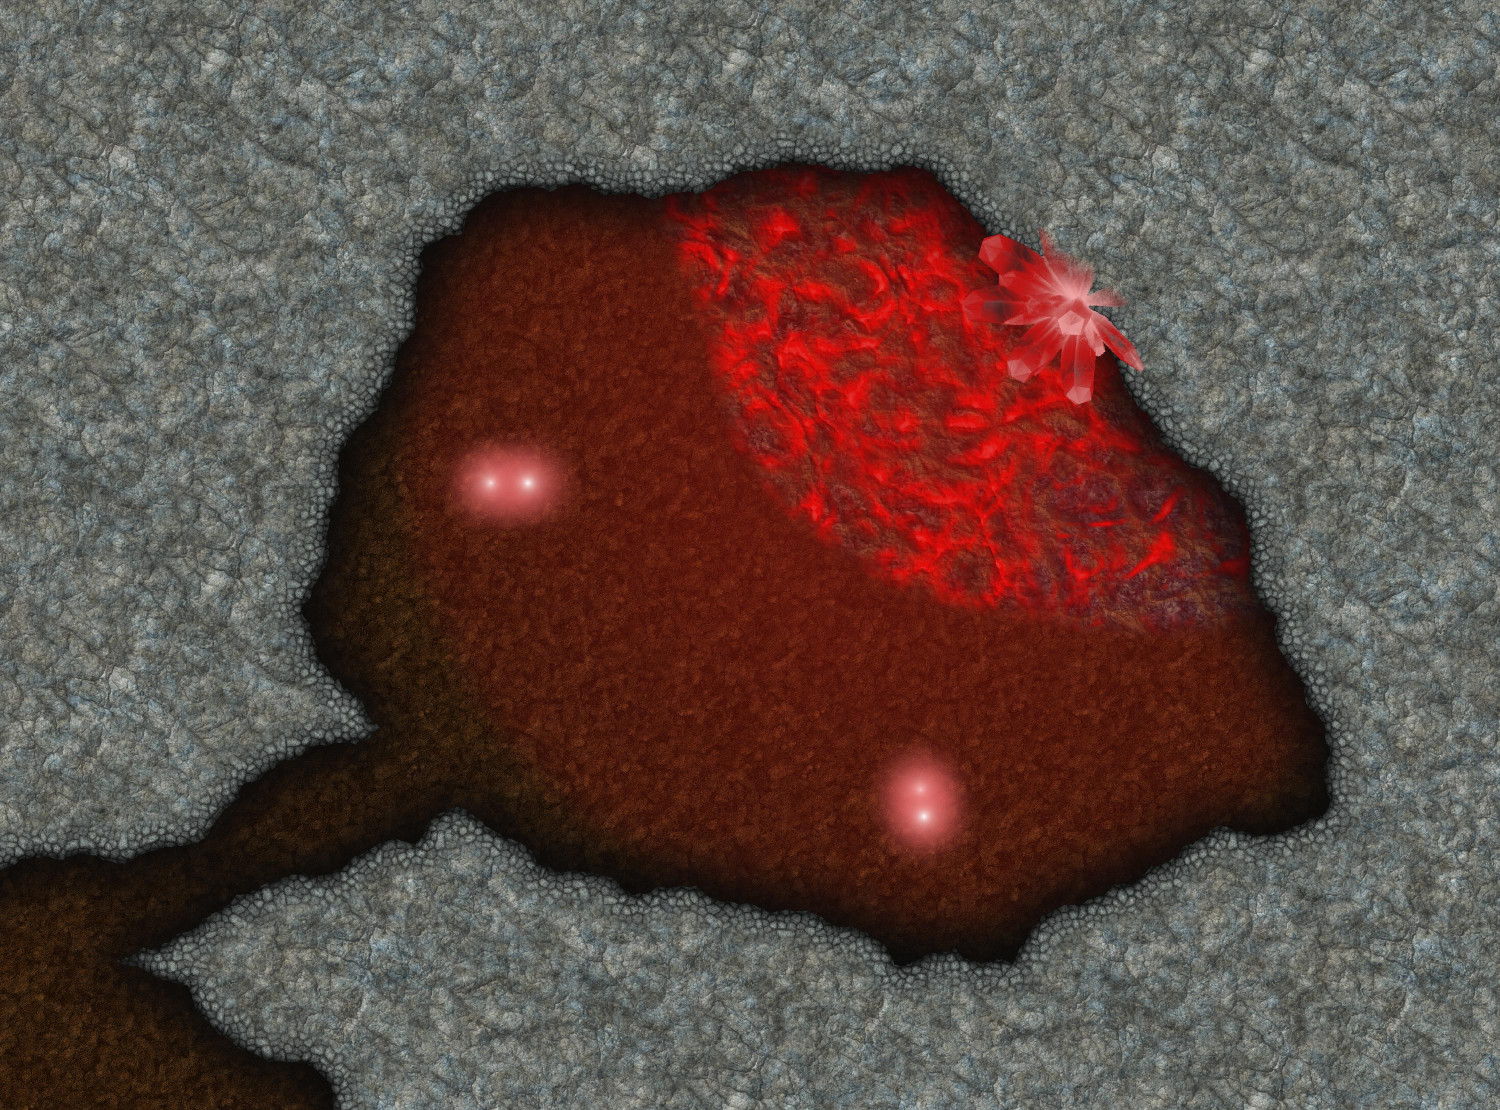
The Cave of Fire
In one room within the caverns, a red crystal is embedded on the opposite wall of the room. A pool of lava blocks access to the crystal, but that is not the room’s only perils. A pair of lesser demons guard the room and will attack anyone who enters.
Anyone who reaches the crystal can easily take a shard from it. This shard will grant the possessor immunity to damage from fire and heat. Although apprentices can complete the trials without the shard, possessing one will make their efforts considerably easier.
The Cave of Ice
In the Cave of Ice, a semi-frozen lake blocks access to a blue crystal embedded in the far wall. A pair of ice devils also guard the room. Visitors who reach the blue crystal can take a shard from it, which will provide immunity to cold damage. A trainee can survive the trials without the shard but possessing it will make their task easier.
The Labyrinth of Fire and Ice
At the end of the caverns, a spacious room holds a labyrinth traced on the floor. While monks at other monasteries use these labyrinths as a meditation tool, slowly walking the path in reflective contemplation, this labyrinth is a device of torture, pain, and possible death. The path of the labyrinth is made of ice, while its edges are magically lined with hot lava.
At the far end of the room, a statue of a horned skull will speak in an archaic but understandable tongue to anyone who enters, saying:
“Welcome, visitor. Art thou ready to brave the Labyrinth of Fire and Ice?”
If answered in the affirmative, the statue will continue:
“Step then at the beginning of the labyrinth and follow every step of the path to the center. Lest thee attempt to bypass the path, remember that the portal will only open for those who have followed my instructions and traversed the path.”
If the apprentice attempts to bypass the path by stepping over its edges or flying over the labyrinth, the statue will again say:
“The portal will only open for those who have followed my instructions and traversed the path.”
If someone reaches the center by flying, leaping, or otherwise avoiding walking along the path, the tele
Every turn, those walking along the path must make a Constitution saving throw. Those who fail with take 1d6 cold damage from unless they have immunity to cold damage, such as by possessing a shard of the blue crystal. In addition, each round they must also make a Dexterity saving throw. Those who fail slip on the ice enough to touch the hot lava, taking 1d6 fire damage unless immune to fire damage, such as from possessing a shard from the red crystal.
Those who perish while traversing the labyrinth will ignite from the heat of the lava. Over the course of an hour, even their bones will have been reduced to ash. For those who survive and make it to the center, a teleportation portal will activate and magically transport them to the Trial of the Elements.


-
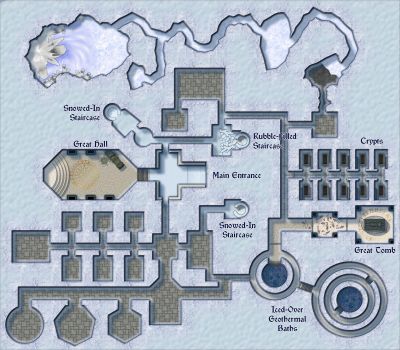
[WIP] Zhao Guang Si monastery
The trainees who survive still have two final tests before they graduate: the Trial of Fire and Ice, and the Trial of the Elements. Those who succeed at both trials will join the ranks of the monks of Zhao Guang Si. Those who fail are generally dead.
For the Trial of Fire and Ice, the initiate must climb the cliff walls without benefit of rope and then make their way through the Hu0 Yu Bing Caverns to the Labyrinth of Fire and Ice, a path magically made of ice and molten lava.
In addition to venomous snakes and giant spiders, the caverns are home to two undead perils as well. When a trainee dies in the caverns, their body is left to rot. Once the worms have picked the bones clean, their bones reanimate as a skeleton, and will attack the next trainees who enter. In addition, their spirits also haunt the caverns and can attack those who enter. (I used purple will-o-wisps to look like the spirits' eyes.)
There are two magical shards of crystal that trainees can try to get, which will help with both the Labyrinth of Fire and Ice as well as with the Trial of the Elements. The first is a shard from a red crystal on the other side of a pool of lava. If the lava wasn't barrier enough, the room is also guarded by a pair of lesser demons.
The second is a blue crystal on the other side of an icy lake in a room guarded by a pair of ice devils.
Trainees don't need to even try to get shards from either crystal, but they will sure help if they do.
At the end of the caverns is the Labyrinth of Fire and Ice: an icy path marked by red hot lava. A statue on the other side of the room will animate when anyone enters, and tell them that the only exit is a teleportation portal in the center of the labyrinth. It will only activate for those who walk the path. If anyone attempts to bypass the path, it will not activate.
Every turn that a trainee walks the path, they must make a Constitution saving throw. Failing results in cold damage unless they possess a shard of the blue crystal. They must also make a Dexterity saving throw every turn. Failing means they slip and touch the lava, resulting in fire damage unless they possess the red shard.
If they make it to the teleportation circle in the center, they are teleported to the Trial of the Elements.
-
[WIP] Community Atlas: Kumarikandam - SE Tiantang Region
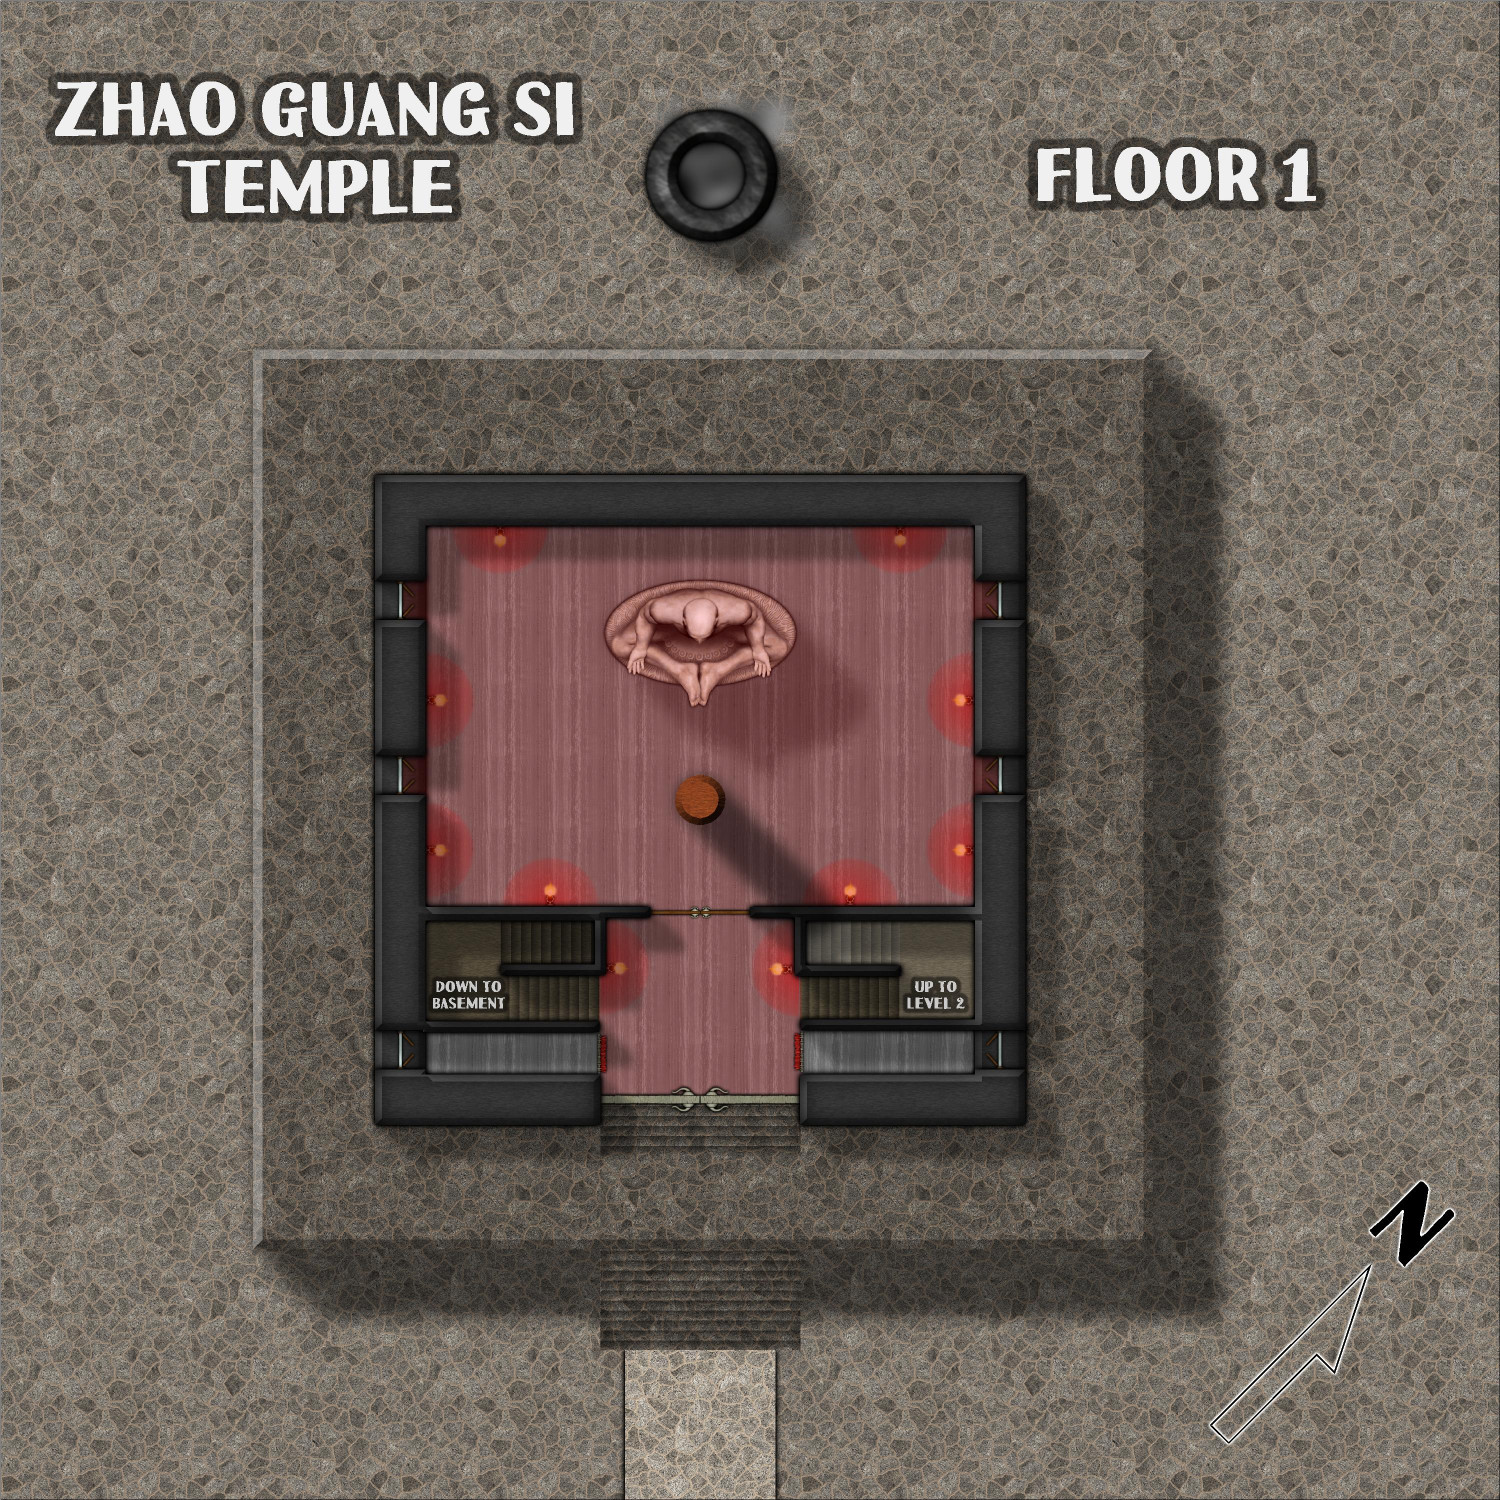
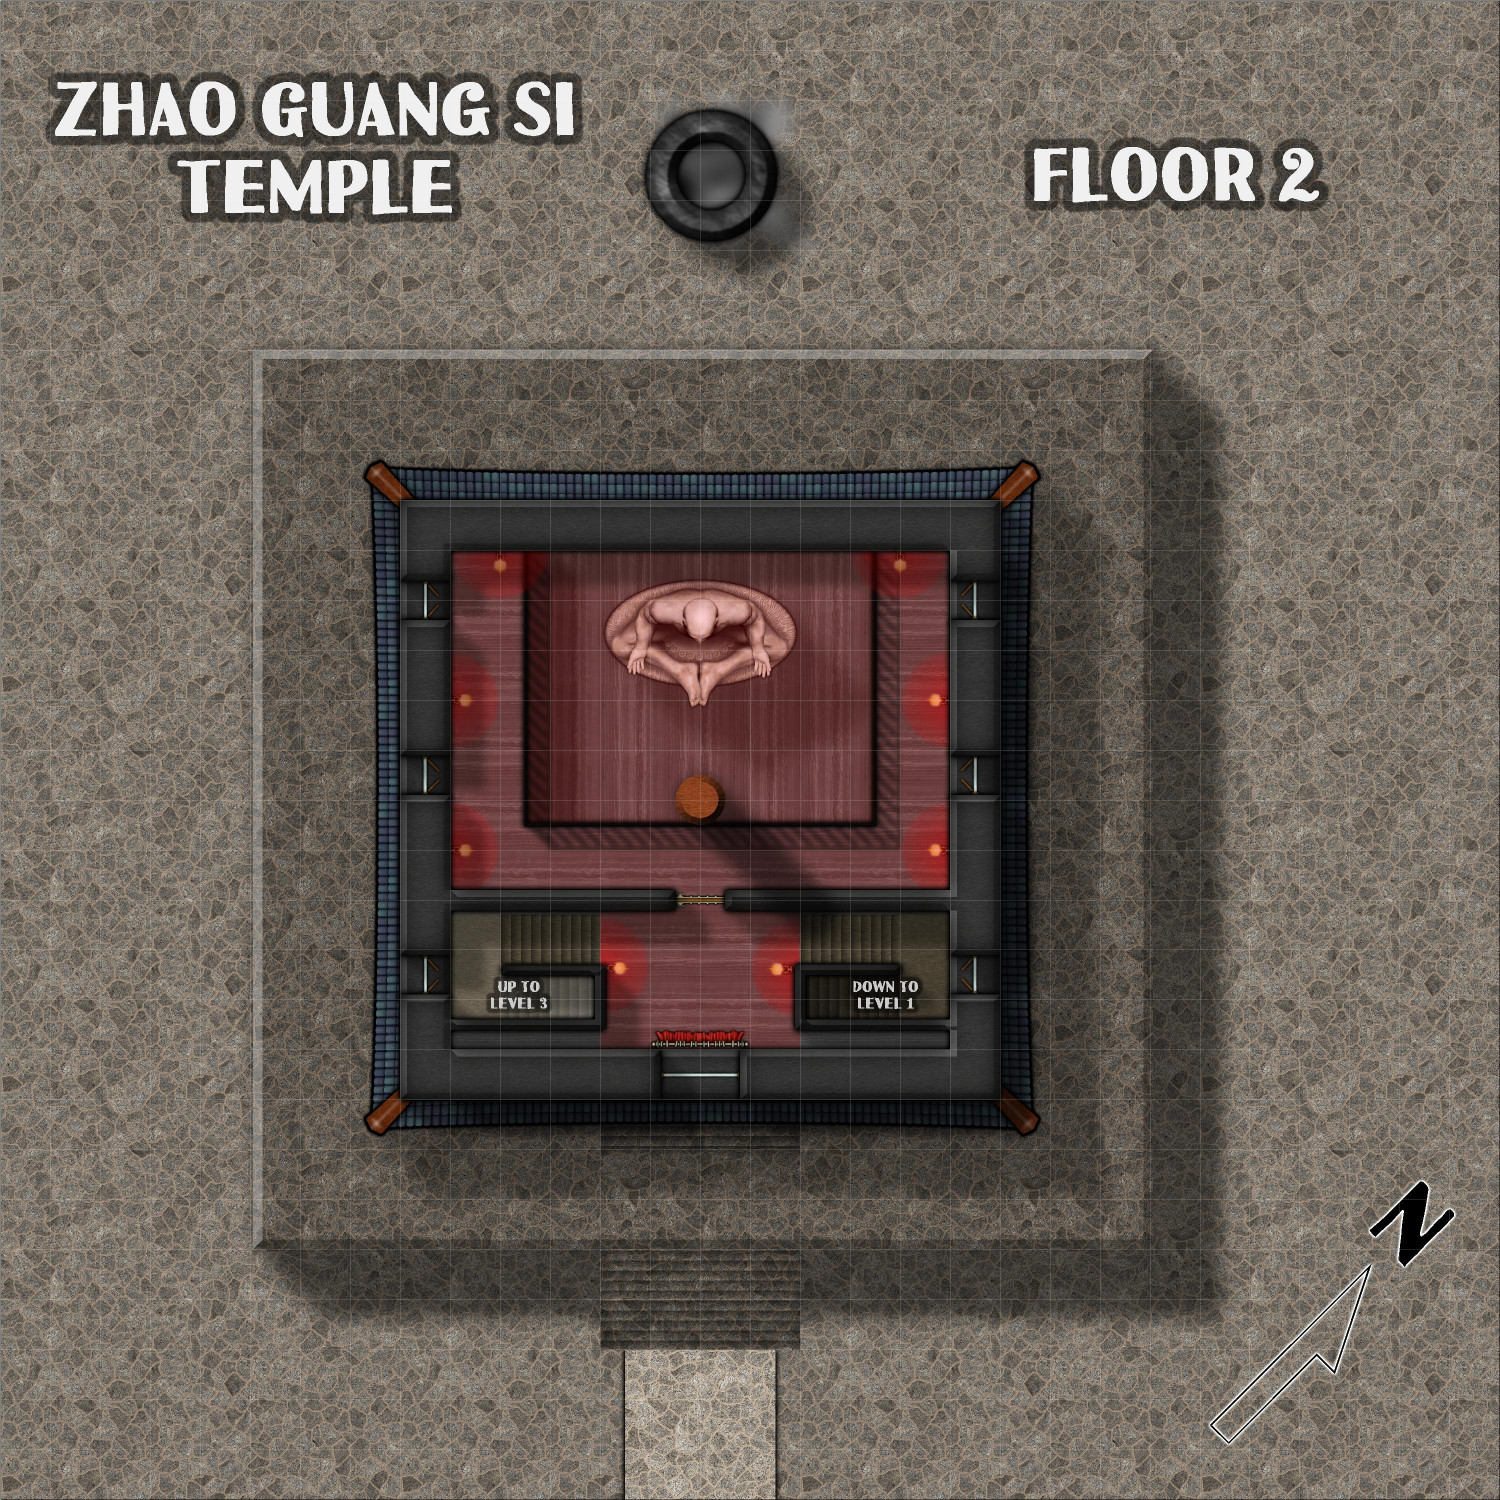
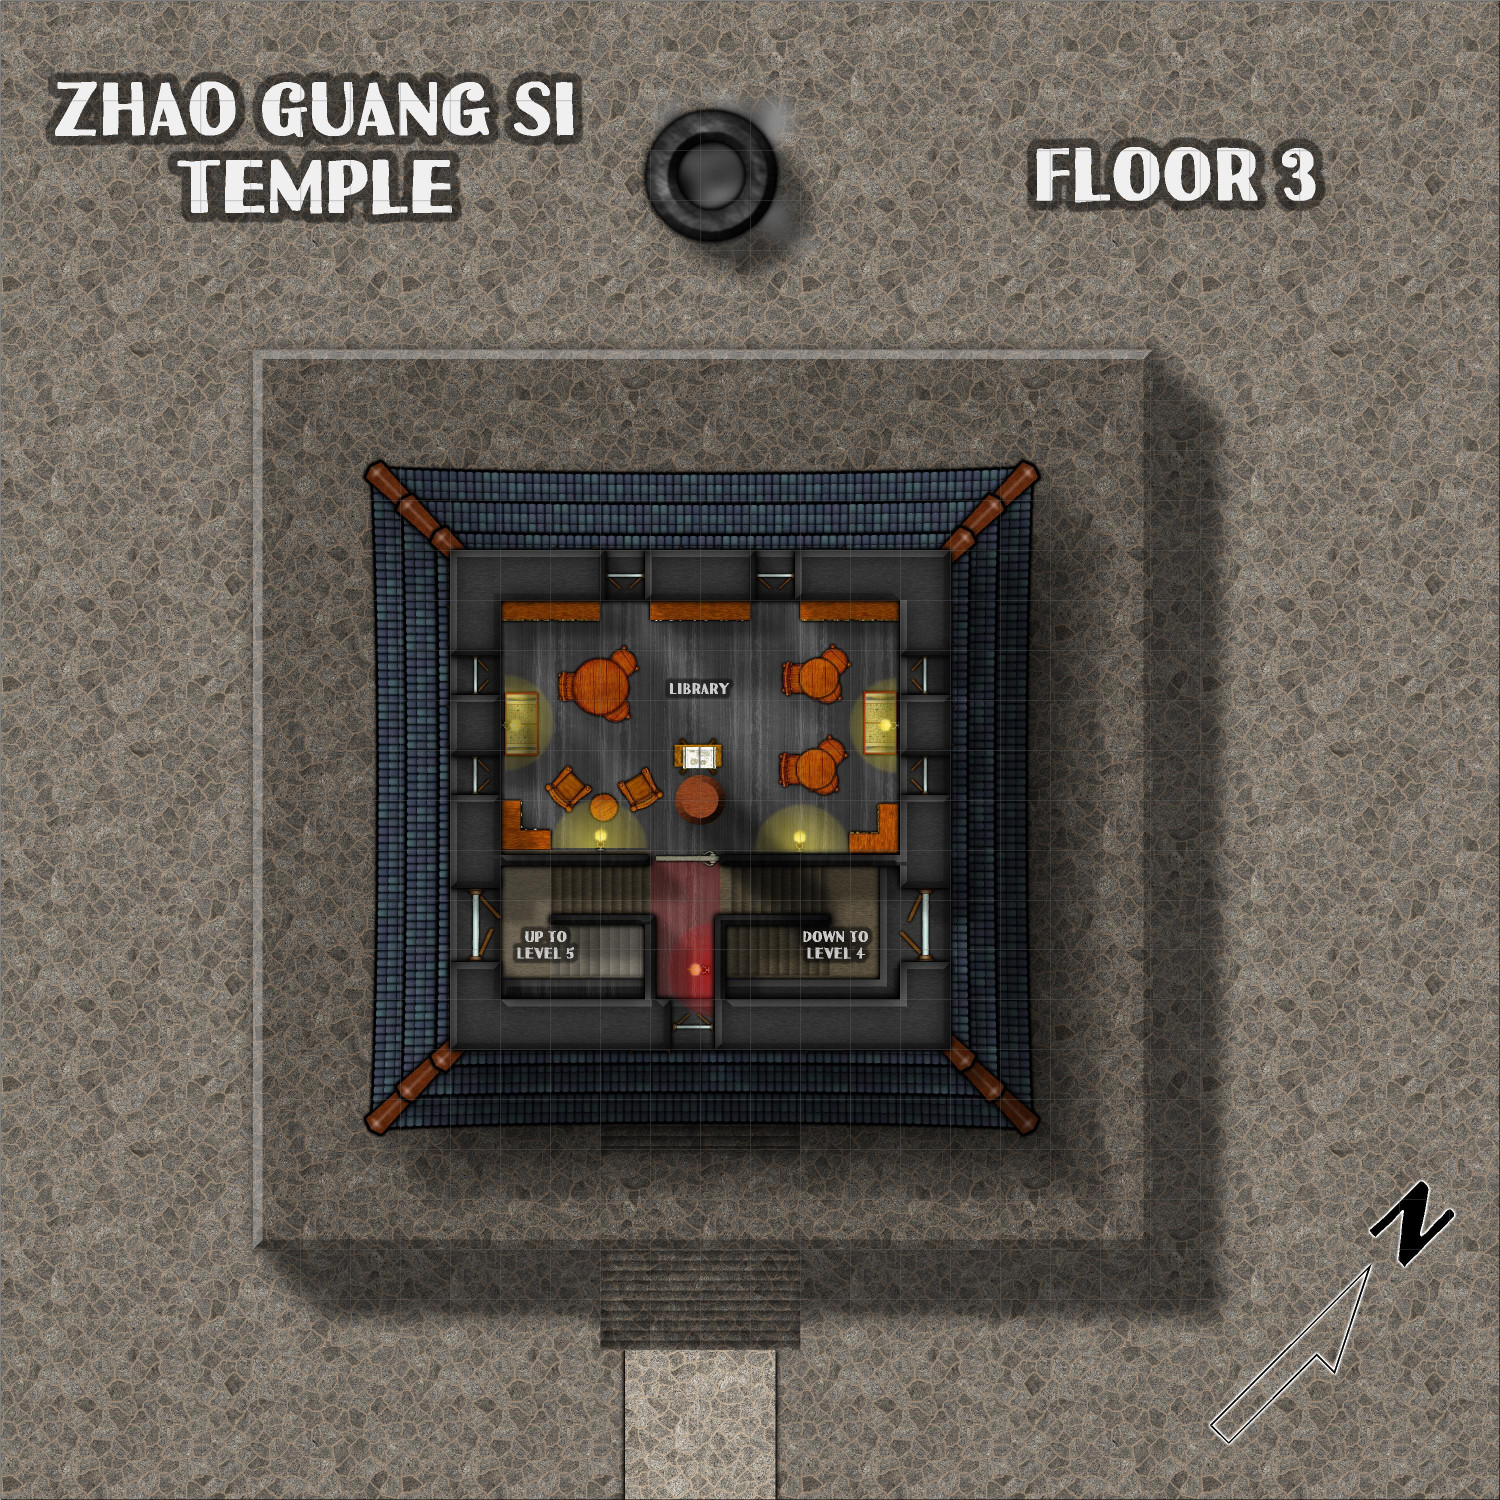
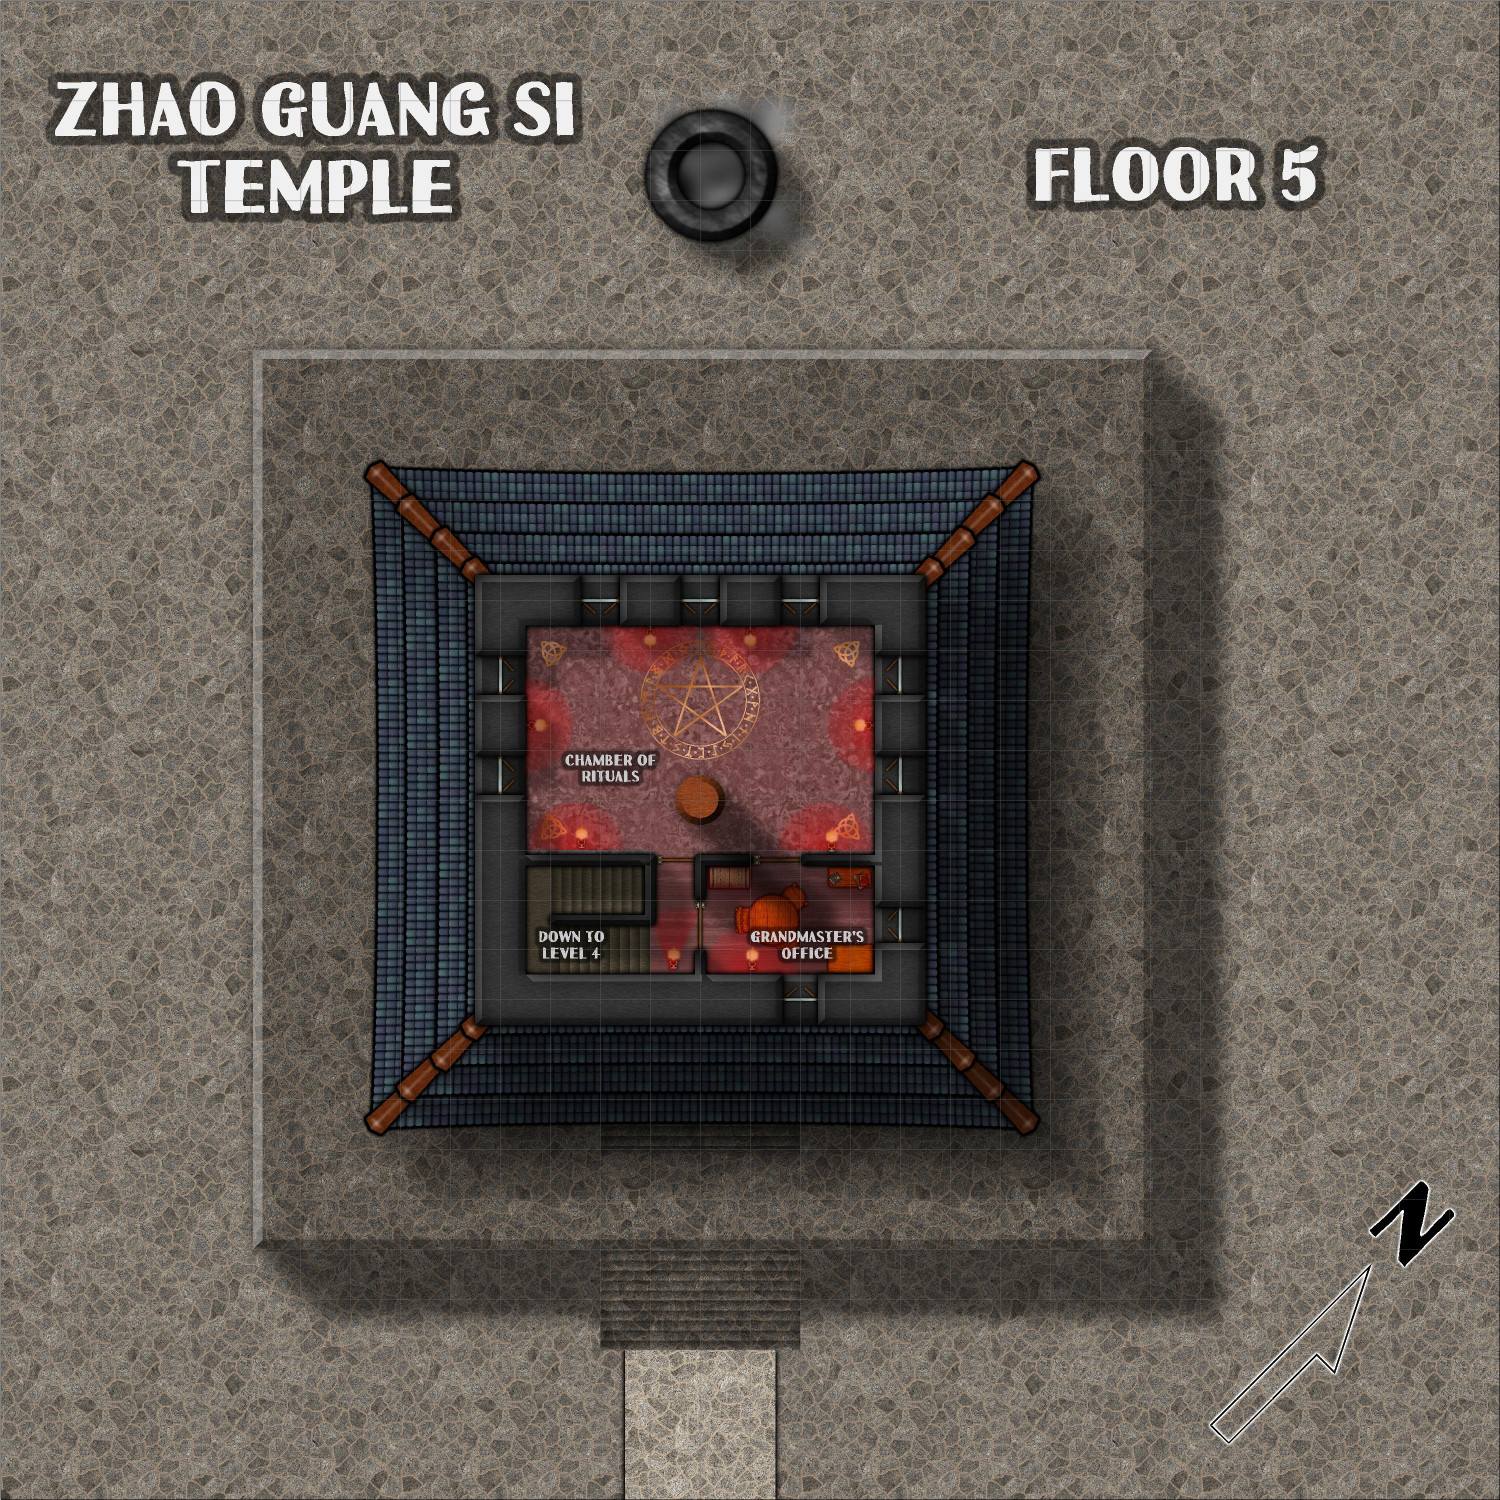
Here are the five above-ground levels of the Zhao Guang Si Temple (the basement will be separate).
Toggle: LIGHTING layer to show/hide the red glow throughout most of the temple.
Description
At the Zhao Guang Si monastery, a five-story pagoda temple rises through the mists and clouds. The wooden walls are painted with a dark lacquer, and the lanterns are covered with a red gauze that gives the interior an ominous red glow. A center oaken beam rises through every floor, providing structural support for the temple.
First Floor
The first floor is dominated by a 40-foot statue of a man sitting cross-legged. Although there are four windows, two on each wall flanking the statue, they generally remain closed and shuttered so that the only light comes from the red lanterns.
Second Floor
This floor consists primarily of a balcony overlooking the temple floor below. The statue is large enough to still be higher than the monks standing on the balcony. As with the other windows throughout the temple, the windows here are generally shuttered.
Third Floor
Except for a few closets for storing equipment, this floor primarily consists of a training room where trainees can spar with each other until they drop from exhaustion.
Fourth Floor
The library on this floor is the only room where the lanterns are not shrouded in red gauze, and the windows may remain open to allow for reading by daylight.
Fifth Floor
The grandmaster has an office on this floor, but much of the floor is dedicated to the Chamber of Rituals, where it is said that senior monks may perform dark magic to enhance their abilities.

-
FT3 Question
Ralf does demonstrate it at the end of this "Fractal Terrains to Parchment World" tutorial (around the 38 minute mark), using a full world Parchment Map that he had created the week before.


-
The Sola System: Adnati's star and celestial neighbors
A few tweaks, including increasing the size of the wormhole and adding a glow.


-
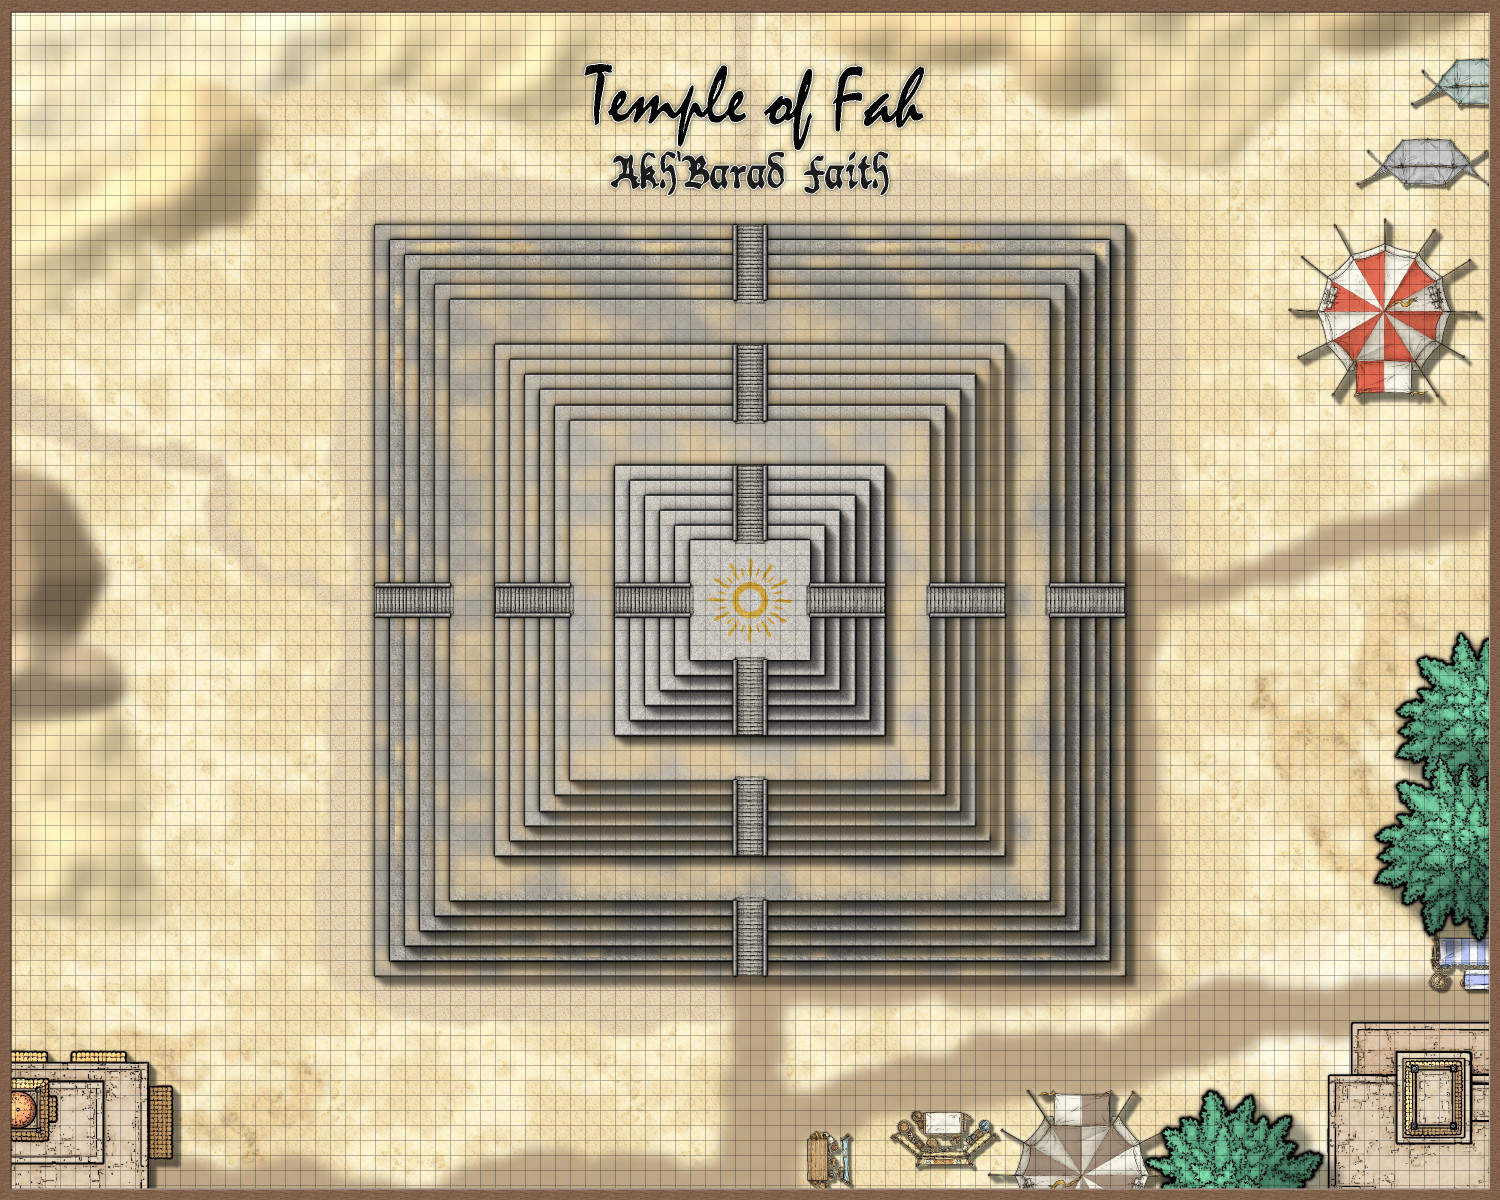
[WIP] Temple of Fah (May Annual: Stairs and Steps)
I decided against trying to "erode" the levels of the ziggurat. It was a lot to change, and I decided that I will keep the technique in mind next time I do one. Instead, I focused on adding layers of the sand texture to each level of the temple (except for the top portion that the priests are more diligent about sweeping). I tried to vary the patterning by starting drawing from different corners, but I'm not sure that helped much. I might alternate which of the sand textures are used, as I did set each to different scalings. I like the color and scaling of #4 the best but I really should change it a little so you don't see angled paths of no sand like on the north face.
I also added the edge of a mountain using the same techniques as the dunes, but with the bevel isn't smoothed as much, and I used a dark brown earth fill. Maybe I should move the mountain to the NW or NE corner?

