


Wyvern
Wyvern
About
- Username
- Wyvern
- Joined
- Visits
- 3,230
- Last Active
- Roles
- Member
- Points
- 5,507
- Rank
- Cartographer
- Badges
- 24
Latest Images


-
WIP: ICS Immaculate Radiance
Don't forget an alternate bridge to command the vessel if it's liable to see combat. Even if the primary bridge is buried deep, that's no guarantee it'll survive the first minutes of an encounter, as it's the classic place to aim for if your targeting is good enough.
Bridge location is heavily dependent on the tech too, as Don notes. Normal windows are useless for anything other than pretty views of whatever's close-by, for instance, so some tech for even "normal viewing" is essential to avoid endlessly wondering if that faint star's a faint star, a massive enemy vessel or a missile heading directly at you. Even massive craft become near-invisible dots at astonishingly tiny interplanetary distances after all!
Dalton, not sure what you're meaning by "texture for the hull that resembles the white complex details of a Star Wars ship", as I thought there were various bitmap options for the rectangular plate effects on imaginary craft like this in Cosmographer already. The Dundjinni Archives have more variants too, and Storyweaver Highspace, for instance. Maybe you're meaning some other kind of texture though? (I'm not very up on Star Wars tech, as I've long found it too unbelievable to be interesting.)
-
WIP: ICS Immaculate Radiance
Been a very long time since I did any spacecraft designs. General principles still apply though, remembering this is a self-contained, self-reliant unit, so essentially you need everything you'd have on a normal ship with a sizeable crew - they need to eat, sleep, stay clean (clothes and person; toilets as well), exercise, medical facilities, a means of controlling each system on the vessel, a means of communicating with other vessels and shore/planetary/orbital bases, a means of carrying out the vessel's primary and subsidiary functions, emergency escape facilities, emergency handling facilities (e.g. fire, flood, general damage control), a means of observing whatever is around them outside the vessel, and as you obviously already have, propulsive engines and fuel sources. This list is not exhaustive! And almost all this has to fit within the outer hull somehow.
Spherical and rounded hull shapes are a nightmare to design for. About 40 years ago, I drew out by hand a spherical free-moving spacecraft intended as a planetary defence vessel, one of a fleet, and that was horrendous, as (well, if you're me anyway) I had to keep checking how the outer circumference affected the internal space for different parts of every vertical level, and having to keep changing things because they'd no longer fit at the size intended, and so forth.
Unless there are strong reasons not to do so that make sense in-game, there's no physical necessity from our reality to have streamlined forms for spacecraft at all. Doesn't look so "Hollywood movie pretty", I grant you, but...


-
Community Atlas: Map for the Duin Elisyr area, Doriant
Yes, this can be a problem with some of the topographic mapping styles, and it's not possible to solve them all the same way (as they don't all use effects that will work equally well with things such as transparency). Luckily, this one does work that way.
Back at the mapping, the fourth quadrant has now been completed, and various items tweaked to a greater or lesser extent that seemed to need them. Names have been added for the main rivers and uplands, as appropriate, and a few more smaller patches of woodland "grown" in parts:
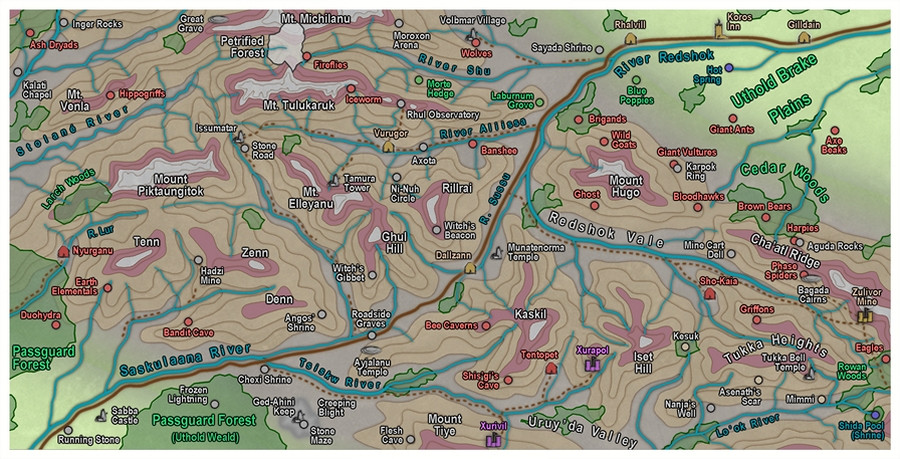
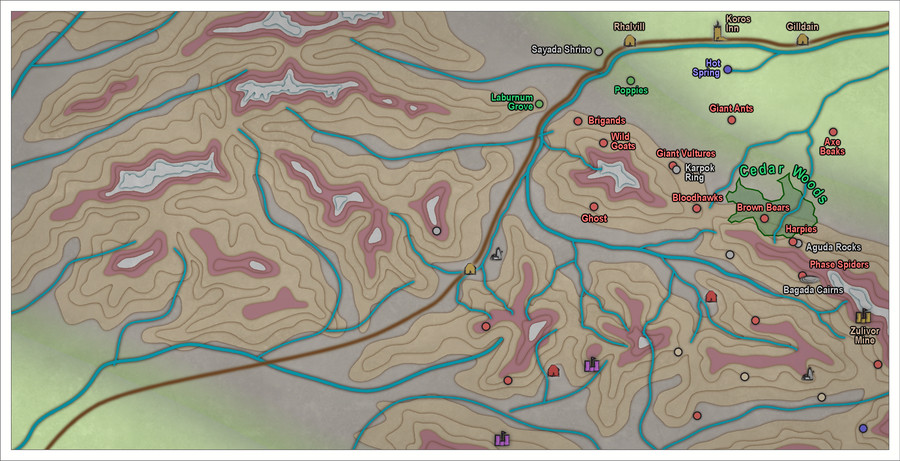
Then I added the title, scalebar and compass rose, and did some tests with the texture options activated. This image shows both in place:
While that looked sort-of OK, I wasn't very satisfied with it, so I tried various alternatives, ultimately deciding to have two separate sheets with the texture on them, because doubling-up helps accentuate the "water-colour-paper" look, and I could also restrict the textured areas to the newly-expanded upper and lower map borders only. That's not possible with the all-map Texture effect. Which brought me to:
However, I wasn't convinced this was sufficiently clear, as apart from darkening the map in general, it also further blurs everything. So I'm now thinking to leave the texturing options off entirely:
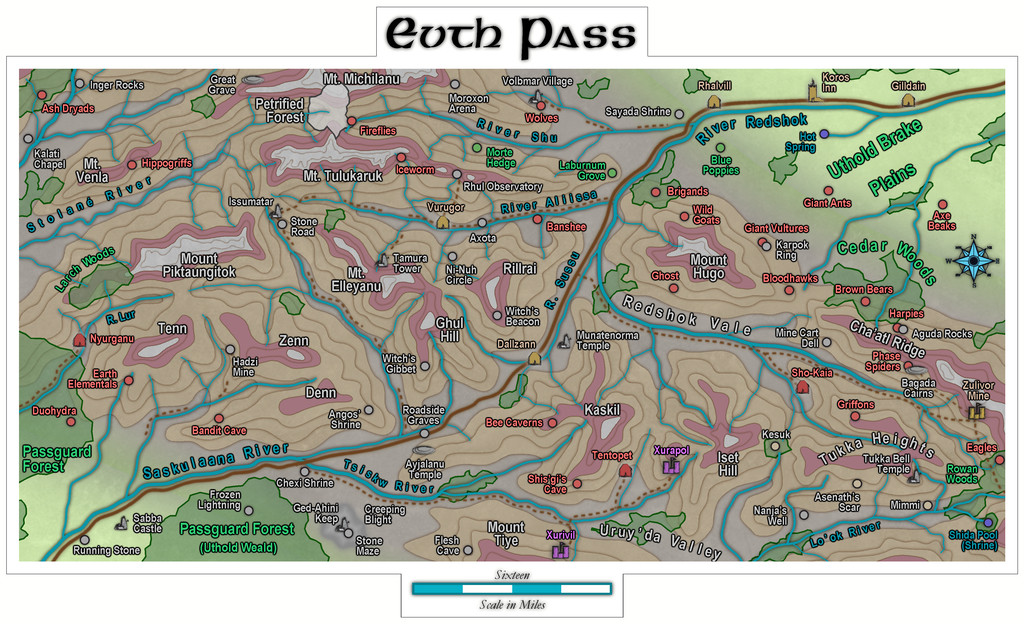
A few more minor adjustments are likely while preparing the notes to go with the Atlas version. At present, I'm intending to add some bridges to help clarify where the fords are over the lesser rivers, for instance. This is though probably close to the final version now. Until I find I've missed something, that is!

-
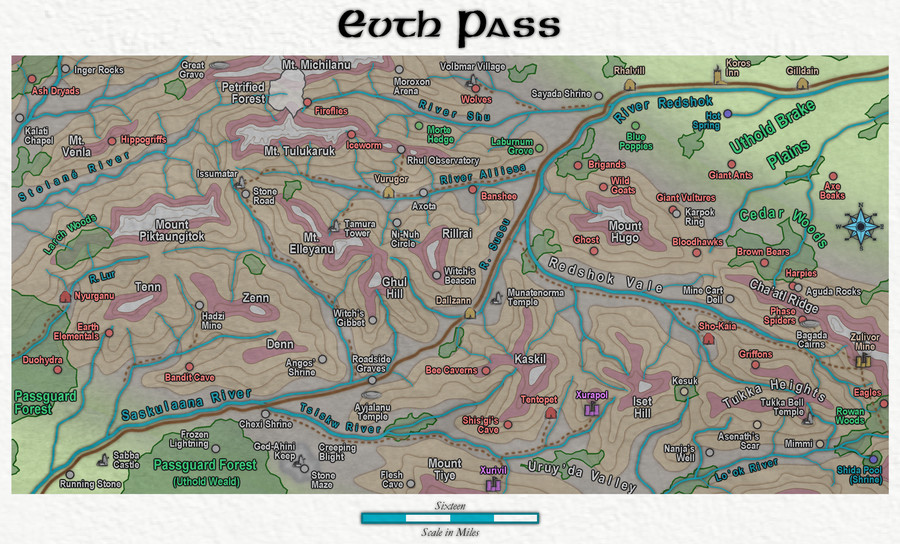
Community Atlas: Map for the Duin Elisyr area, Doriant
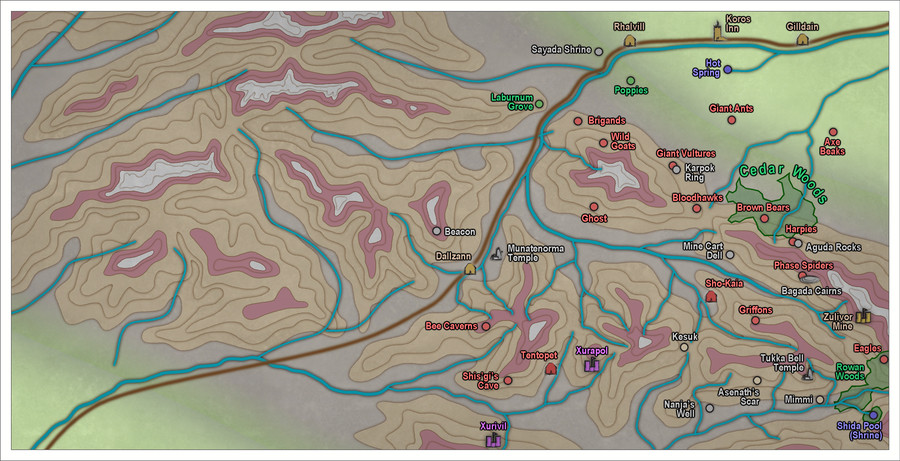
@Don Anderson Jr. commented: For me personally the text looks to fuzzy. Can the glow be lowered so the text edges are sharper, or is that the aesthetic you are going for? (or did you compress the image a lot during conversion?)
I think it's just an issue with the resolution here on the Forum Don. The symbols also look pretty fuzzy to my eye right now on these shots. At a higher res on screen and in printout (at the level the map'll be available in its final version in my Gallery), it looks fine. I am also using a smaller size image than the maximum allowable here for these WIP shots to try to keep things a bit more manageable, as they're really just for general illustrative purposes. I did run a few tests to adjust the text glow early on, and this was certainly the better option from those at the "proper" resolution levels.
Back to the mapping, if with a shorter update today.
Adding the randomly-allocated features to the lower left quadrant meant dropping-in a couple of more substantial pieces of woodland, as already identified from the Duin Elisyr base map. That in turn meant thinking of adding some further smaller scraps of woods elsewhere, all of which quickly snowballed into adding place names for some of the main rivers, peaks and valleys, along with the first extra trails. There was also some tweaking of a few river lines, thinning some out, adjusting the courses of more, and suchlike. Plus amending the line of the pass road to better fit alongside the southern river out of it, now named as the Saskulaana. So it's all starting to look a bit more "lived-in", with just the upper left quarter to complete:
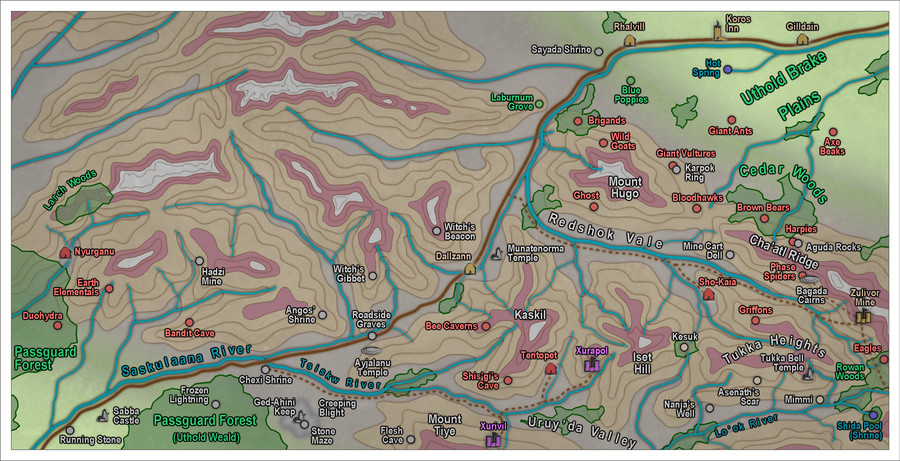
More tweaking of already-placed elements is likely, of course, and at some stage soon, I'll need to find somewhere to put the title, scale and compass pointer!
-
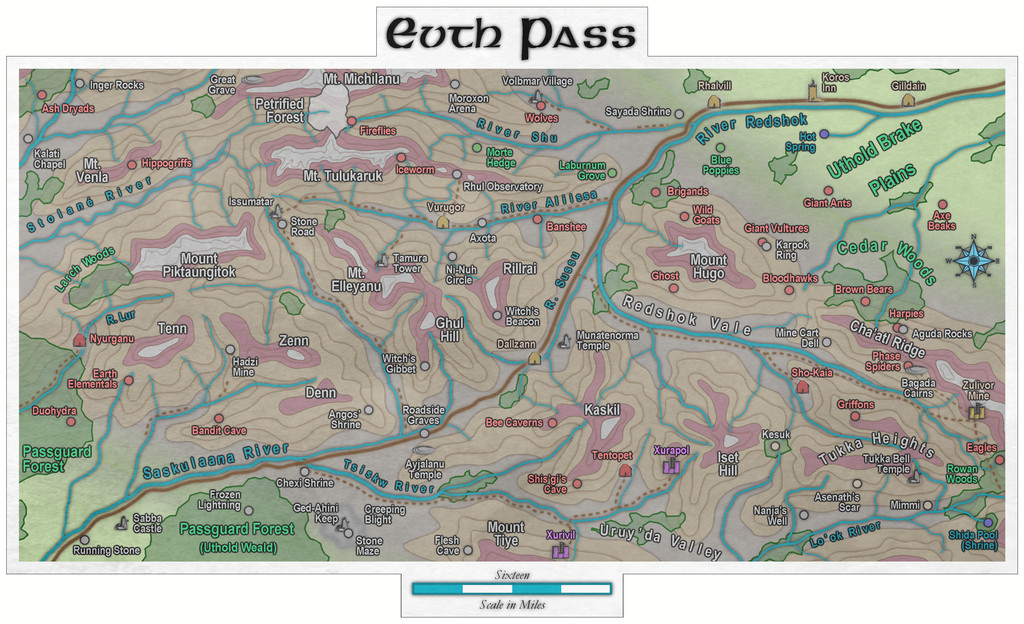
Community Atlas: Map for the Duin Elisyr area, Doriant
Rather a longer gap between posts here than I'd hoped, but such is the way of things sometimes.
However, coming back to the map with fresh eyes, it was obvious the symbols were over-sized for its scale, so I resized them all, changed one and moved a few others, and then had to move all the labels to reflect their altered locations. The usual two steps back and one forward; all part of the process!
Plus I also changed the look of the woods in the manner suggested last time, adding a new outline sheet, copying the wood onto it, and setting it to a suitable solid green colour of a satisfactory width, so the main woodland area could be made transparent enough to still show the rising contour lines in the trees. After which, I added another segment of map symbols in the lower right, tweaked the northern line of the pass road more, and added a few smaller river lines. This is how it looked before I started adding the next batch of labels (still with none of the texturing active):
The two new purple symbols are the entrances to a pair of subterranean Gnome settlements. That nearest the southern border has been moved some distance west of its original location, as the mountain tip there from the side-on symbols didn't make the cut into this topographic view. I had been treating those tips across the map as the northern side of what would be shown - which also explains why so many of the symbols in the northeastern quarter have migrated southwest, to be in the northern slopes of where those mountains were drawn here, of course. Those pictorial symbols can be so misleading sometimes 😉.
Before I added the labels though, I grew distracted by some of the contour lines, which didn't look quite clear enough in places. So that took up a bit more time, tweaking and re-tweaking, to get to something more satisfactory (I hope!). And then I changed some more river lines, mostly in the southeast quarter, to be nearer their final versions.
And finally, I added the next batch of labels!
A couple of new stretches of woodland have sneaked into the lower right corner as well, and I suspect there may be a few more before this is finished 😁.

