


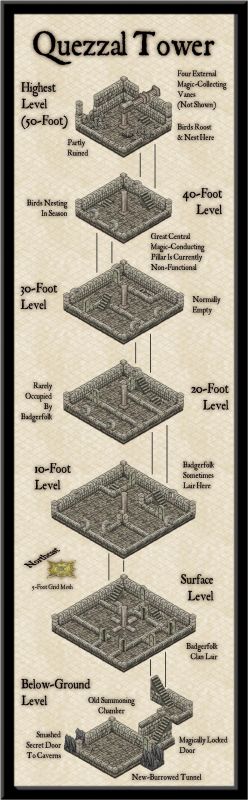
Wyvern
Wyvern
About
- Username
- Wyvern
- Joined
- Visits
- 3,266
- Last Active
- Roles
- Member
- Points
- 5,585
- Rank
- Cartographer
- Badges
- 24
Latest Images
-
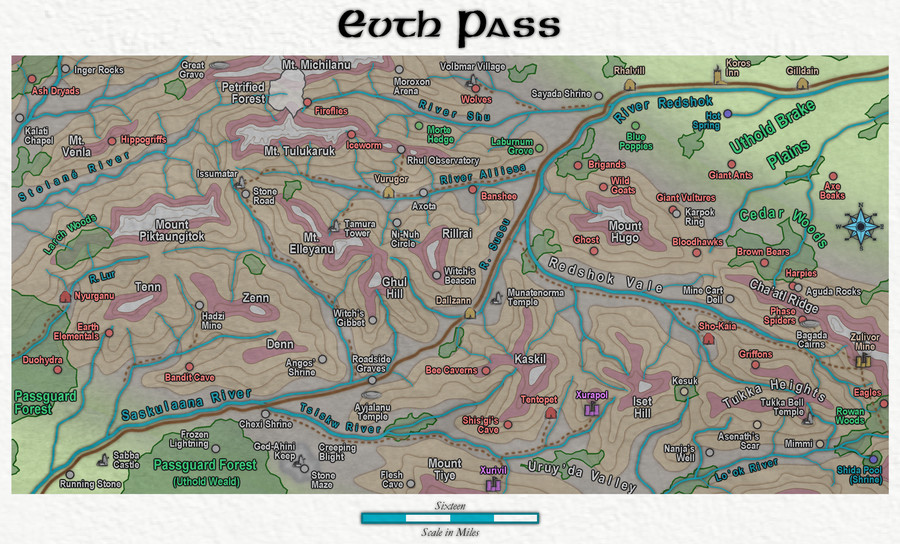
Community Atlas WIP - Panaur region of Doriant
Don't forget that aside from adding more character to the coastline, you can also add smaller islands there in places to help break up that "smoothness" aspect, much as other features too small to have been added on the original larger-area map can be added inland. What's shown as a peninsula on a large scale, might be really an island with a tidal causeway headland instead when you start looking closer, say!
I'd definitely recommend using your Atlas mapping to experiment with different styles; it's what I've been trying to do for some years now! It does indeed push you into thinking in different ways about mapping, and trying out new things in terms of how to use the program.

-
Seven Pines Lodge (keep it simple stupid)
Now everyone should have a good idea where to poop after experiencing a Eldritch horror.
Yeah, as Don says that's not really an issue for anyone who's ever played Call of Cthulhu. Surviving long enough to actually get to that point, now THAT'S the tricky part 😉.

-
Community Atlas: Map for the Duin Elisyr area, Doriant
Yes, this can be a problem with some of the topographic mapping styles, and it's not possible to solve them all the same way (as they don't all use effects that will work equally well with things such as transparency). Luckily, this one does work that way.
Back at the mapping, the fourth quadrant has now been completed, and various items tweaked to a greater or lesser extent that seemed to need them. Names have been added for the main rivers and uplands, as appropriate, and a few more smaller patches of woodland "grown" in parts:
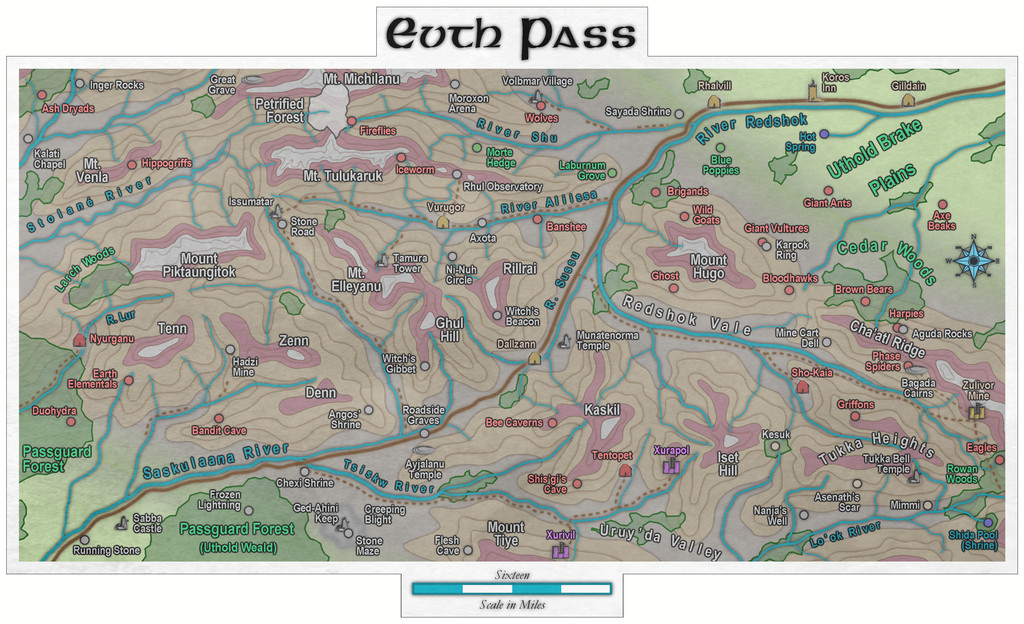
Then I added the title, scalebar and compass rose, and did some tests with the texture options activated. This image shows both in place:
While that looked sort-of OK, I wasn't very satisfied with it, so I tried various alternatives, ultimately deciding to have two separate sheets with the texture on them, because doubling-up helps accentuate the "water-colour-paper" look, and I could also restrict the textured areas to the newly-expanded upper and lower map borders only. That's not possible with the all-map Texture effect. Which brought me to:
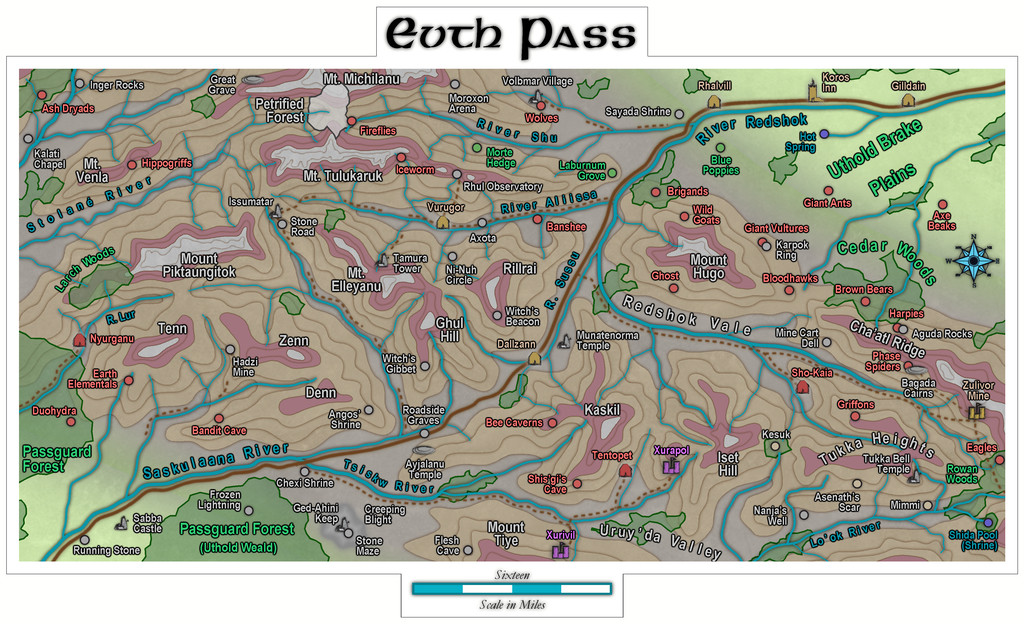
However, I wasn't convinced this was sufficiently clear, as apart from darkening the map in general, it also further blurs everything. So I'm now thinking to leave the texturing options off entirely:
A few more minor adjustments are likely while preparing the notes to go with the Atlas version. At present, I'm intending to add some bridges to help clarify where the fords are over the lesser rivers, for instance. This is though probably close to the final version now. Until I find I've missed something, that is!

-
My Favourite Fantasy city.
Ha just as I posted it I realized I am missing a valley.
There's always something... Been there, done that, have a wardrobe of T-shirts to prove it 😏.
-
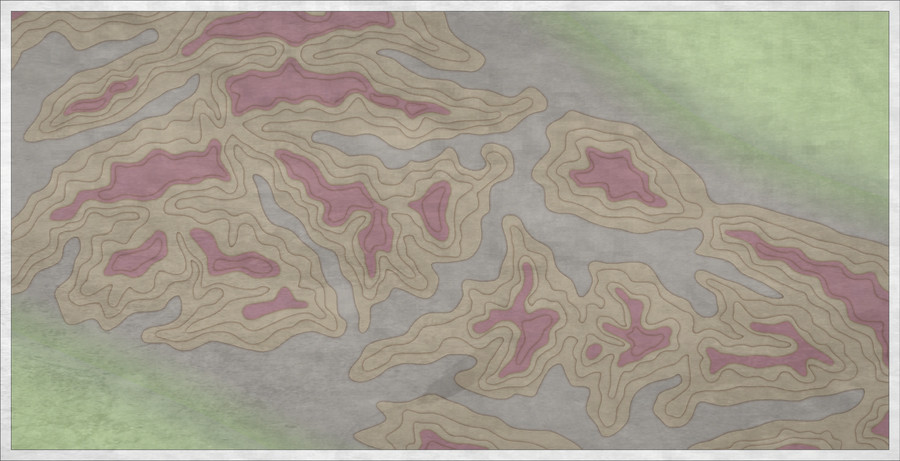
Community Atlas: Map for the Duin Elisyr area, Doriant
Further progress now, with the contours mostly mapped-in, except for the highest peaks. I felt it was growing less easy to separate the upper contours, so experimented with some colouring alternatives. The range of fill-colour options in this style is very limited, so that meant trying out some effects as well, including one or two I've only rarely tested previously. Naturally, everything remains in flux at this stage. However, this option seemed satisfactory, using a combination of an RGB Matrix Process, retaining the Glow to highlight the contour's edge, and a Blend Mode using the Phoenix setting:
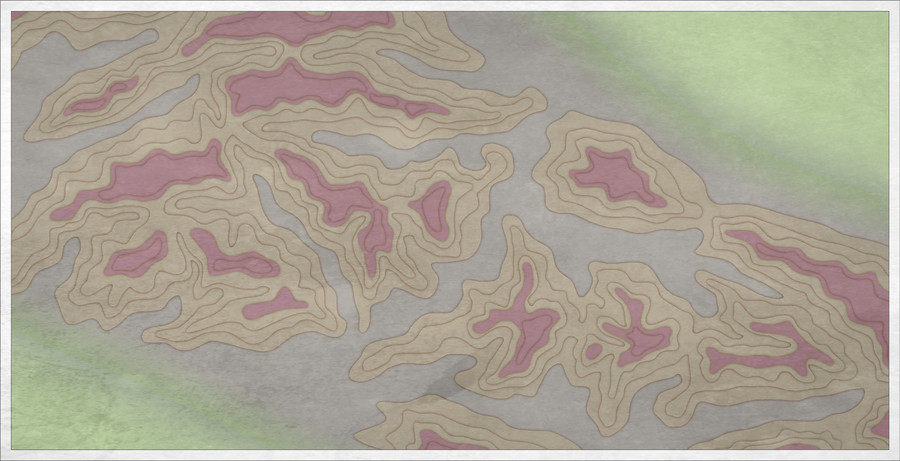
As should be obvious enough, I've also hugely toned-down the contour-edge Glows since my previous post, when I was still trying to get the contour shapes right, and being able to quickly identify which was which was more important. The "woodcut look" of earlier has its attractions, and has been used to good effect in other maps presented on the Forum over the years. It seemed much too strident for the Worthington style's subtle colouring at this scale though.
Whilst blundering about among the effects, I chanced to find there was an inactive Texturize effect on the whole map. Turning it on did nothing obvious, even when I changed its settings. When I looked closer at what file it was reaching for though, the reason became obvious, as the file it was trying to find was located at D:\Programme\ProFantasy\CC3\Filters\Images\CA91 Texture.png. The correct file location for a standard CC3+ installation should be C:\ProgramData\ProFantasy\CC3Plus\Filters\Images\CA91 Texture.png. So I changed that, with this result (without altering any of the default settings):
While quite subtle, especially at this res, it does create a somewhat different appearance, as might be expected, rather like watercolour paper. I do like how it softens everything, even if I'm not sure if it'll stay to the end of the mapping at this point. While mapping, it'll have to stay off for best clarity (as it affects EVERYTHING in the drawing, of course, including the bitmap version I'm copying-in details from).
Further exploration showed a possible reason why this global effect had been turned off (and perhaps forgotten, given the non-standard file-path), as there's also a TEXTURE sheet, which has a Transparency effect, set to 70% opacity by default, and another copy of the texture PNG on it. This is right at the top of the list of sheets (actually, of course, at the bottom in the Drawing Sheets and Effects pane), so it affects the entire map and its frame. Naturally, this is why the whole map looks quite misty, and a little faded. I ran a series of experiments with both the global effect setting and this TEXTURE sheet on or off (hidden or shown for the sheet), though I'm undecided as to which is preferable still. I suspect I'll need to see how the finished map looks before making a final decision. The contours alone probably aren't enough to judge by at present.
All of which lengthy fiddling about only left enough time to add the highest mountain peaks, with a further colour change, this time making use of the CA91 Ice bitmap fill for a suitable pale topping. With whole-map texturing and the texture sheet visible:
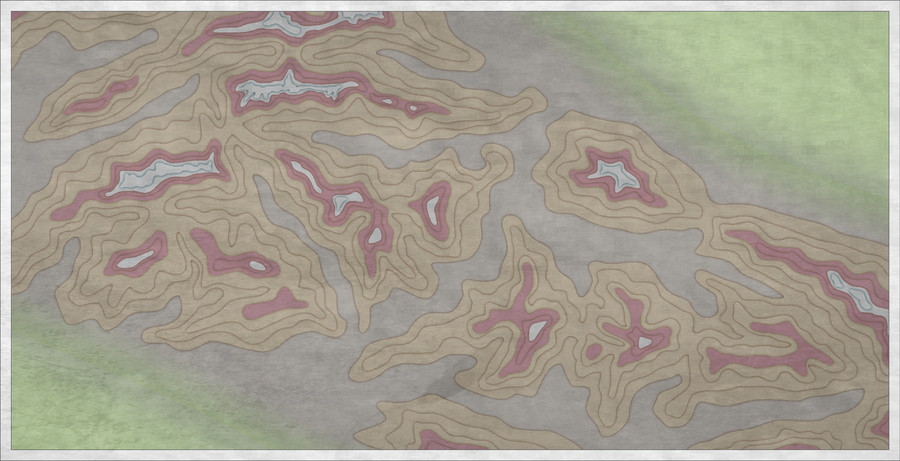
and with just the texture sheet shown:
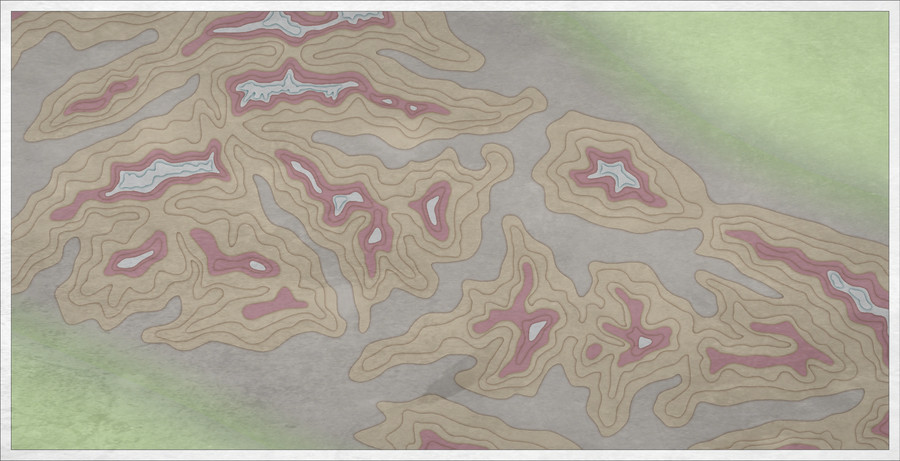
Without the global texturing is certainly clearer. As noted above though, have to see how I feel about it another day 😊.


