


Royal Scribe
Royal Scribe
About
- Username
- Royal Scribe
- Joined
- Visits
- 9,725
- Last Active
- Roles
- Member
- Points
- 3,384
- Birthday
- February 5, 1968
- Location
- San Francisco, California
- Website
- https://legacy.drivethrurpg.com/browse/pub/31814/Royal-Scribe-Imaginarium
- Real Name
- Kevin
- Rank
- Mapmaker
- Badges
- 16
Latest Images
Reactions
-
Merry Christmas, Happy Solstice, and Happy New Year!
I first joined the forums a year ago after months of watching YouTube tutorials (and years of owning the software but too intimidated to learn it). Map-making has become a soothing respite for me. The process taps into both my analytical side (figuring out all of the techniques to make things work) and my creative side (creating a work of art from a blank canvass). Thank you all for being such an important part of my year.
Apropos of Ralf's tutorial today (go "like" and subscribe!), I wanted to share my own holiday maps I designed for cards. You can see more in my galleries.
My first attempt was a country inn celebrating the Yuletide.
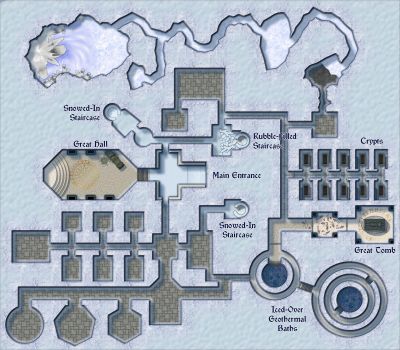
But I have found that for friends and family who aren't used to role-playing games or fantasy books with maps, some find the top-down maps to be a little confusing. I decided to go with a more isometric route using Spectrum Overland. This is the one I ended up putting on my cards. I call it "The Toy-Maker's North Pole Workshop."
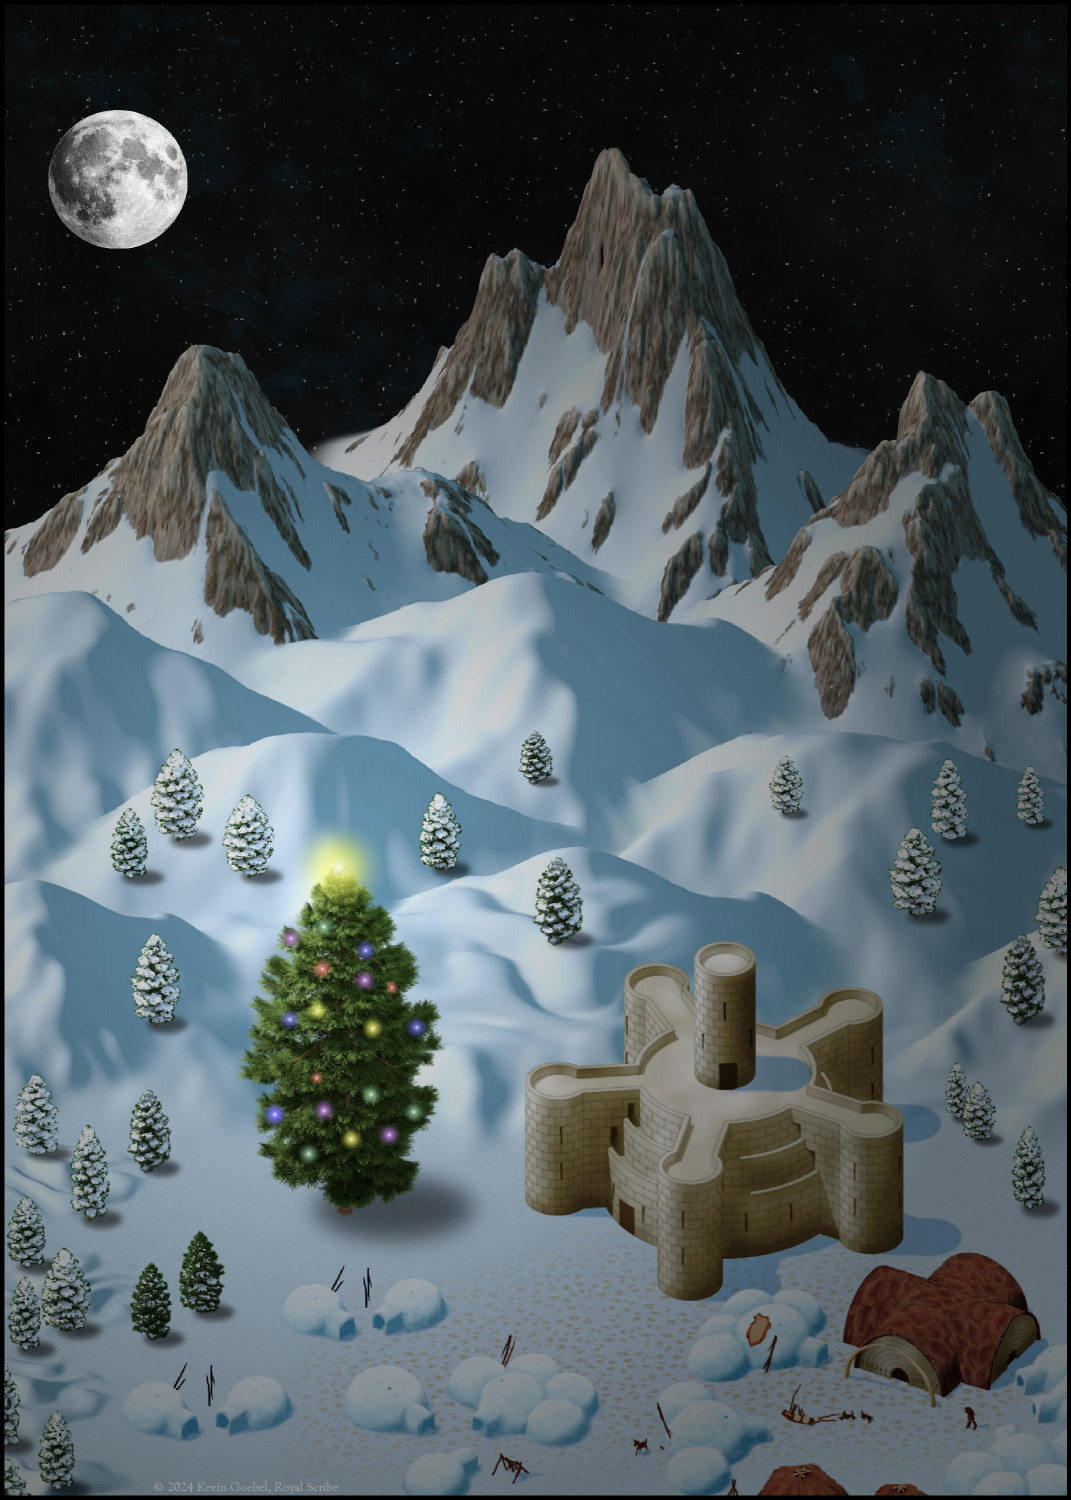
(A friend commented that the castle is snowflake-shaped, which hadn't occurred to me. Love it!)
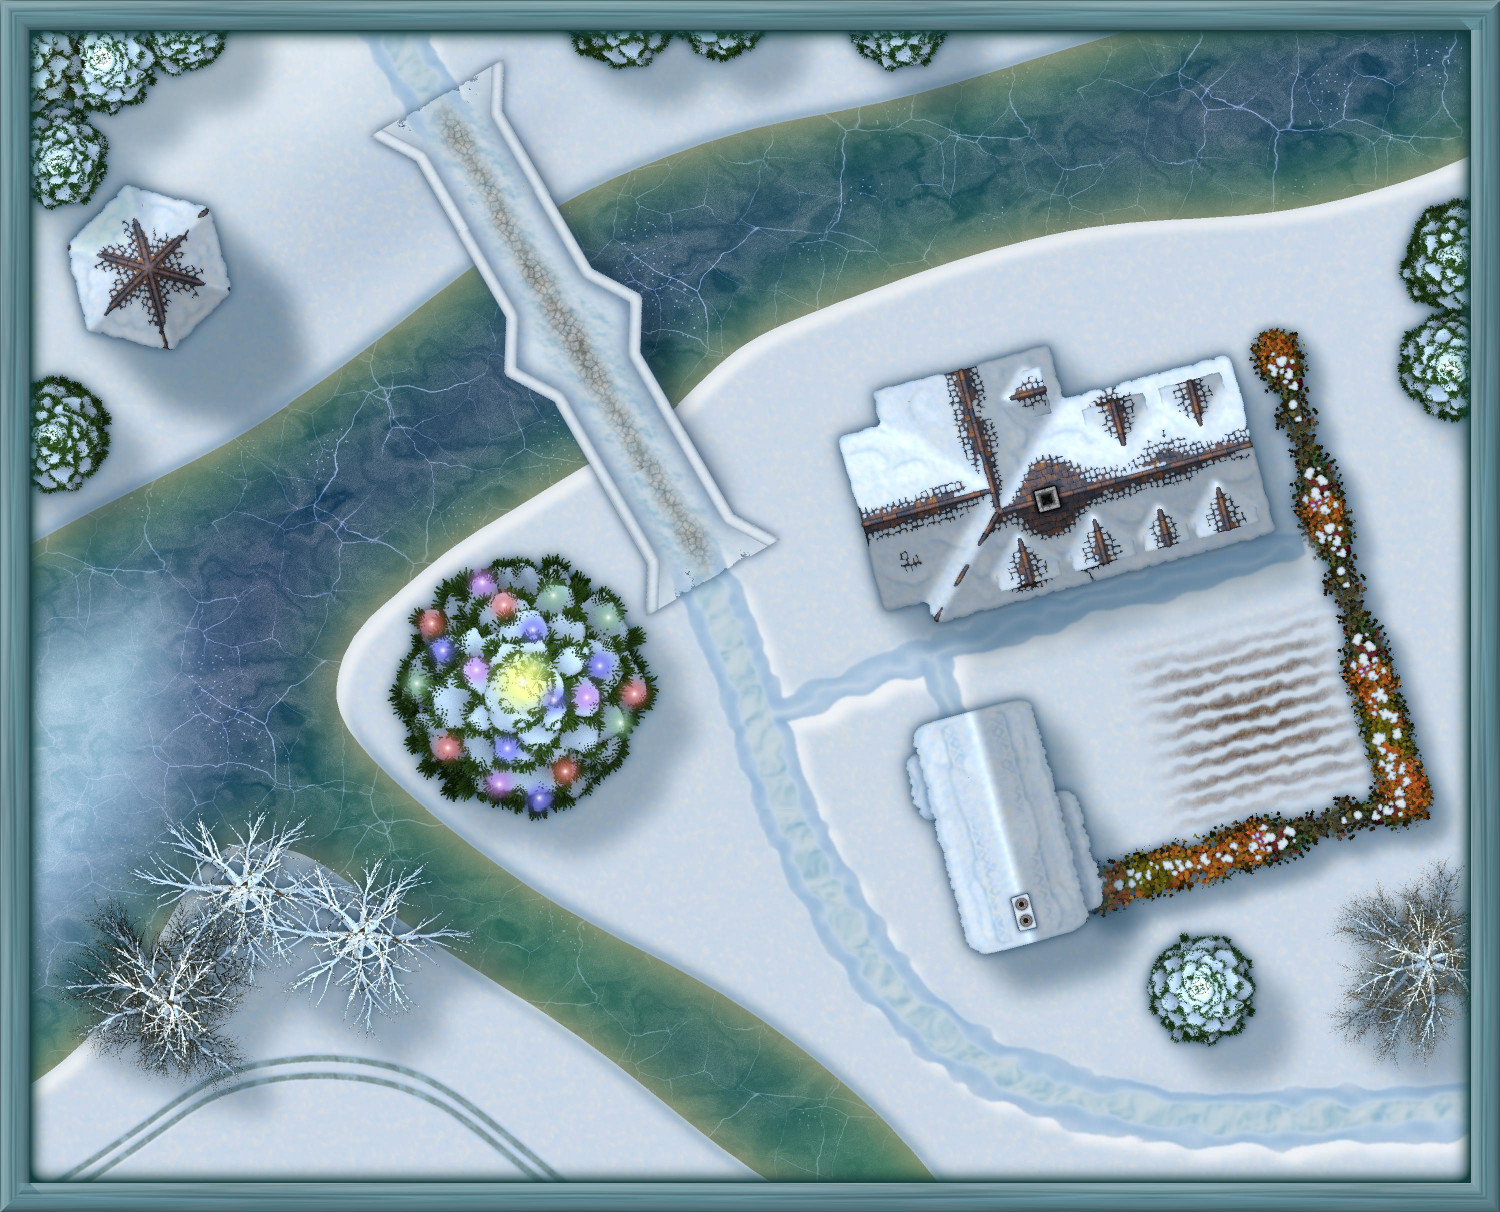
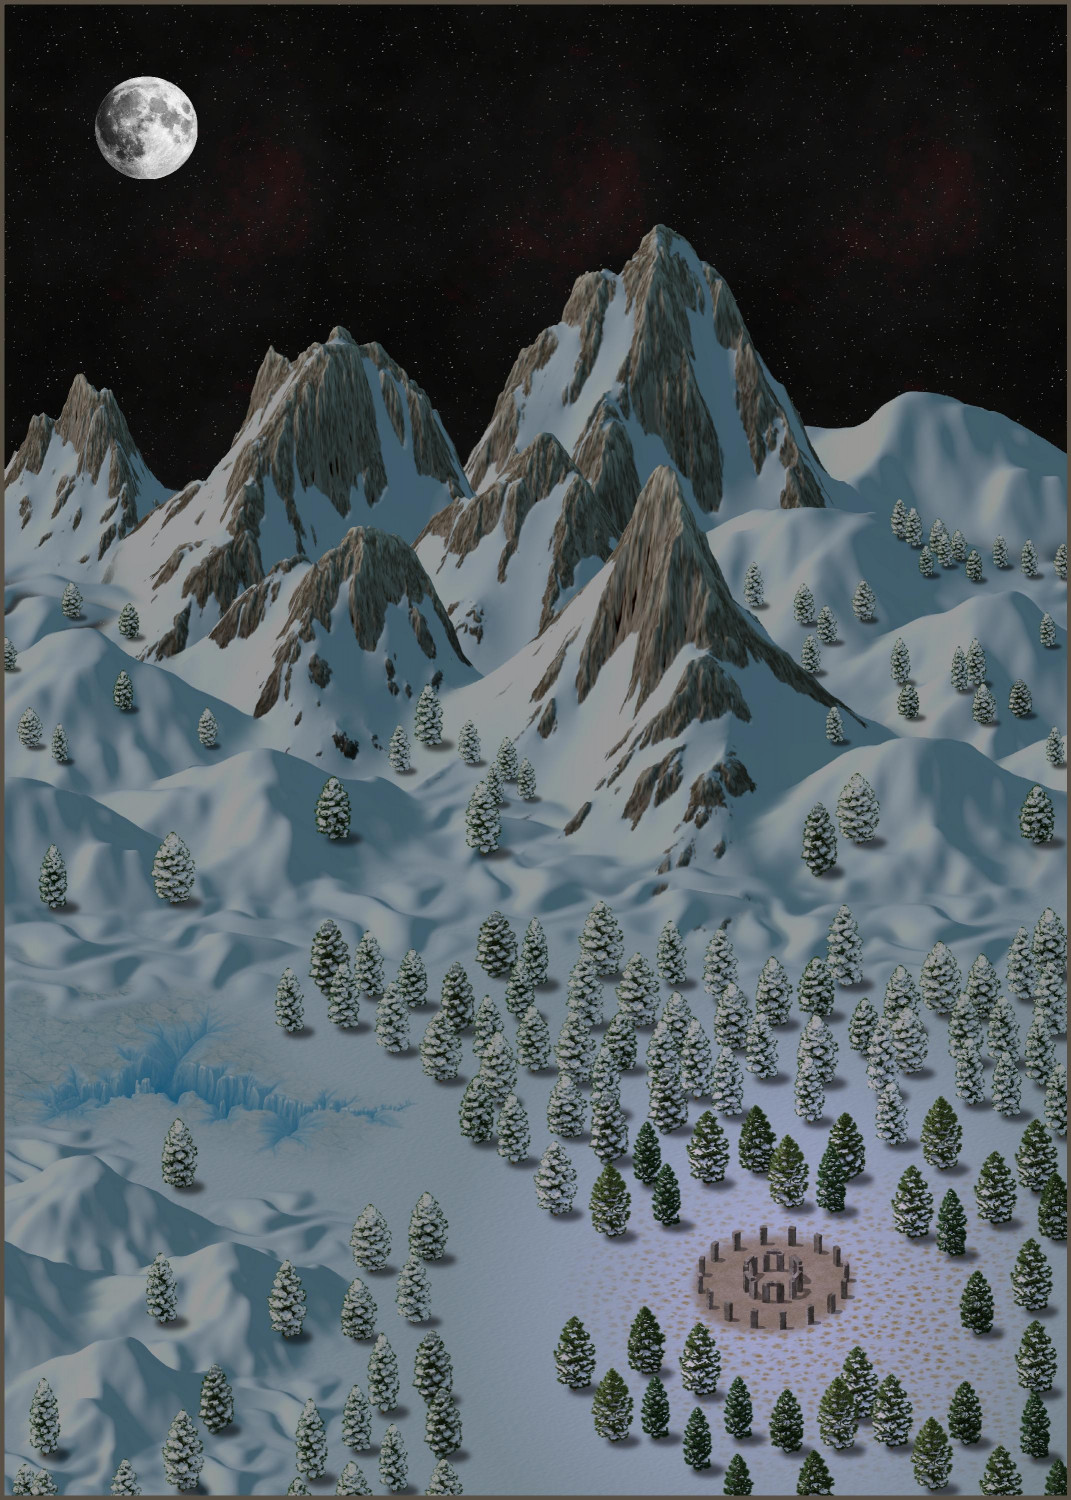
And for a more pagan solstice vibe, I also did this henge in a snowy forest. The henge radiates a magical purple glow.
Thank you, everyone, for your kindness and support this last year. I am very happy to have found this community.


-
Ideas and Wishes for Monthly Dungeon Symbols
I am so glad you asked, because you know I've been keeping lists! You can check out some of my ideas in this thread, but here's a recap of some highlights:
Interior
- Thrones - Ornate metal and stone; "elven" (wooden with art nouveau flourishes); "evil" (skulls, spikes, etc.)
- Regalia - Crowns; scepters; orbs
- Couches - Both "regular" and Roman-style (I think SS4 only has chairs that I make extra wide for couches)
- Mage/Sage Furnishings - Globes, astrolabes
- Ornate Staircases - Maybe modular so you can construct your own (left, right, and center for bottom, middle, and top, in stone and wood, with and without varicolor carpeting)
- Musical Instruments - Upright and on their side (lutes, harps, harpsichords, drums)
- Ancient Tombs - Think Indiana Jones-style stuff, like idols
Exterior
- Gardens - Varicolor flowers, rose bushes, berry bushes, exotic/carnivorous plants
- Tiltyard - Quintain, pell, horse armor
- Topiary - Bushes trimmed to form the shape of animals and mythical creatures
- Statues - Riding and standing free. Royalty plus archetypical character types (sword fighters, archers, mages)
Building Construction
- Flagpoles - Upright and on their side, separate from flags for flexibility
- Flags - Varicolor top-down and on their side
- Gargoyles and Grotesques
- Clocktower - Clock hands on side of building; bells for belltower
- Spires
- Façade Ornamentation - I don't know the proper term, but here are some pics I took to illustrate
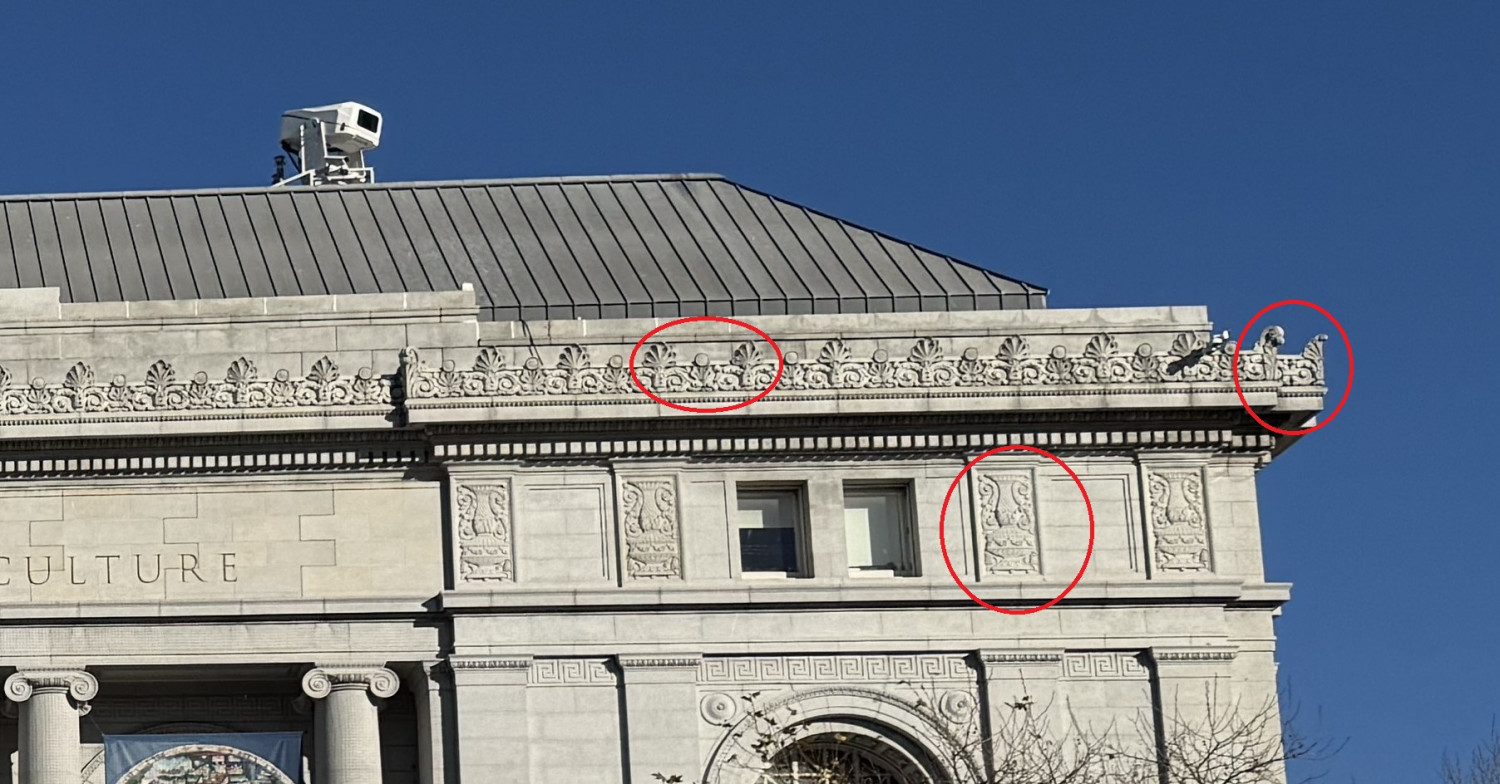
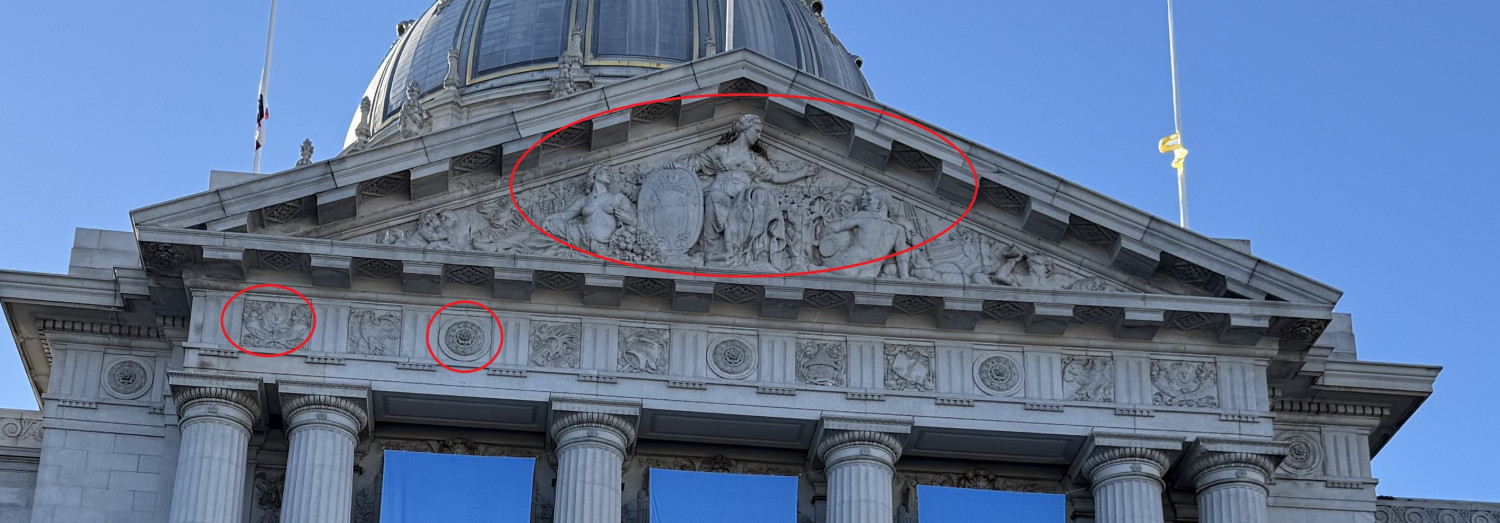
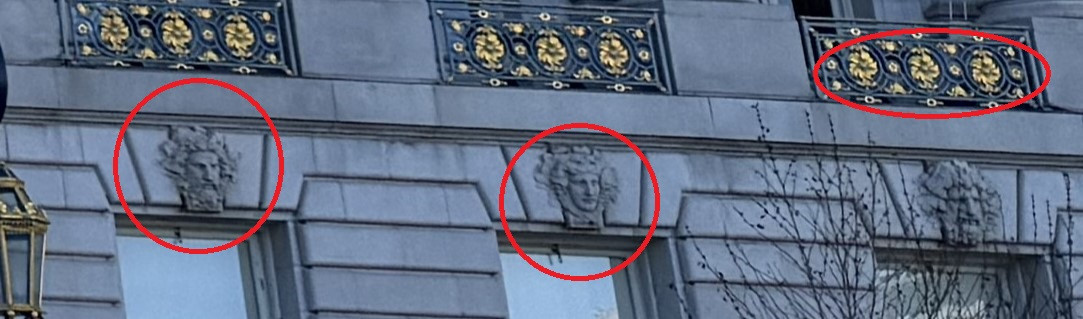


-
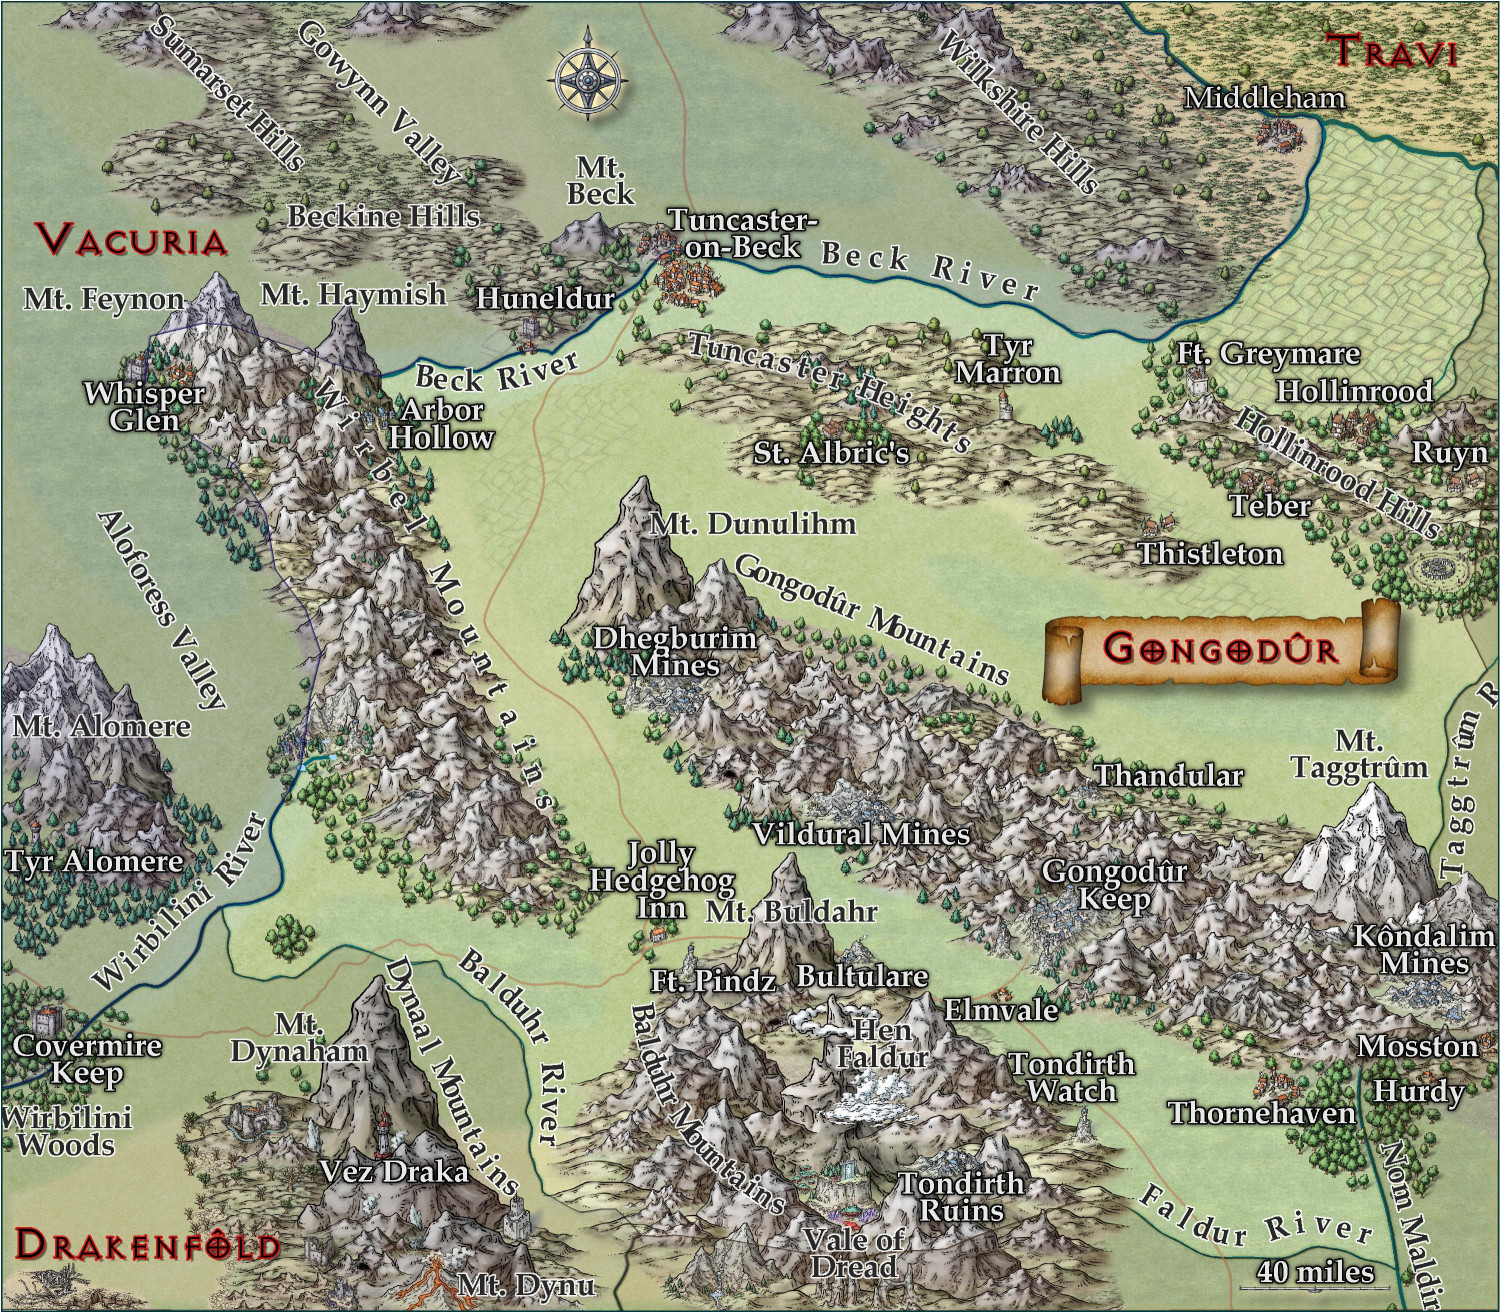
[WIP] Kingdom of Gongodûr
Okay, the first thing I did was back another backup of the FCW in case I didn't like the fractalization and couldn't undo it. ;-)
The fractal command isn't something I've used that much, and when I tried it on this map earlier, I wasn't sure of which settings to play with. While I think the smoother map works for a map of this scale, I rather like the Depth 2, Strength 40, smooth result on the rivers. Fractalized a few of the roads but not all -- there were some where it just made the road look overly-caffeinated.
With the place names: I added names for the settlements and rivers that were missing them (let me know if I missed anything important). I've played with the Glow settings a bit. I'll post the FCW, too, if anything has adjustments to recommend.
Here it is without the borders:

And again with the redrawn borders:


-
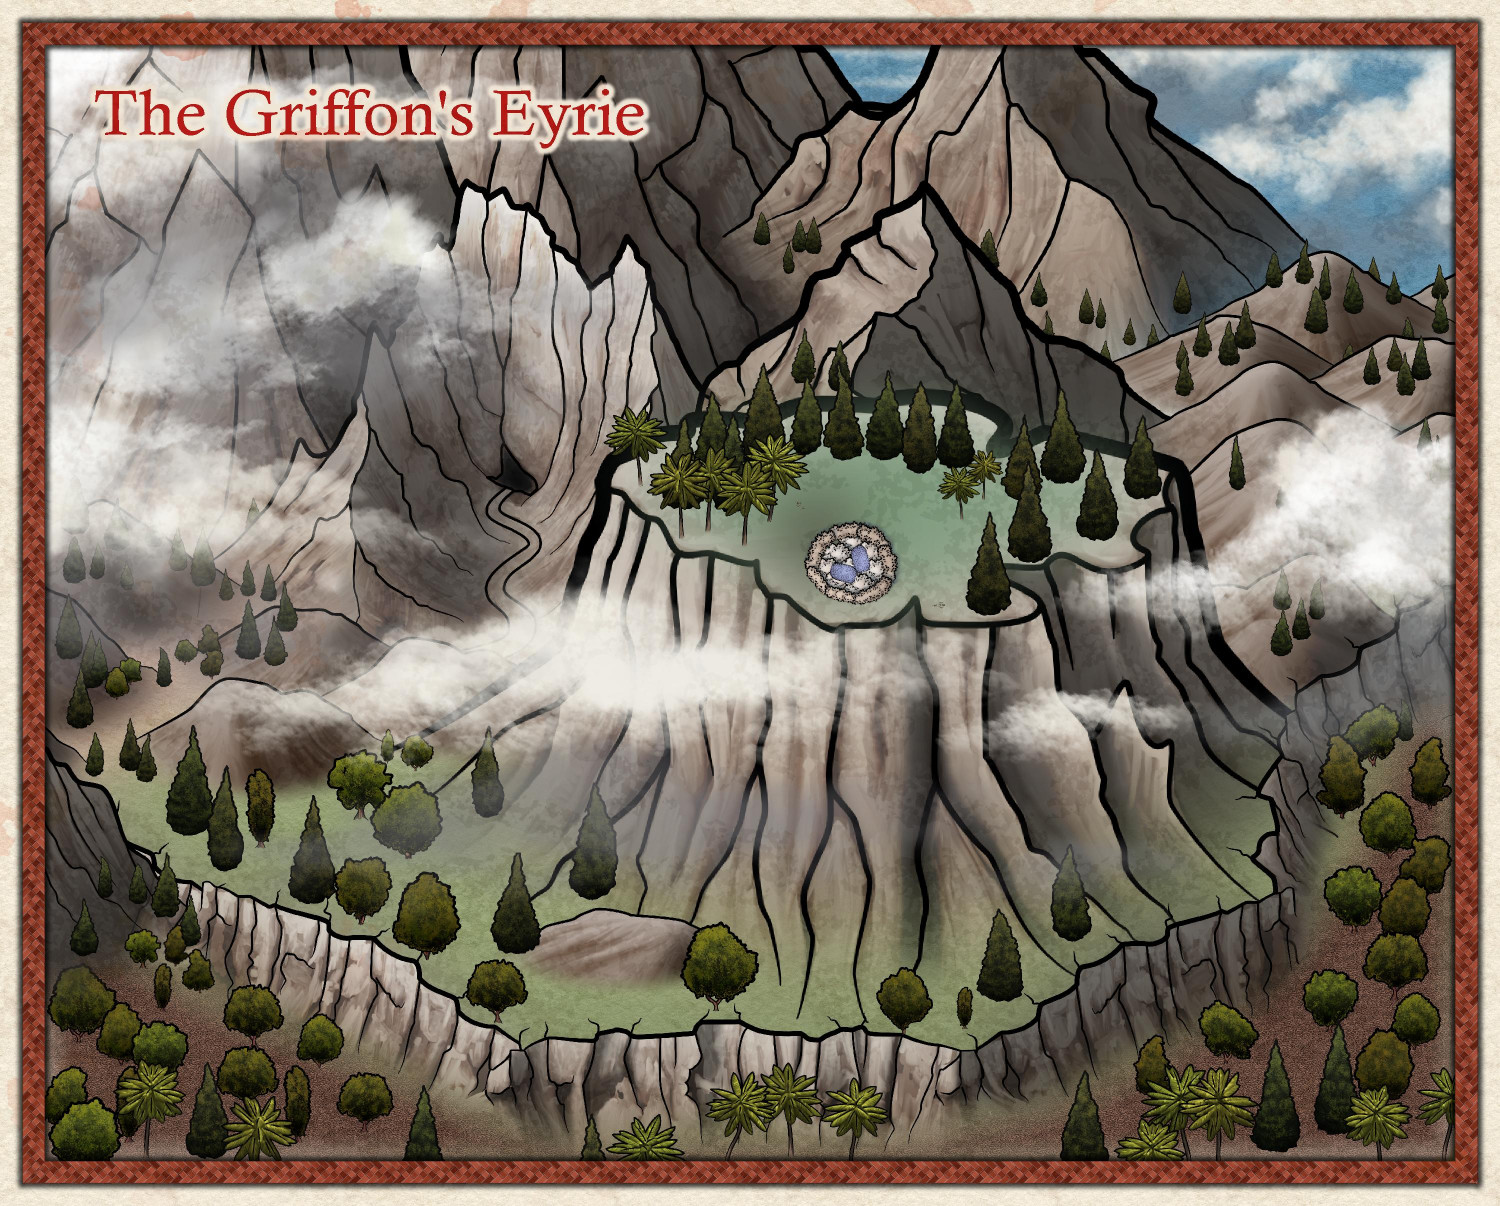
[WIP] - The Griffon's Eyrie
Some adjustments based on Ricko's recommendations...
-
[WIP] - Lumadair: Birdseye Continental
Added some more. Only put in Lumadair's capital city and a few notable landmarks, not the other cities that were in previous versions of this map. Do you think the font size for my labels for cities/landmarks is too small?
I'm glad Sue chose to use a default font that can do accent marks because when I do the global map, there are a lot of accent marks. Mostly in names derived from Elvish, because Elves are fancy that way, like the French.
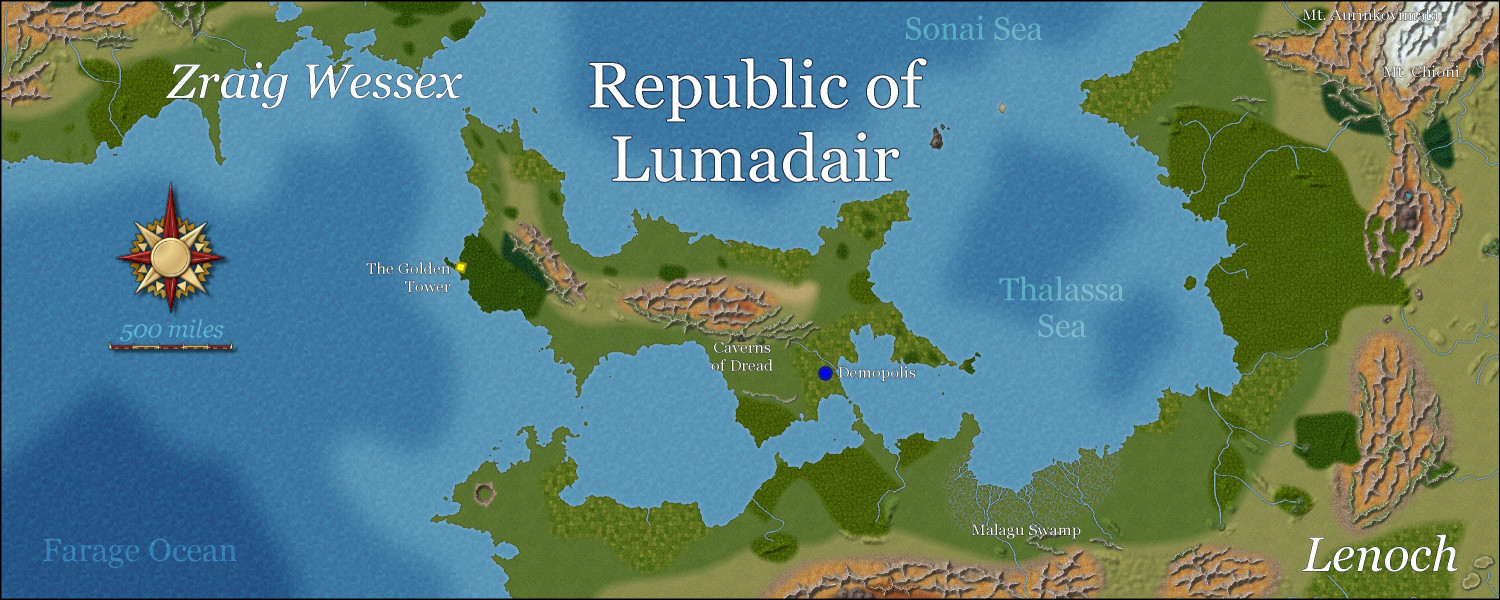
This map is 6,109 miles wide. I used the technique that Ralf showed of creating a 1000 x 800 map so that symbols would default to the scale of 1, and then resized it. I assume I should do the same when I start my global map, which is 25,000 miles wide.


-
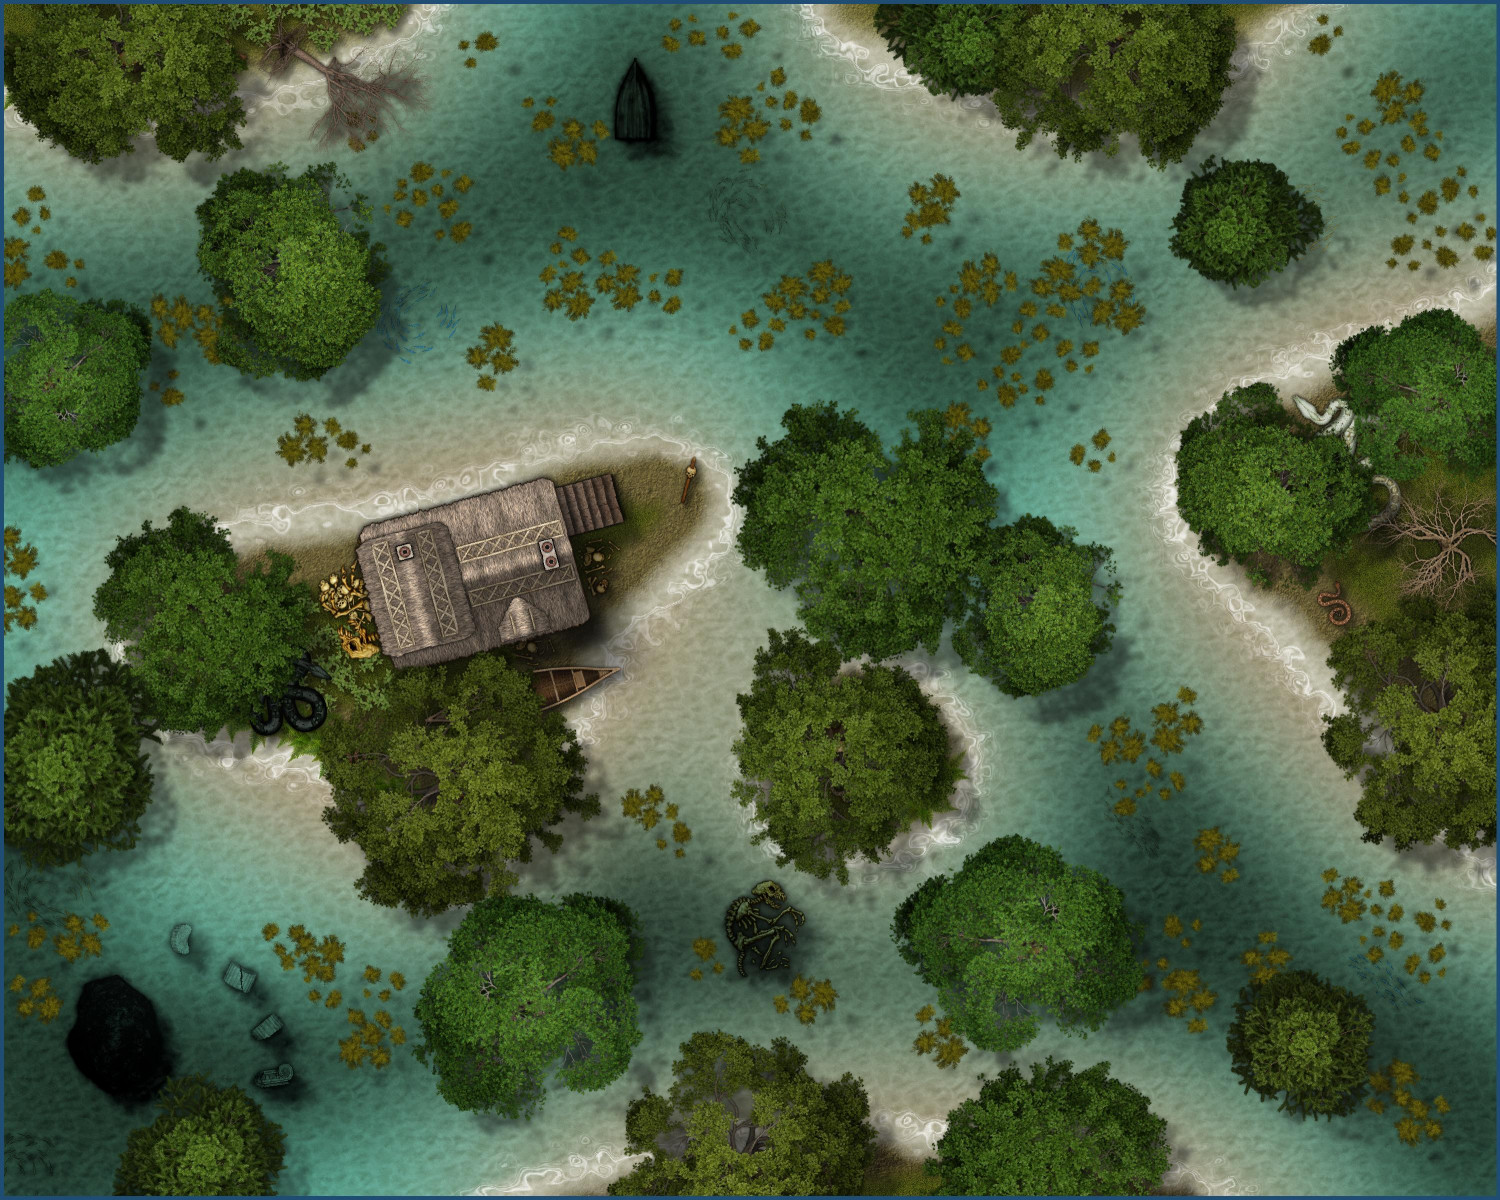
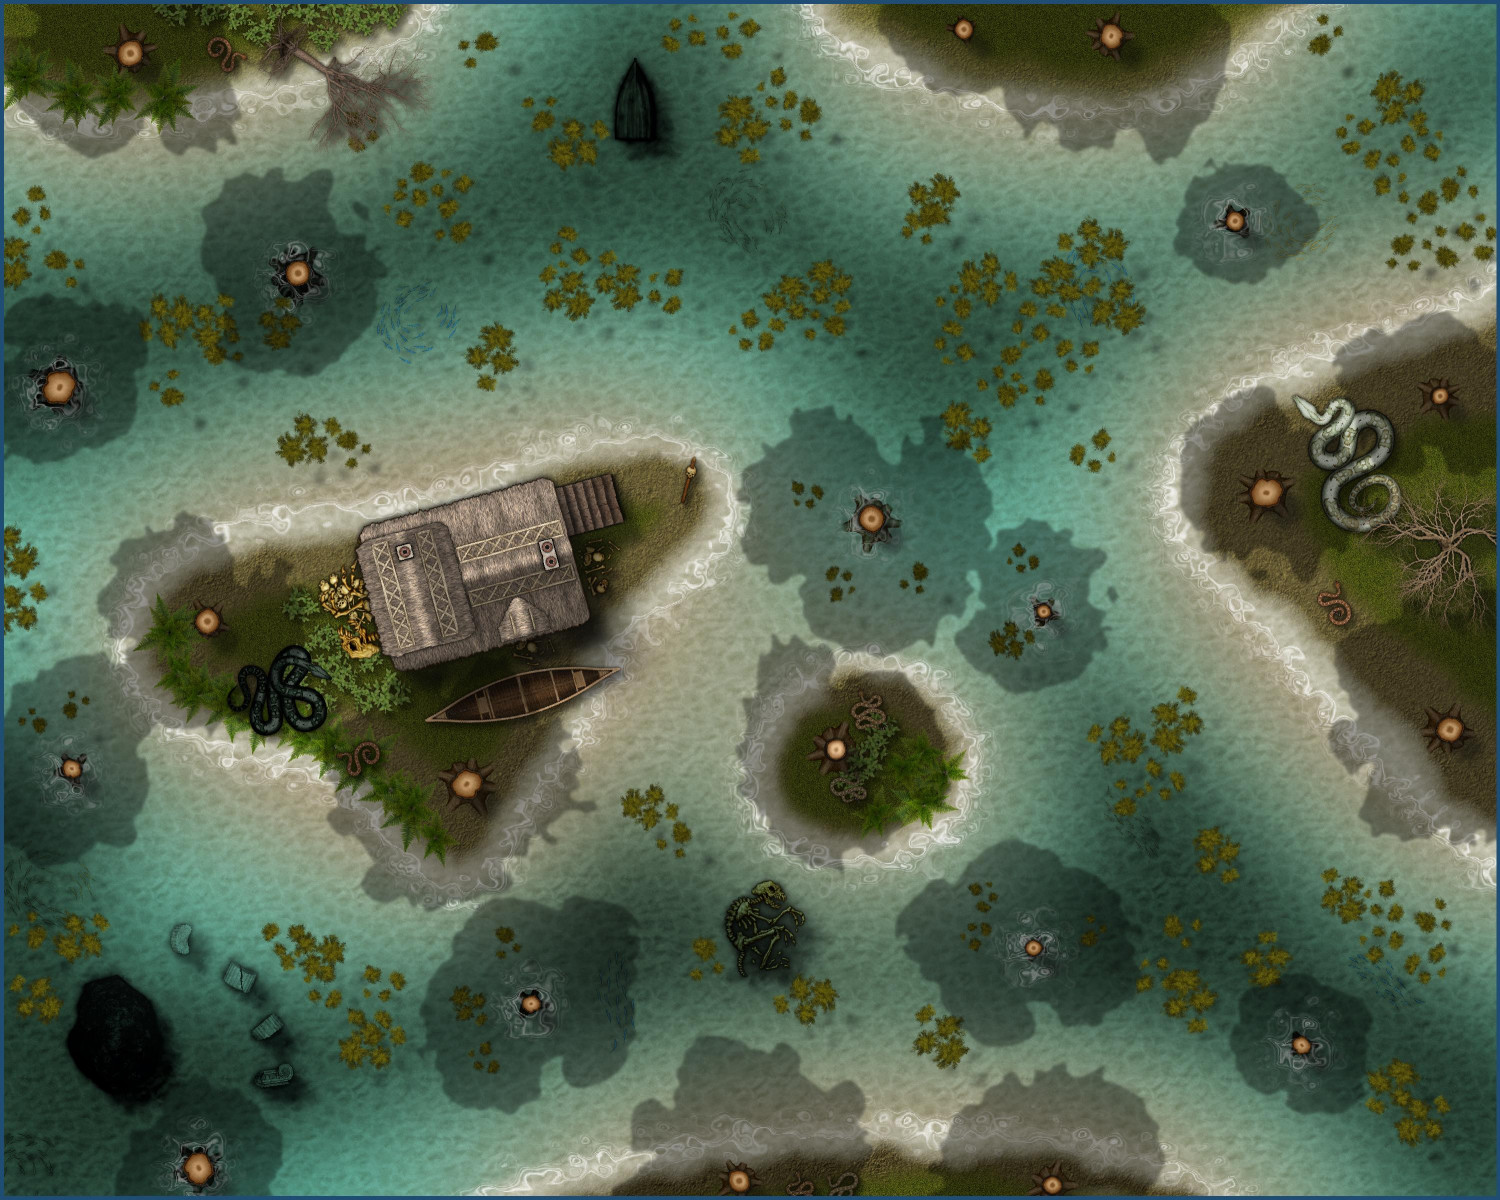
[WIP] Swamp Witch
Tweaked the Marine Dungeons version a bit: darkened the deeper water a little more, added a few dead trees, added more algae, and a few more bones.
-
[WIP] Winter Solstice
Okay, I think it was just one mountain that was mirrored and needed to be switched so the shadows were consistent. I tried to look at all of the hills and trees, too -- please let me know if you spot any with aberrant shadows.


-
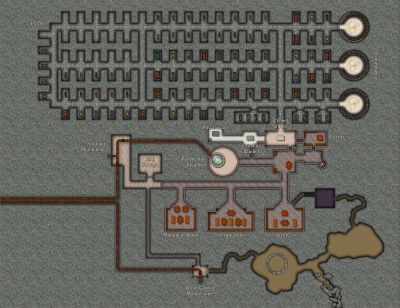
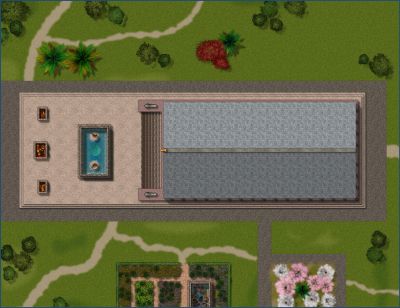
[WIP] Wizard's Tower - Interior
Added the missing pews and lounge furniture to the Fourth Floor:

And now, up another flight.
Fifth Floor
This floor is entirely for guests. Why would a wizard need plenty of guest rooms? Maybe he or she is the party's patron, and they come back periodically to receive instructions for their next adventure. Maybe adventurers periodically visit to have the wizard identify the magic items and artifacts they've found, or to help explain mysterious prophesies or other adventuring clues they've discovered. (Great opportunity for lore dumping!) Maybe the wizard's old adventuring party all decided to retire together in the tower.
There's a hallway closet between the internal stairs and external door. Another WC and bathing chamber. A small guest bedroom on the eastern side. And then two spacious guest suites on the southern side.
The southwest suite has a spacious living room with a double window, along with a separate bedroom with a "king sized" bed. But the other guest suite is for the real VIPs. Not only does it have a fireplace and working sink in the living room, it also has a private balcony with views of the river and the rear of the cherry tree garden.

These suites come are handy when adventurers visiting the wizard don't want to be separated. (Never a good idea to split the party!) The suites are large enough to accommodate the typical-sized party, assuming a few are willing to sleep on the couches or pallets on the floor. And for very large parties, the stone door separating the two suites can be unlocked to create a double-sized suite.
Onwards to the wizard's bedroom and workshop...

-
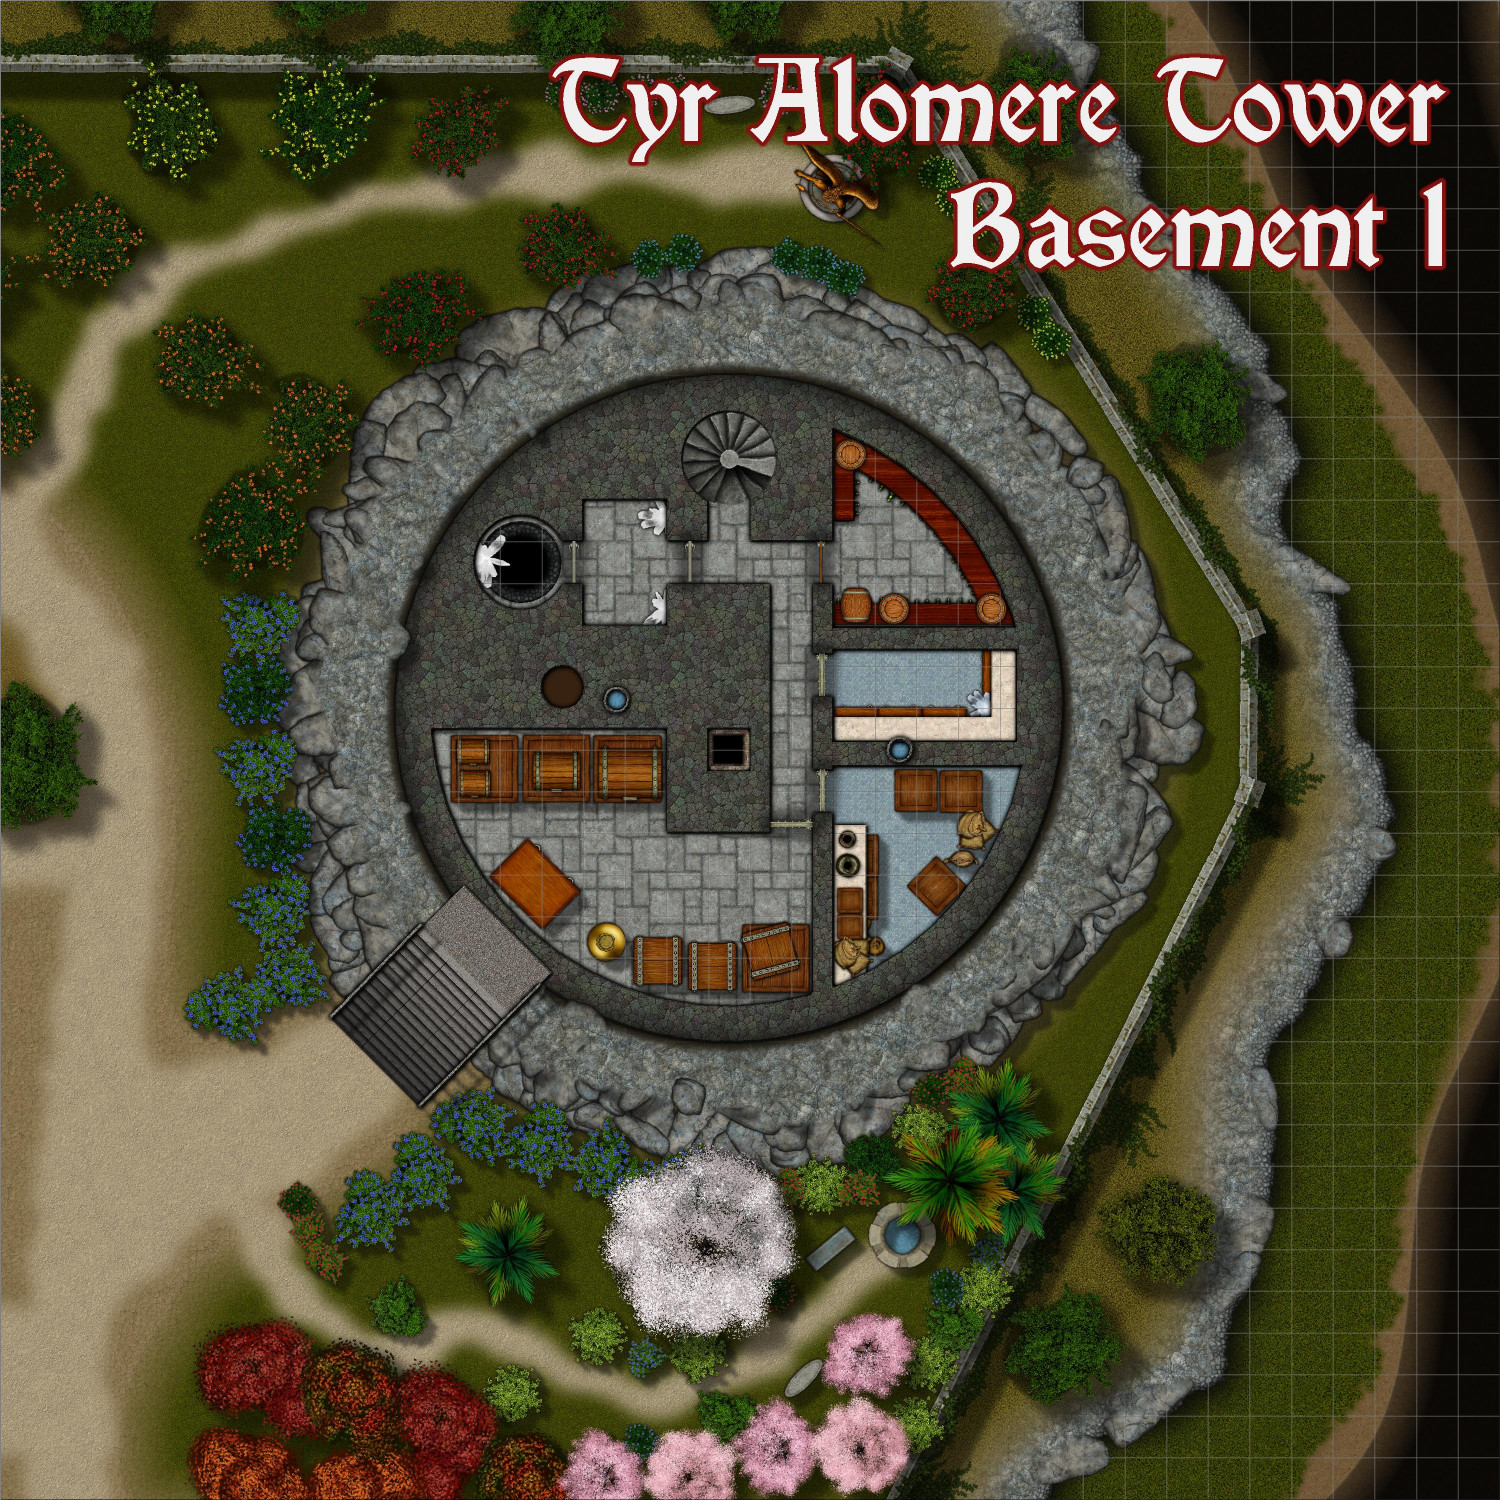
[WIP] Wizard's Tower - Interior
Here are the first two levels of the basement. Sewers still to come.
Basement 1
A wine cellar in the northeast corner is conveniently close to the stairs, so that the wizard or their staff can slip down for a few more bottles in the middle of a dinner party. Continuing clockwise, the other rooms are a freezer, a larder, a storeroom, and in the northwestern corner, a refuse pit is used to throw organic, wooden, and metal waste for disposal in the sewers.
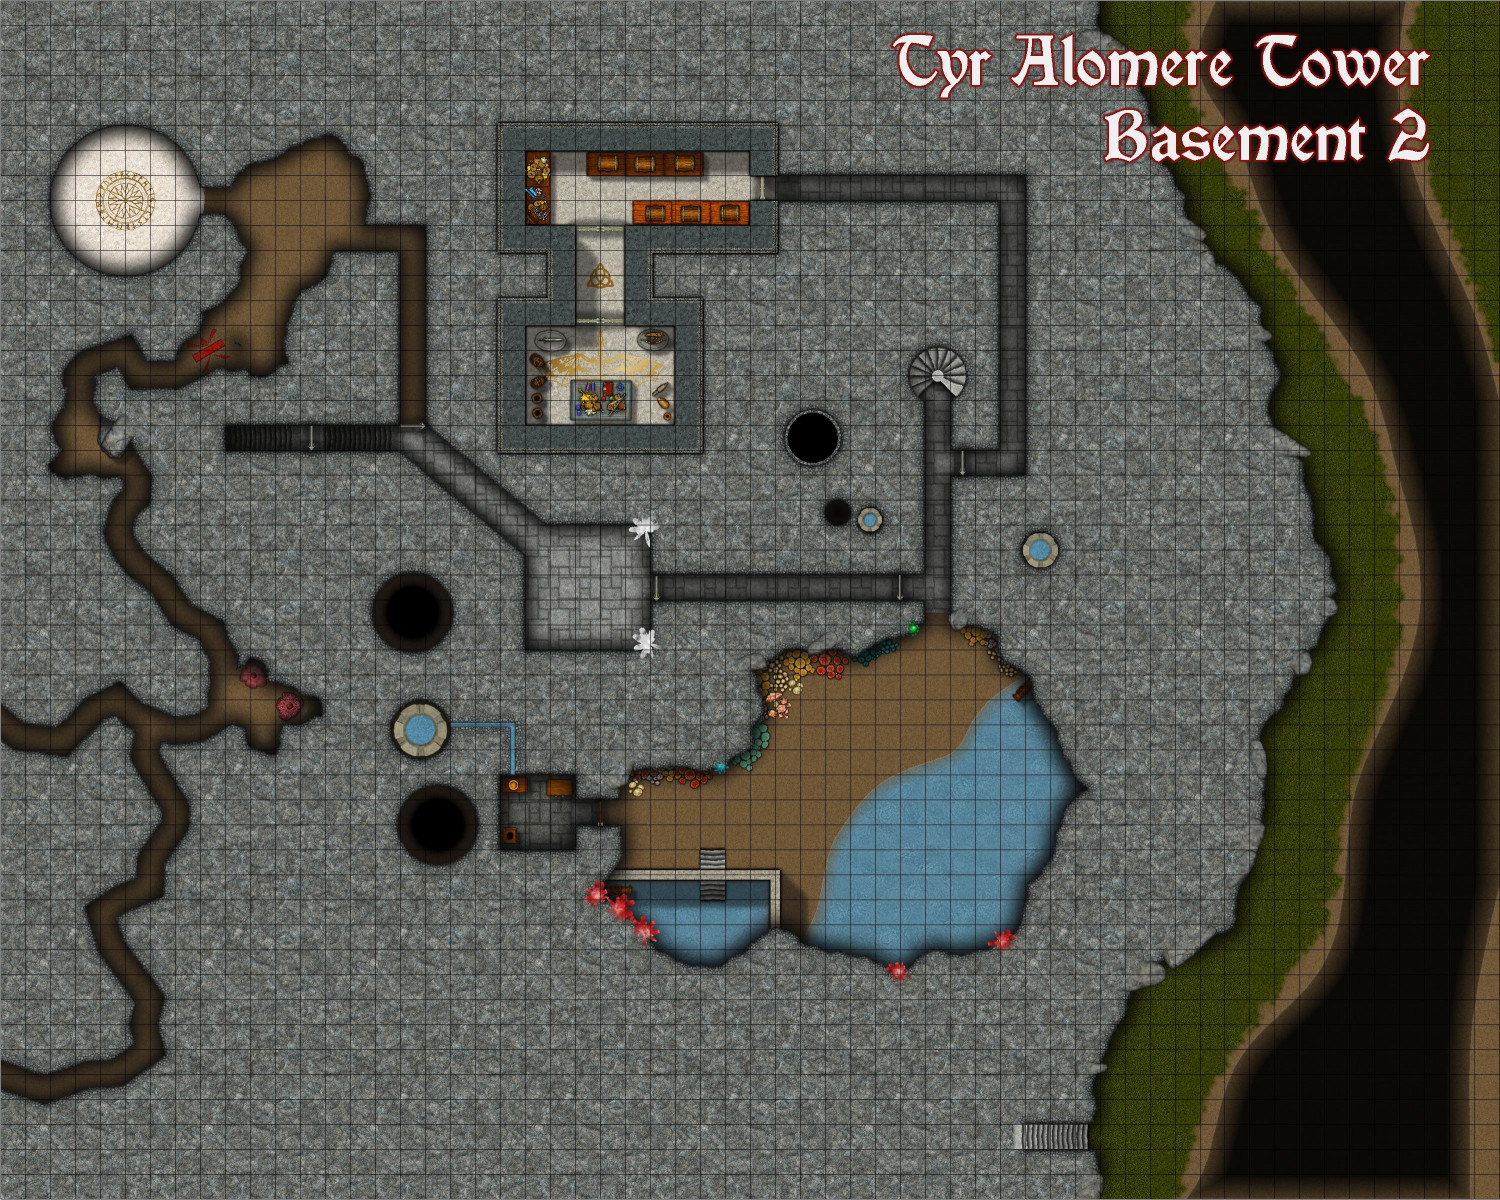
Basement 2
The second level of the basement doesn't appear to have much. A corridor heading west leads to stairs that descend into the sewers. To the south, a cavernous chamber has been turned into the wizard's grotto. River water has been pumped in to make a man-made pond, heated to a pleasantly cool temperature by a few warm luminescent crystals. A second, larger pool is warmed by enough luminescent crystals to keep the water as warm as a hot bath. The room is lighted by clusters of luminescent fungi. On the western side, a spacious WC also doubles as a changing room.
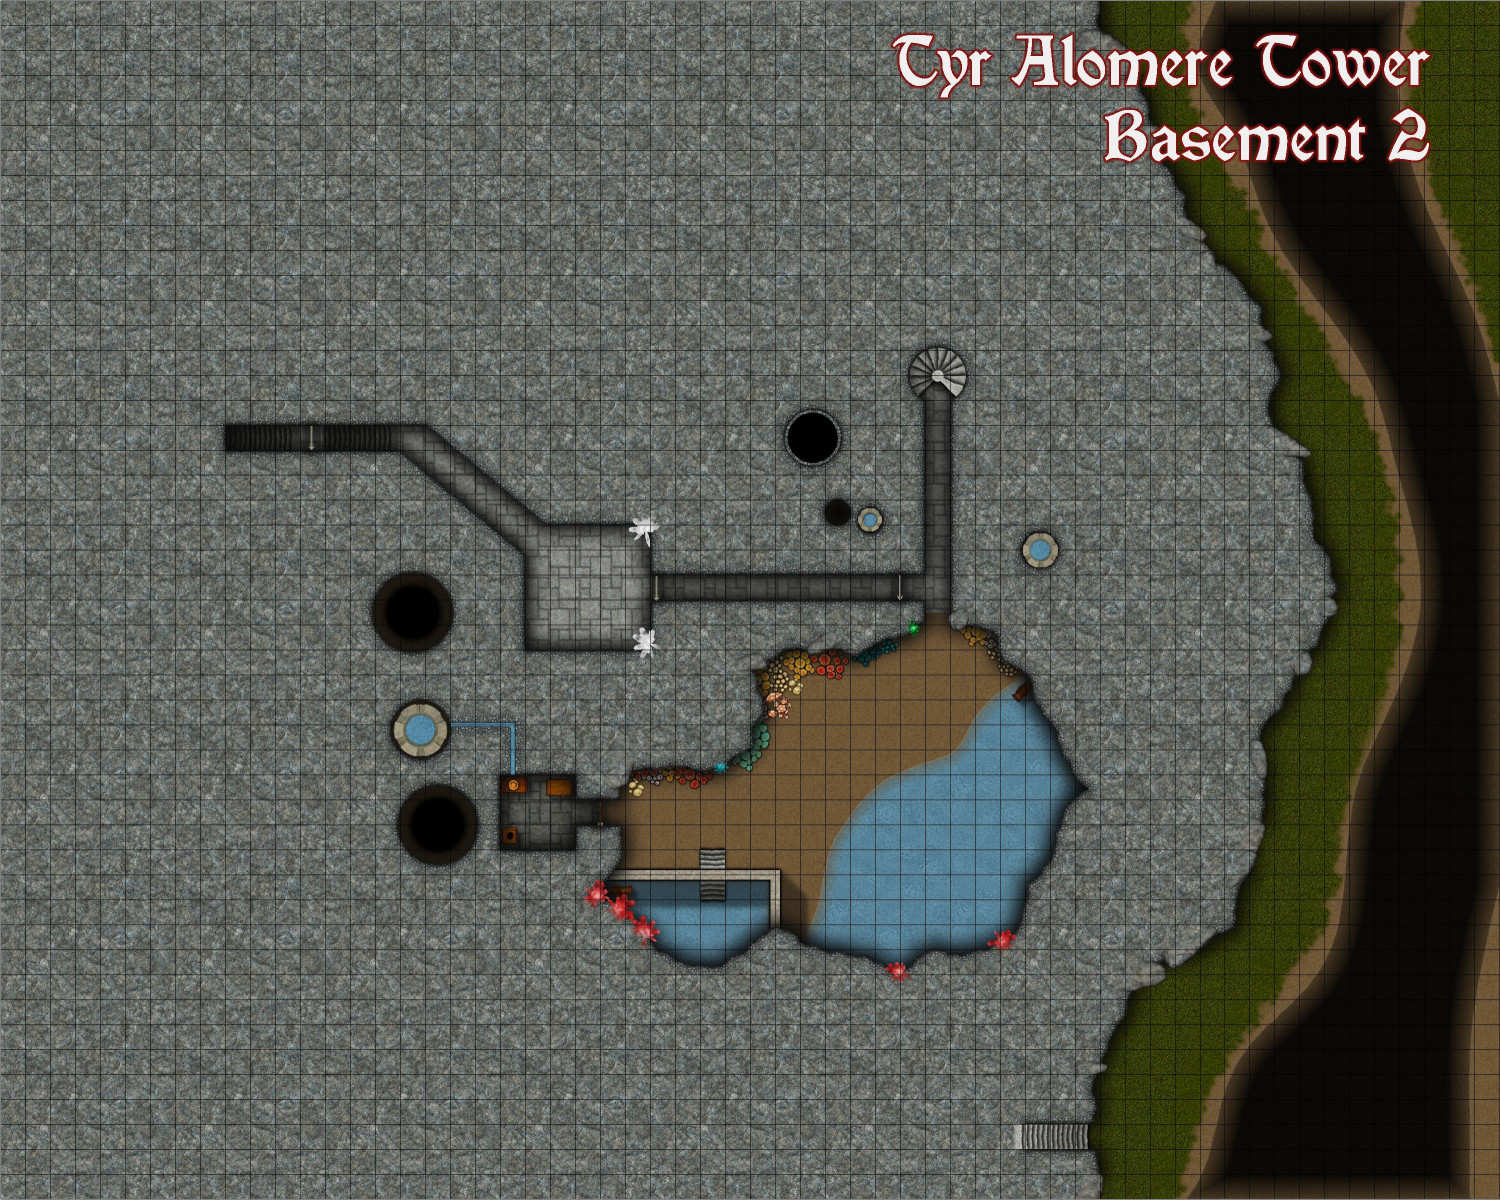
But wait, there's more! This floor also has two secret passageways. One near the stairs leads to the Wizard's secret treasury chambers. The outer chamber is used for coins, gemstones, and other valuables. The second chamber, accessed through a short corridor protected by a Glyph of Warding holds the Wizard's magical treasurers. In addition to being about 30 feet underground and carved into the rocky hillside, the treasury is protected by marble walls that are five feet thick. Between these walls and the rocky cliff is another foot-wide wall of lead to protect the room against scrying eyes.
Another secret passageway north of the stairs leading to the sewers leads to a cavern, through which a secret Teleportation Portal can be accessed. The southwest corner has been sealed by a Wall of Steel, protected by another Glyph of Warding. If you get past that, the passageway quickly dead-ends into a pile of rubble.

The Wall of Steel and the rubble can be hidden using the RUBBLE layer:
FCWs
And here are the FCW files for these levels. (Remy, this is not the official thread for submitting to the Atlas. I will create a new thread with these maps properly labeled and described, plus a village map to come.)
-
Hi from Reddog
Hi Reddog! Welcome.
I'm pretty new here myself — though I’ve owned the software for many years, it’s only been about six months since I realized I couldn’t learn it simply by experimenting. The tutorials really, really helped me.
I’ll let others with more experience guide you, but my two cents: it sounds like Dungeon Designer will best achieve what you want. The name implies old-school D&D dungeons and caverns, but it's really great for any type of inside or outside floorplan (a house, a temple, some crypts, a section of a forest road where bandits are lurking to attack). If you want something that you can use figures on, whether to print out to use with miniatures or to use on screen with a virtual table top, Dungeon Designer will probably suit you best.
As for tutorials, which is how I learned: the new ones are great but I would start with some of the older ones to get the basics down. On the Video Tutorials page, you'll find a really well organized list. I started with Joe Sweeney's, which did a great job starting with the basics. They are old, and some tips have been superseded by software advancements. (For example, Joe made a point in the older videos of talking about placing symbols from the back and moving forward, but now there's a "Sort Symbols on Map" function that makes that advice no longer necessary.) But they really helped me get the concepts down.
The Learning CC3+ videos will give you a good grounding in the basic tools. I would then proceed to the Quickies section. With the Campaign Cartographer Concepts and Blog Videos, I would recommend going to specific ones once you've got the basics down and have a specific question about a technique or tool.
The Live videos are really great, but each one covers lots of different techniques, and many of the newer ones assume some basic knowledge, so I wouldn't start with them. Once you've gotten the basics down, you might want to look at the names to see if there are some tackling stuff similar to what you're doing. For example, if you're designing a dungeon, "Creating dungeon with the Jon Roberts style" and "Livemapping: Dungeon & Cave" would be useful. I've gone through almost the entire archives of Live videos and I learn something from every single one, but you'll want to have the basics down first.


