


Wyvern
Wyvern
About
- Username
- Wyvern
- Joined
- Visits
- 3,237
- Last Active
- Roles
- Member
- Points
- 5,515
- Rank
- Cartographer
- Badges
- 24
Latest Images


-
current situation with Image Magick and CC3+
It looks like this is something that only needs to be done once, as if changing a setting within CC3+ itself so that ALL exports (on any map I open) will use the 40 million value now that I've made this change (at least, until/unless I were to manually change it back). As opposed to needing to enter this command + number for each map or for each export ... Do I have that right?
Yes, you do have it correct. The only time you might need to do it again is if CC3+ has a serious crash and resets its defaults back to their originals, or if you need to reinstall the program again. Thus it's worth keeping a record of what the command is that lets you reset it just in case (because it may be months to years before you'll need it again, with luck!).
Can't help you with your ImageMagick query though, sorry.

-
How to Mark/Illustrate relative depth in Dungeon Maps?
There are various other options you might try, beyond what's been suggested already. Perhaps the most comprehensive guide to mapping cave systems for CC3+ is in the very early Annual Caves & Caverns modern style, as the mapping guide for it demonstrates how to use a top-down drawing to create a workable cross-section as well. That mapping guide also has a link to the UIS Working Group's website, which has a PDF of various real-world caving symbols, including for illustrating heights, that can be used that way, and a further website that has detailed example maps as further inspiration.
For more "art-style" dungeon drawings, where there's overlap between features on different levels, the classic method is to use a dashed line to indicate the underlying part - as I've done recently for the Nidag Temple map, for instance.
I used these, with a mixture of other tricks (shaded stairways, shadow from an angled ledge, different floor fill styles/colours) on the Rosebud Caverns map from the Atlas last year as well, which may give you a few more ideas.
Even with a "flat" dungeon level, it need not be the same level everywhere; early versions of D&D encouraged use of sloping passageways and similar features for example, based on real-world caves and artificial underground places, although that often simply made for player headaches in trying to map things during games, so tended to disappear from practical gaming use very often.
Don't forget too that something as simple as an arrowed line can help show where a gradual slope is, drawn on or beside an affected area, and different styles of arrow can be used to show different degrees of steepness.

-
Long time wannabe
Hi Jeff!
Perhaps the key thing once you're past the initial "how do I do this again?" phase is to make more maps, and keep making them. That way instead of trying to remember how to do too many things every time, a lot will become second nature, mapping will speed up, you'll start to develop your own way of creating maps, and it will stop feeling like a chore.
For some context, I got the program (CC3 then) back in 2013, tried it out and hit a wall with it, because I needed to generate some maps for publication, and wasn't making fast enough progress learning the program to do so. I only really started again in 2016, when I watched a lot of the video tutorials, and worked out what I needed to be doing, after which things became a lot more practical. And I'm still learning now 😁!


-
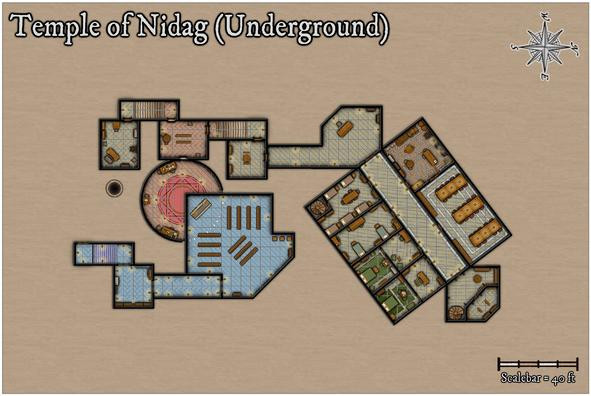
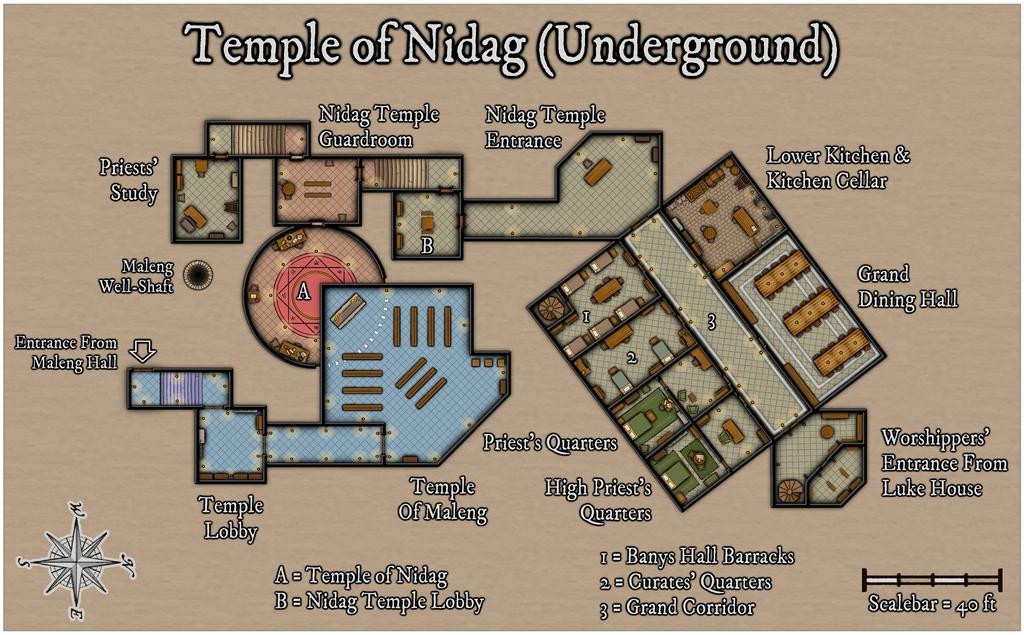
Community Atlas: Temple of Nidag, Stormwatch, Emerald Crown Forest, Alarius
Four rooms left to complete now. The first two were fairly straightforward, a lower barrack-room for the temple staff and guards below part of Banys Hall on the surface, and a shared space for some of the temple priesthood:
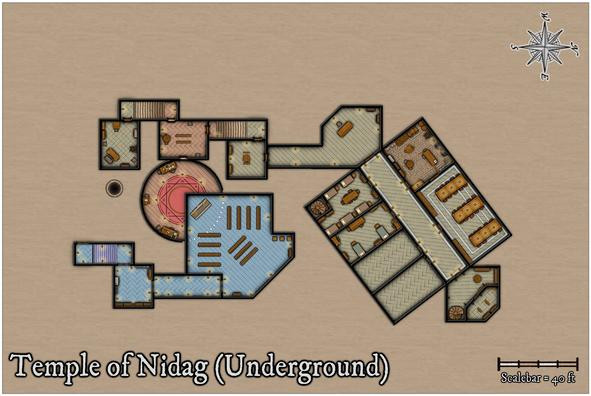
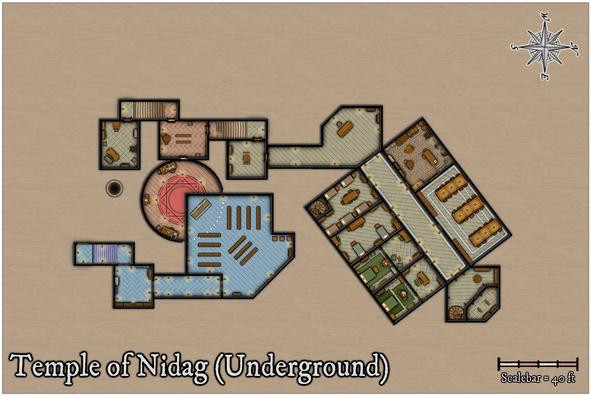
These were followed by combined study and bed chambers for the leading priests, which necessitated adding cross walls to both the last two rooms, and fresh doorways, as well as somewhat more sumptuous furnishings:
That completed the main map drawing, which left the labelling and layout, plus I decided to add a grid, as I often do for dungeon drawings. I tried with a 10-foot grid spacing at first, but the offset walls, and non-standard width areas in places, because of the adjustments to fit to the pre-existing surface features, meant that wasn't helpful, and looked quite messy. So I went with a 5-foot grid instead, although that too looks uncomfortable over that northern segment, where the diagonal floor tile lines clash with the grid in places. It seemed OK for the rest of the map at least, and people can always turn it off, or amend it, in the FCW file if they don't like it.
It only needed adding to selected parts of the whole drawing, and without a walls mask sheet, that meant a grid mask was going to be required, with another chance to break-out the magic of the Color Key sheet effect:
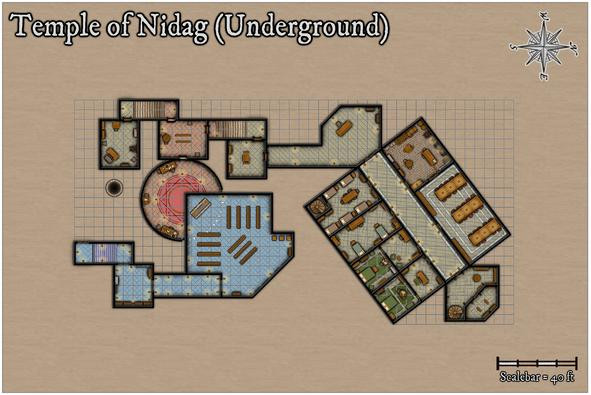
Looks quite impressive here, less so with Color Key off, to show how it was accomplished:
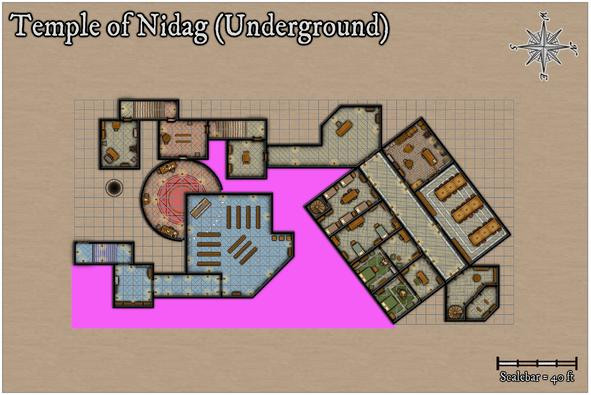
Thanks to the complex and off-axis shapes involved, I'd quickly created a new drawing tool just for this Color Key mask, because that allows the tracing of already-created polygons, of course. And once the remaining strident pink sections were added, the magic was complete:
The perceptive will have noted too that one basic layout action has happened while all this Color Keying was ongoing, moving the map's title. More such juggling followed, as also with the labelling, to reach this final version, gridless, then gridded:

The usual higher-res versions have been added to my Gallery as well today.
The outline arrow for the surface entrance from Maleng Hall was just a little drawn polygon linear shape using the snap-grid, and the upper part of the background map area has been shrunk to better fit the final map's layout, using the Stretch command on the Map Border and Background sheets.
Not quite ready to submit these maps for the Atlas yet, as the PDF notes are still to complete, so I'll post again here once they're done and the maps have been sent-off to Remy.


-
First time map maker, long time DM, Need some Non-video help!
Beyond what Royal Scribe mentioned, if you've only used basic graphics manipulation programs for mapping before (such as Inkarnate), you may struggle to get to grips with CC3+ at first, because it's a true CAD software package, and works in a rather different way.
If you haven't already, I'd definitely recommend reading and working your way through the tutorials from the PDF CC3 User Manual (despite the name, it is written for CC3+ users; you'll find it in the Profantasy => CC3Plus => Documentation folder, or just click the "Help" drop-down menu in an open CC3+ window, then click "User Manual"). I can't stress enough the importance of doing this, rather than simply trying to make your own way through the program, if you have no prior experience with CAD software. Many folks (including myself) tried that, and ended up hugely frustrated until we sat down and actually learnt these basics properly.
There are other written tutorials available on the Forum and the ProFantasy Blog. This topic has a list of options, although they are mostly dealing with specific elements, not just how to map with the software.
Good luck, and if you get stuck, feel free to ask again here!


