[WIP] a watersource in the woods
 Fersus
🖼️ 11 images Surveyor
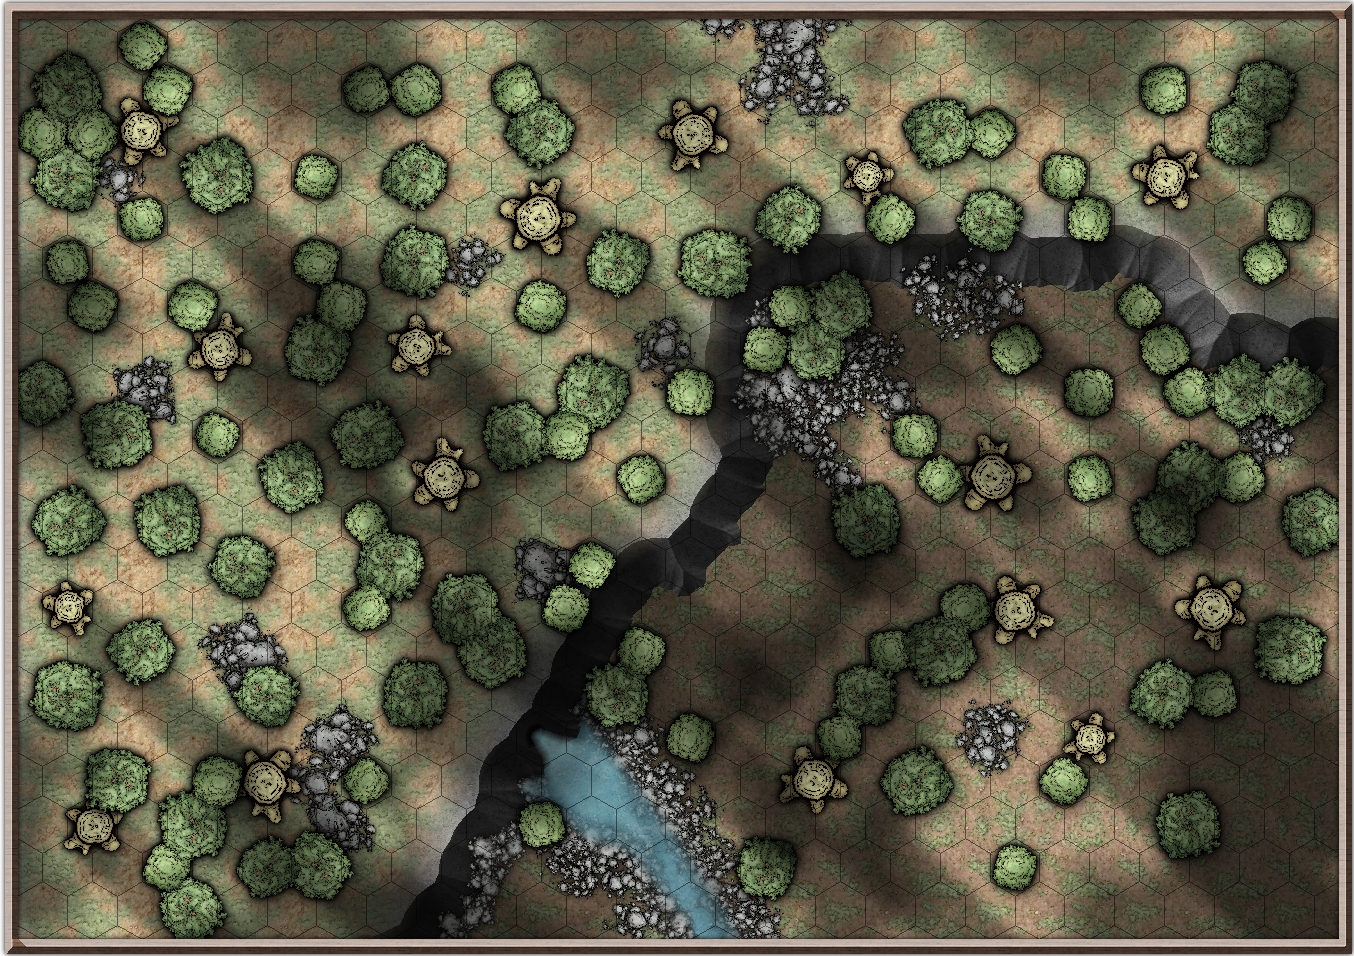
This is a reimagining of a battlemap I made a long time ago, but now done in Mike Schley stile:
I'm not quite happy yet with the shadows. I think I made the tree shadows too long. I'll play around with that a bit more.
Especially the shadows of the treetops: I placed them manually on a separate shadow layer. They seem to vanish completely, I probably made them too weak. Also the positioning is just guesswork. A drop shadow that's bigger than the object it is casting it (as if the tree stump was close to the light source) would be perfect to automatically generate treetop shadows, but I didn't find such an option.
The bevel effect on the high ground however looks really nice and I think it gives a good impression of depth. I'm quite pleased with that.
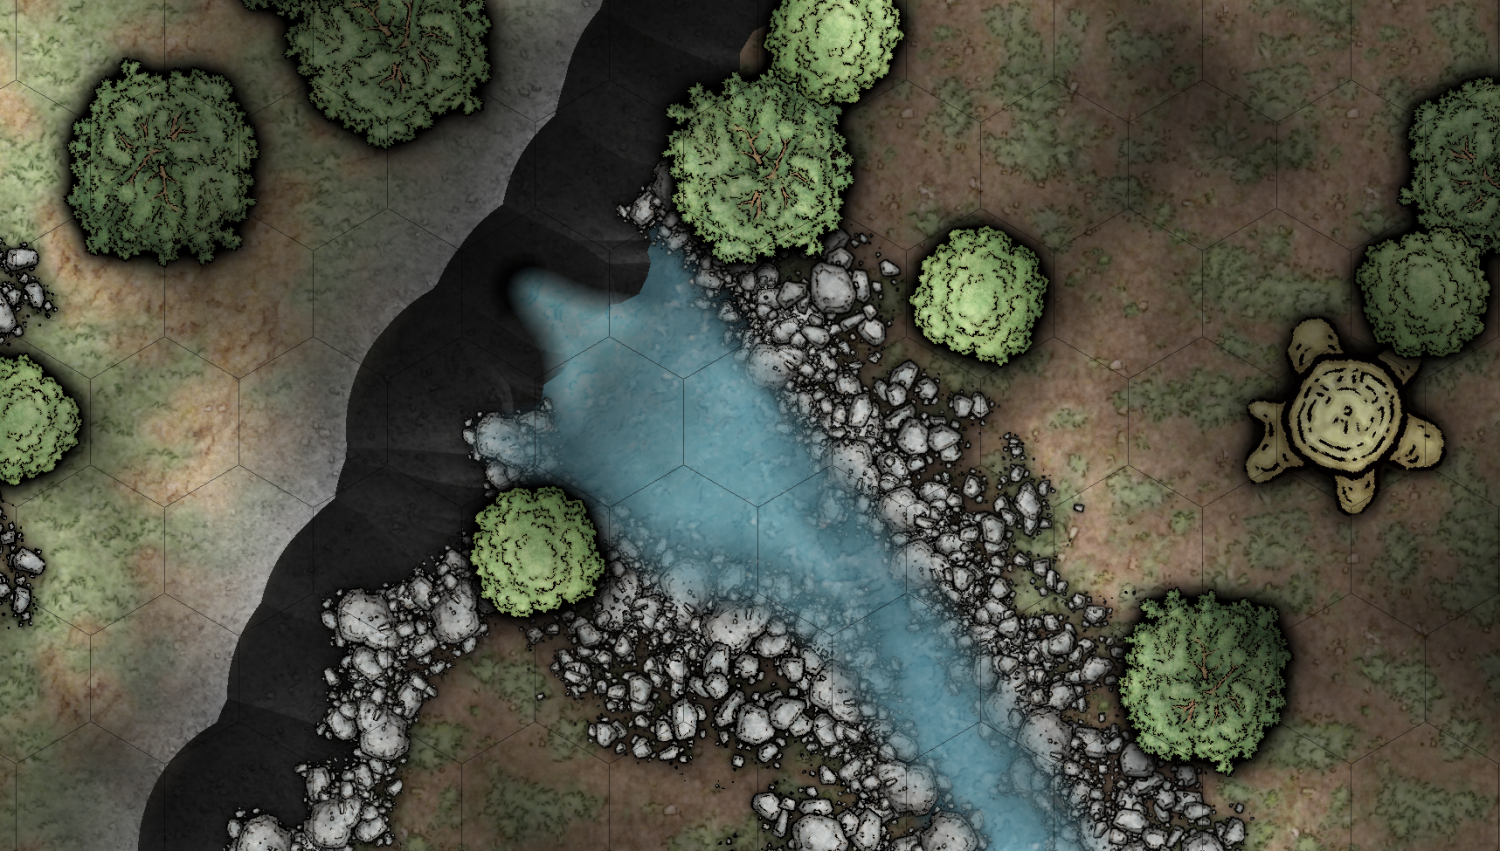
The little waterfall is a good start but I think it's missing something that gives it more live. I tried to add white lines with an edge fade and a dropshadow to simulate areas with lots of air bubbles and the shadows those would be casting, but that did not look good at all.
here is a closeup of the waterfall:
Does anyone has any ideas on how to improve on that? I think @Loopysue made some amazing water ripple effects once, but I don't remember the map annual she did it for :/


Comments
Hi Fersus :)
There are shadow sheet effects that should achieve what you describe. Try hiding that drawn shadow sheet and instead adding a Wall Shadow, Directional sheet effect to the sheet with the trees and then editing it to check the drop shadow option in that effect.
I've done several water effects, both in sheet effects and symbols in different styles. The greatest number of them are in Marine Dungeon, but there are some in Darklands City. I can't be sure which you mean.
Hi Sue :)
Thanks for the hints! It was the ripple effects you made for the marine dungeons I was thinking about.
It took me quite a while of trial and error to get the settings right for my mapsize, but now it looks gorgeous!
I still don't understand it enough to reproduce it on my own/come up with my own ideas on how to use this, but for now I'm very happy with the result :)
Next step: your hint about the drop shadow:
I'm aiming for something like this effect:
I thought I could get that by drawing two shadows: a wall shadow, directional for the tree trunk and one drop shadow for the tree top.
But for this to work I'd need an option for the drop shadow to be bigger than the original object. the only way I could achieve something similar was by setting the opacity to 100% and use a strong blur. but that yielded way to faint shadows.
But then it hit me!
Did I not just learn that if one effect is not enough, by the magic of using the same effect a bunch of times I might get what I want.
So I did a little bit of math, to get thy X and Y coordinates right and used 6 drop shadows that overlap on each other, and here we go:
Now I only have to play around a little bit to get the length of the wall-shadow and the placement of the tree top shadows just right and I can scrap the shadow layer I used to place the treetops by eye :)
Thanks for your support!
I love the water :)
I'm not sure about the shadows. Unless the sun is very low, like sunset or sunrise, the trunk doesn't really cast a big enough shadow to fall outside the shape of the crown, so a straightforward drop shadow on the crown of the tree should be enough. The base of the trunk almost always falls within that pool of shadow - except when the sun is very low.
I'll trust you on this and made the shadows shorter (17 recalculations and reentering of the values, because drop shadow does not have the option to go with the sun and just define a distance and wall shadow directional interacts with itself, so that this couldn't be used. But both options wouldn't have helped anyways, as neiter of those two have an offset option that's perpendicular to the sun direction, so these shadows won't move with the sun anyways, ergo the only option is to keep the sun fixed and hardcode the dropshadows. yay :D)
Still looks nice. You where once again right, Sue!
You can make drop shadows that behave according to the global sun by checking the 'Draw as drop shadow' box in a Wall Shadow, Directional sheet effect.
Yes, that what I was talking about, Sue:
i turned of the blur effects on the left one, so you can better see why that is not working for me:
the left one is I was going for originally, the right one is what I get if i do two wall shadows, one as wall, one as drop.
the two wall shadows have a strange interaction that the dropshadow does not have. But even if that was not the case (or if I ditch the wall shadow as you so kindly pointed out): I still cant get a proper treetop shadow. For that to work automatically I have to put multiple dropshadows next to each other and set a rather high blur, so they smear into each other and the underlying hack disappears.
I had one other "genious" idea: what if I just draw a big magenta circle over the treetrunk put that on a shadow sheet, make it a wall shadow as drop and then apply color key. Most of you will probaly instantly see that this does not work either. I did not see it, I had to experience it. The effect one gets is something like this:
or nothing at all if the color key is applied first.
I don't grasp a lot of effects yet, especially those that use some kind of a filter like the edge stripes and the displace effect, so maybe those are capable of adding an automatic treestop shadow that follows the sun, but the only way I see at the moment is to live with the fact that we can't change the sun afterwards and just hardcode a bunch of dropshadows.
Or just eyeball it and place the shadows manually on their own shadow sheet.
If we had a scale option in the wall shadow dialog, we could use your treetrunk symbols. I think those come in two parts. so we could make the roots on one layer (with a wall shadow if we wanted to have evening/morning feeling) then put the second part on a second layer, again with wallshadow but this time as drop shadow and scaled up. that way the two shadow effects wouldn't have this strange interaction, the second part would get blown up before the glow effect get's a hold of it and that way we could get sun following treeshadows semi automatically...
Oh I see!
It is rather complicated isn't it.
I think that if I were trying to do what you are trying to do I might massively simplify everything by dropping all those really complicated sheet effects, getting rid of all the Color Keys and so on, and just using a tracing of the visible trees in solid black (use TRACED to trace the symbols) on a separate sheet, and then adding just two sheet effects to that single shadow sheet - a blur, and a Blend Mode set to 15% opacity and Multiply.
I'd have to move everything on that sheet collectively away from the sun to actually 'cast' the shadows in a direction, but unless I wanted to change the global sun settings I wouldn't need to worry about it once it was done.
I'm sorry it took me so long to grasp the problem. I seem to be having a 'slow thinking' phase right now.
No worries, given the temperatures outside all I do constantly is supressing the panicky voice in my head that keeps screaming: OH NO! IT'S TOO HOT! FIND BETTER SHELTER! MORE WATER! MAKE IT COLDER! YOU GOTTA GET OUT OF AFRICA! THIS PLACE IS NOT MADE FOR US!
It just doesn't get that we're not in africa anymore, so that's not gonna help :D
But back to the problem: I think I'll keep it now. I have 3 layers set up now for short, medium and long shadows. So whenever I want to make these tree like shadows I just copy everything to the tree sheet and it's done.
I'm happy with that now, so next step is the interior design. let's see if what I've learned in the last few years makes it easier for me to get it right this time...