


Monsen
Monsen
About
- Username
- Monsen
- Joined
- Visits
- 723
- Last Active
- Roles
- Administrator
- Points
- 9,029
- Birthday
- May 14, 1976
- Location
- Bergen, Norway
- Website
- https://atlas.monsen.cc
- Real Name
- Remy Monsen
- Rank
- Cartographer
- Badges
- 27
Latest Images
-
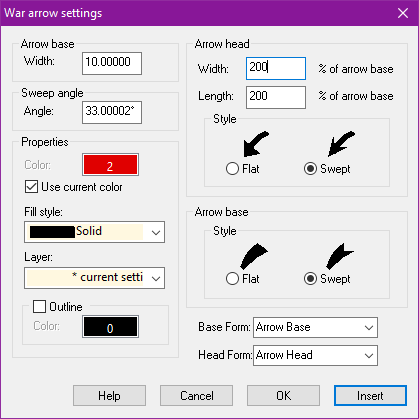
CC3+ World War Unit Arrow draw glitch
I am not aware of any know problems with this command. Seems to always work fine for me. Are your arrow settings set to sensible values, like in my example dialog? What about the sheet you draw them on. Are there any effects on that that might turn them invisible (like a powerful transparency or edge fade effect)?
Any example of a problematic map?

-
Colourising a textured fill tool
GE vshape SELBYP
GV vrandom RANDOM*360
You cannot use the commands like that. SELBYP doesn't return entities that can be stored in a variable, all it does is change the selection mode to be by prior instead of the normal selection procedure. Also note that GE doesn't actually store an entity, it stores a set of coordinates where the entity is located, that can be used to grab the entity but it doesn't store the entity itself.
Likewise, RANDOM doesn't have a return value. The command is used very similar to the GV and similar command, i.e.
RANDOM varnamewill cause a random number between 0 and 1 to be stored in varname. You can then manipulate this further.The SHADEPOLY command also need a second argument for the pitch.
Also be careful with those semi-colons. Commands in CC3+ are executed by using either a new line OR a semicolon. Using both means you are basically creating an empty line, and in CC3+ that means repeat the previous command.
You can find the correct syntax of all the commands in the table in the tome, or in the spreadsheet in
@documentation\tome\commands.xlsx
-
Colourising a textured fill tool
I haven't tried this, so don't know if it works but you should be able to use a series of commands:
RANDOM - to generate a random number (multiply the result of the command by 360 to get random degrees)
SHADEPOLY - to make it a shaded polygon at the randomized angle
SETFSFLAGS 192 - Turns off shading by light, leaving only rotation.
-
Colourising a textured fill tool
Good work.
CHANGEC requires a color number (black is 0), so unless you have defined a variable called BLACK and set it to 0, that's why it fails for you.

-
ALBINO BEVEL
Note that even if you do not know the name of the fill, you can still use CHANGEFS, if you just let the fill name be blank when asked and just hit enter, you will get the fill style dialog where you can pick your fill. (But admittedly, picking through MPEDIT is probably easier as it is a single dropdown, not a dialog with 4 pages)

