


Monsen
Monsen
About
- Username
- Monsen
- Joined
- Visits
- 723
- Last Active
- Roles
- Administrator
- Points
- 9,029
- Birthday
- May 14, 1976
- Location
- Bergen, Norway
- Website
- https://atlas.monsen.cc
- Real Name
- Remy Monsen
- Rank
- Cartographer
- Badges
- 27
Latest Images
-
Morta1337y
Welcome to the forums Morta1337y.
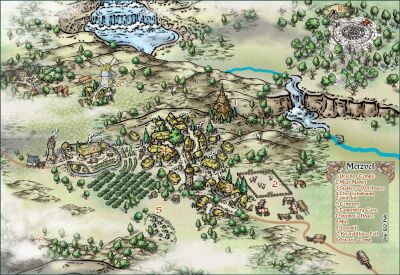
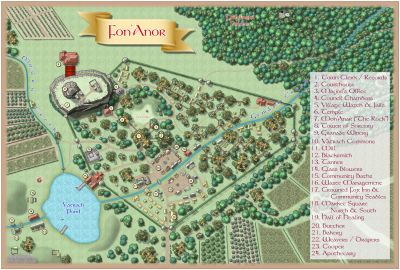
Map looks nice so far, but parts of it do look a little bit empty. Some of those empty sea areas can be made "disappear" simply by throwing in a map title, a compass rose and a scale bar, empty sea is a good place to put those.
It is also a bit difficult to get a good look, since you've only included such a small version. Higher resolution images makes it easier to see the map properly. I recommend about 1000x1000 for inclusion in a forum post.

-
Is there a way to get a handrawn look for the grid?
Do you have the 2020 annual? Dyson Logos style "Inked Dungeons" appeared in the April 2020 Issue. Here the floor grid is made using a scalable hatching made up of polygons to be able to create variable width "lines" that look handdrawn.
-
Select catalog setting window every time I click on wall features (or any other type of feature)
Which dungeon style are you using? If you use the CC3 dungeon style, that's just a vary simple cutdown dungeon style intended for people not owning DD3, and it don't have catalogs for all those dungeon buttons. When using this style, the filters from your previous map would be retained.
The DD3 dungeon style is fully featured, and should have all the appropriate catalogs and filters.
-
Changing crosshair color
No. These elements don't have a color, they are drawn on the screen using an XOR function, which means their color is always the opposite of what is below them. You can see this in effect yourself by drawing a solid black square and a solid white square next to each other, and see how the grid dots and crosshairs actually have different colors depending on where they are.
This is intended to make them visible no matter the background color, but for busy fills it may still be difficult to see them. For the snap grid dots, you can also experiment with a different size/design of the dots.

-
Run a report of symbol locations
You can run the LISTIMAGENAMESDWG command to do this. It will list all the images in a drawing, and tell you if it is a fill style image (bmpsty) or a symbol/inserted image (pictr2)
You can also use my custom command that list images sorted by addon. Note that the accompanying data file is a bit out of date, so a lot of files will be identified as unknown add-on.


