


Monsen
Monsen
About
- Username
- Monsen
- Joined
- Visits
- 723
- Last Active
- Roles
- Administrator
- Points
- 9,029
- Birthday
- May 14, 1976
- Location
- Bergen, Norway
- Website
- https://atlas.monsen.cc
- Real Name
- Remy Monsen
- Rank
- Cartographer
- Badges
- 27
Latest Images
-
Merging polys -- how?
If they are partially overlapping, the simplest way to merge them is with the TRACED command. This will create a new poly, so delete the other two afterwards, and change properties on the new one if required.
The link below shows how to use TRACED. The example uses a single bitmap image, but it works just as well on a set of polys.


-
CC3+ Connecting nodes (to connect passages)
This is one of the situations where it isn't that difficult to do, but the explanation may look a bit involved at first. This is a bit extra complicated because I see you are using a custom version of the drawing tool, but you haven't set the sheet and layer settings for the outline properly.
Connecting it will require a bit of manual work since you cannot use the edit feature of the drawing tool, since that will just extend it from one side, but not connect the other. There is also the complication that regular polygons cannot have holes in them, but connecting it up will end you up with a hole in your floor poly immediately to the left of where you are connecting up. There are a couple of ways to do this, but some node editing and a multipoly is probably the way to end up at the desired result here. Keep in mind that a multipoly isn't editable with the drawing tools edit features, so this should be done when you are done drawing the system.
First, keep in mind that the wall line is a separate entity. We'll start by editing this one. To avoid editing the floors instead (easy to do when two entities overlap), start by hiding the BACKGROUND (FLOOR 1) layer, this should leave you with just the wall entity.
Use change properties to move your wall entities to the WALLS sheet and the WALLS layer. If you find yourself unable to select it at this point, it is because it is on the HEX/SQUARE GRID layer, and that layer may be frozen. If so, you must first enter the layers dialog and unfreeze that layer.
Then use :CC2BREAK: on the wall to create a gap in both the upper and lower section where approximately where you want the joining segment to meet up. (When selecting an entity to break, the point you used to first select it on defines the part of the entity to keep)
Now, right click :CC2EXPLODE: and pick Path to Poly. You're going to use this twice, first on the small wall that goes around that little "hole" to the left of your marked area, then on the main wall going around the rest. This should leave you with two walls, one outer and one inner. If you are unhappy with the straight connecting lines, you can add some detail by using :CC2INSNODE: to add a few more nodes in the walls.
Now, show the floors again by unhiding BACKGROUND (FLOORS 1). The existing floors are of no use to us, so we are going to erase them but let us just pick up their settings first, so use :CC2KEEP: on it first, then :CC2ERASE: it.
Now, right click :CC2COPY: and pick Copy to Sheet. Use this to copy both your wall lines to the FLOORS sheet.
Hide the walls sheet. The walls you see now are the copies on the FLOORS sheet. Use :CC2MCHANGE: on the large outer one, and just hit OK. The default values in change properties is the current properties, which we got from the old floors when we used extract properties on it earlier. The large polygon should now look like your floors
Finally, to make the hole, use :CC2MPOLY2: to combine the floor poly with the smaller wall segment. The wall segment may be hidden below the floor poly at this point, but you know where it is, and should be able to pick it up using a selection rectangle even if you cannot see it. You'll see that you have succeeded when the selection counter tells you that you have two entities selected. Be vary of the grid, you don't want to select that.
Now all that remains is to show the WALLS sheet again, and you should have both your floor and the walls.

-
FAQ: Frequently Asked Questions and their solutions
- I've imported new fills into my map, but they don't show up in the drawing tools window
🎬️ Videos: Drawing tools for new fills +++ (also watch these for more context: Short video about fills +++ Longer video about fill styles)
Drawing Tools in CC3+ are more than just a list of fills. If you look at the full list in any given map (:CC2DRAWTOOLS:) you'll se that they have different shapes, some have outlines of different widths, some are lines, some are filled entities and so on. Drawing Tools are all manually crafted tools for common features of the current map style, they're not automatically created from the fills in the map.
Instead, to find fills you have imported, click the FS: (Fill Style) indicator in the top right, and go to the Bitmap Files tab. The dropdown here lists all the fill styles in the current map. From here, you can pick the one to use, and then use the basic tools in the right hand toolbar to draw entities using this fill. Keep in mind that when using these basic tools, they don't set anything automatically like the drawing tools do, you manually have to set all the correct properties first by clicking the elements on the status bar, such as fill, line width, sheet and layer.
You can also make new drawing tools yourself utilizing your new fills. In the drawing tools window, hit the Advanced button to start editing. From here, pick one of the tools you'd like to use as a starting point, then hit the New button to make a clone of the selected tool. Now, make sure your copy is the selected one, and yhen access the properties to set it up to use one of your new fills
![[Deleted User]](https://secure.gravatar.com/avatar/c75d9a245b74d9c59be0999ea81ca541/?default=https%3A%2F%2Fvanillicon.com%2F92add7f8c954488718110edc4896ad39_200.png&rating=g&size=200)


-
Battle map question
Normal print size for a battle map is 1" per square. A paper in A4 is 210x297 mm or 8-1/4 x 11-3/4 inches. That allow for 8 by 11 squares assuming the printer don't need huge margins, which gives a map size of 40x55 feet.
A3 is double A4, so 16 by 11 squares, A2 should be 16 by 23 and so on.


-
some questions i have.
1 - Yes. But you need to import the relevant fill styles into the map. See this faq entry
2 - No. The software doesn't have that feature.
3 - I don't really understand. The icons you show in the image are already in one row. But generally, you can do whatever you want with them by editing the menu files


-
Refreshing an old map with new textures
That means it is an old map from before CC3+ (Or it was created from a flawed template that wasn't properly updated)
The default data file location was moved between CC3 and CC3+, and the # symbol refers to the installation directory, where the data files used to be kept. CC3+ has a fallback that it will be able to still display these files, but I guess the symbol import doesn't check this.
Fortunately, it is easy to fix, just run the
FFIXcommand in your map to automatically convert the paths.
-
Another one with scaling issues on metric maps
That large scale bar is actually correct, it's just that it is a bit larger than you want.
That particular scale bar is 50 map units large, so at scale 1, it will fill the entire map width. But you can use that knowledge to make it the size you want it. Because if it is 50 at scale one, well, then it will be 5 at scale 0.1.
I might not have been spesific enough when I said scale bars should always be placed at scale 1. What I really should have said is "don't apply metric conversion to the scale for scale bars.". Placing it at 0.3048 will never work. But sensible scaling based on 1 as the default value does, so using 0.1 as I described above, it will be one tenth of it's "intended" size, which should work fine for your map. Or maybe you want 0.2 (which then results in a 10m long scalebar)

-
Displace moving everything to the left
They are just 500 px bitmaps of pure red and pure green.
500px shouldn't be needed if they are uniform, 1px should be enough.
-
How does the Displace effect work?
@JulianDracos you are mixing vector drawing entities here with mathematical vectors. A normal map is just a grid of (mathematical) vector represented as as an image. Each pixel represents a single vector, where the three directions are encoded as the red, blue and green channel in the pixel respectively. Thus, when a normal map is used with the distort effect, each vector tells which direction to move the pixel at that position in the rendered map.
This is also very similar to how roof shading is done with CD3 buildings.
@roflo1 I don't know exactly how it is done internally, but I assume it calculated as a 3D-space and then projected down to the 2D plane, and the projection used for the actual distort.
-
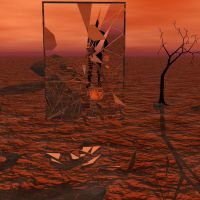
The Sunken Temple
I put it in on Malajuri, off the coast of a small island. The map looks quite tropical, so I think this is the best fit.


