

Edit direction

So when using the "Edit" function in a Drawtool to make an existing object smaller, is there some trick to making it go in one "direction" vs the other? Really can't figure this out - frankly this has been something that's baffled me for years, I think I might have asked on this forum about it once before but if so I don't remember. Most of the time I just try to work around it but I'd like to know what I'm missing.
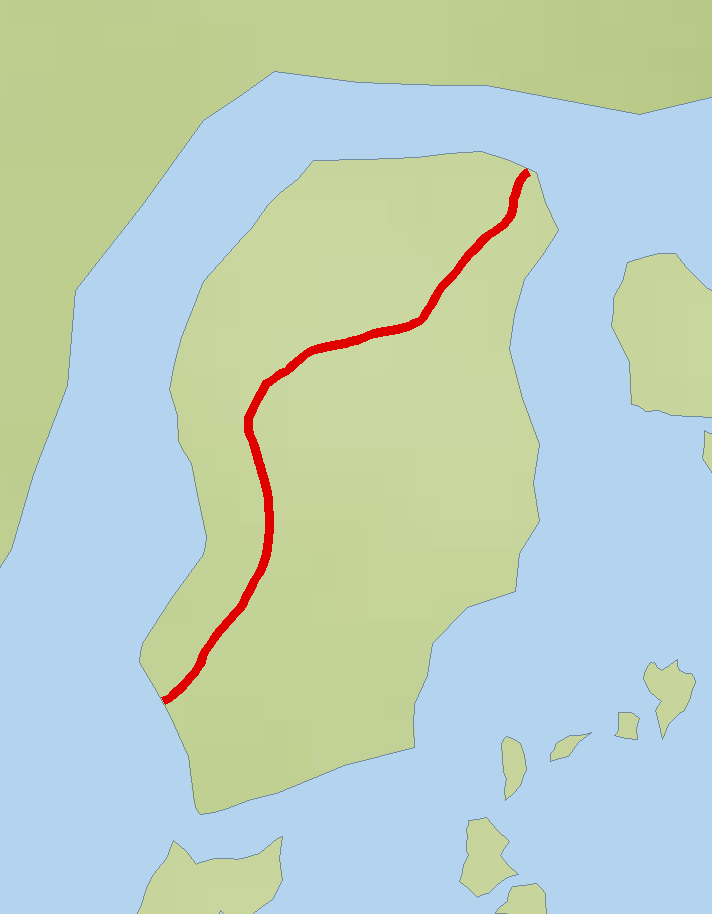
So I've got this island and I want to make it smaller - specifically, everything to the LEFT of the red line, I want gone, while keeping everything to the RIGHT of the red line.
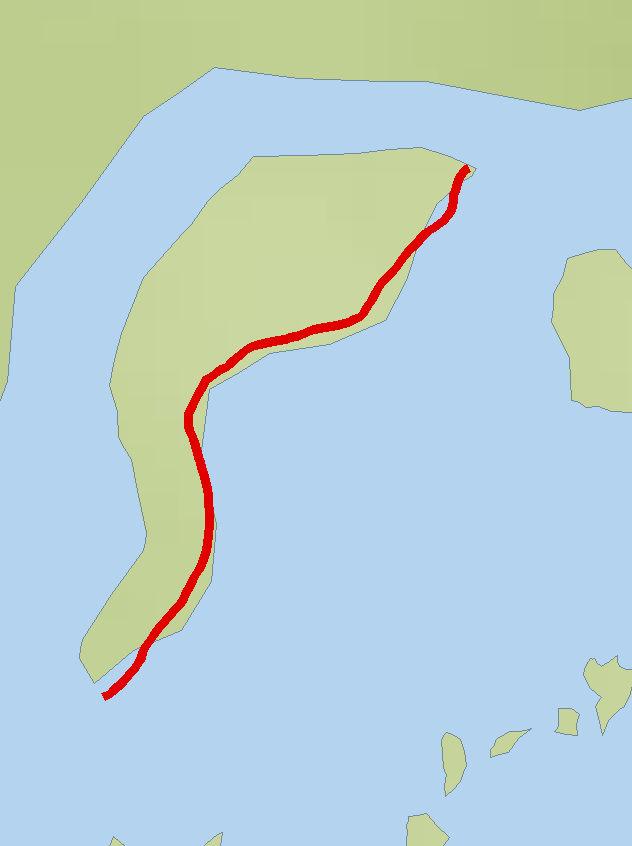
But ever time I try to edit, I end up with this which is the exact opposite of what I want:
So... what's the deal here? Is there some way to predict which "way" it will go based on something like where I click to start the edit or something?
Comments
Not sure exactly how the algorithm is working internally, but it seems to like keeping the start/end node of the polygon (which would be located where you started drawing the poly in the first place.)
A few ways to deal with this:
- ClickExtract Properties
 then select the edge of the island to set the proper sheet, layer, line width and fill to work with.
 - If the red path is not already on the current sheet move or copy it to that sheet.
- Hide all other sheets to protect them.
- ClickTrim to Entity
 selecting the edge of the island then trim the ends of the red path to it.
 - ClickBreak
 selecting the edge of the island you want to keep then start the break at one end of the red path and end it at the other. (UsingEndpoint
 would be good for this.)
 - Right clickFractalise
 and combine (CMB) the two paths making sure the close ends connect.
 - Close the combined path (if it isn't already) and the island has a new coastline. (You can show the other sheets now.)
I hope this helps.Ah I see. So it seems like one of those quirky CC3/Fast CAD things, haha. That's fair enough, I thought that might be the case (and I'd rarely be able to remember where I started drawing any given poly) but figured it was worth the ask.
As for either editing by removing small pieces repeatedly, or just re-drawing the landmass with a trace at the new size/shape, those are basically the workarounds I've used in the past, as I mentioned. Honestly both methods work pretty well and aren't really all that time-consuming - but, again, I figured it was worth the ask! Thanks for the reply.
@DaltonSpence - hmm, that list of steps seems a bit too involved for what I'm trying to do, haha. But, I appreciate you trying to help in any case, and I didn't really know you could use Break and Fractalise that way so who knows, maybe this could be useful for something in the future!