

Mixing Mike Schley isometric city + Mike Schley Overland symbols
 Ricko
🖼️ 107 images Mapmaker
Ricko
🖼️ 107 images Mapmaker
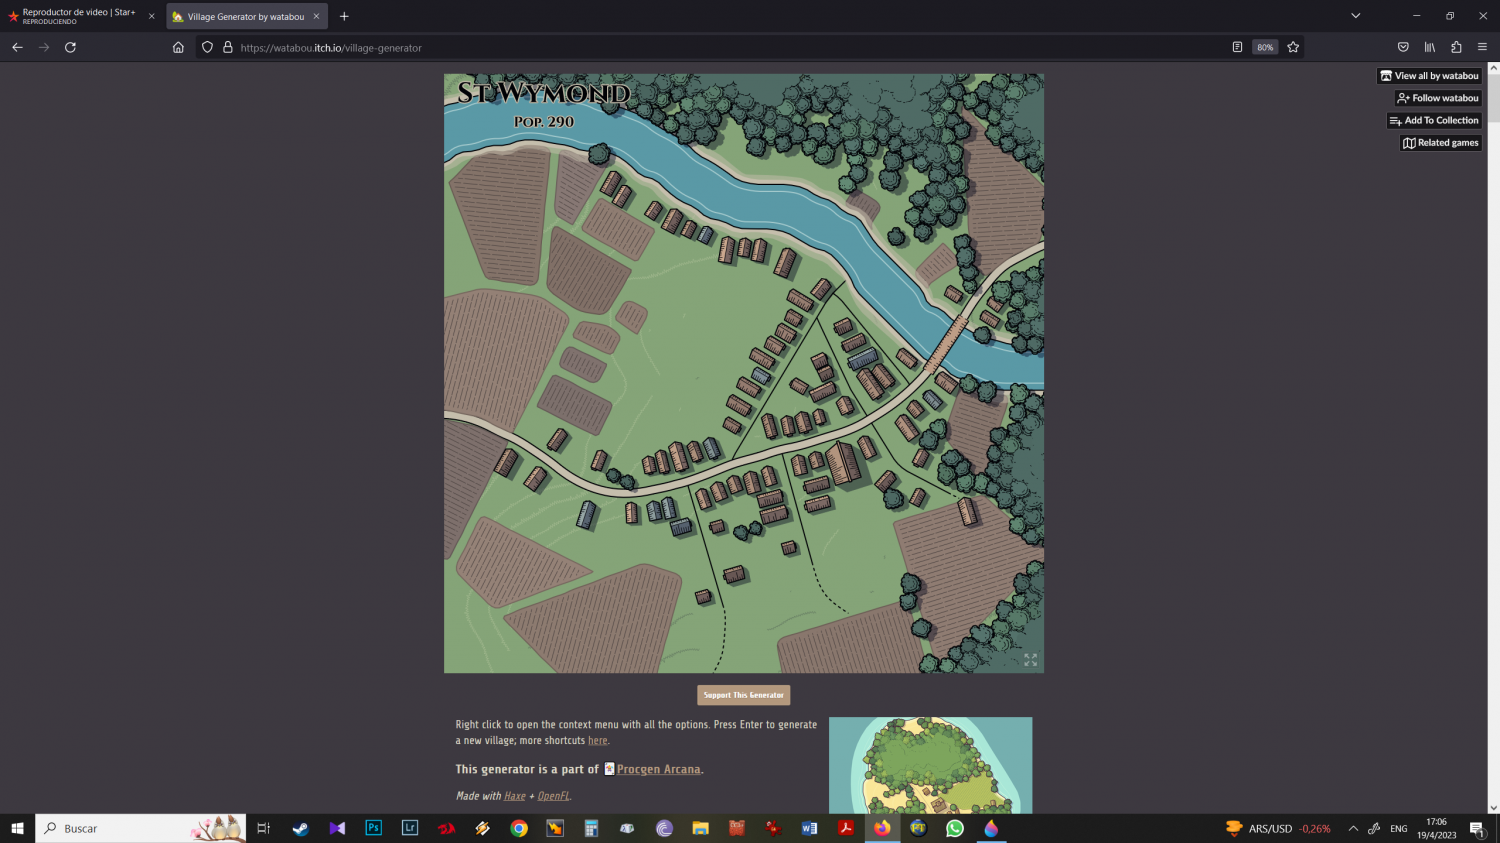
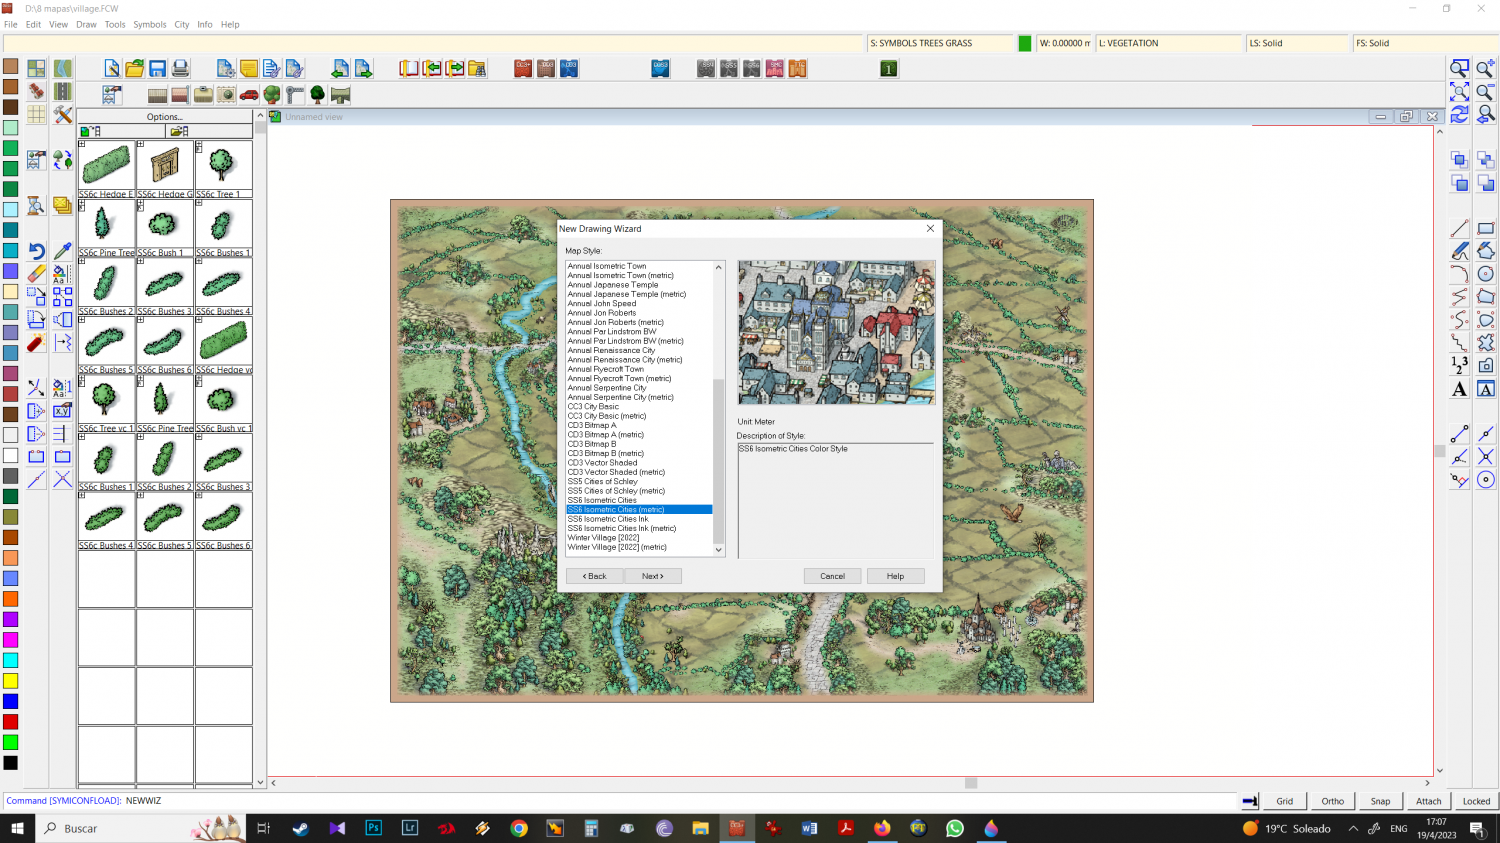
1 - I was asked to explain how I use Mike Schley Citys and Overland at the same time and what my workflow is. For the small village tutorial, I resorted to the help of Watabou map generator: I go to the village generator and click generate new city until the idea suits my needs-desires. I download the image and open the CC3 program
2 - I choose the isometric city to work as a base - I prefer it because it's easier to make the roads.
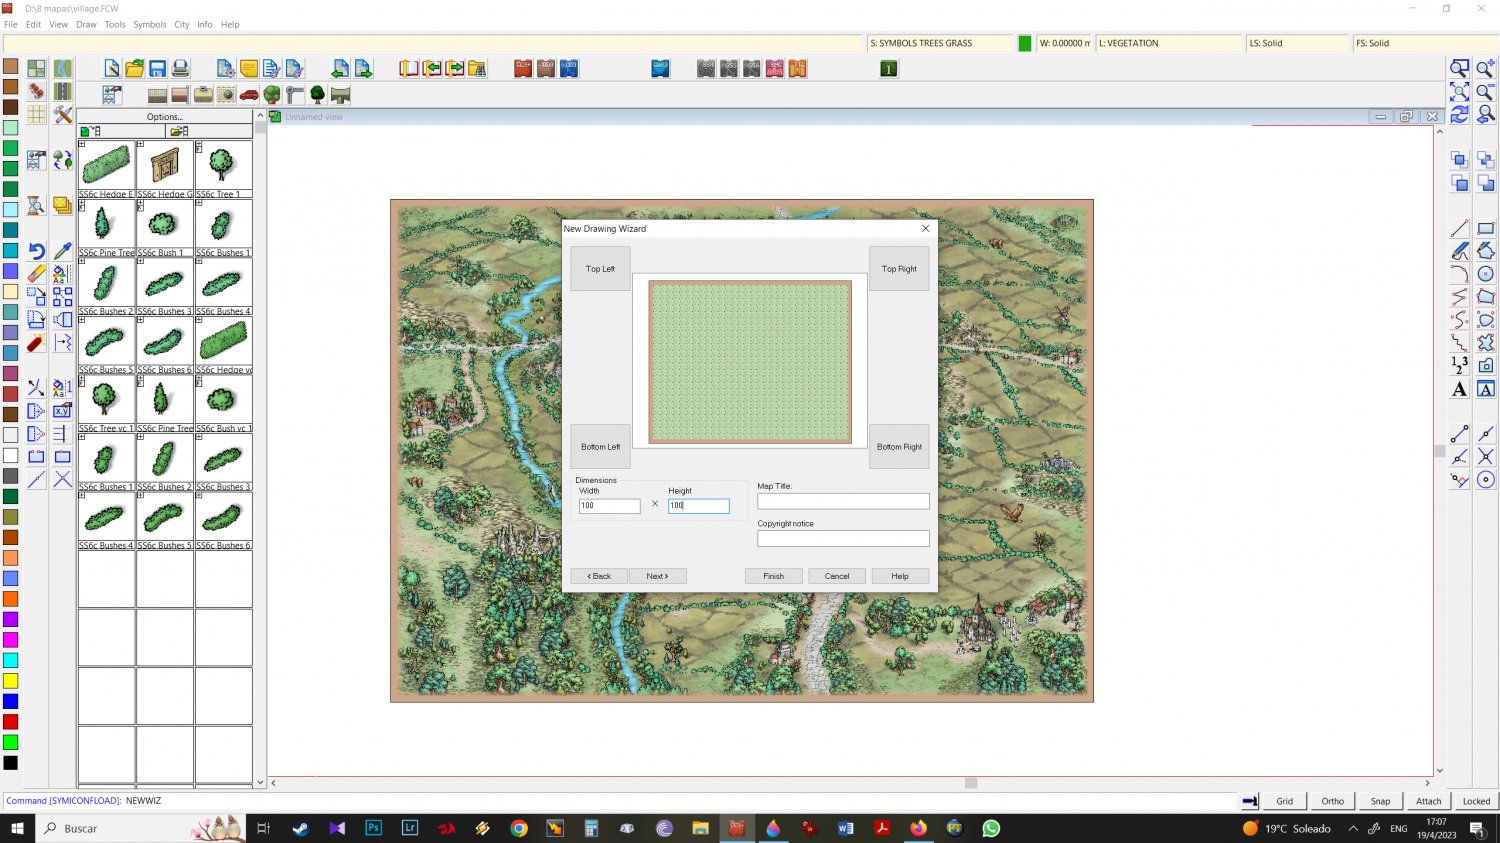
3 - As the image is square, I selected an equal measure of height and width. in this case (I'm working with metric) I put 100 x 100. I am asked if scale is important and the answer is yes. however this would be a descriptive map, or that I can adjust the scale "to my pleasure" at the end of the drawing, no matter if the measurements are real or not.
4 - I usually prefer to work with gray 10 because I can print any color I want on the "canvas".

5 - the screen is ready, we need to import the base image.

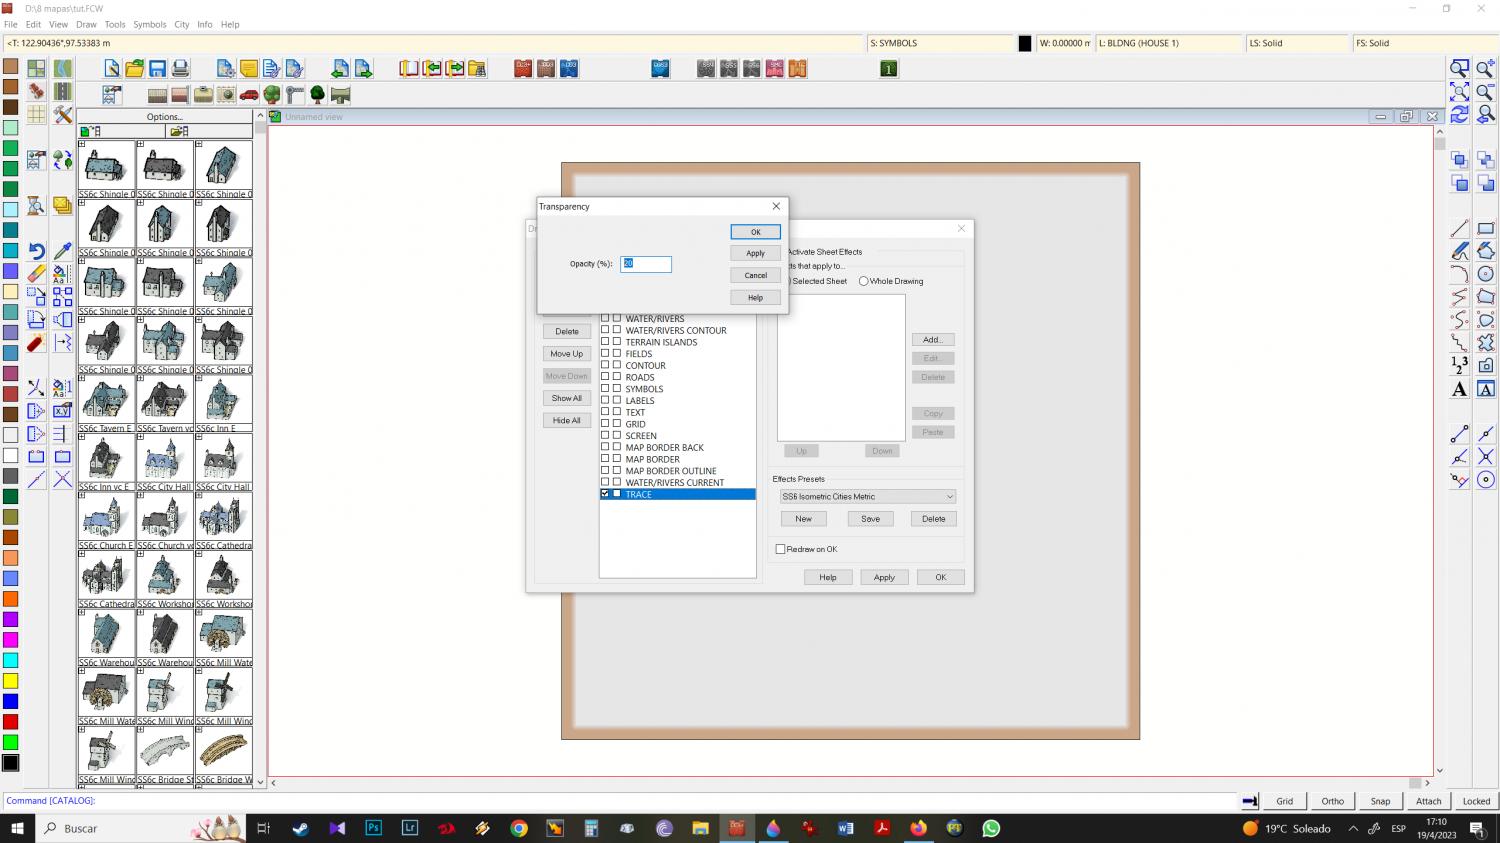
6 - You must create a new sheet and call it TRACE

7 - Add transparency effect. I like to work between 20 and 50% maximum. 50% when I need to see more of the base design, and 20 to 30% when I need to have more emphasis on the CC3 icons that I add to the draw.
8 - Inserting the trace draw. Draw > insert file
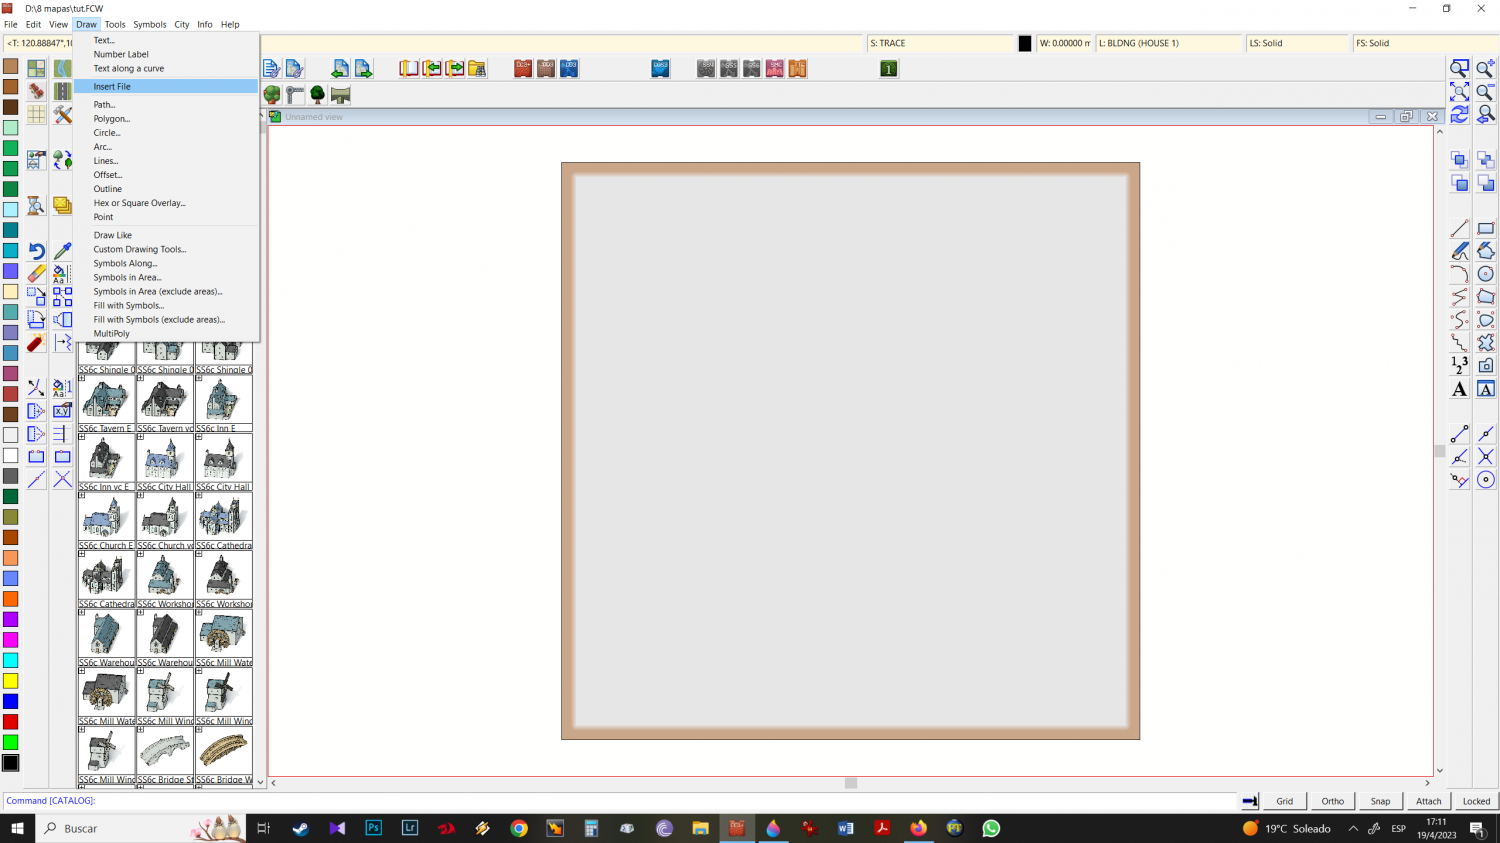
9 - import the photo from where you download it. place on the canvas so that one square overlaps the other.
10 - With the transparency effect active, we can start the next phase. import icons


Comments
11 - to import, right-click and CC3 navigation will open (I don't know the correct term for that part)
12 - Back to symbols, from there MAPS (overland) > MIKE SCHLEY COLOR
13 - In the mike schley color folder (overland) I go, subfolder by subfolder choosing the icons that I like the most. Detail here: I prefer to start with the trees, I import all the trees I want to work with, and then I go to the city's vegetation and also click on all the trees I want. In order for the program to record all the multi options (when they exist) in the icon groups, at this point I hit TAB so that they all appear, then I move to the next icon. I select all the trees I want and group them.
14 - I keep choosing icons from other folders (preferably all together - Mountains and hills, structures, natural etc. Folder by Folder.
Once I've imported everything I want, clicking on that part will show you all the imported items (save your work now). Earlier I mentioned that I like to import in sets (whether it's just overland or in the example of trees, overland + isometric trees) and the reason for this is to facilitate the workflow, since things will be in that part, grouped in similar: trees, buildings, mountains and hills, structures, etc.I start with the river
15 - I start with the river
16 - I notice that it is too thin and I want it to be bigger (its measurement is in 2)
change properties and put size 6 (3 times the original)
17 - refresh and seems ok to me, lets go
18 - Note that the isometric city recognizes mike schley overland trees as when you work with overland. as SYMBOLS TREES and, as it did not exist before - the program creates a new sheet with that name by itself. Move it under (on top) of the sheet symbols.
SYMBOLS TREES new sheet is in correct place now..
19 - Having the tree symbols you want all together helps especially when you're looking for "vegetation diversity" making work much faster. Choose the trees you want but keep in mind that some of the icons come in "different size scales" be aware of this difference and solve it by pressing CTRL and moving the mouse up or down. As a tip, also vary your sizes intentionally, so you have a greater variety of looks.
20 - once the trees are in place, I go to the buildings. Note that I will stick to the SYMBOLS TREES sheet because at this point if I go back to the symbols sheet, the images I will use will be behind the trees.
with all the icons, trees, structures etc, sometimes I use the mirror function: I select an icon, left-click and click mirror. Doing this allows for variety, especially in the most interesting constructions, and will have a less monotonous final result.
21 - Here again use the trees to hide details, like the street - in this case leading nowhere, from the structure icons.
22 - the river is too big to grow the mike schley overland bridge icon which would cause it to pixelate a lot. so I choose the isometric city bridge and place it where I want it.
23 - after the bridge has been placed i select stone road size 2 and draw on both sides. Always try to get right out of the middle of each part of the bridge your road, so it will be correctly positioned in connection with the bridge.
24 - now using a dirt road, I place it where the dirt roads will be.
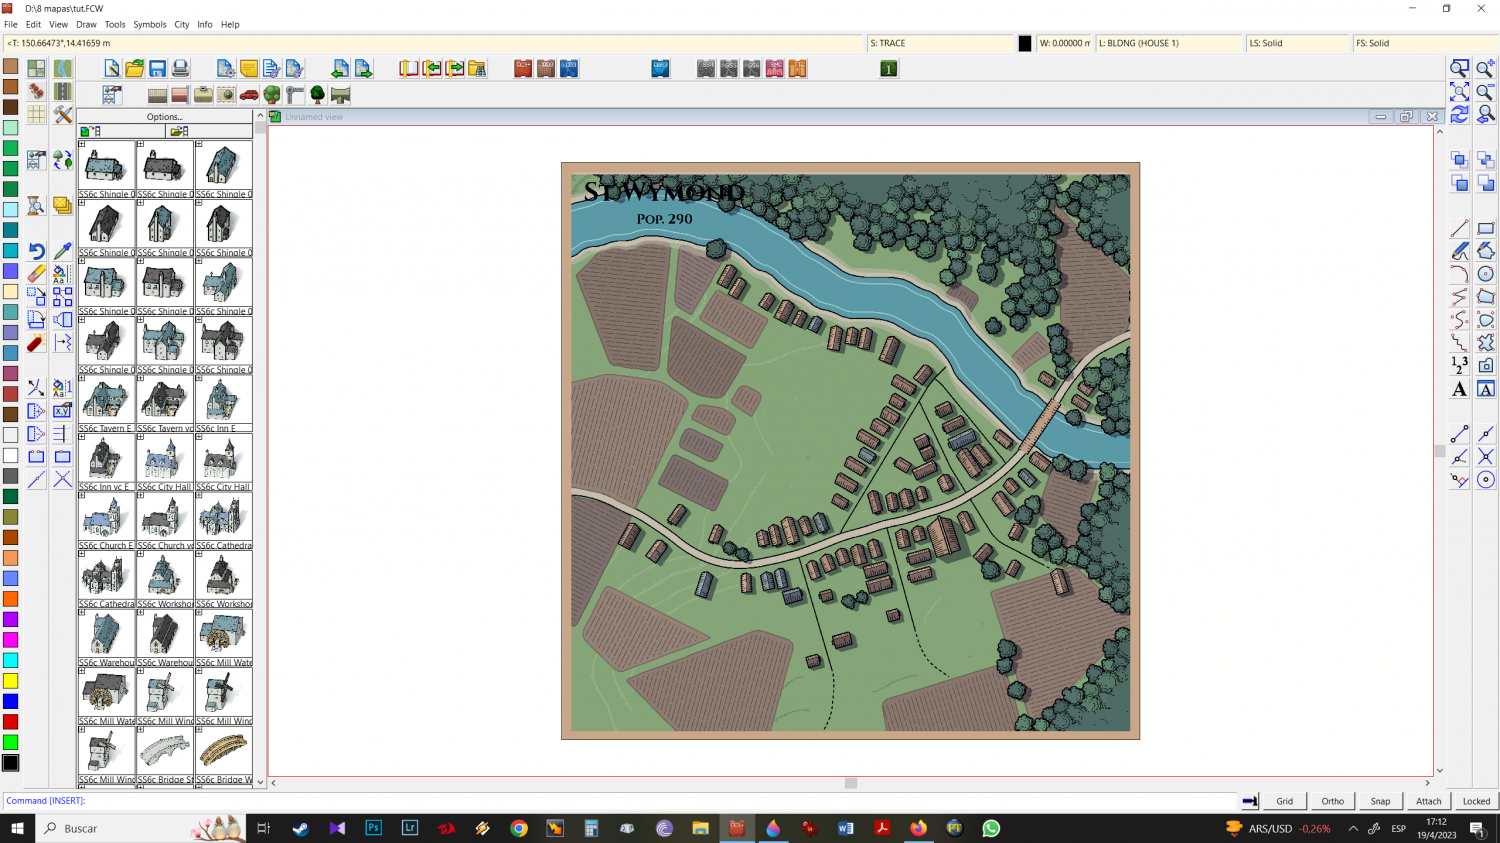
25 - we already have the trees, buildings, roads and streets. now let's do some decorating. Using isometric images, I position the market, boats, and a few more trees.
26 - time to place the plantations. You can intersperse the colors or put them all the same, it depends on your taste or need.
27 - I chose to put both in this example
28 - Refresh and look how is going
29 - I want a little more inner edge fade on the roads, so I go to your sheet and increase the intensity of the effect until I get what I want.
edge fade inner more strong on roads now.
Refresh and see, maybe adjust settings onde more, untill you like the results.
30 - let's add green, terrain light green where you want it. I always use these effects beyond the edge of the drawing, since when I use the edge fade inner effect "inside", it doesn't attack the inner edge "in the border".
refreshed
31 - create a new sheet and name it TERRAIN Earth (I chose this second name to remind myself that I will use the terrain earth effect on it). Select Terrain Earth
32 - draw where you want this effect
33 - refresh and create another new SHEET: TERRAIN DARK GREEN
34 - draw where you want the dark green
35 - refresh
36 - as the program does not allow you to use SYMBOLS TREES by mike schley overland in another SHEET that is not SYMBOLS TREES, we created a new sheet SYMBOLS TREES GRASS. And we place it above (below) symbols and symbols trees.
37 - Place Scrub 1 and/or 2 where you want (CErtify you are working on Symbols TREES GRASS sheet)
38 - refresh and you will notice that the "grass" is under the trees and other buildings.
39 - with the animals previously chosen when importing the schley overland folders, position them on the map
40 - for a cleaner final file write in the command: COLLARW and hit enter twice
41 - once clean outside map border, save and your map is ready to go!
all work, flow, without the stops for print screenings and savings is about 15-20 min max.
Cheers
Great tutorial Ricko. It takes me that long just to get started!
i forgot share the FCW sorry.