

Community Atlas: Errynor - Aunty MacKassa, the Area Maps
 Wyvern
🖼️ 293 images Cartographer
Wyvern
🖼️ 293 images Cartographer
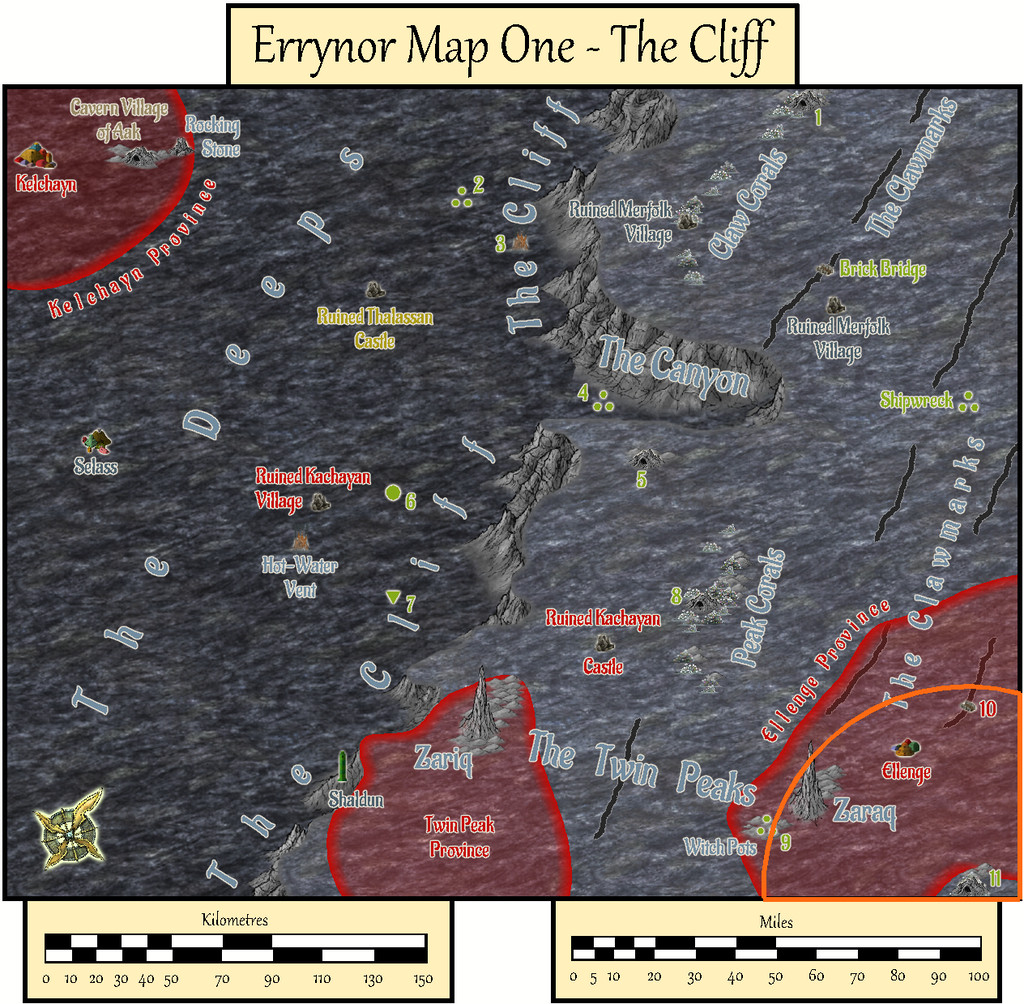
The set of Aunty MacKassa maps is the final group in the series of sub-maps from Map 01 of my Errynor mapping project. I'm not intending anything quite so extensive for the other 39 250 x 200 mile maps in the set, though you never know! Indeed this group of drawings grew rather out of hand anyway, albeit I've long found RPG scenario planning has a tendency to do that as the ideas build up along the way. My original intentions for three maps to detail deep-sea hag Aunty MacKassa's lair (site 11 in the lower right corner of Map 01) have ended-up as seven separate drawings!
Partly, this was because while working on some of the other detail maps in that corner of Map 01, I'd realised Aunty MacKassa could have been long-influencing events elsewhere across the region, especially at the Kachayan settlements of Shark Bridge and Ellenge. Aunty's backstory in all this is given among the various map notes with this set, incidentally.
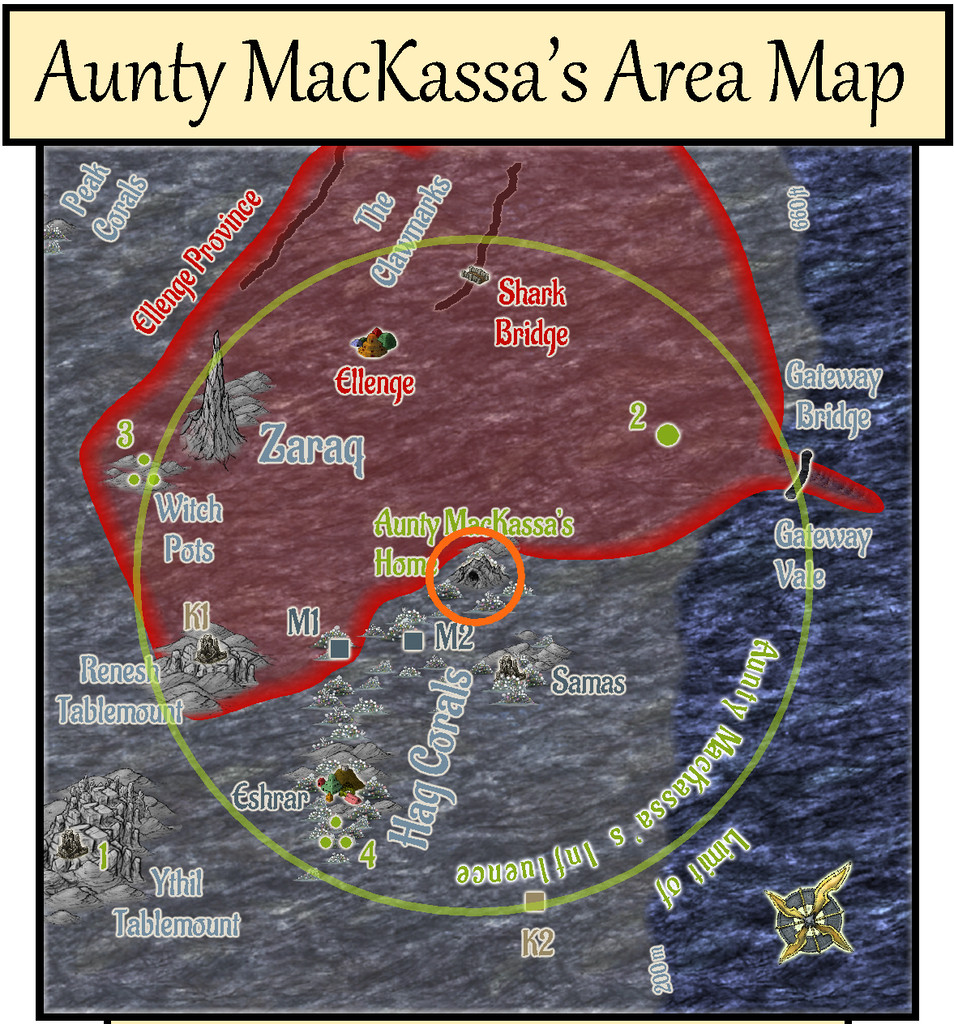
As Shark Bridge is almost 50 miles from Aunty's coral cave lair, I decided to set a 50-mile radius limit to her influence overall, a zone where she might sometimes be seen, and within which she might wish sometimes to act. This had the further possibility to reduce the edge-of-the-world syndrome of Errynor Map 01, because this zone spans parts of Maps 01, 02, 09 and 10. Of which only Map 01 has so far been completed, of course:
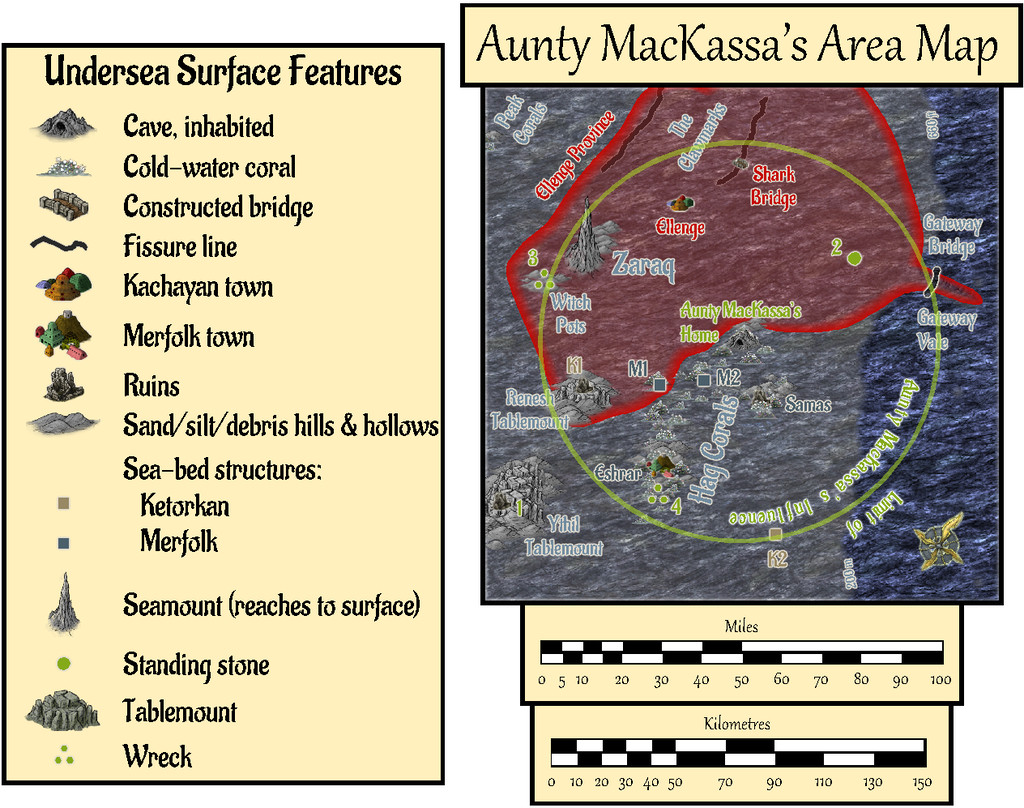
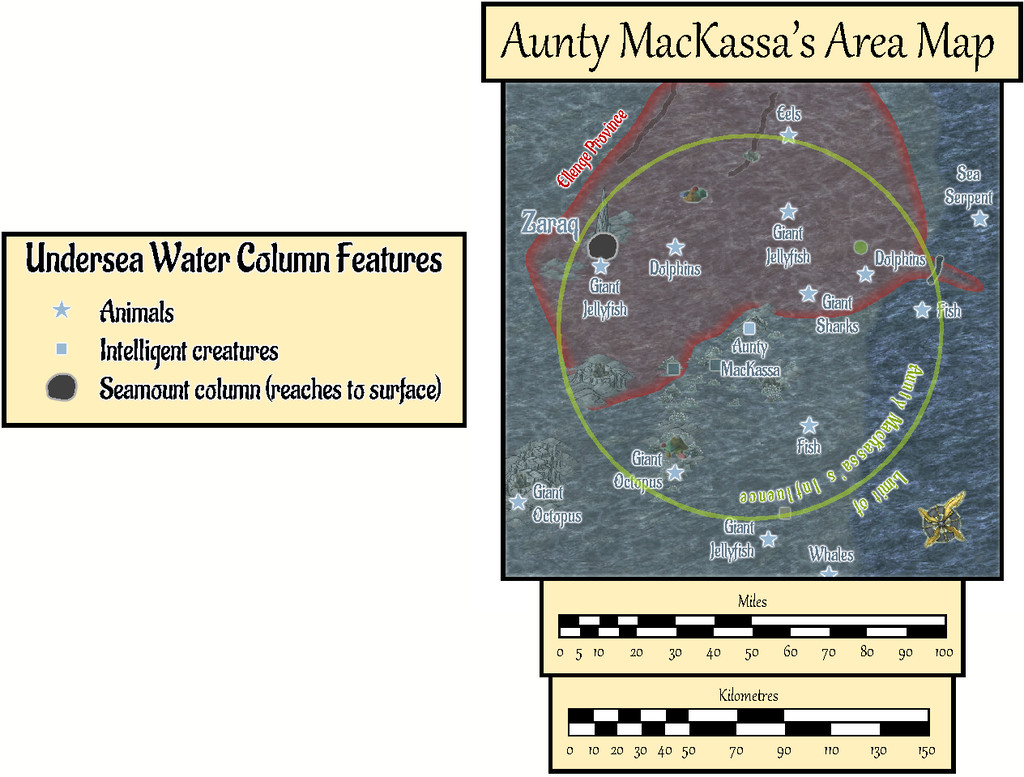
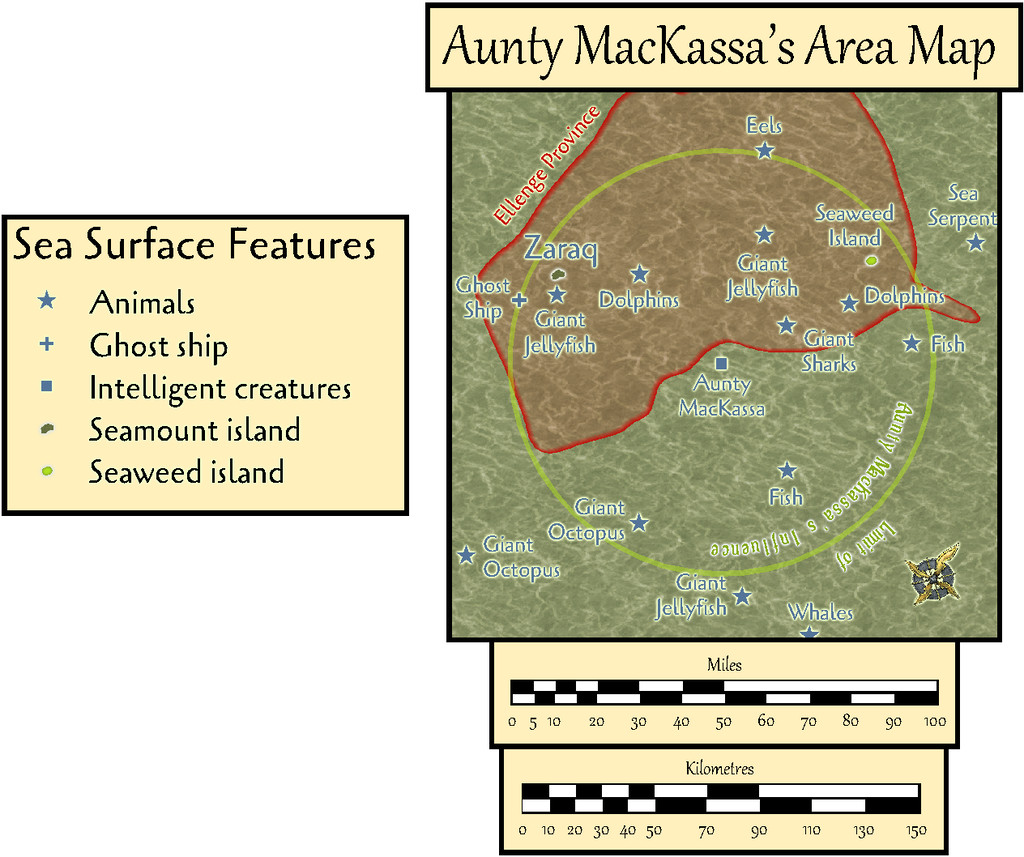
Thus came about the first Area Map, in three versions, following the standard pattern established by Map 01, for the sea-bed, water column, and sea-surface views, using the Herwin Wielink mapping style:
Fresh PDF and text notes were prepared to accompany this map.
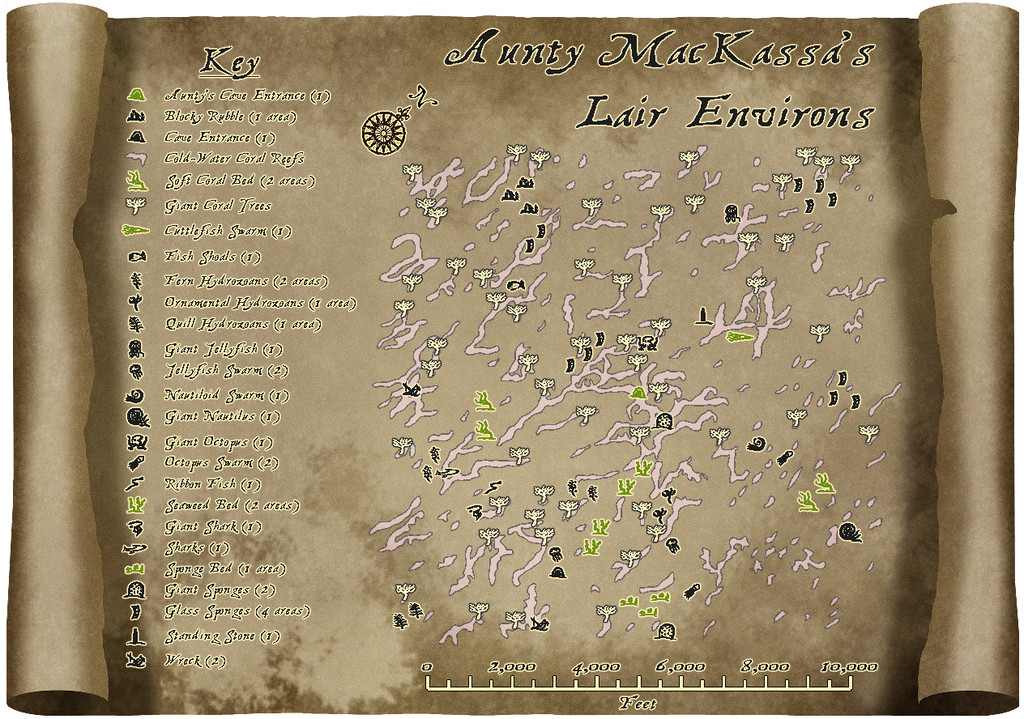
Next, I began zeroing-in on just Aunty's lair:
The next map shows in detail the sea-bed region a little over a mile in extent all around Aunty's Cave home. I'd rather enjoyed drawing the Shark Bridge area map earlier, using a different background and simple vector not-symbols (they're just copied small drawings, not true CC3+ symbols), so opted for a variant on that, choosing one of Sue's Parchments from CA132A for this map's backdrop, and sketching-in the cold-water coral reefs, with the local wildlife and other surface features, all of which had been previously randomly-rolled in preparation. The "symbol"-drawings were much-expanded from the collection used in the Shark Bridge map, naturally:

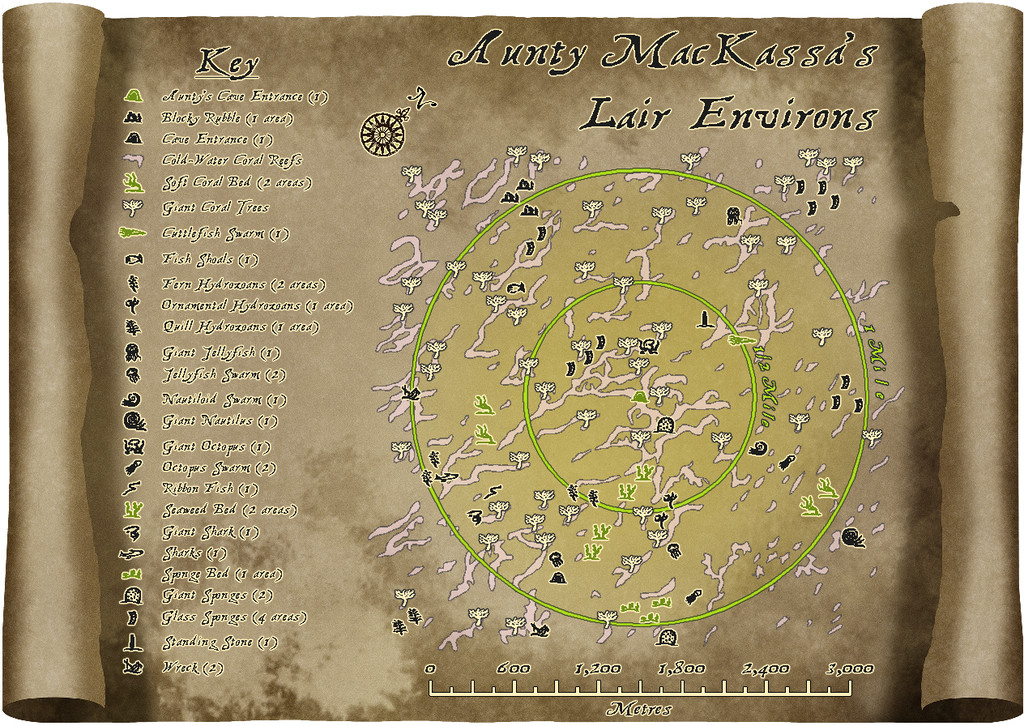
The second version allows the zones closest to Aunty's lair to be precisely identified for GMs, using toggled circle overlays. The nature of the features themselves is detailed in a further set of PDF and text-files notes accompanying this map.
There wasn't space to add a metric scalebar too, so that's been provided as an option via toggle for the Atlas FCW version:
The remaining five drawings in this set should follow shortly, all being well!

![[Deleted User]](https://secure.gravatar.com/avatar/c75d9a245b74d9c59be0999ea81ca541/?default=https%3A%2F%2Fvanillicon.com%2F92add7f8c954488718110edc4896ad39_200.png&rating=g&size=200)


Comments
OMG - should get a heart for every one. Brilliant work.
Wow !
Thanks very much everyone!
Wyverns maps are now to be found in the atlas:
Thanks @Monsen !
The remainder of the Aunty MacKassa maps are now shown and discussed here.