

Community Atlas: Errynor - Shark Bridge
 Wyvern
🖼️ 293 images Cartographer
Wyvern
🖼️ 293 images Cartographer
Continuing with the sea-floor mapping begun with the Aak and the Aak Hills maps from "my" corner of Alarius, this time I swapped to the opposite corner of Errynor Map 01, to map the Kachayan stronghold marked by the mysterious sea-bed bridge structure crossing the Clawmark fissure line labelled "10" there:

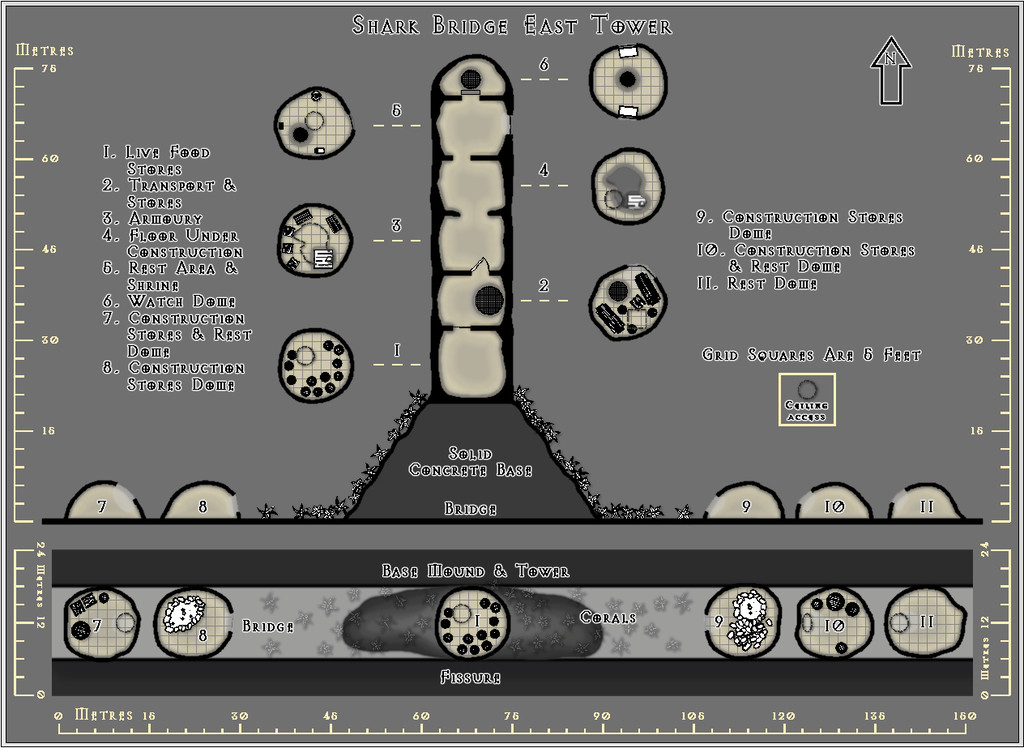
I'd decided already there should be watchtowers on the bridge, and cave strongholds below it, one on each side of the fissure's cliffs. While it might have been nice to visualise the bridge as like the Map 01 symbol, a classic hump-backed arch rising high over the fissure itself, given the fissure was to be around 3,000 feet (over 900 metres) wide at the nominal "crossing point", that seemed impractical - and maybe a bit too "goldfish bowl ornament". So I opted for an arch set in the fissure, with a level bridge top resting on it instead. A vast arch by medieval standards, regardless.
Then I hand-sketched some to-scale ideas from these parameters, and quickly realised I needed a series of drawings to better visualise the general area around the bridge, give an impression of its size and nature, and show where the various Kachayan settlements were on and around it. This led to the Shark Bridge map, albeit it was actually the last map prepared in CC3+, because I needed a clear impression of the appearance of the towers and caverns first to be able to add them correctly to it.

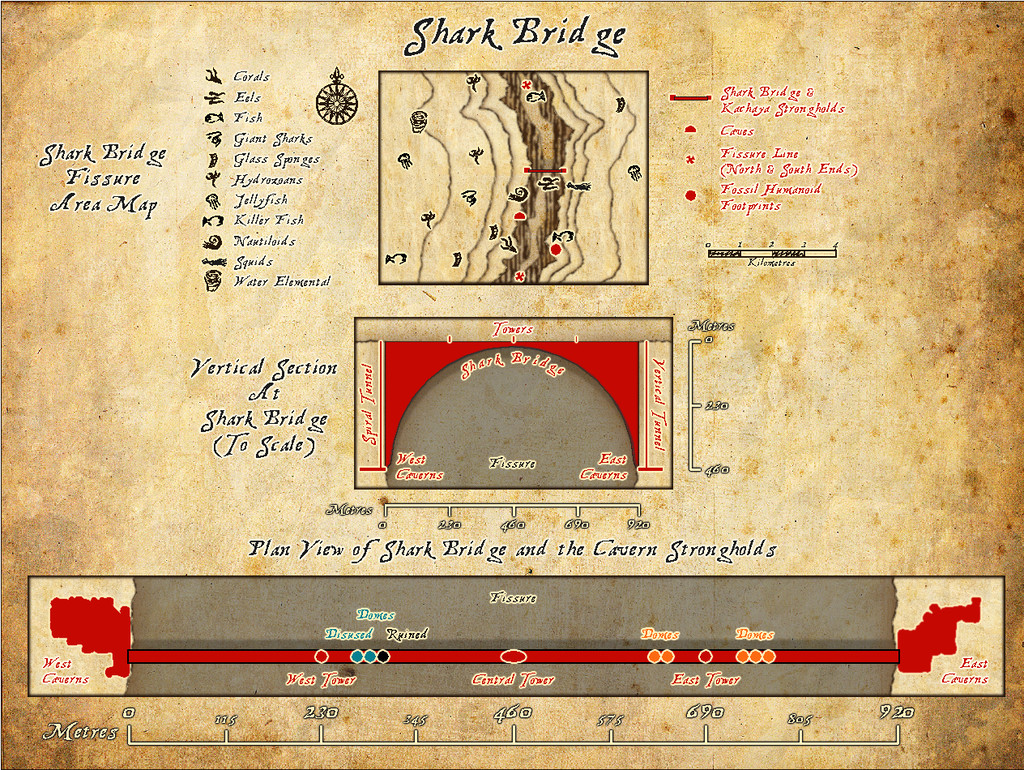
The two versions allow switching between Imperial and Metric scales (via a toggle in the Atlas version, if all goes to plan).
Partly because I'd been mapping extensively in another style for quite some time to reach this point, partly for contrast, and as an opportunity to explore a - to me - new mapping style, I chose the Treasure Maps style from the October 2011 Cartographer's Annual, including its Treasure Map Deadhand font. I rather like this parchment-look texture, where you can't be quite certain it isn't really the surface of an old driftwood plank, with the map lightly cut into its surface in gentle relief.
It has the added advantage of coming with vector symbols drawn in a style that's quite easy to copy, so I drew-up my own not-symbols (they're just drawn shapes in CC3+, not "true" symbols) for the near-sea floor features I'd randomly added from an amended version of my deep-sea encounters & features lists prepared for the original Errynor mapping. As usual, there's more detail in the accompanying PDF and text-file notes.
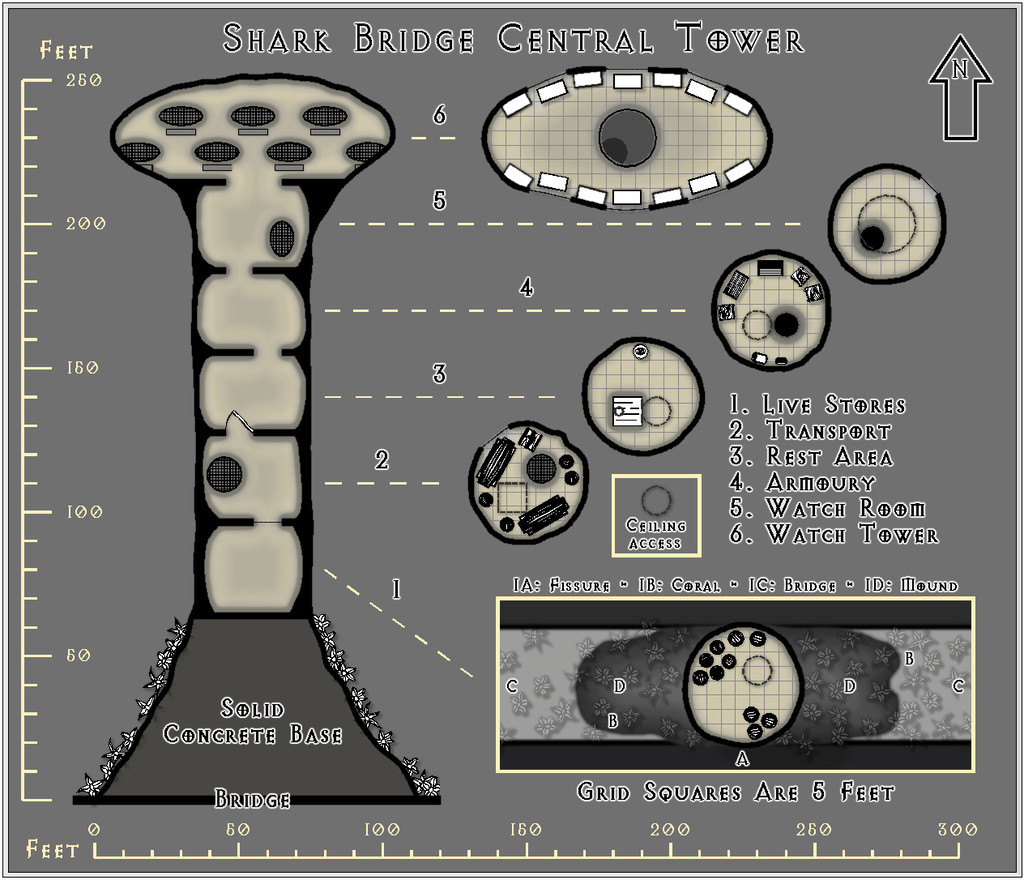
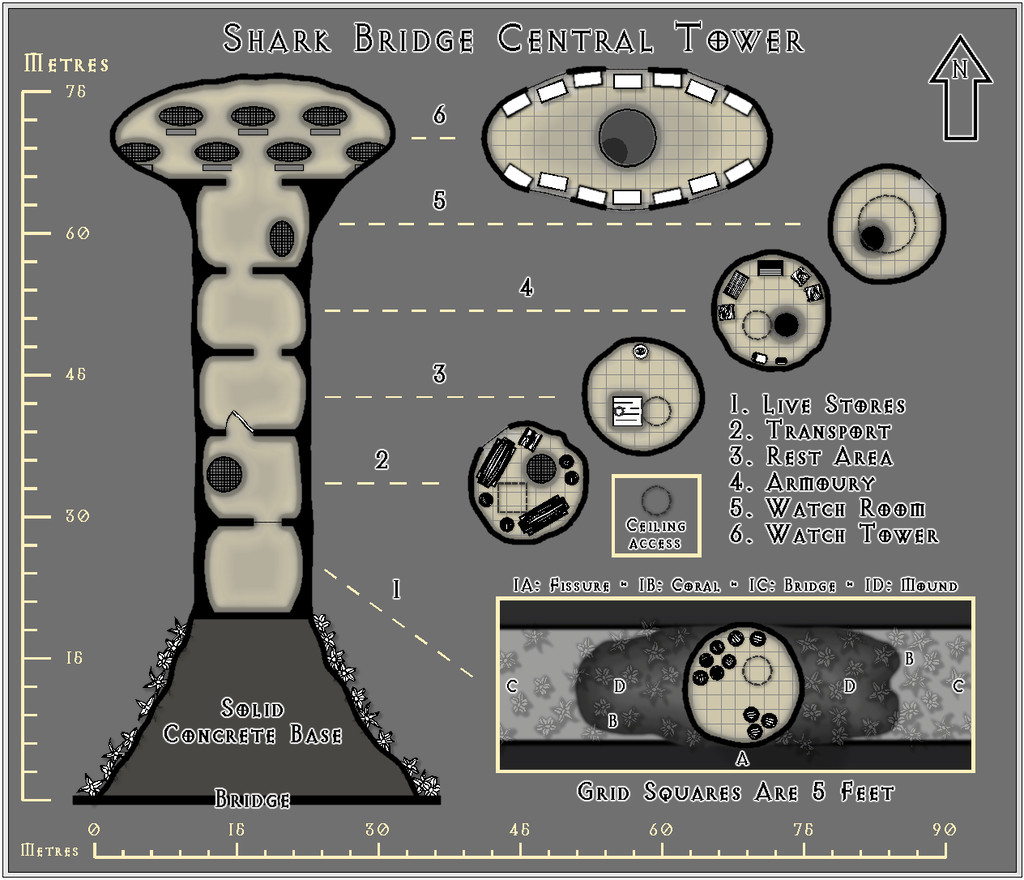
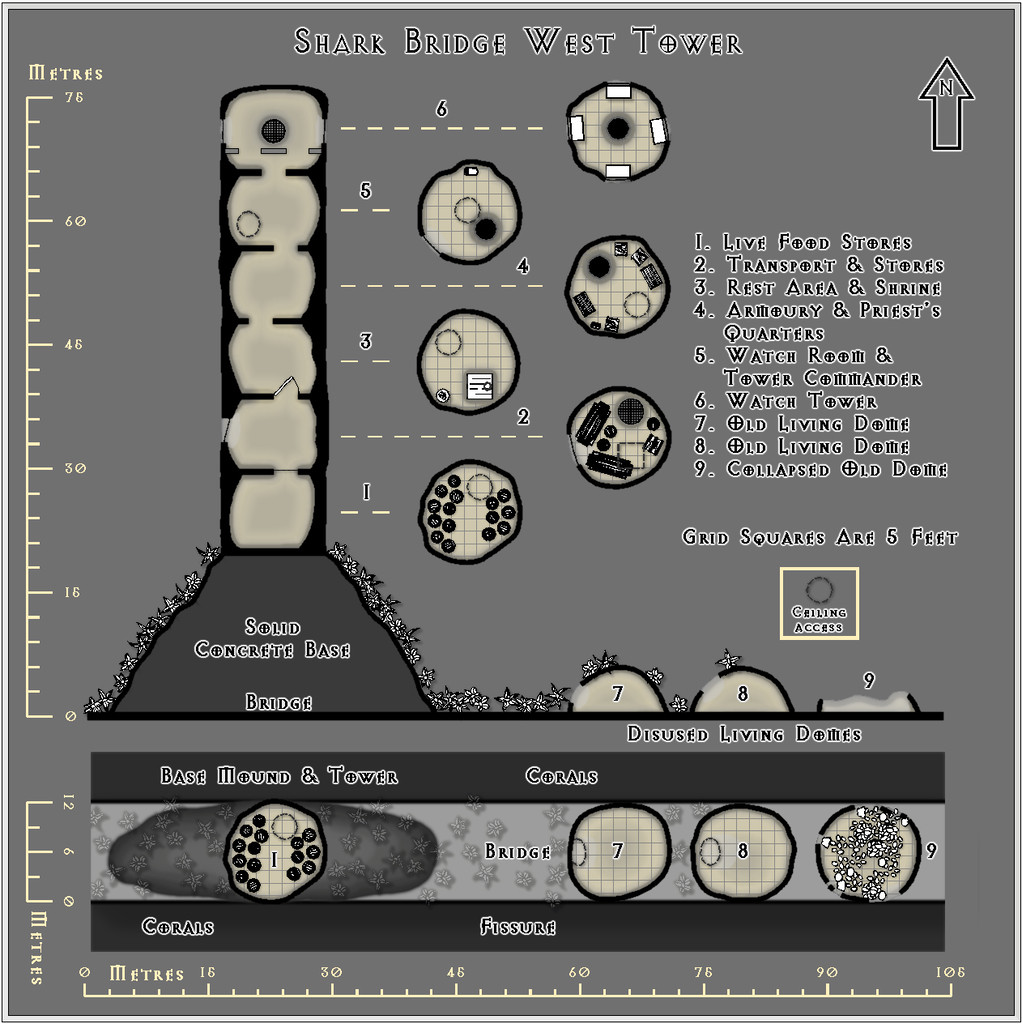
For the detailed mapping, like Aak, I chose another black-and-white style - monochrome vision only in the lightless deep oceans! This time, I went with the Black & White Dungeons style from the December 2010 CA, labelled using the Avalon Quest font from the 2012 CA. Three maps for the towers along the bridge top, each with a vertical section and individual floor plans, plus a toggle option to show Metric or Imperial scale lines (though the grid is standardised at five-feet-squares only):


Then one more each for the West and East caverns respectively (floor plans only), again with the option of alternating scalebars:

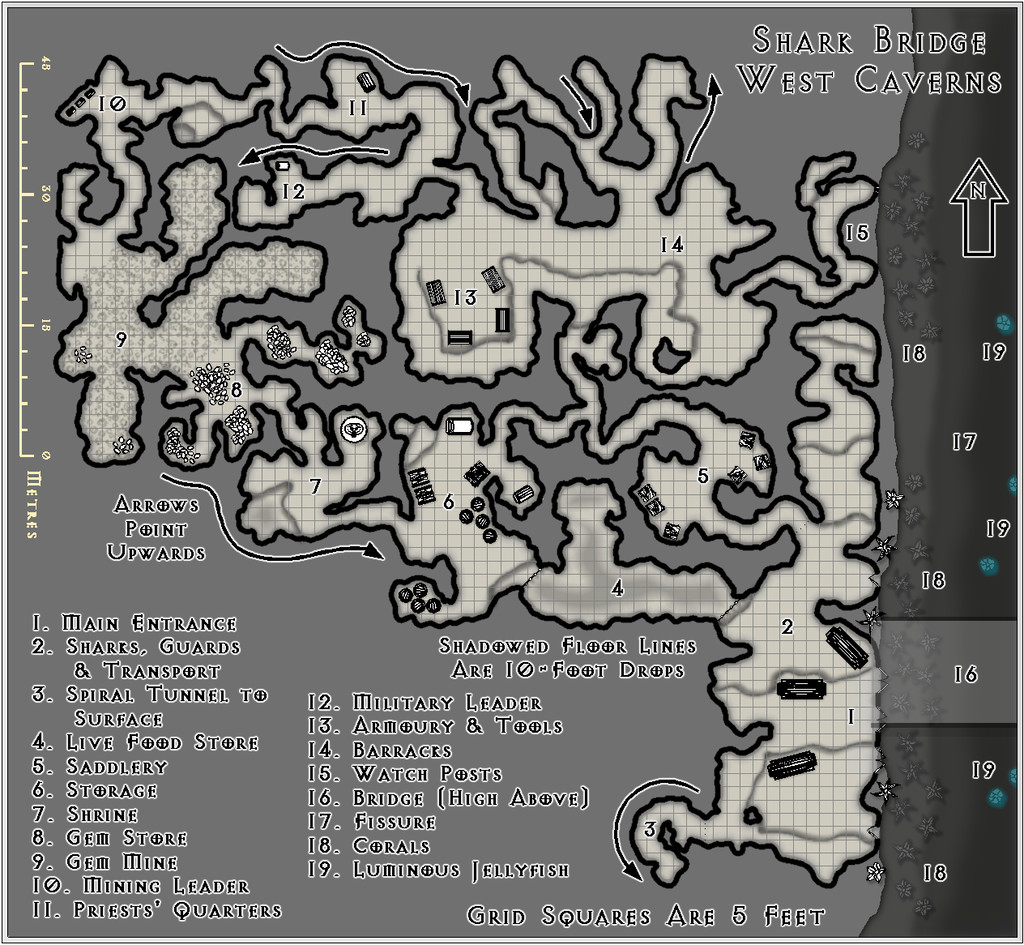
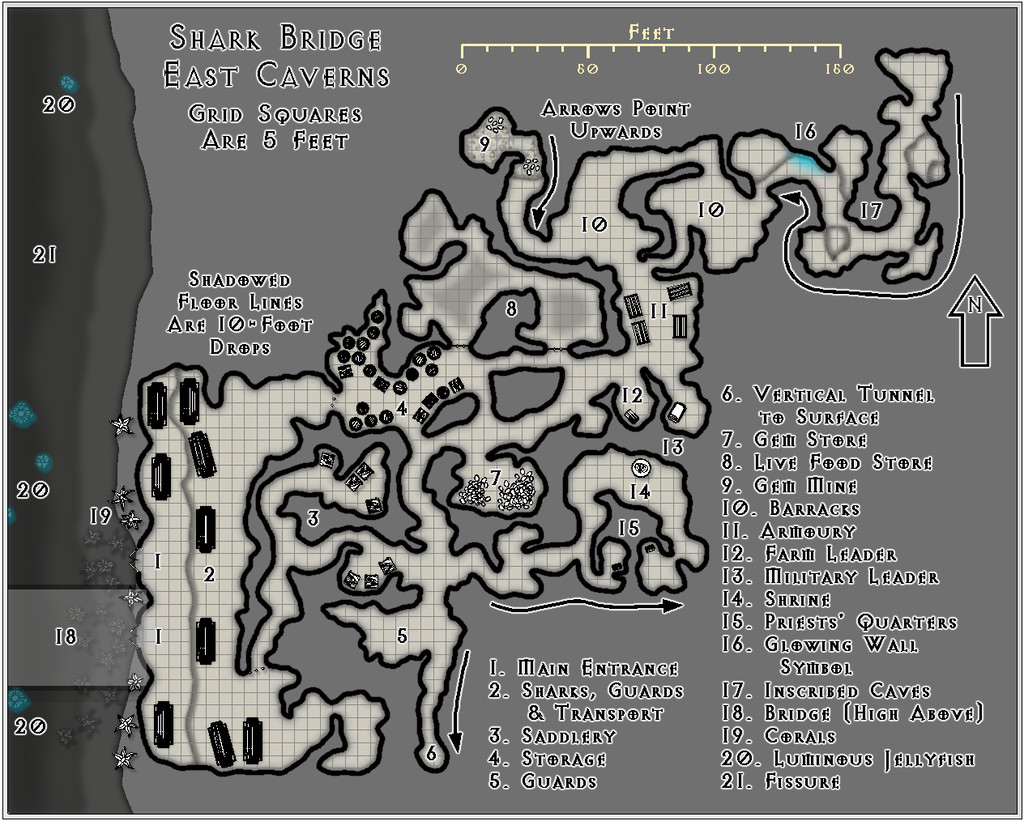

Each separate map comes with its own PDF and text-file notes.
The tower designs were based on my own previous notes regarding Kachayan sea-bed surface architecture, while the Caverns used mildly reworked versions of more random layouts created by the Curufea's Random Cave Map Generator website, like that for Aak village.


![[Deleted User]](https://secure.gravatar.com/avatar/c75d9a245b74d9c59be0999ea81ca541/?default=https%3A%2F%2Fvanillicon.com%2F92add7f8c954488718110edc4896ad39_200.png&rating=g&size=200)

Comments
Wowsers. !
Thanks very much folks!
Maps now added to the atlas. Thanks for the contribution.
Awesome contribution, Wyvern :)
Thanks very much Sue!
And also Remy for getting them into the Atlas so quickly!