

CC3+ City Designer - Help Improving my Cliff Tool

Hello everyone,
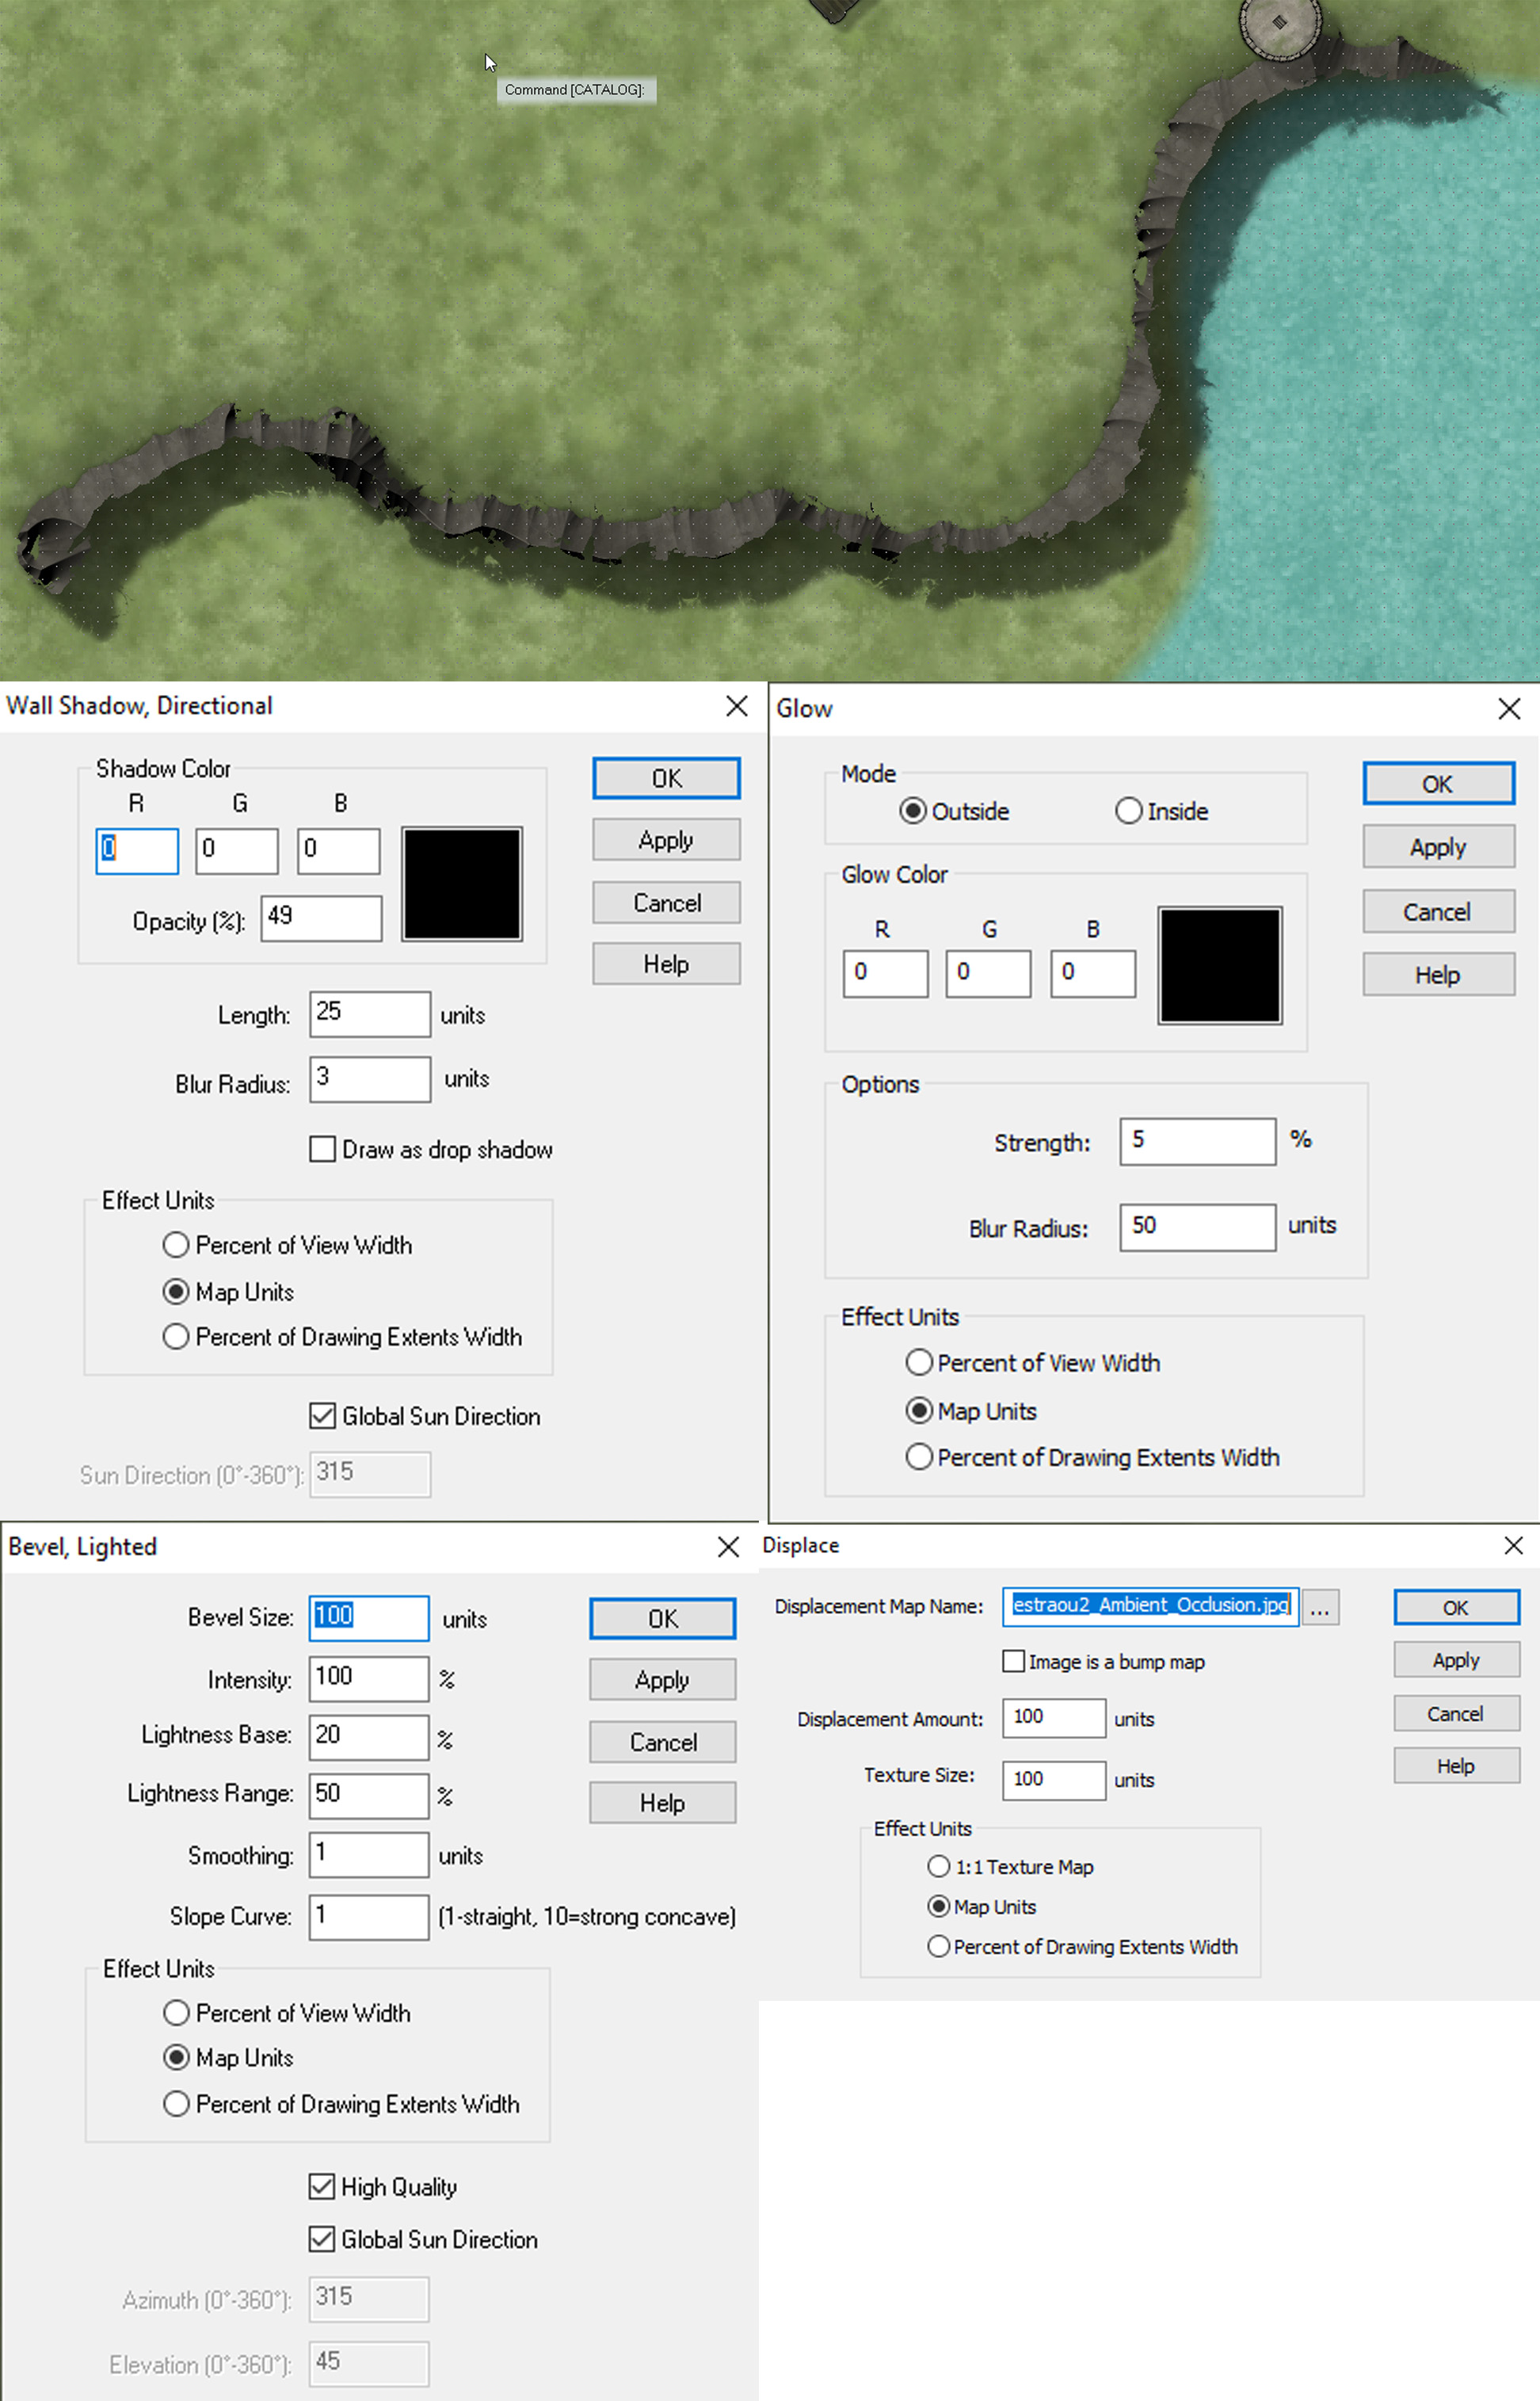
I recently picked up the City Designer, and have wanted to add some cliffs to my map. I am aware of the tutorial here (http://forum.profantasy.com/comments.php?DiscussionID=5869&page=1#Item_0), but that uses symbols rather than a drawing tool. I’ve made some progress (image attached, along with all the filters added to the sheet), but could use some help improving.
So far, I’ve copied the directional lights and glow from the aforementioned tutorial as a base. I then added a displace filter to texture the edges of the polygon (also fractalised some), and added a lighted bevel to make things look somewhere vertical.
However, it seems like the light on the cliff face itself isn’t coming from quite the right direction. Also, I’m not sure I’m using displacement to its full effect (there is no help page).
Any advice would be appreciated, thank you.
Comments
I see what you mean about the light direction, but I can't think why that would be, since the effects that use the global sun direction are both using the global sun direction.
If it is any help at all (and I apologise if you haven't got this year's annual already) I am currently making a set of cliffs as a connecting symbol set. I don't know if it is what you are looking for, but here is a sneak preview.
I did get the 2020 annual. Would mind sharing how you're achieving an effect like that? Not to steal the thunder from your upcoming content. Also I'm not sure I've run into connecting symbols yet. By the name can I assume they link together and generate similar to a road tool or the like?
I've only just picked up CC3+ in the humble bundle a while back. This is my first proper attempt at a map (recreating Sandpoint from Pathfinder), and I'm still learning my way around. I've been searching the forums and youtube, but cliffs seem to be particularly difficult.
The cliffs I showed you are a set of connecting symbols. They will lay themselves down end to end along the line that you draw for your cliffs. These are bitmap symbols, not fills or effects. Some of the city styles have connecting symbols in them if you want to examine the way they work. Usually they are walls, fences, or hedges.
The cliff set I'm drawing for next months issue of the annual has been adapted to close the tiny gaps that sometimes occur between the ends of the symbols at low resolutions by having a small overlap between the individual symbols, so what you see in the image I posted is actually about 8 separate cliff symbols.
But it doesn't seem to be the issue here, as if you look at the beveled area to the right, which is the only place you can see the lower bevel, you can see that it is indeed the lower bevel that is the dark one.
What you probably want to do is to tweak your lightness values. for the effect.
The first part of your comment is correct, adjusting the light direction for the bevel does nothing. The second part is correct! If I change the wall shadow direction it changes the look of the cliff as I would hope. However, it also changes the direction of the shadow that is cast. I think I have a better idea of what is going on now, and how the order of the effects is messing with things:
1. The Glow is providing a small shadow around the shape
2. The wall shadow, directional is casting a shadow to mimic the cliff shadow I want.
3. Displace is hiding part of this shape which causes ...
4. The bevel to build up to a center point, however most of the lower part of the shape is hidden by the displace.
So where I was seeing the bevel going in the wrong direction, in reality, it was coming from both sides to a center apex, and I was just missing the lower half. What I really need then, is to find a way to alter where the apex of the bevel is. If I can shift the visible center to the top edge, I should be able to accomplish the downward slope look I'm going for.
Anyone know how to start on that? Control where the bevel is placed?