Loopysue
Loopysue
About
- Username
- Loopysue
- Joined
- Visits
- 9,982
- Last Active
- Roles
- Member, ProFantasy
- Points
- 9,863
- Birthday
- June 29, 1966
- Location
- Dorset, England, UK
- Real Name
- Sue Daniel (aka 'Mouse')
- Rank
- Cartographer
- Badges
- 27
Latest Images


-
My mountains are dissapearing
You're welcome :)

-
My mountains are dissapearing
Hello Anthonys :)
You are probably right. It is quite likely that the sheet order is to blame for your vanishing mountains.
Most symbols are set to paste themselves onto named sheets. You will see these sheets listed if you click the Sheets and Effects button |CC2SHEETS|. Your mountains are probably on a sheet called SYMBOLS MOUNTAINS, or one of the other SYMBOLS sheets, depending on the style you are using. The order of the sheets is upside down as it is shown in the list. In other words the BACKGROUND sheet is right at the bottom of the stack of sheets as they are rendered. Here is a quick example.
This screen shot shows the SYMBOLS MOUNTAINS sheet just below the BACKGROUND sheet, where the parchment background is visible.
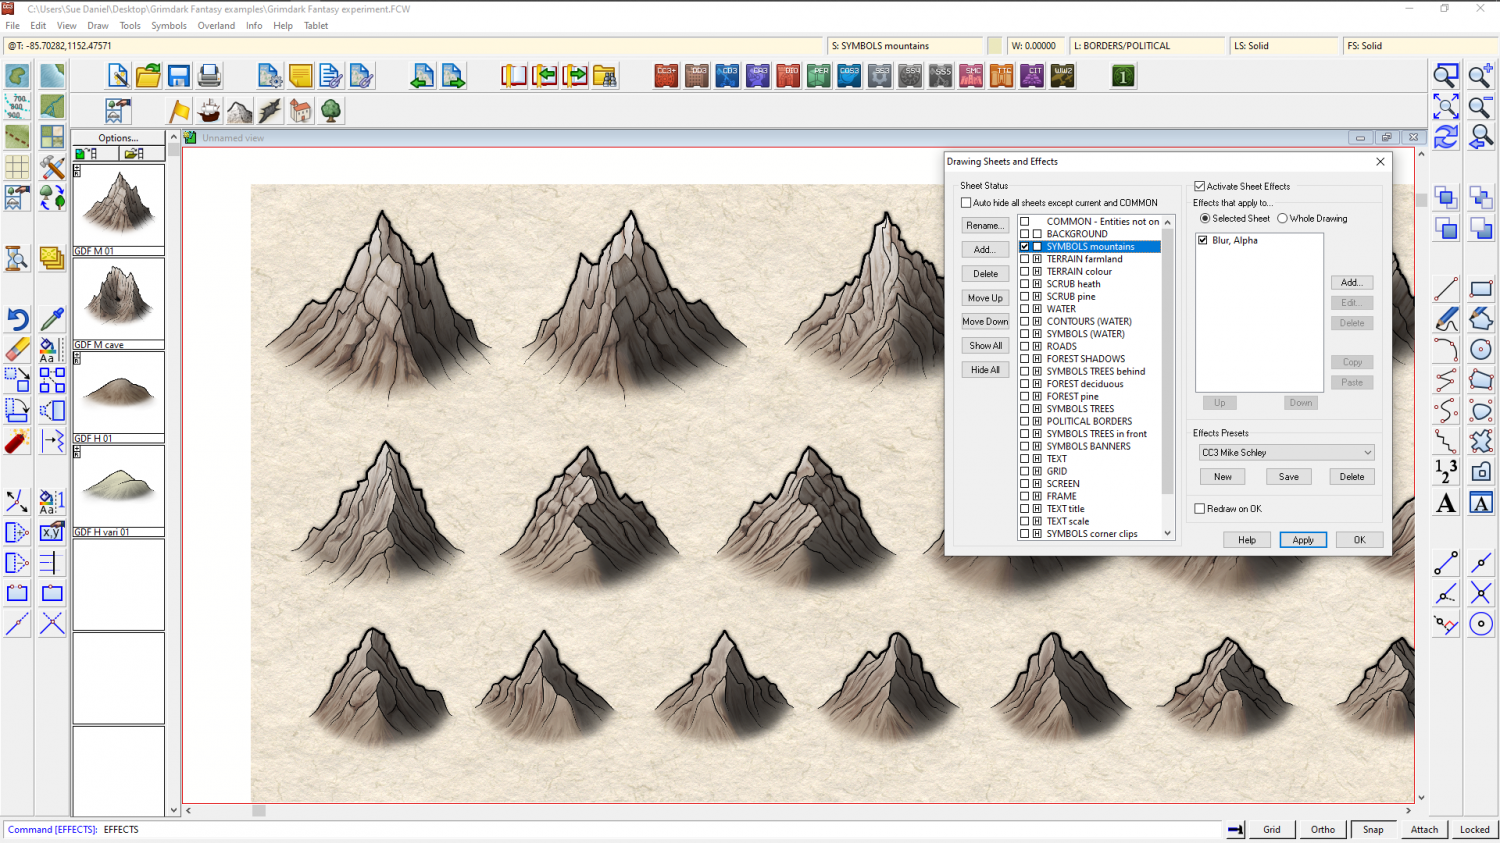
(I have hidden all the other sheets to keep this simple)
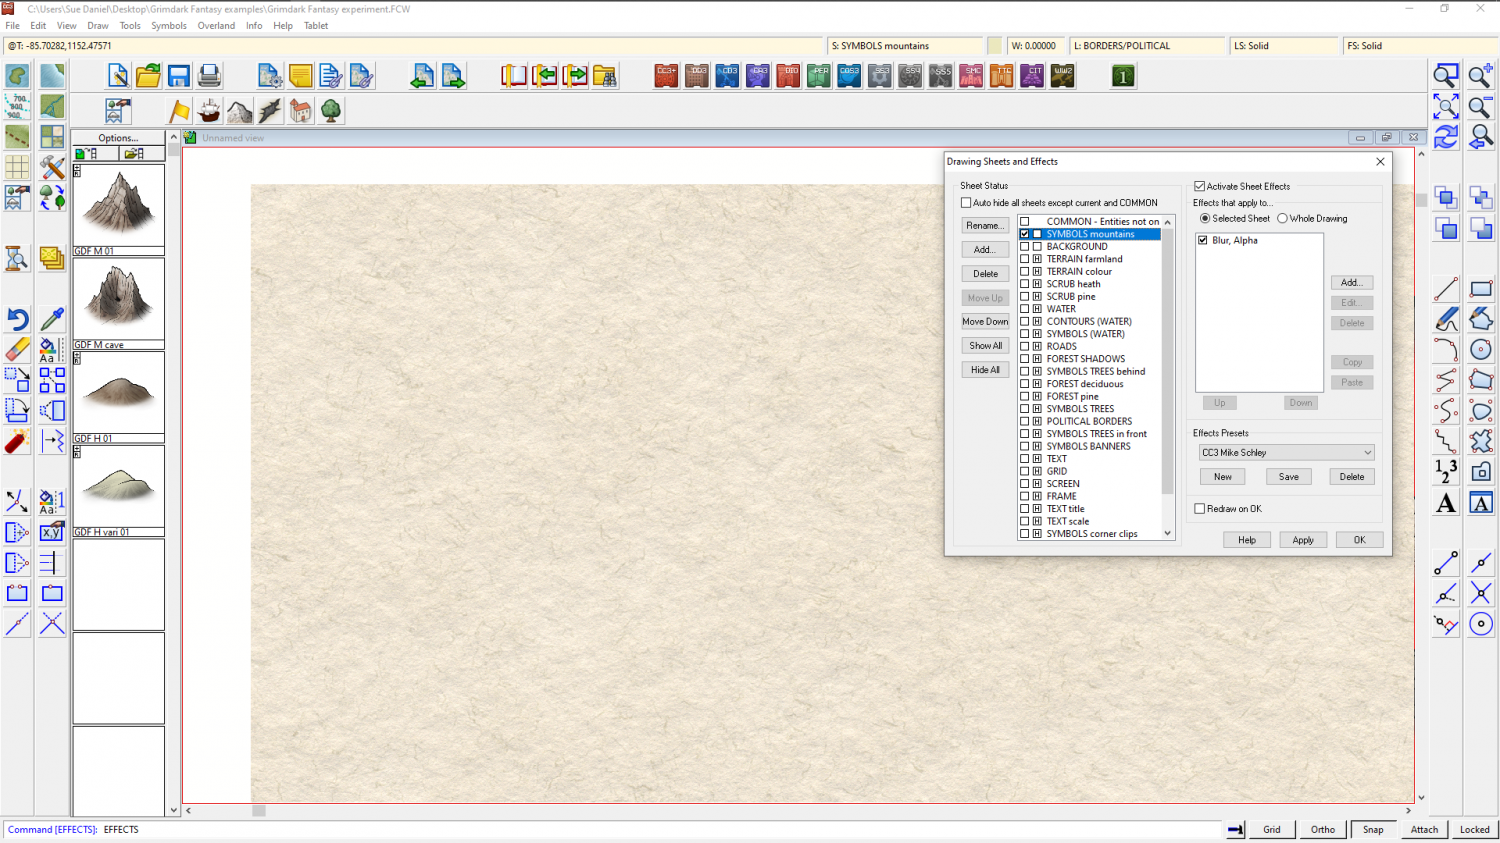
In this shot I have moved the SYMBOLS MOUNTAINS sheet above the BACKGROUND sheet, and the mountains are now hidden behind the background parchment.
If you are unsure which of the SYMBOLS sheets your mountains are on, use the List option in the Info menu to find out.

-
Best way to accomplish "edge striping," but with a tile/bitmap fill?
Hi WizardOfFrobozz :)
The result you got is very typical of using Offset on a very complicated polygon. If you imagine each node projected the set distance away from it's origin at a perfectly perpendicular angle to the line of the original, you should quickly see how a large offset will case most, if not all of them to fly off and cross over each other on the way. That's what causes the triangular shapes.
A suggested cure for this is to copy your landmass onto a new temporary sheet, hide all other sheets, use the SIMPLIFY command to grossly simplify the coastline of the temporary land shape, and then use that as the base of your offset. Once done, you can then moved the offset shape to it's proper sheet.
You might still find there are issues with a few crossed over nodes, but it should be a whole lot easier to use the node editing tools to put them right.
---
SIMPLIFY is a keyboard command you type and hit enter or space bar. The command line will offer a default value, which expresses the minimum space the command will leave between adjacent nodes on the polygon you simplify. You can adjust this by typing a different number and hitting enter. You can also use CTRL+Z to undo the operation and adjust the number again if you wish.
EDIT: actually, I think Monsen's suggestion is better ;)

-
How would you go about creating a stack effect?
I would do it by adding a series of new sheets - one for each step of the stack, and adding a lighted bevel effect to each sheet.
You might have to add a backing sheet between each one if you are intending to use the same texture for each layer. That's an identical copy of the polygon in a different solid colour immediately beneath each level. It prevents something called transparency acne from happening.

-
[WIP] Post Station
I meant that you can't do the same thing with a wall shadow because you wouldn't be able to 'cap' the open doorway lights like you have with the polygon. Your solution was a good one.
Unfortunately, I don't think Colour Key's work on shadow effects. I seem to remember trying something like that myself a while back.
You seem to be working this map on quite a complex level. That's good. I do stuff like that myself quite often. Regarding limiting the glow of that fire to just one side of the wall...
Try adding a new sheet that is just above the floor and drawing a circle of bright red/orange on it, then add an Edge Fade, Inner (EFI) sheet effect from zero to about 20% opacity, and a Blend Mode effect to that sheet in that order. Set the Blend Mode to overlay, or any mode that works to blend the red with the map in a similar way to that glow, then add a Colour Key effect to that sheet between the EFI and the blend mode, and set it to that nasty bright green (so that it doesn't interfere with the red glow in any way), and draw a bright green shape to mask off the bit that invades the wall and the next room.