Loopysue
Loopysue
About
- Username
- Loopysue
- Joined
- Visits
- 9,991
- Last Active
- Roles
- Member, ProFantasy
- Points
- 9,867
- Birthday
- June 29, 1966
- Location
- Dorset, England, UK
- Real Name
- Sue Daniel (aka 'Mouse')
- Rank
- Cartographer
- Badges
- 27
Latest Images


-
Marine Dungeon - further developments
I've started working on the ruined parts first, since that got the most votes on the FB Group poll with shipwreck bits coming in a close second, and I was wondering what you might think of this first draft of a 5ft wide ruined wall connecting symbol. (Hex and oct corners aren't yet finished).
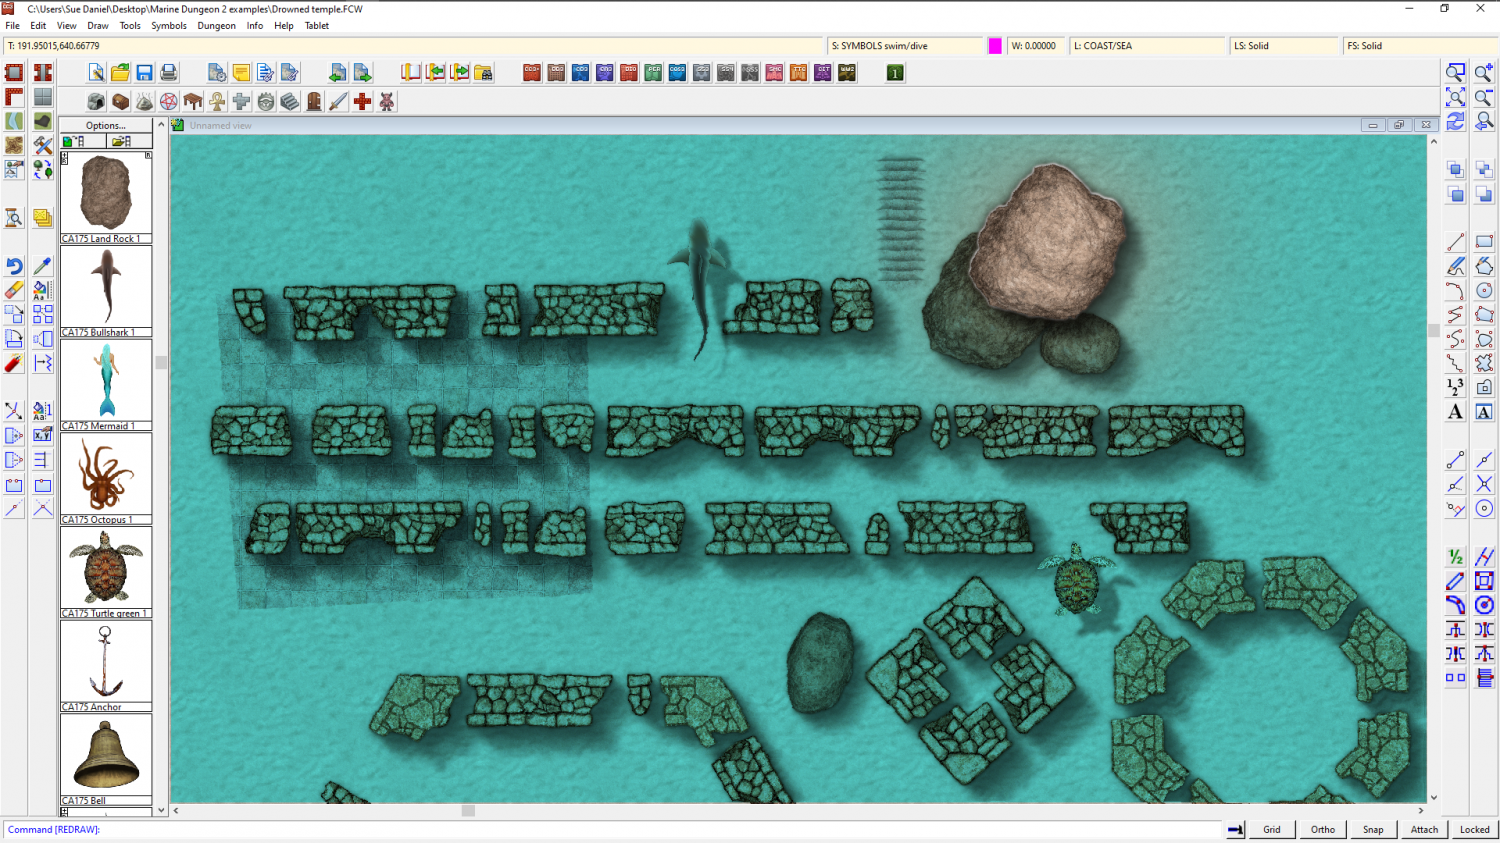
There's no reason it can't also be used in other dungeom maps as a perfectly ordinary ruined wall without all that water.

There will, of course, also be rubble and broken columns.


![[Deleted User]](https://secure.gravatar.com/avatar/c75d9a245b74d9c59be0999ea81ca541/?default=https%3A%2F%2Fvanillicon.com%2F92add7f8c954488718110edc4896ad39_200.png&rating=g&size=200)


 and 4 others.
 -
What printing suggestions do you have for printing maps as art?
At this size it looks good - nice and clear, no fuzzy bits or problems.
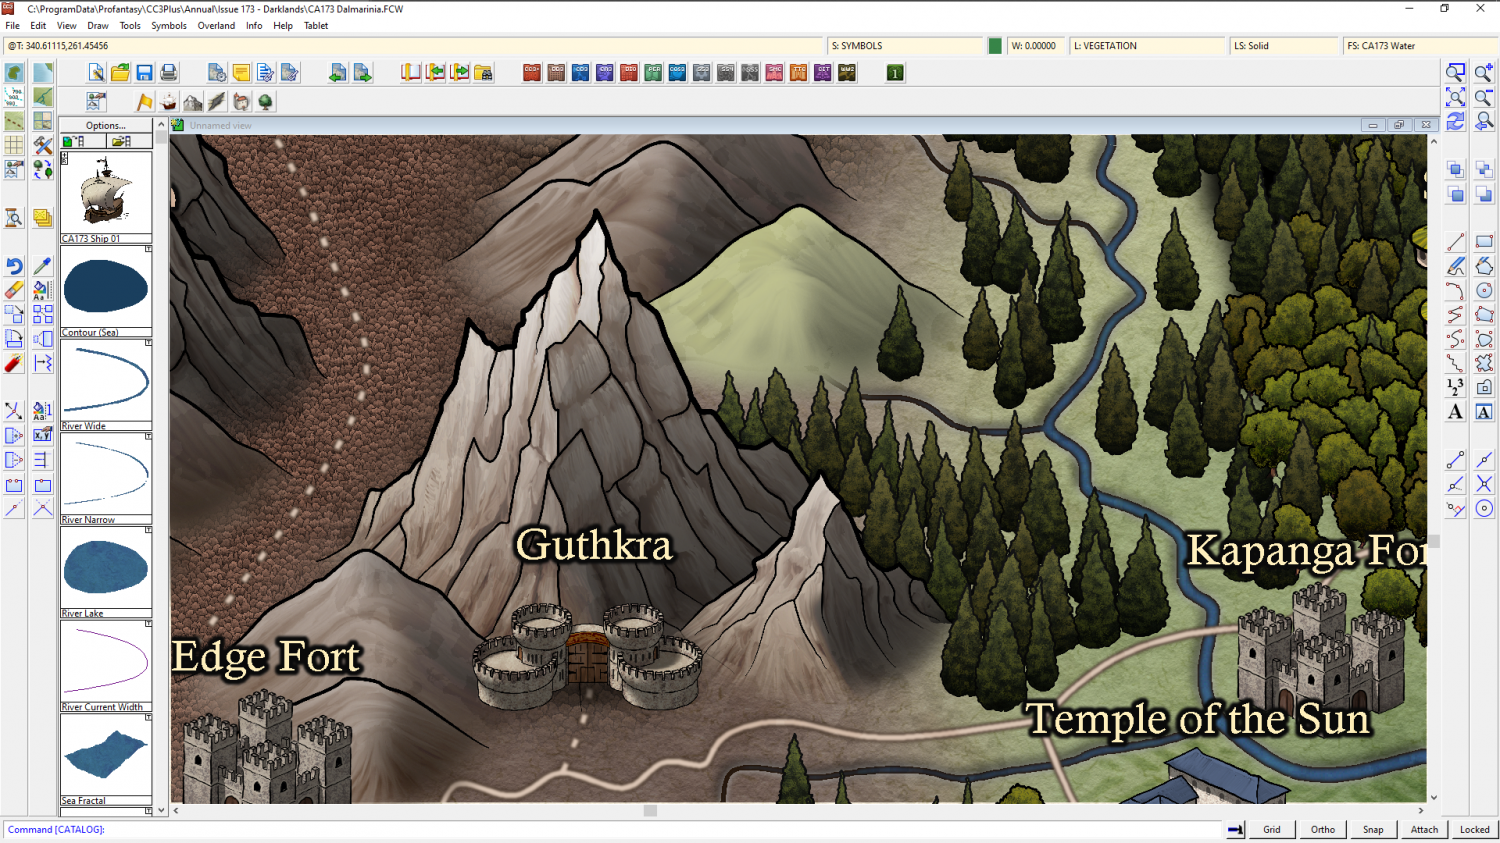
And this is quite large - large enough to print the map so that the mountain is maybe 2 inches tall in itself within the map and it would still look fine.
but if you blow the entire map up to wall size with 6 inch high mountain symbols you will be able to see the jagged edges of the lines, which are the pixels of the original bitmap image.
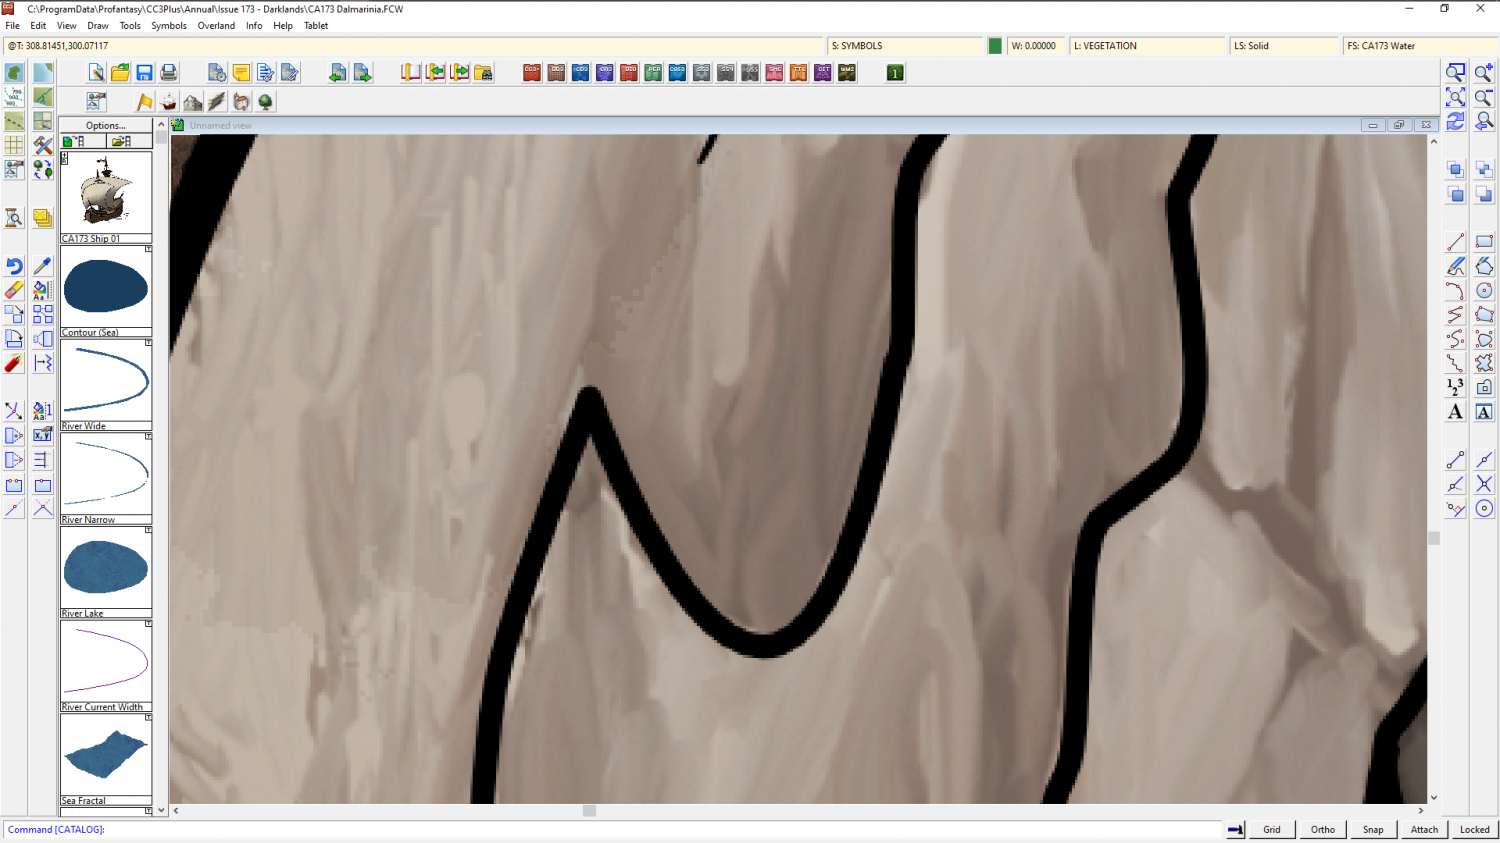
So it is better to print the smaller version nice and pin sharp so your friends can get their noses right up to the map and still be really impressed, rather than them having to stand back a bit so that the pixels aren't quite as noticeable.
As Remy explained above, this is a problem with all map graphics that are bitmap based, whether they are CC3 bitmap symbols, or PS symbols. All bitmap artwork is the same, and you can't get away from it.
The best way to tell if you will get pixelation if you blow your map up to the size you want to blow it up to is to print a smaller section of the map on your home printer at the same scale as you would print the whole thing on the bigger paper. Then you will see if the bitmap symbols and fills look bad.

-
What printing suggestions do you have for printing maps as art?
I would talk to the printer and ask to see some samples. Any printer worth the money will have a set of the same image printed on different media.
For your part, I would make sure that you aren't about to print anything that is too enlarged for it's own good. For example, a lovely bitmap mountain symbol might look fantastic on your screen, even a pretty big screen, but if you print it ten times the size on a piece of paper it will look fuzzy, or pixelated, because there is always a limit as to how large you can print a bitmap fill or a bitmap symbol. A3 and sharp is better on your wall in a nice frame, than A2 and all blurry and pixelated.

-
Tool control background fill color
You're welcome :)
Now click the :CC2PRESETS: button and then click the Attach to Drawing button in the dialog that appears and save the file.
We might never know how that happened, but if you get into making your own palettes in the future those top 2 rows must always be left as they are because they affect the colours of the interface.
In answer to your question - the default palette is used in the vast majority of templates, though there are a few styles that have their own variation of the palette, like the one I just showed you.

-
Trim problems in navigation lines
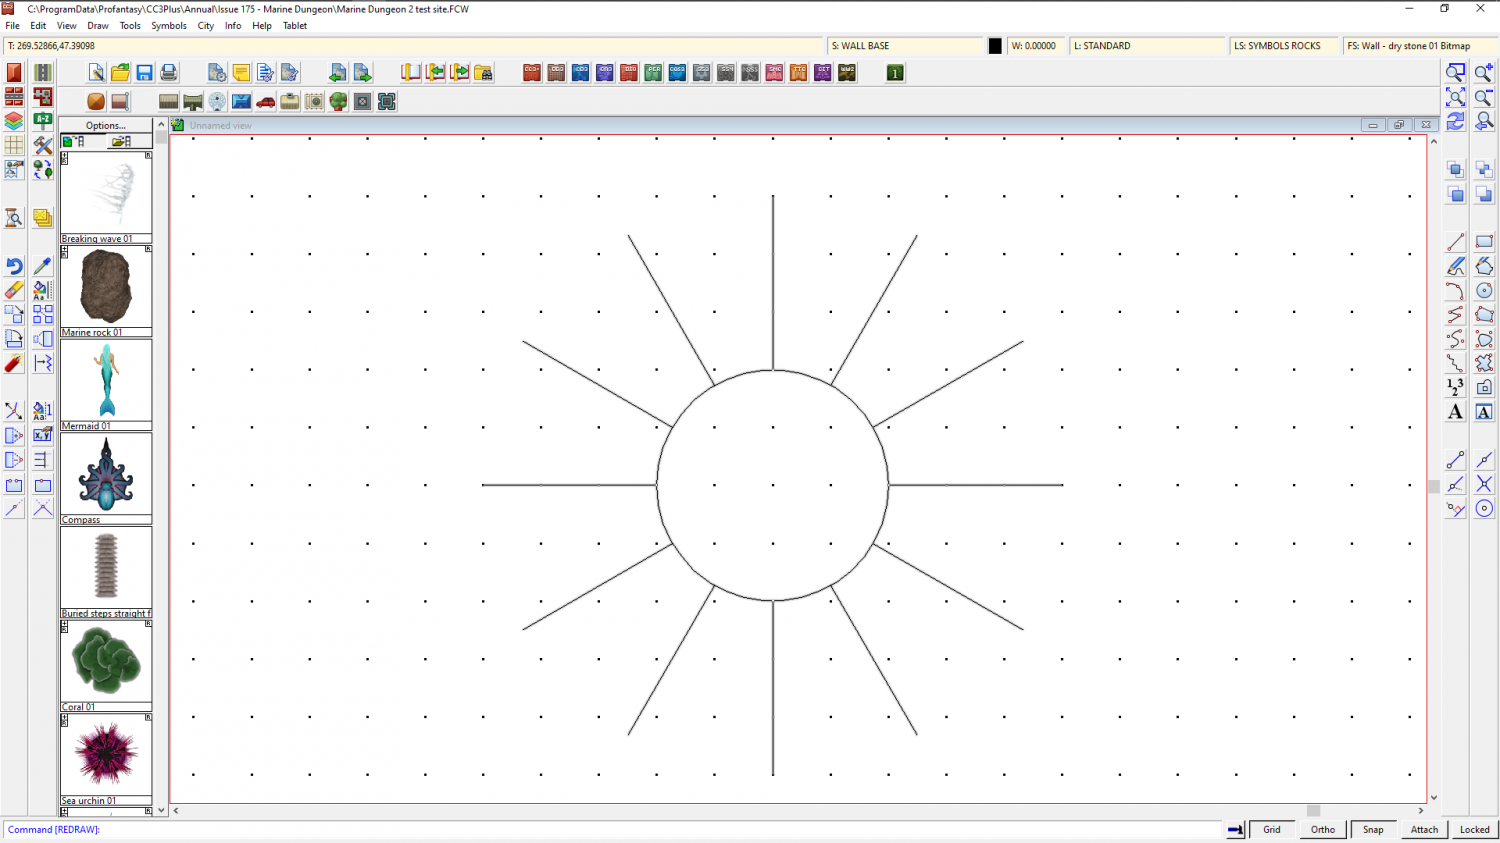
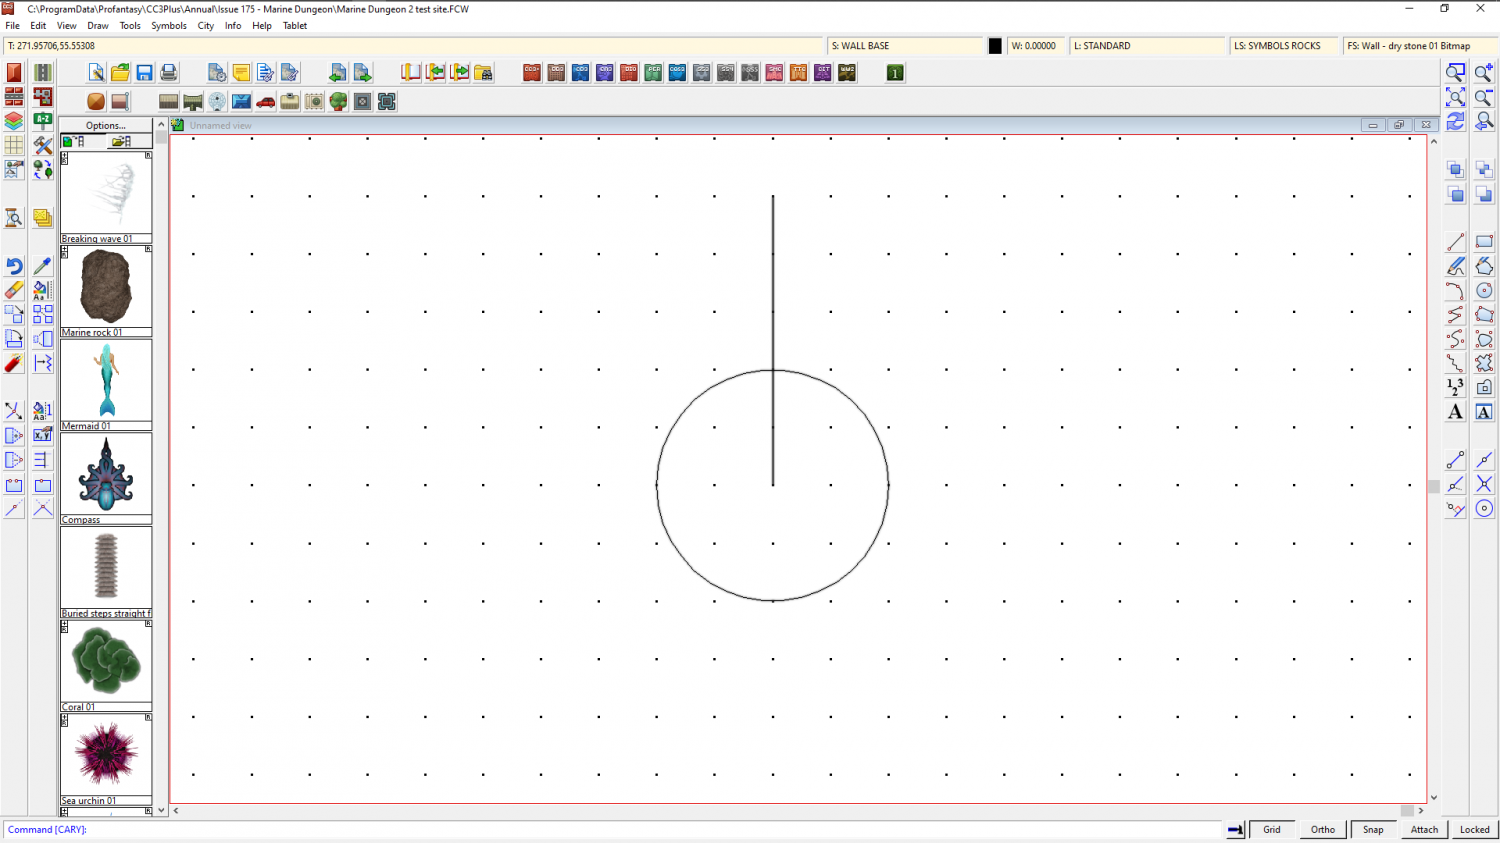
Here is how to make the circular array in a bit more detail than I wrote in the blog.
Start with the circle, and a single vertical line from the centre outwards.
Then right click the copy tool on the right :CC2COPY: and pick Circular Array from the dropdown menu.
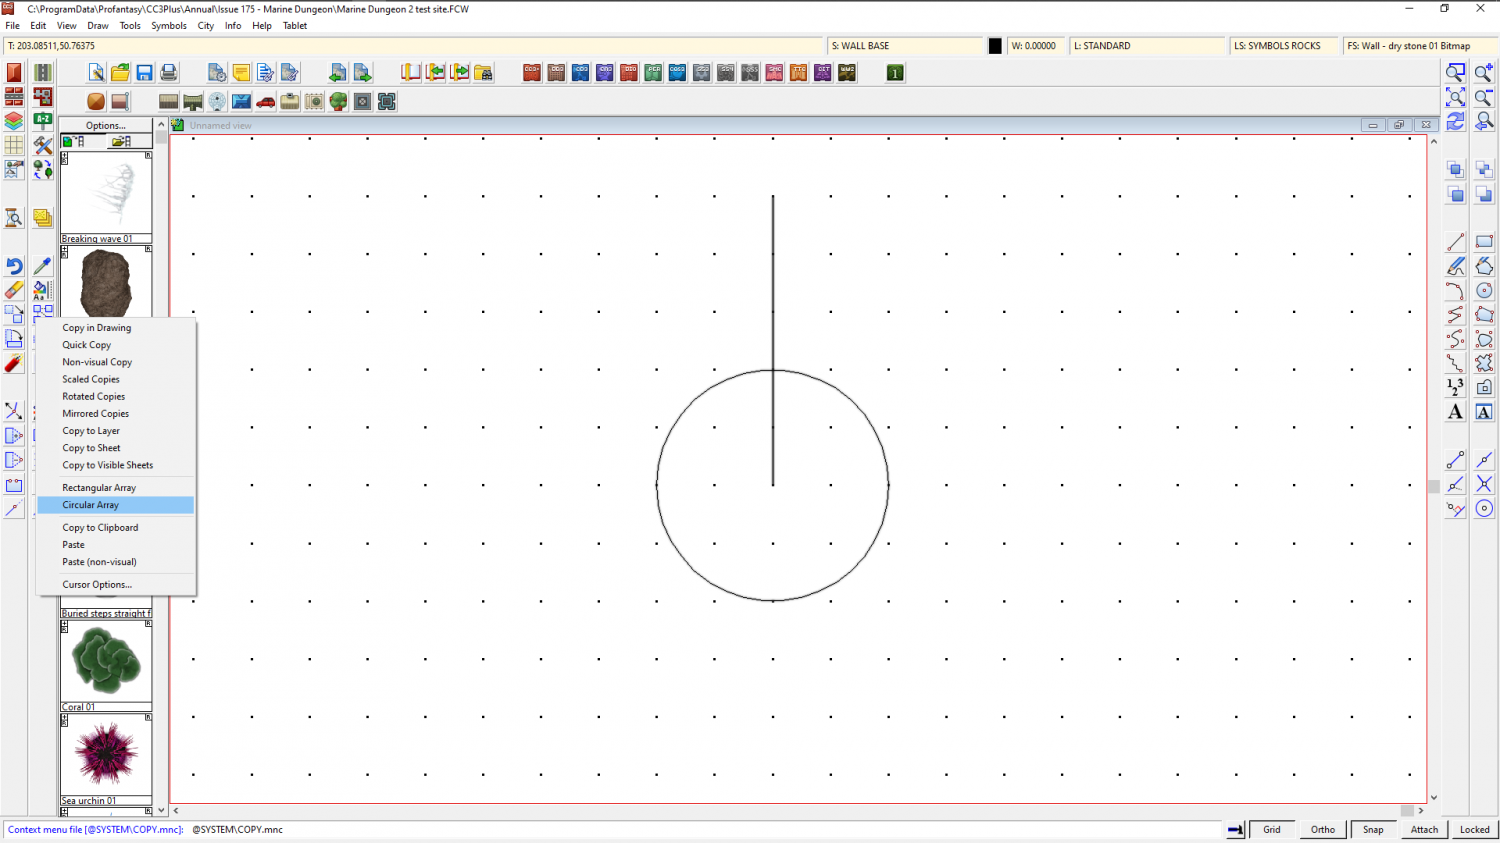
You will have a small square on your cursor. Pick the vertical line with that square and then press D for do it, and read what it says in the command line at the bottom of the screen, where it is asking you for the Number of spokes. I want 12, so I type 12 and press Enter. Then the command line asks you for Number of rings. The default is 1, so just press enter, since we only want one ring of spokes.
The command line should now be asking you for the Array centre, whic is the centre of the circle, so click at the centre of the circle. Since you have SNAP turned on your click will automatically be accurate as long as you are reasonably close to the grid point at the centre of the circle.
Then you will be asked for the Copy Origin, which is again the centre of the circle, so click there a second time.
Finally, the Command line will check the angle you want between the lines of the array. Just press enter, and the array will be drawn atuomatically for you.
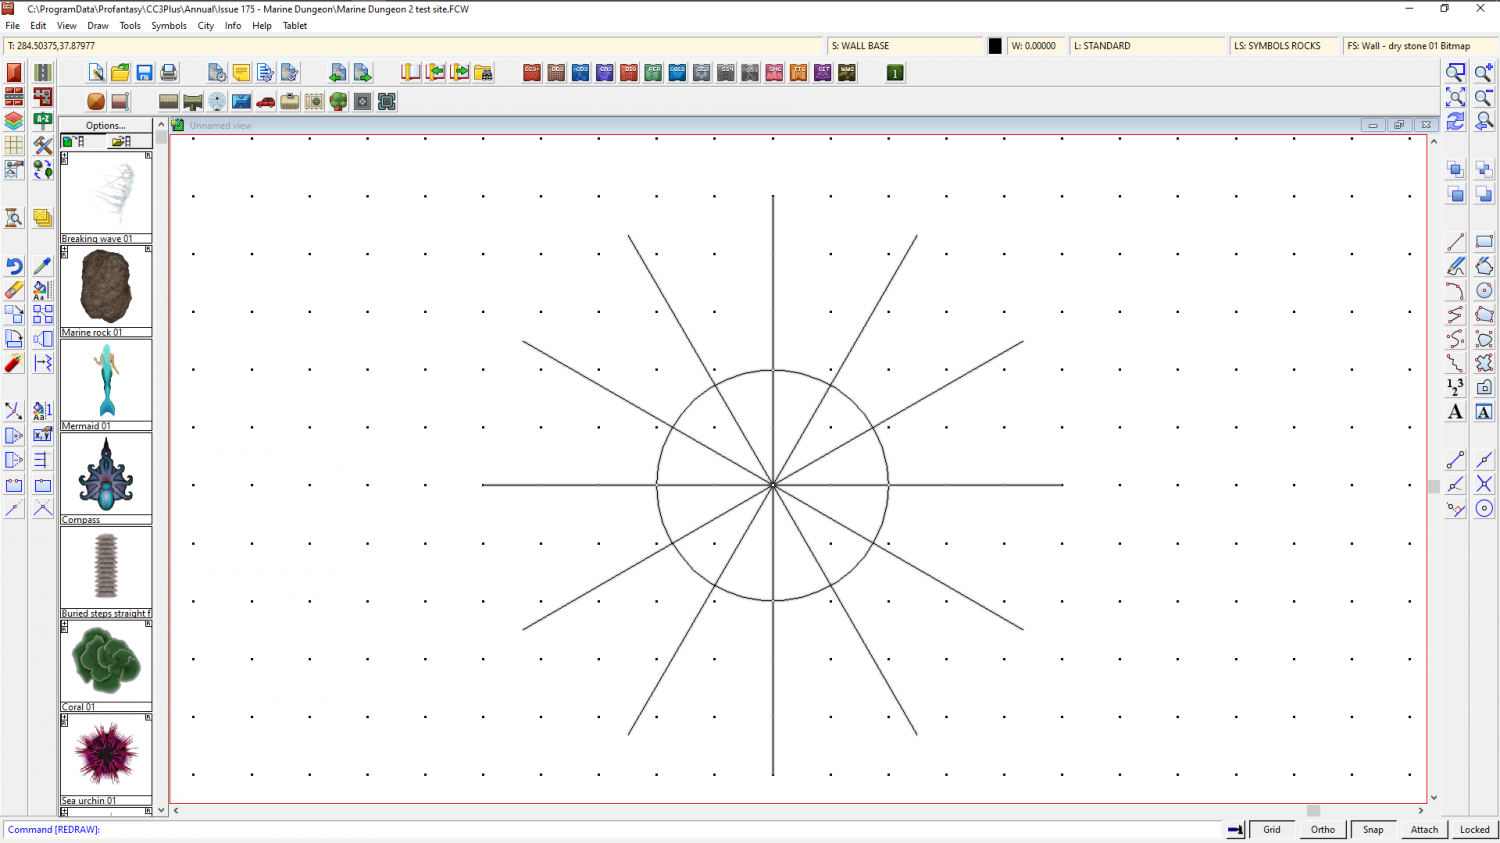
The drawing above shows the resulting circle with 12 equally spaced lines at 30 degrees from each other that all end in the centre of the cricle.
When you use the Trim to command as described in the blog you should be able to trim all 12 to the outside of the circle as described, because they are separate lines that end in the circle, and not only 6 lines that cross the centre.