Loopysue
Loopysue
About
- Username
- Loopysue
- Joined
- Visits
- 9,975
- Last Active
- Roles
- Member, ProFantasy
- Points
- 9,855
- Birthday
- June 29, 1966
- Location
- Dorset, England, UK
- Real Name
- Sue Daniel (aka 'Mouse')
- Rank
- Cartographer
- Badges
- 27
Latest Images


-
Having trouble installing CA 200 Inked Ruins
Yes, this annual issue was not code-signed in the rush to leave for Gen Con, so windows will be a little fussy at installation. Ralf said he would fix it when he got back. I don't know if he already has, but in the meantime if you are talking about Windows Defender you can override that fuss. It's perfectly safe - just unsigned.
EDIT: I just downloaded it again myself. It looks like Ralf has updated it if you want to download it again.
I use Windows Defender myself. As long as you right click the installer and pick Run as Administrator it should be ok.


-
how do I set up two floors when both have the same footprint?
Sorry - I realised that after I posted the comment.
However you can still make a multi-level map from scratch using the New Map Wizard, like this:
New map (chosen style is SS4)
Set your size
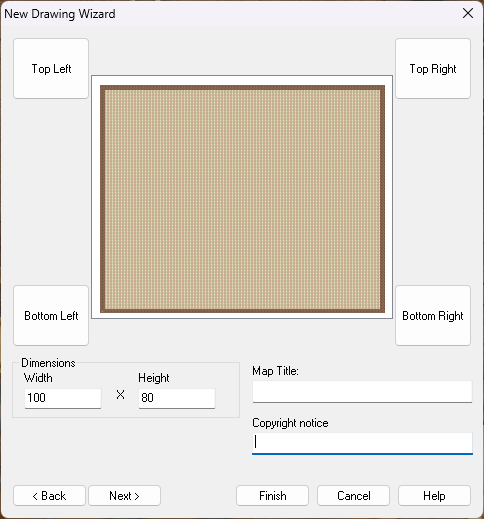
Pick your background
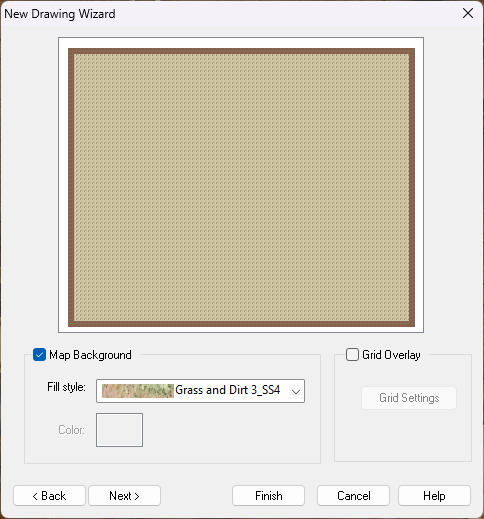
The next dialog is the one where you set up your multiple levels. Consider what naming scheme you want to use, how many levels, and whether you want a roof drawing or not.

When you click finish from this last dialog pick the folder where you want to save your map. Better that it's a folder than just a general destination like Documents. Perhaps a subfolder of documents? The reason it's good practice to use a folder for this map all on it's own is that the moment you click save CC3 will create a collection of hyperlinked drawings in that subfolder. This collection needs to be kept together to preserve the links between them, which is much easier if they are isolated from everything else and all together.
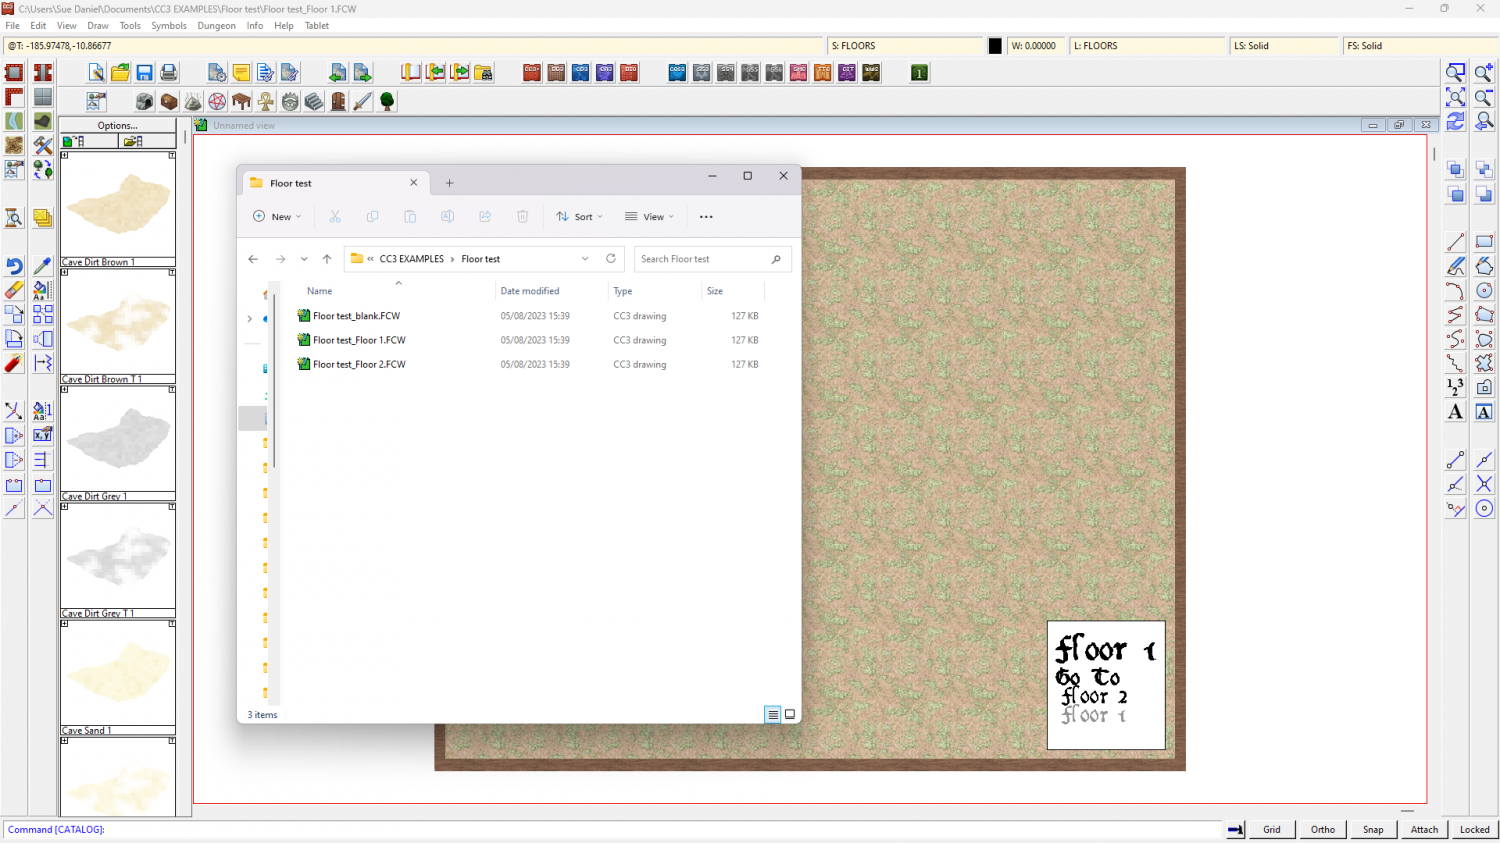
I have a folder called CC3 EXAMPLES in my Documents folder. This is where I keep all the maps I use to illustrate things on the forum here and on the FB page. I've just created a new subfolder in that one called "Floor test", where I will save this file as "Floor test"
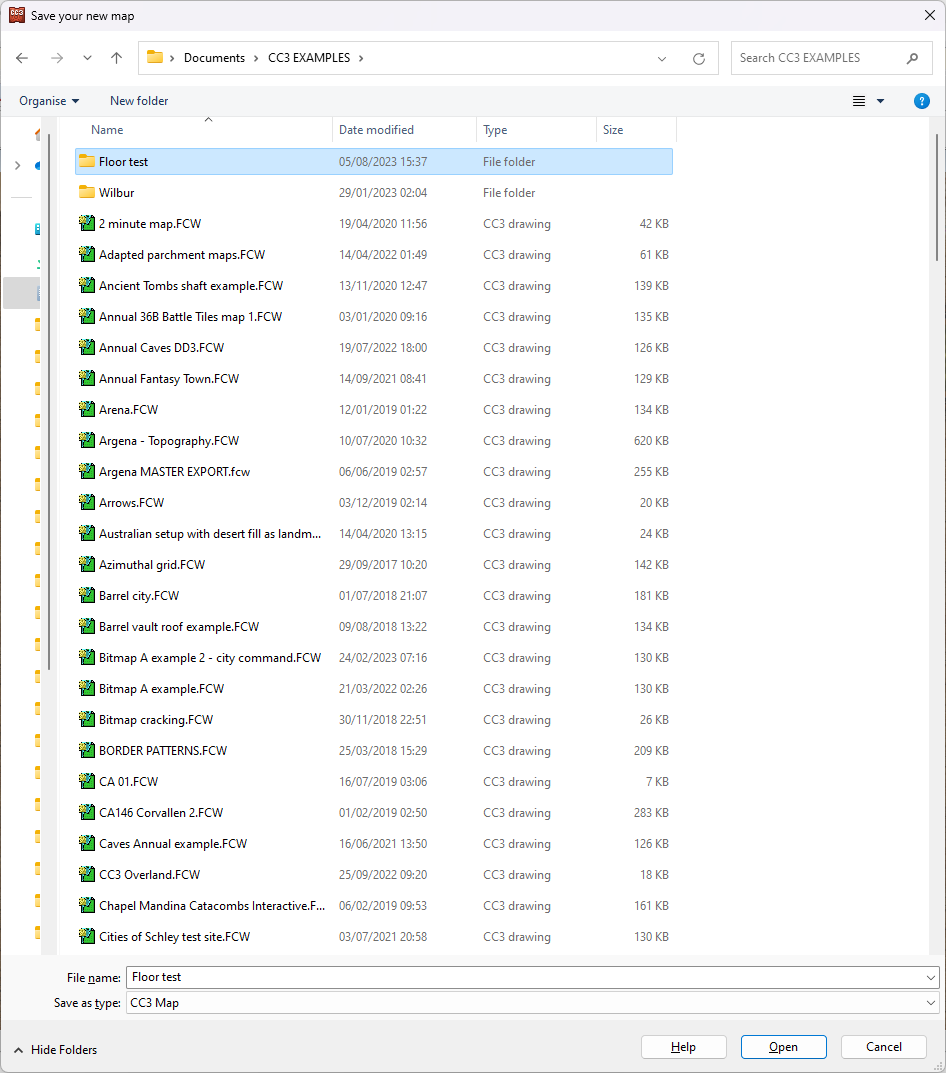
When I open the folder there are 3 files in it. 2 are the 2 levels I wanted and the third is a spare floor level in case I decide to add more floors. I can move between the maps using the hyperlinks in the white box bottom right.
When you get to this point make sure you are on the ground level (Floor 1 in this map) and draw your map just like you draw any other map, and show just the ground floor.
When the map is done hide all but the walls and floors and any stairs you might want to take to the next level, and copy them using the origin as the copy origin.
Then click 'Floor 2'. You'll be prompted to save the map you are leaving. Do so, or your work won't be saved.
When Floor 1 closes and Floor 2 opens you can then paste the walls and floors, using the origin as the paste origin.
Once you have pasted the walls and floors you can use change properties to change floor fills, and edit internal walls as you see fit.
I hope that helps.
-
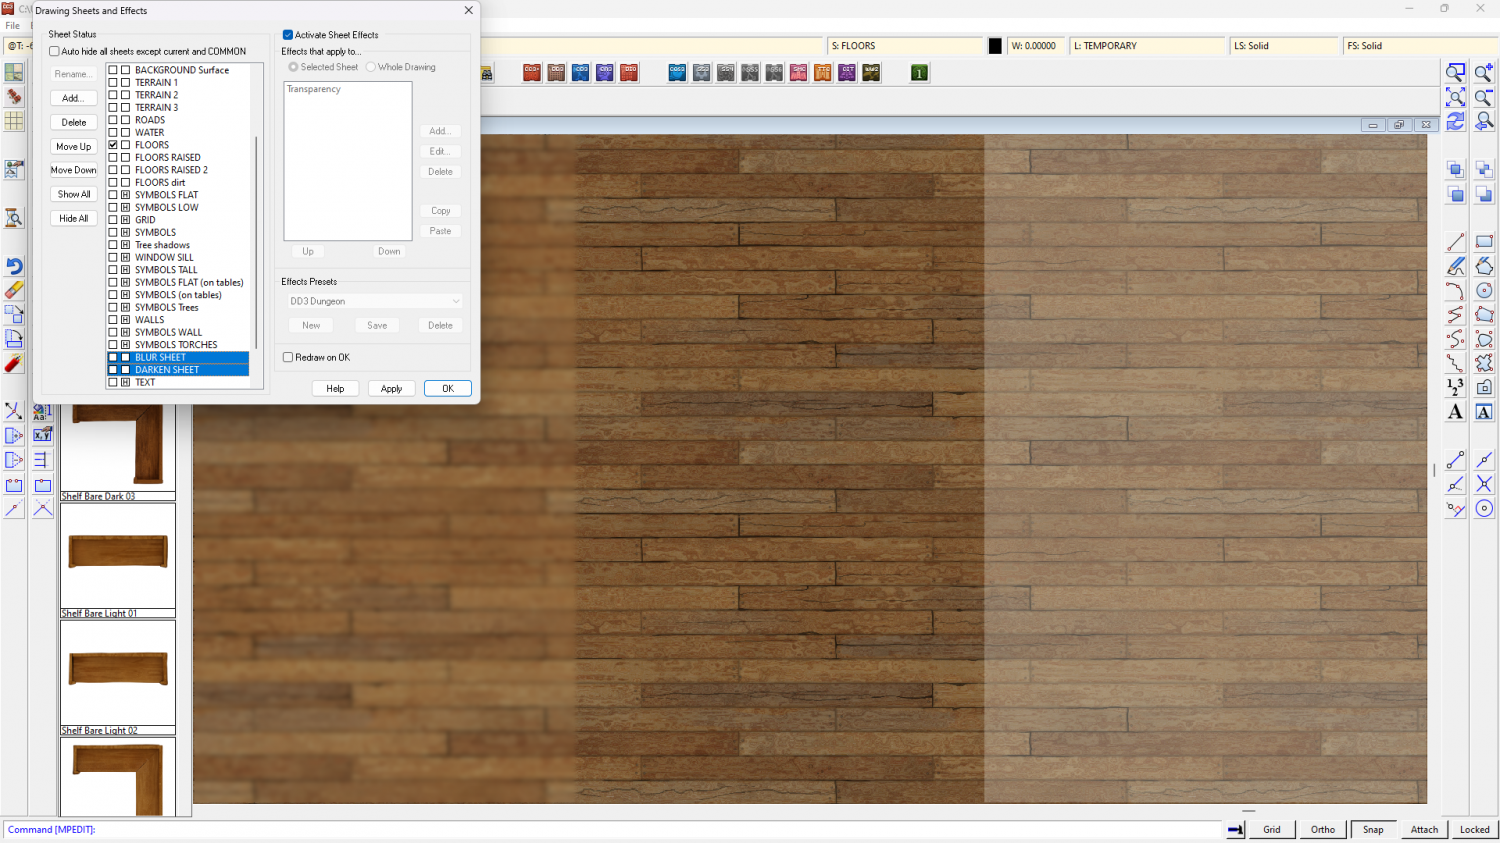
Shading or Blurring a lower floor.
Try adding a new sheet called DARKEN SHEET (or something similar) and put it between the sheets of the lower floor and upper floor. Then add a solid black polygon that covers the entire map and a Transparency sheet effect on that new sheet. Edit the Transparency effect and set the opacity to about 25% and see what you have. You can see the result on the right side of this floor. The central section is the original floor texture.
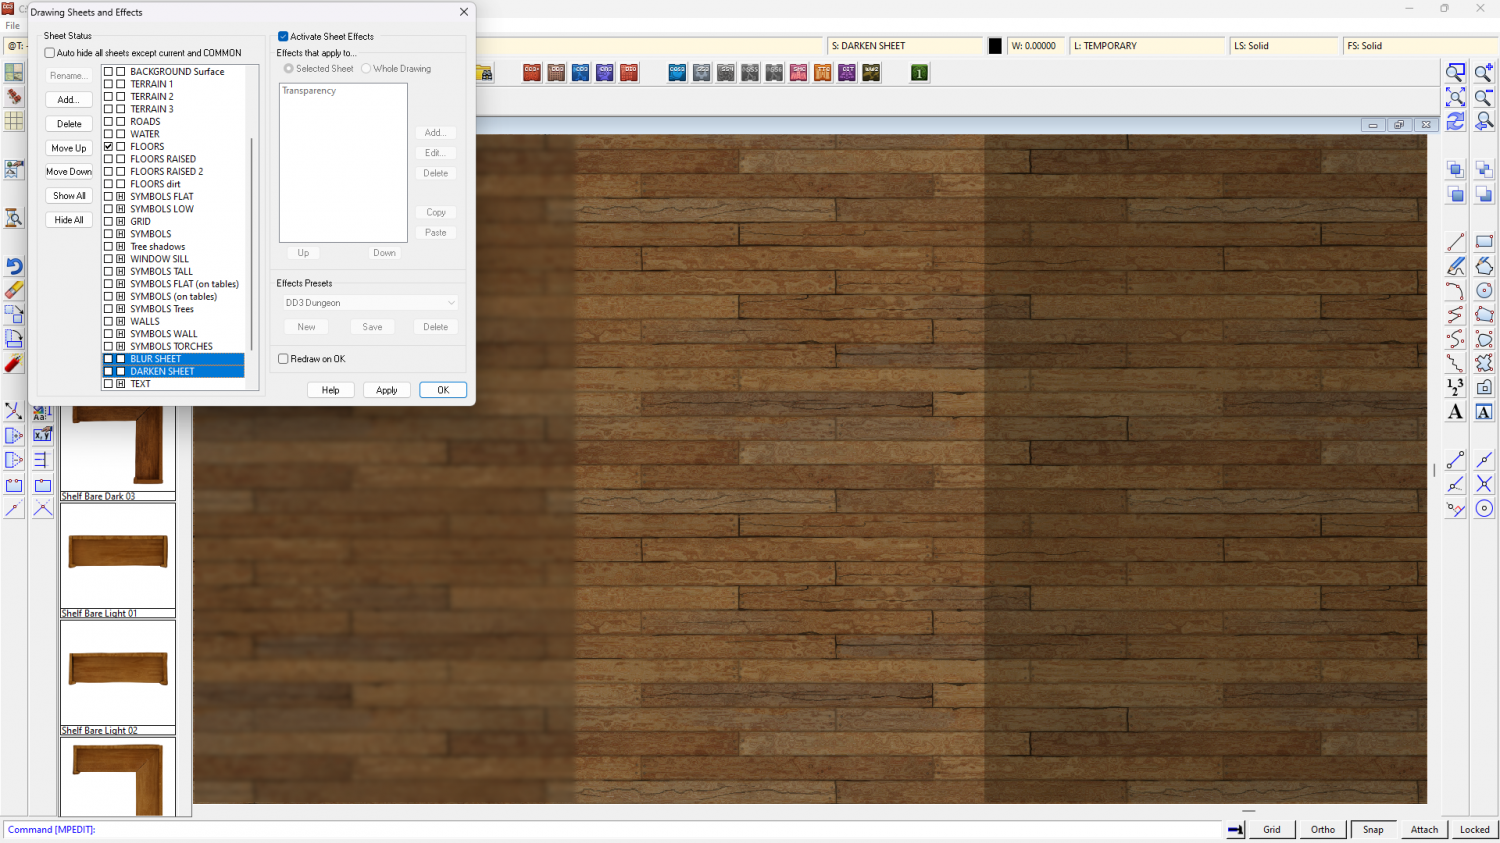
If you want to blur the view as well as darken it, call your new sheet BLUR SHEET (or something similar) and add a Blend Mode sheet effect (instead of the Transparency effect). set the BM effect to Linear Light mode and about 15% opacity. Then add a Blur sheet effect below that. You will only need a very tiny amount of blur. You can see the result of the BLUR SHEET on the left hand side of the map in the screen shot above.
Some people prefer to make a sheet that lightens the view rather than darkening it. If that is what you prefer just use Change Properties to turn the black polygons white. This is what both those sheets do with exactly the same sheet effects on them if all you do is change the black polygons to white.

-
conflict with explorer.exe during setup
Thanks for letting me and others reading this thread know what happened.
I'm sure TS will be able to sort it out quite quickly. They're at Gen Con right now but the response is normally very fast.
-
CC4?
We are working hard on it. However, since my part in the whole thing is creating new assets for just a bit of it I can't really throw much light on anything else.