


Loopysue
Loopysue
About
- Username
- Loopysue
- Joined
- Visits
- 9,970
- Last Active
- Roles
- Member, ProFantasy
- Points
- 9,853
- Birthday
- June 29, 1966
- Location
- Dorset, England, UK
- Real Name
- Sue Daniel (aka 'Mouse')
- Rank
- Cartographer
- Badges
- 27
Latest Images


-
How to Represent Elevations in a Top Down DD3 Map?
Using sheets is probably the best way if you are quite happy to draw the shaded extent as a polygon shape.
The global sun only affects:
- how CD3 buildings are shaded, and
- which direction the shadows fall from objects on sheets with Wall Shadow, Direction sheet effects.
It doesn't affect the artificial shading you add using a sheet with black polygons on it. That sheet might have a Blur effect, and then a Blend Mode effect that is set to multiply. Transparency is controlled from within the Blend Mode.
---
An alternative that isn't quite so flexible is to use a Bevel Lighted on a sheet on which you then draw polygons of texture or one of the semi-transparent fills. If you adjust the bevel to a huge width and use masses of smoothing you can get recognizable hills. However, the width of the shading won't vary.


-
non-rectangular stairs in dungeons
Hi Mika :)
There is no right or wrong way to do a thing in CC3. Only variations on a theme.
For my suggestion I have started with a standard DD3 template for this map (using one of the dirt bitmaps as the background), and prepared it by adding 10 new sheets. 9 of those sheets are STEP sheets, and one is a SCREEN sheet. This last sheet is designed to hide things that fall outside the area of the map. Some styles have it, but some don't. My copy of the DD3 template doesn't.
I didn't use the FLOORS sheet at all, but drew the mass of the rock directly onto the FLOORS MASK sheet using the freehand drawing tool. I modified the sheet effects to make the edge more prominent by adding a Bevel, Lighted, and strengthening the glow that was already there.
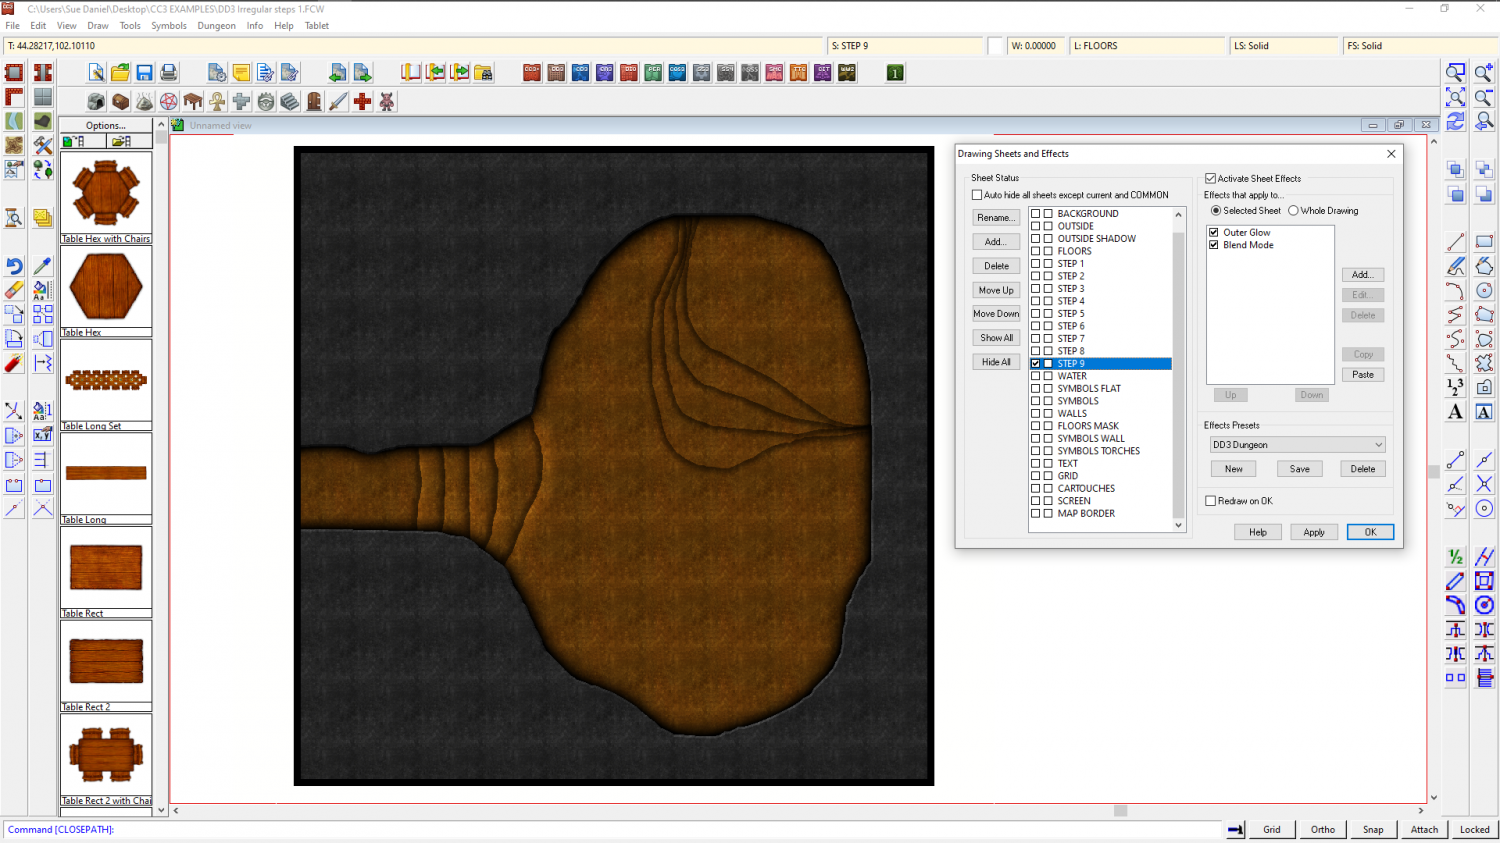
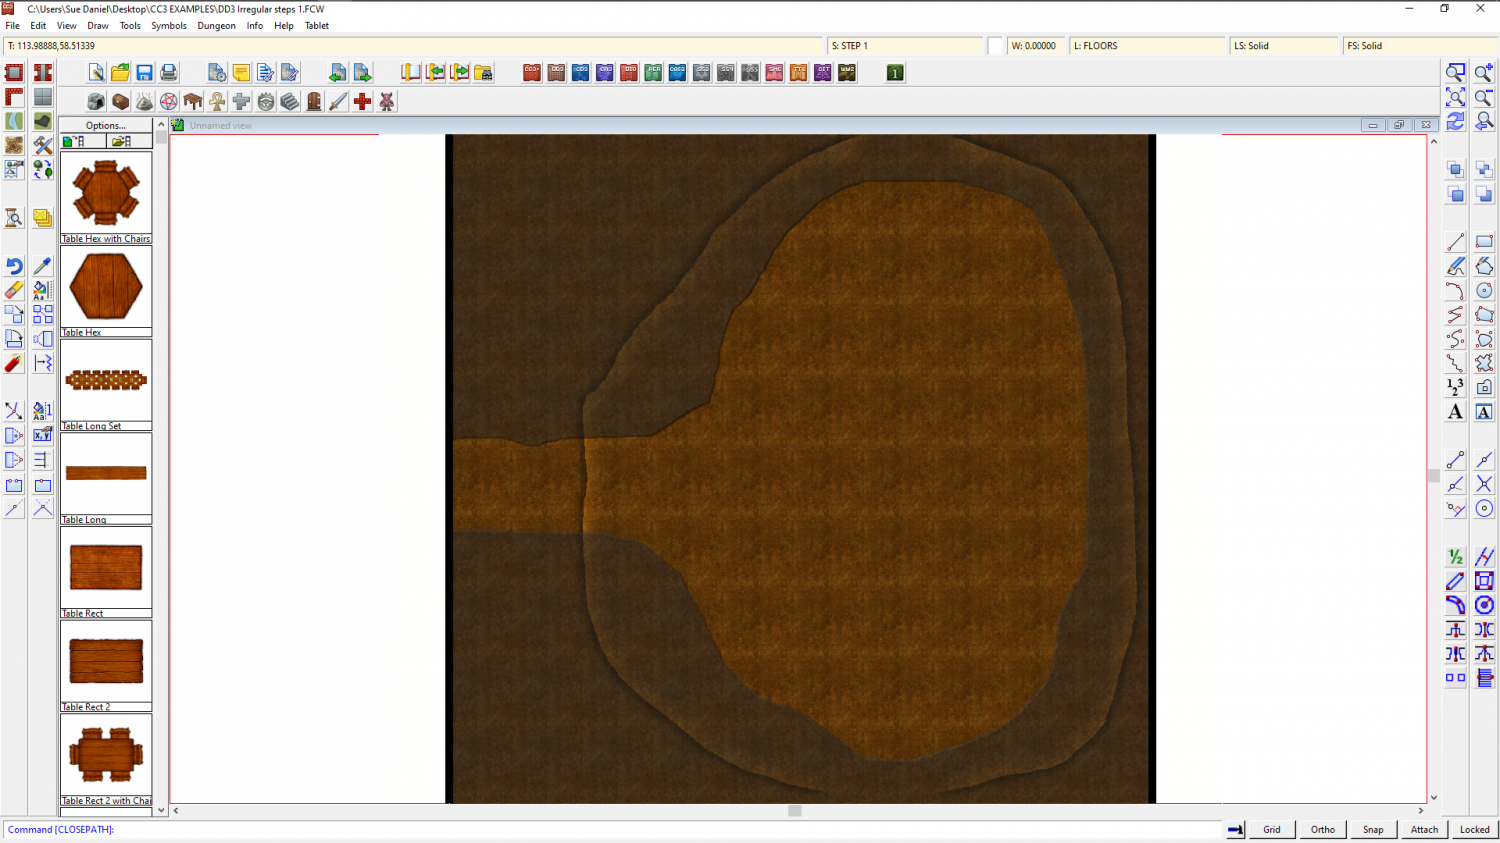
Each of the 9 steps is a simple white polygon drawn with the freehand drawing tool, such that it covers the entire extent of the level it represents and extends under the edge of the FLOORS MASK. Here is one of the step shapes with effects adjusted to show it's extent.
The freehand drawing tool doesn't create a polygon all by itself. You have to draw the outline a bit like you would on a piece of paper with a pencil, and then use Path to polygon from the right click menu of the Fractalize tool to convert it.
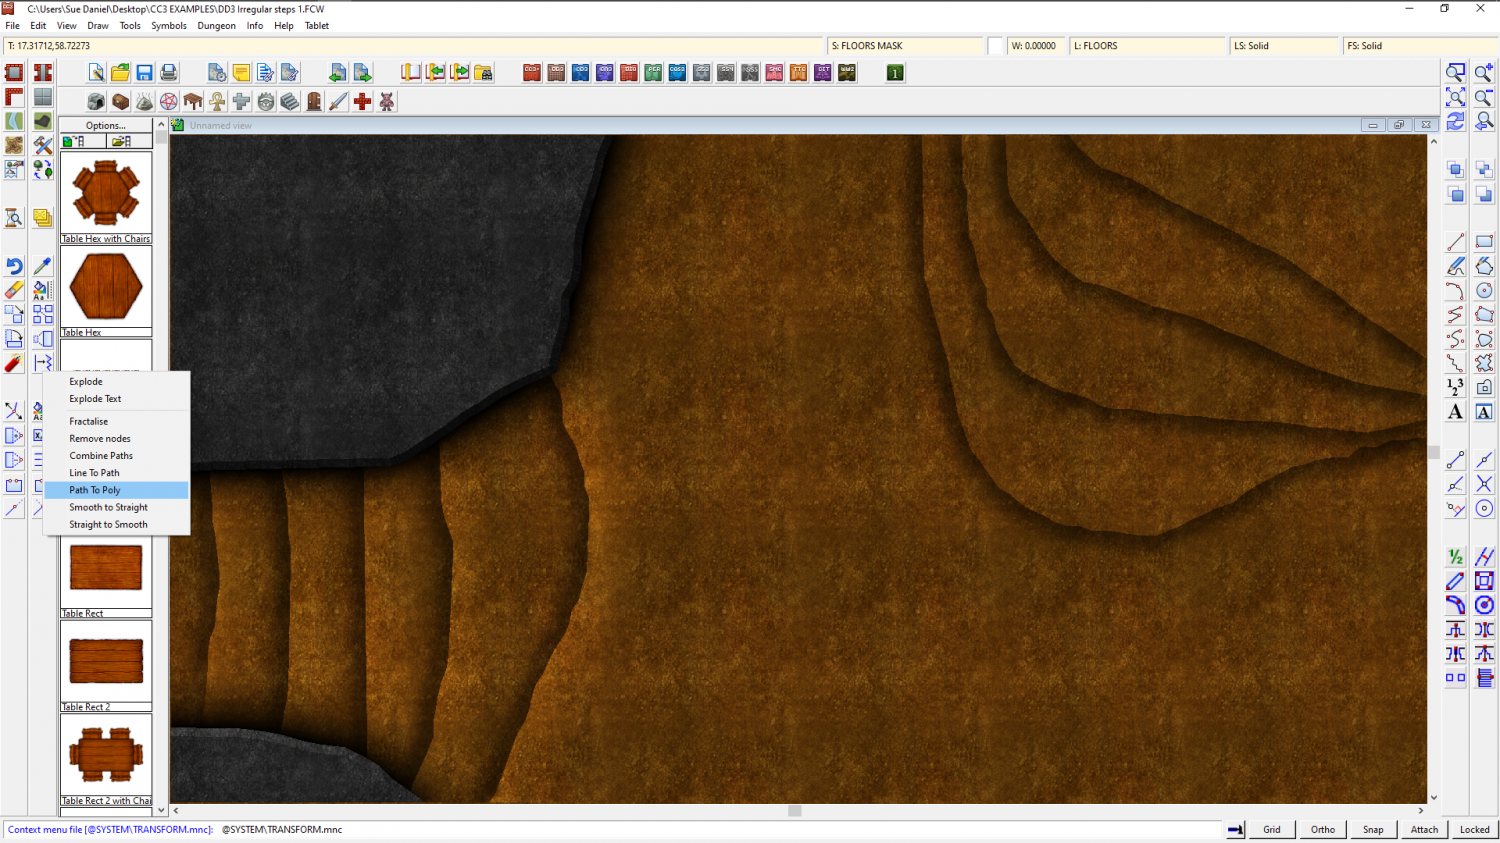
As you can see from the screen shot above, I have used 2 different techniques on the 2 sets of steps. Rather than carry on describing these effects and adding loads more to this description, I have attached the FCW file below, so that you can see how the Blend modes are set up. There is one important trick that is very useful to know, however, and that is if you set a Blend mode to 'Multiply' all the white is taken out of the fill. If the fill is solid white (as it is with these steps), then all you are left with is the line and the shadow showing on the top set.
I used Multiply as the Blend Mode on that top set of steps because the highlight effect on the other steps became extra concentrated where the edges were closer together.
Here is the FCW file for you to have a look at. If there is anything you don't understand just shout. Or you may decide to do it a different way.
![[Deleted User]](https://secure.gravatar.com/avatar/c75d9a245b74d9c59be0999ea81ca541/?default=https%3A%2F%2Fvanillicon.com%2F92add7f8c954488718110edc4896ad39_200.png&rating=g&size=200)
-
Objects completely invisible while being moved/rotated
Try hitting the TAB key while you are moving/rotating/copying the objects. It toggles their visibility on and off.

-
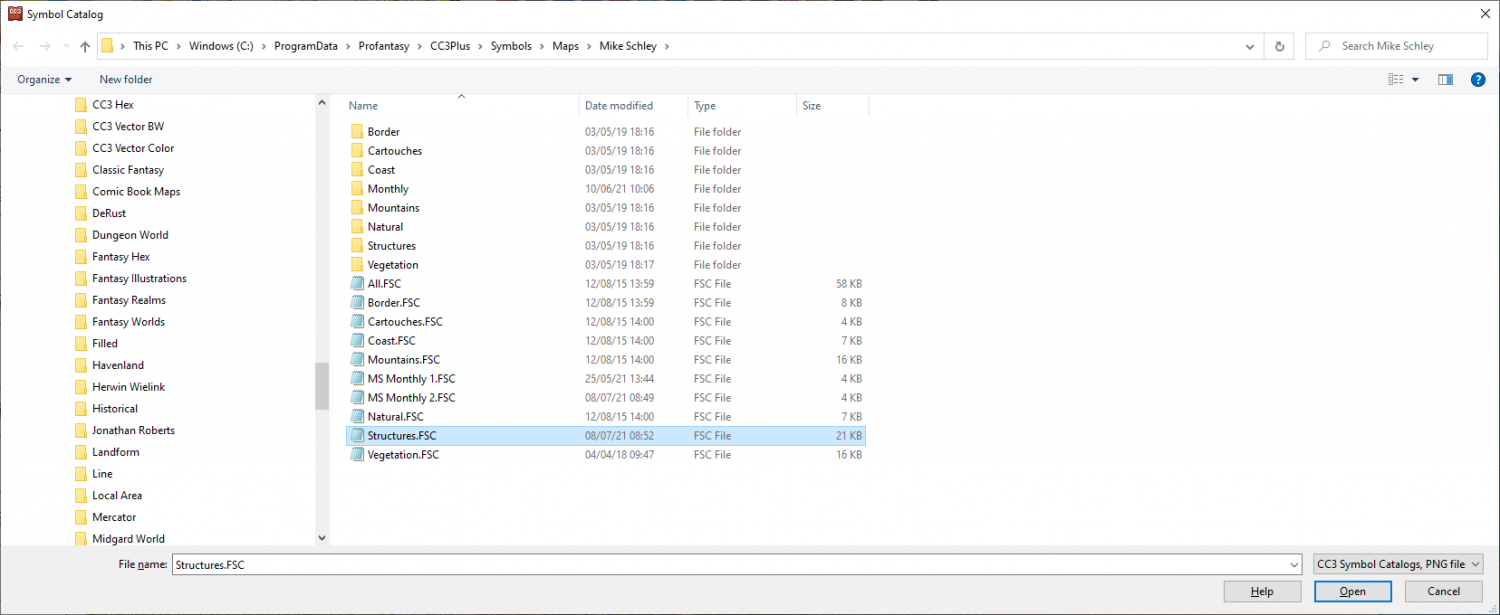
Help adding the monthly content to existing map!
Hi MakerofWorlds :)
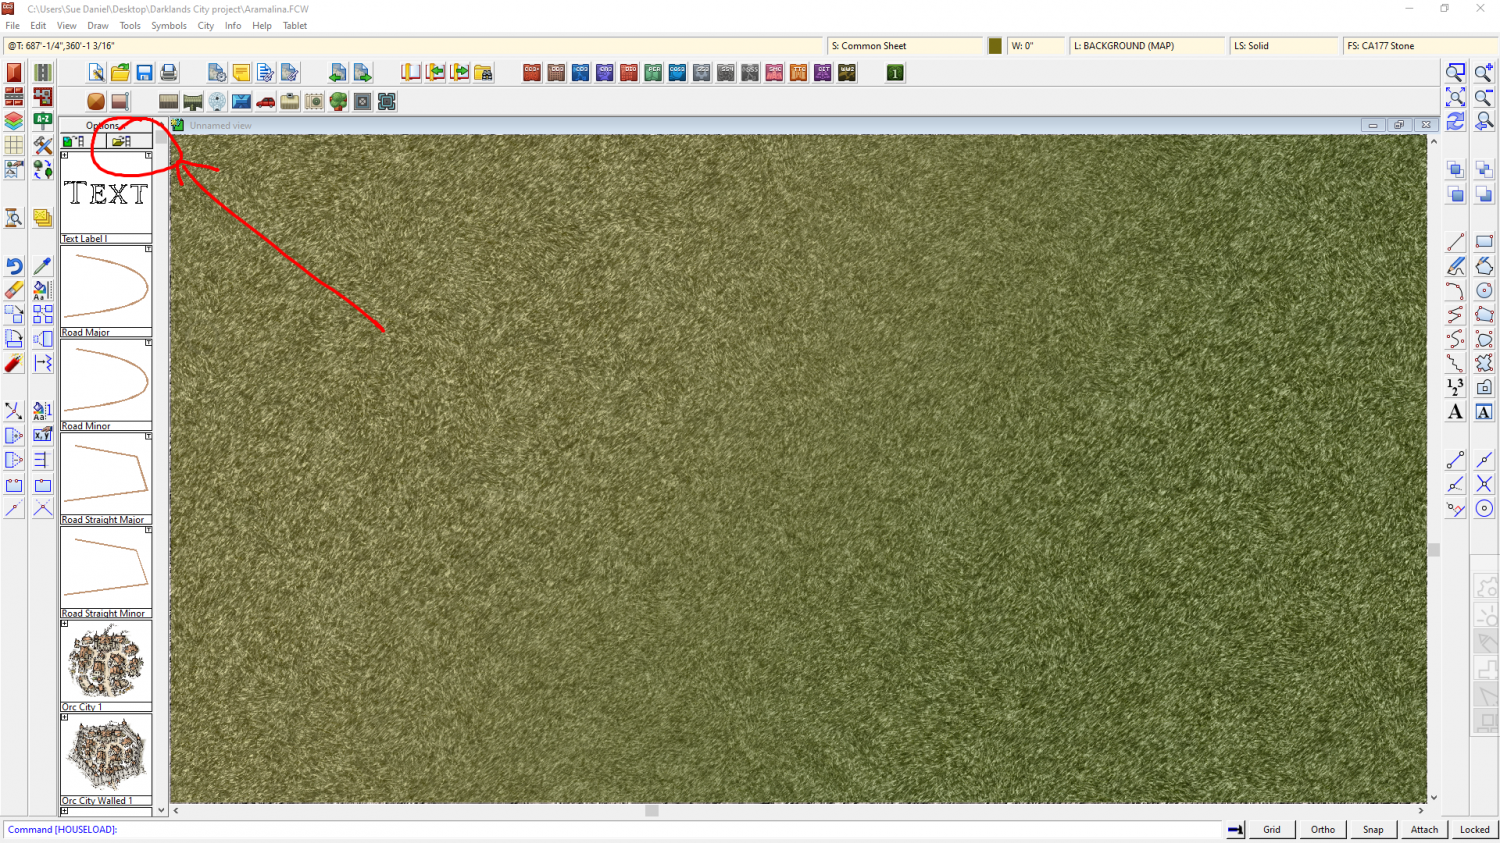
Assuming you have downloaded the installer from your account page and installed it, try clicking the little folder button at the top of the symbol pane and re-open the Structures catalogue file.
-
Annual 1, issue 3 - Inn Map. My example after the Live Mapping session
And there I was thinking it might be some kind of colour thing...
Try playing with the colour of the grass and soil. I think the grass is a bit too blue, and both the grass and the soil are a bit too colourful. That's not the same as too pale. The colour is just a bit too intense.
