Loopysue
Loopysue
About
- Username
- Loopysue
- Joined
- Visits
- 9,975
- Last Active
- Roles
- Member, ProFantasy
- Points
- 9,855
- Birthday
- June 29, 1966
- Location
- Dorset, England, UK
- Real Name
- Sue Daniel (aka 'Mouse')
- Rank
- Cartographer
- Badges
- 27
Latest Images


-
WIP - Rise of the Runelords: The Rusty Dragon.
I had this issue with my own recent lit dungeon map, and solved it by duplicating the WALLS sheet, naming it WALL CAPS, and moving it above the lighting setup to hide the tops of the lit walls.
I then added an RGB Matrix Process to dim the colour of the copied walls to be the same as if it was still within the lighting setup. In this case I had used 35% shadow opacity in the Global Sun settings, so I set the Unity matrix to .35 instead of 1 all down the diagonal.
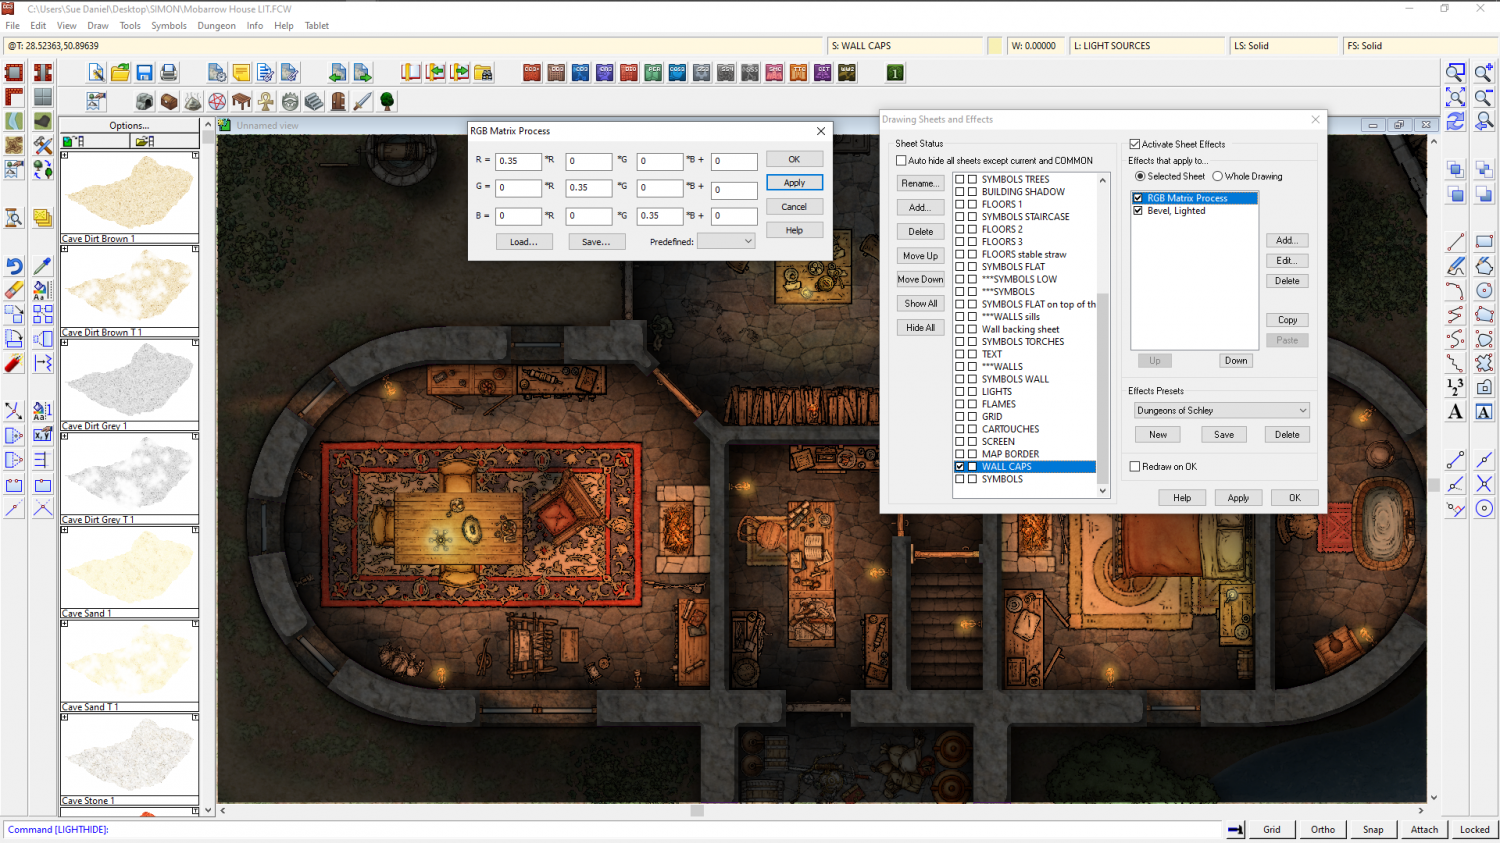
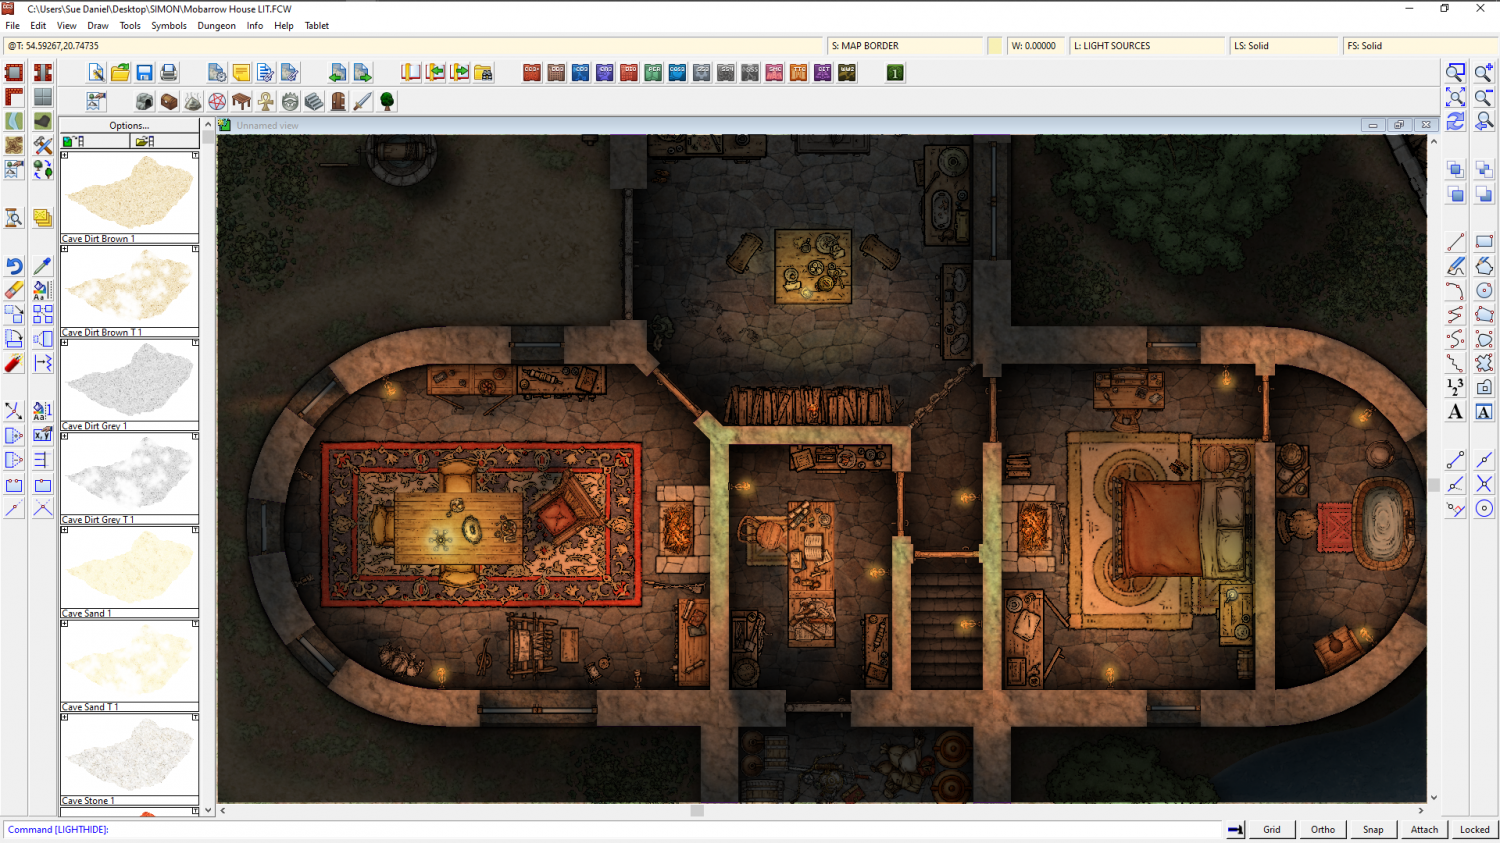
If I hide the WALLS CAP sheet I have the same issue as you do.
In fact I have it even more than you do, since the orange lights mix with each other over the tops of the walls and produce a strange green glow.
Only put the walls on the WALL CAPS sheet, since things like windows and doors are symbols and are not dimmed by the RGB Matrix Process. So they just look really odd.


-
Trying to Create Multiple Holes in a Single Sheet.
It is easier to use the Color Key sheet effect.
Fortunately, I happen to be working on something similar, so I can show you some screen shots.
The visible floor here is on the FLOORS marine sheet. There is a Color Key sheet effect on this sheet.
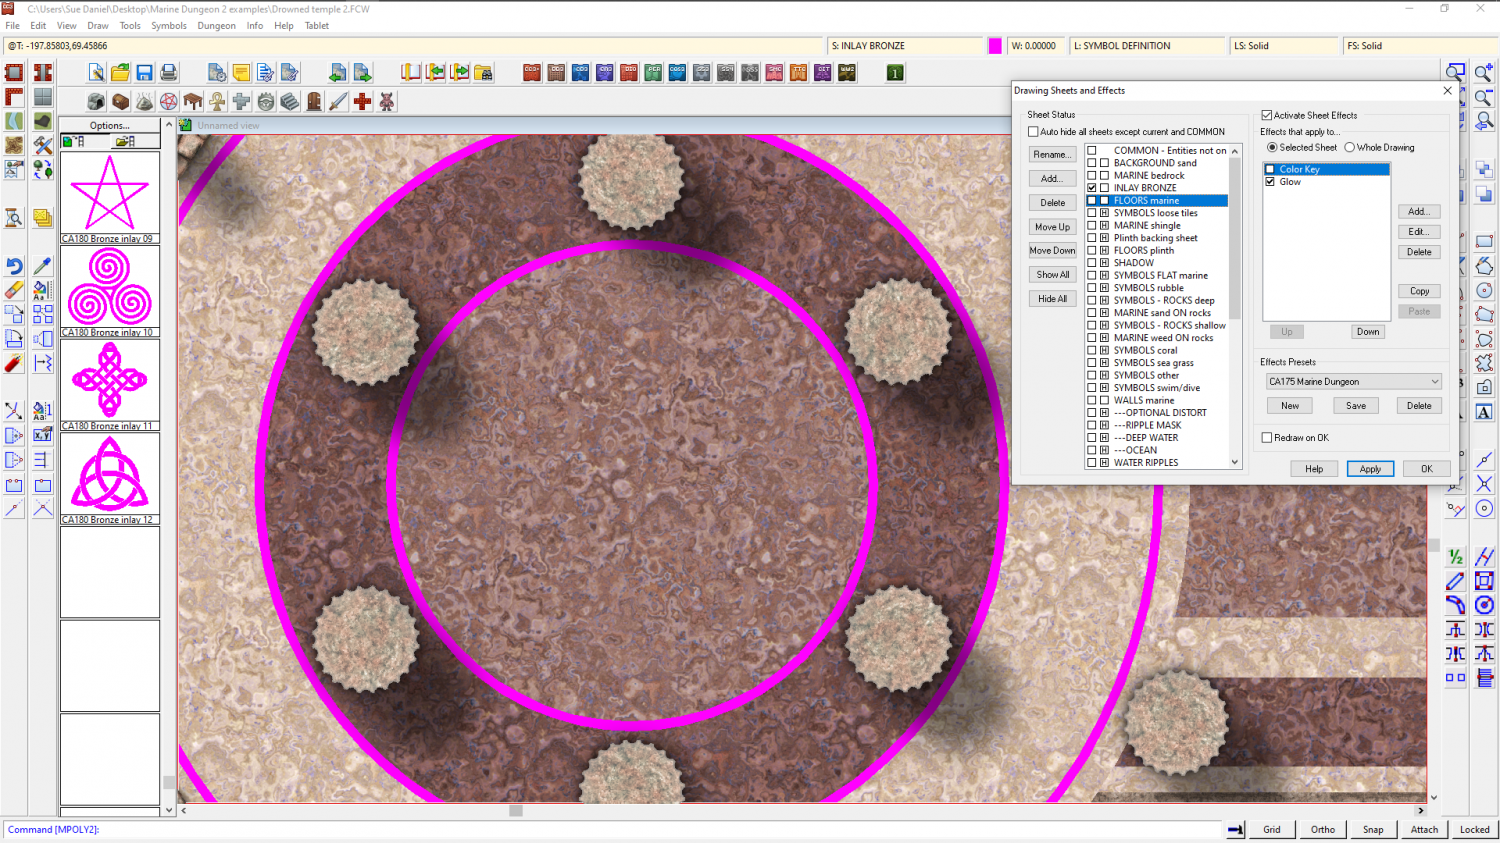
The Color key knockout colour is magenta, so when the Color key is activated the magenta cuts a hole in the floor to reveal the underlying sheet - one called INLAY BRONZE. There's a polygon of a bronze texture on that sheet.
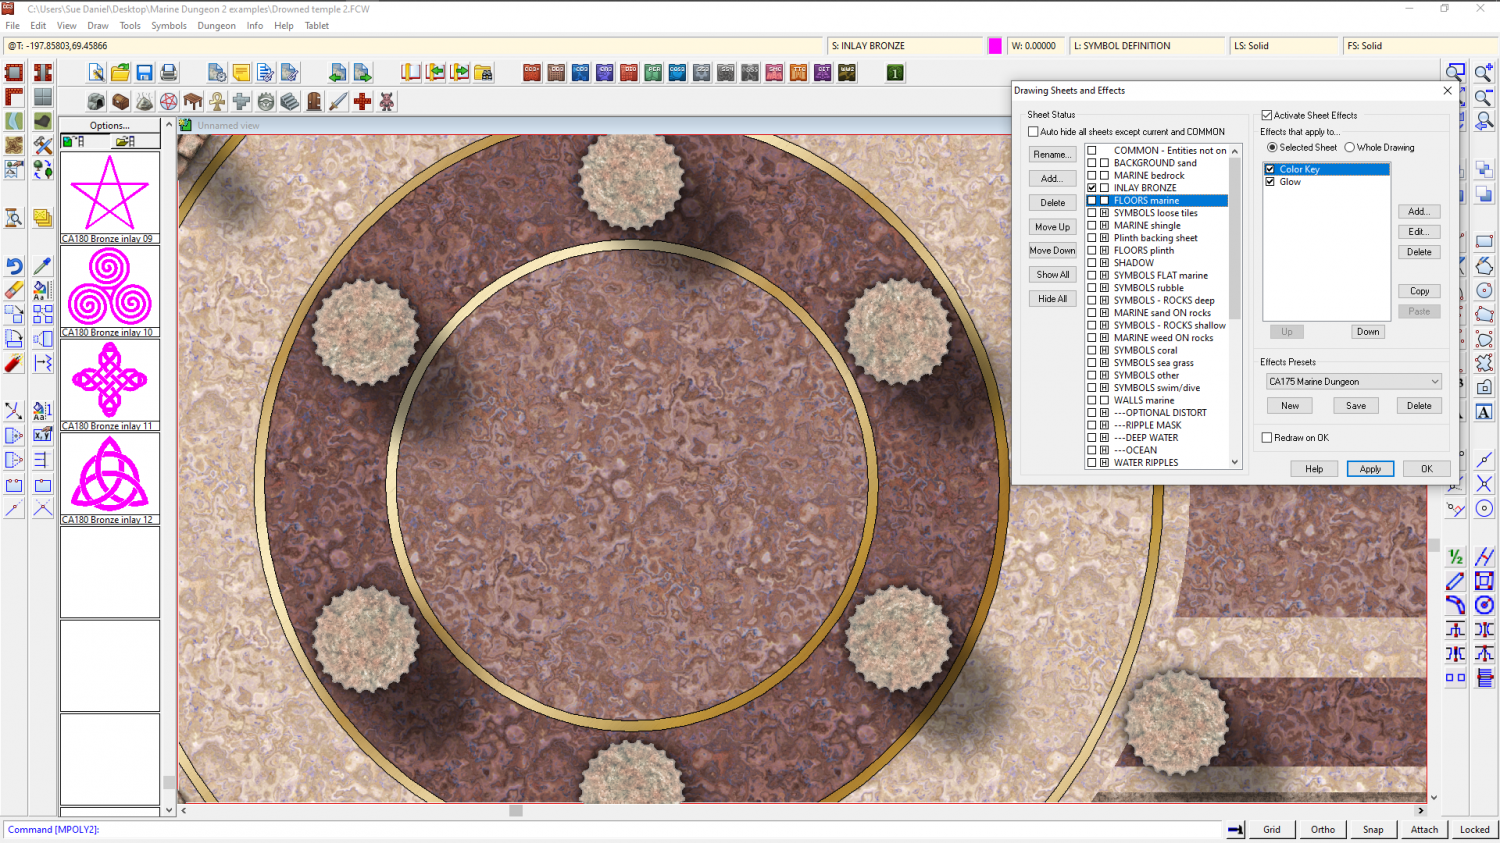
So all you would need to do to adapt this to your own map is to add the Color Key to the sheet where you want to cut the holes and draw the holes as separate shapes in the knockout colour.
![[Deleted User]](https://secure.gravatar.com/avatar/c75d9a245b74d9c59be0999ea81ca541/?default=https%3A%2F%2Fvanillicon.com%2F92add7f8c954488718110edc4896ad39_200.png&rating=g&size=200)


-
How do you change the order symbols are drawn?
In the Symbols menu you will find "Sort symbols in map".
Pick that option and select everything (right click, "all"), then press D for do it.

-
Problem with exporting
I think you have run into the issue of Transparency Acne, which is when the rendering engine identifies two pixels from overlying and underlying sheets as being the same colour and therefore a pinprick hole in the topmost sheet. This would be harmless, except for the sheet effects on the topmost sheet. Edge Fade, Inner sheet effects, and both bevel effects are affected by this, and produce a tidy hole or dimple around the edge of the pinprick as if it was a real hole in the polygon.
With this style the easiest solution is to add a new sheet between the two existing grassy textures and copy the polygons from the topmost sheet onto it, then turn those new polygons on the new sheet a solid colour that is least likely to be in the topmost texture. Then copy the Edge Fade Inner sheet effect from the top sheet to the new 'backing sheet' and tweak the values up just a little to prevent it from showing around the edges.

-
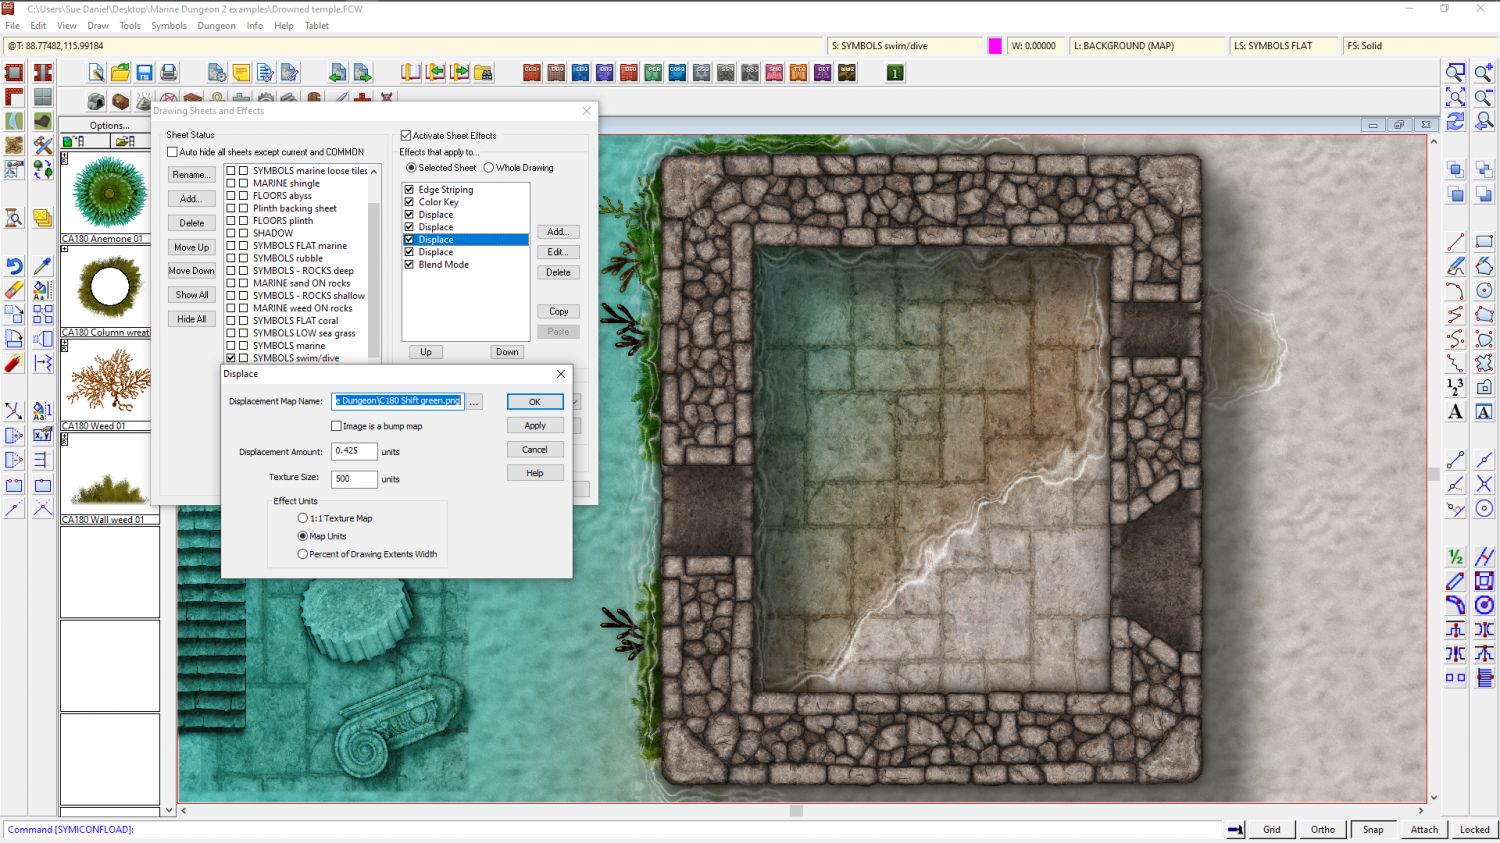
Displace moving everything to the left
It was your thread that gave me the initial idea to do this :)
It works ok if you use the correctional displacements after the main one. One red and one green. They are just 500 px bitmaps of pure red and pure green.
There's no rhyme or reason to the actual amount each will be required, but at a scale of 500 I needed a displacement value of anywhere between 0.2 and 3.0, depending on how bad the drift was. Using the same values in both green and red correction displacements to start with helped a lot, otherwise it is a bit like trying to saw just the right amount off the legs of a rocky table without a tape measure.