


Loopysue
Loopysue
About
- Username
- Loopysue
- Joined
- Visits
- 9,984
- Last Active
- Roles
- Member, ProFantasy
- Points
- 9,863
- Birthday
- June 29, 1966
- Location
- Dorset, England, UK
- Real Name
- Sue Daniel (aka 'Mouse')
- Rank
- Cartographer
- Badges
- 27
Latest Images


-
Panzer sample thread
I think I prefer the ones with better definition. The tanks, I mean. You can have well defined tanks with soft trees because tanks are hard edged and trees are not.


 and 1 other.
 -
Strange artifacts from the Bevel sheet effect
That's a form of 'transparency acne', where the current rendering engine in CC3 suffers an error if a pixel on one sheet is the same colour as the underlying pixel on another sheet. The identical pixel is interpreted as a hole exactly one pixel in dimension, and the sheet effects are applied to its edges - hence the buckling effect when you have a bevel. The Bevel Lighted effect creates little craters, and the Edge Fade Inner creates telltale circular holes.
To cure it you can either use a different texture for the affected parts, or insert what I call a separation sheet. You can do that by adding a new sheet just underneath the one with the problem and copying the affected entities to that sheet. Then turn them purple, or some colour you can be sure isn't in the texture. 227 is a good colour to use.

-
Creating Hollow Tree Dungeon Style
I think that's how I learned how to use graphics software back in the beginning, where I once painted in oil paints on hand stretched canvas ;)
If the walls already include heartwood then you've already got the potential there for a contrast between the walls and the floor, which is what you are after.
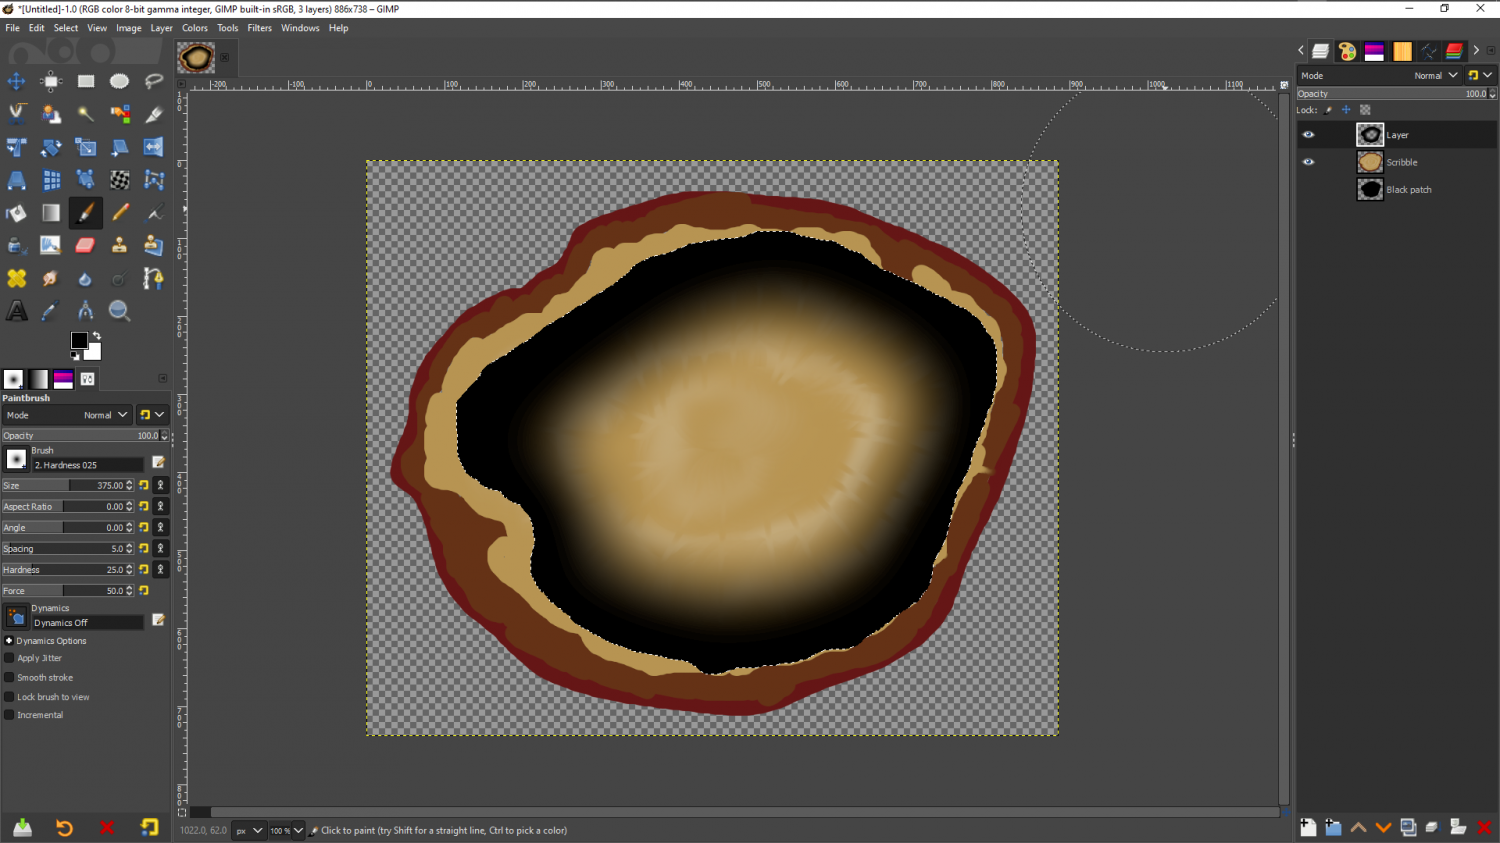
I don't have any tree stump photos to show you anything with, so I've scribbled something here for you in GIMP. I've not tried to copy what you are doing, which is a lot more detailed and artistic. I've only done something to illustrate what I was talking about above.
I don't know what software you are using, but I can do it again in that app if you would prefer.
Starting with the straight photograph (in this case my scribble) I've drawn a black shape on a new layer above the stump that represents the hollow core.

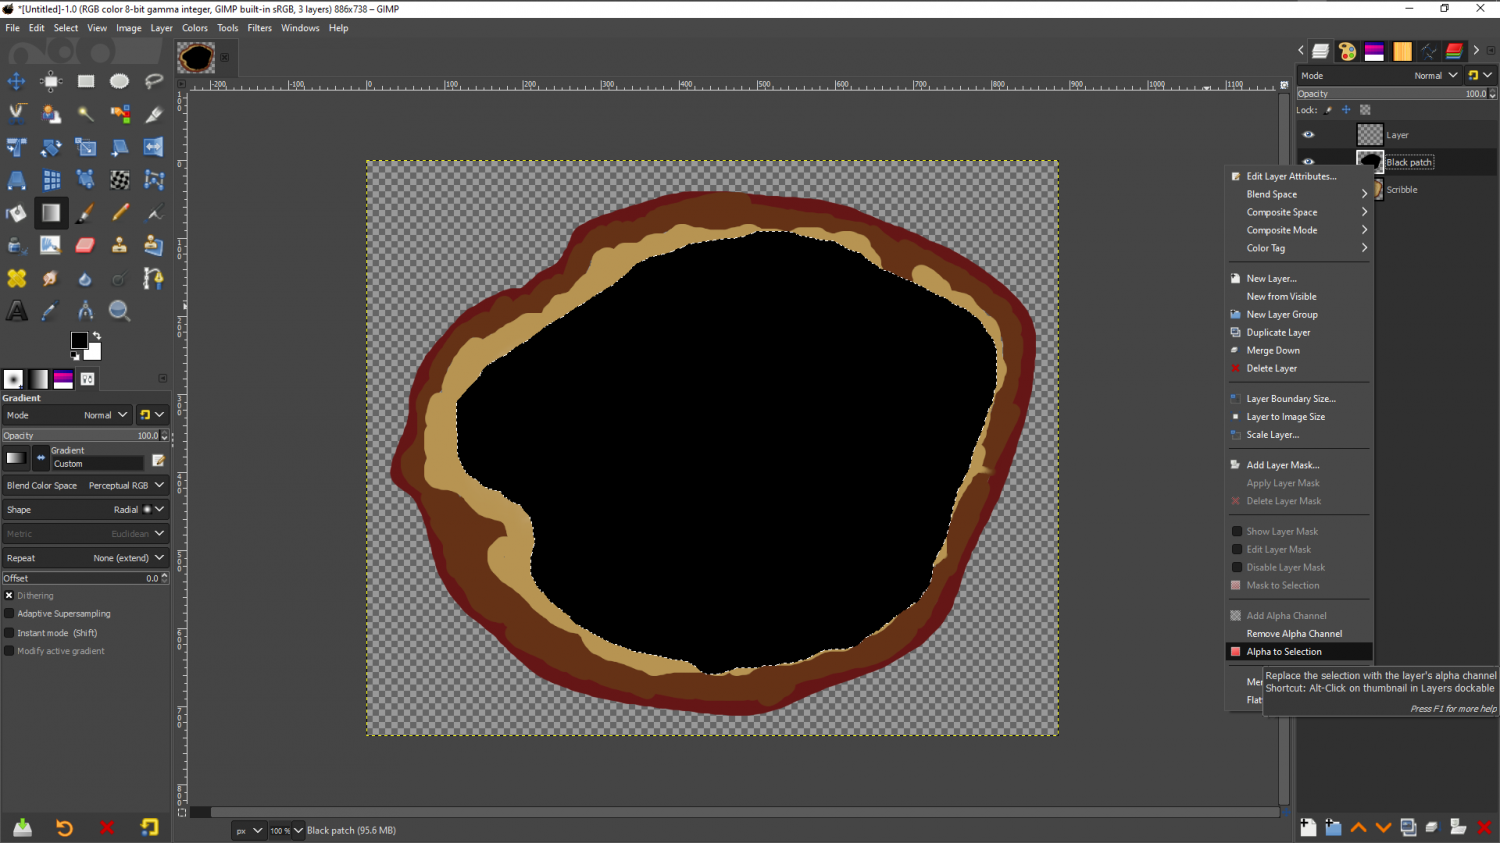
Then I've right clicked the black patch layer and picked 'Alpha to selection', so that there is a marque around it. I've then hidden the black patch and moved it below the stump where it won't get in the way, and added a new blank and transparent layer on top of the stump.
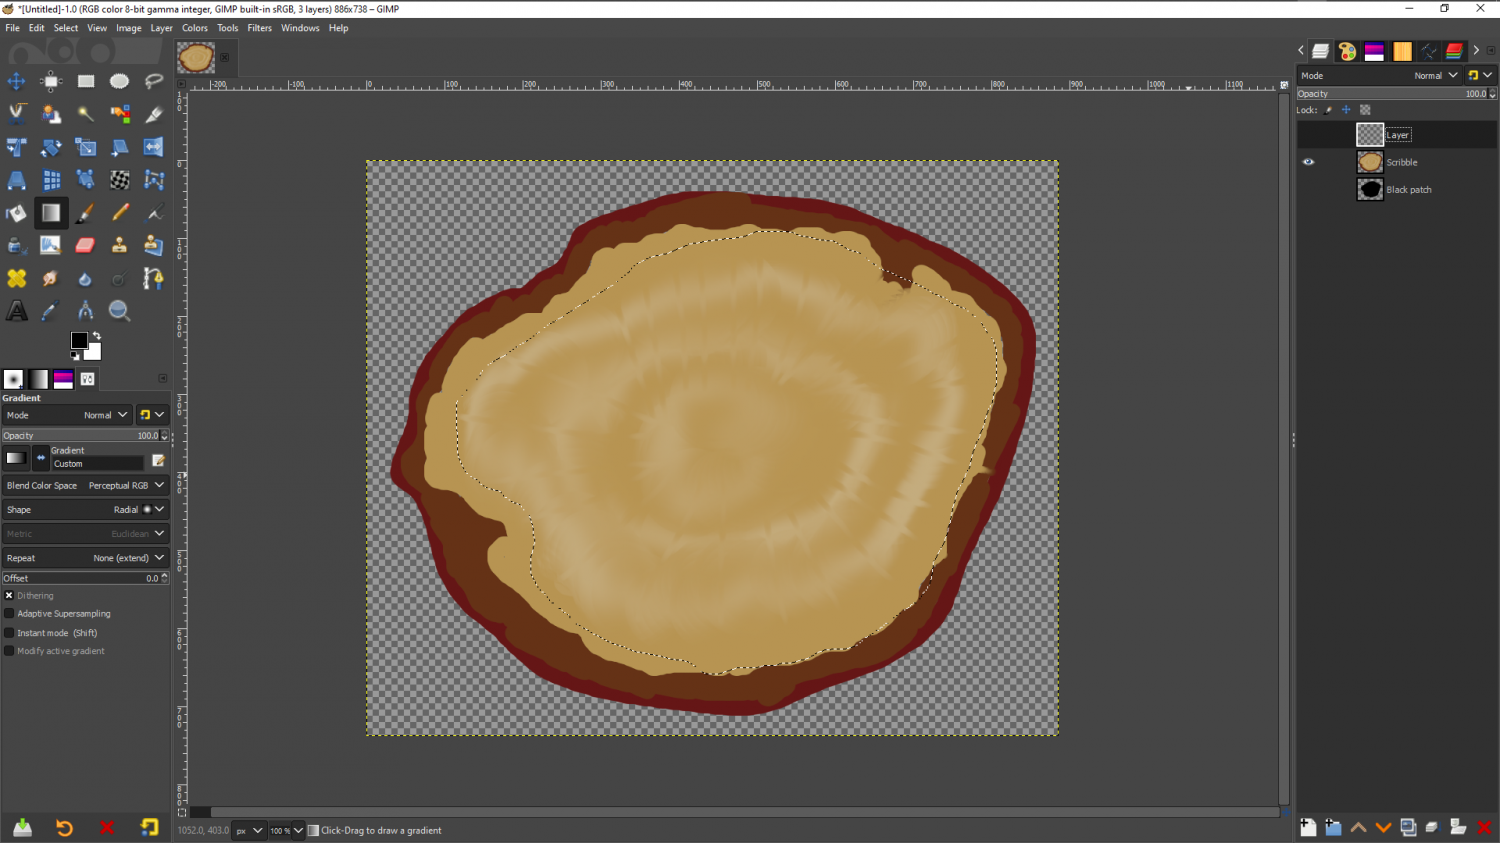
Using a very large very soft brush I've then drawn all the way around the edge with black on this new layer
Then I've reduced the opacity to about 50-60% and changed the blend mode of this new layer to 'Soft Light', and removed the selection.
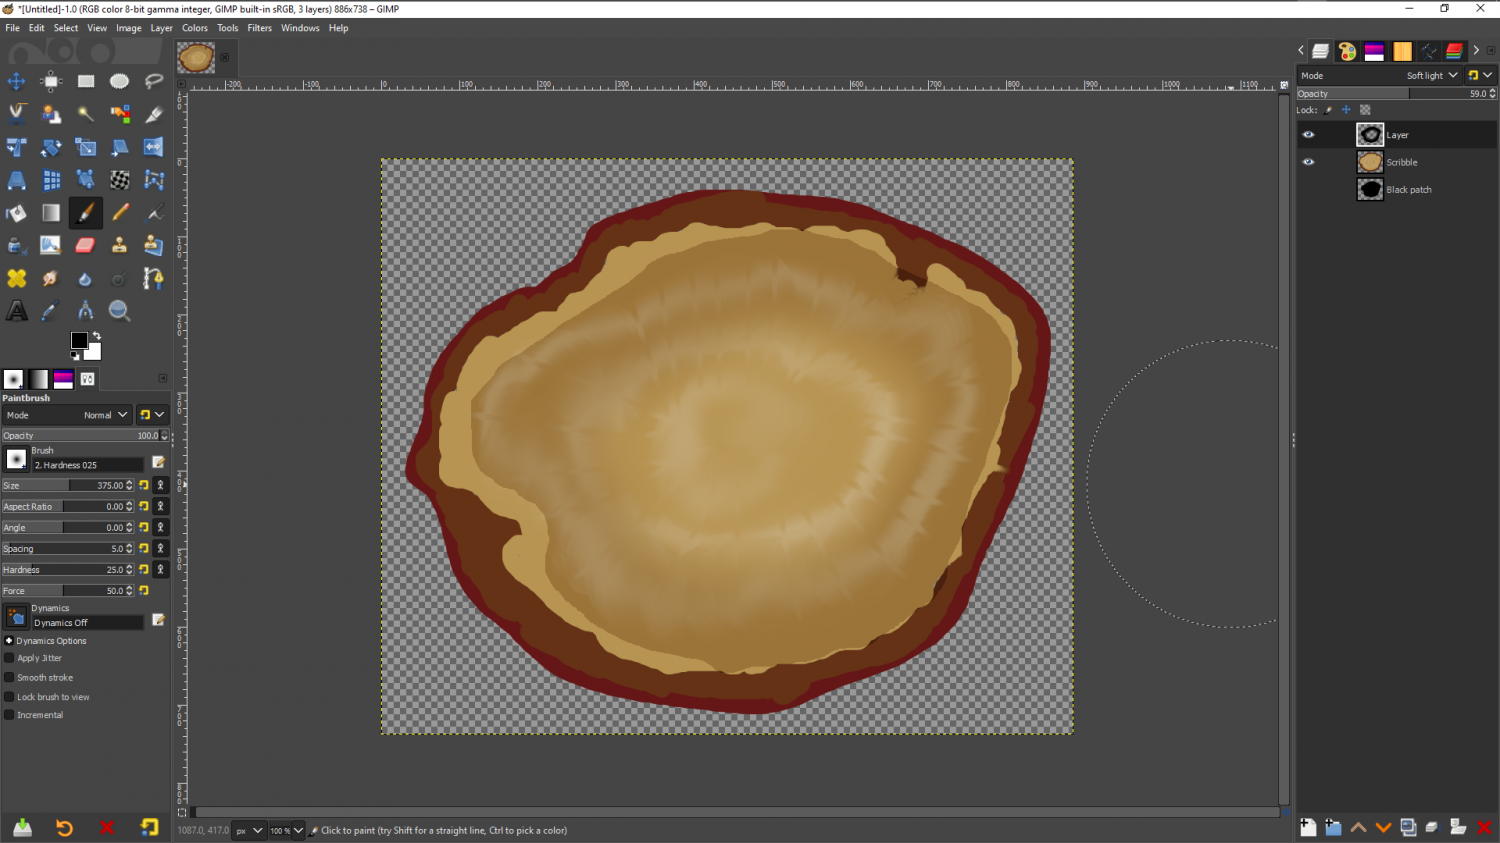
It's not a perfect hole in a stump, and indeed some of yours actually look better than this already (I mean the shading here - obviously your lovely photographs are much better than my scribbled stump), but I hope that you can see that where the black shading is darker and less saturated than anything else in the picture, it's produced a line of contrast between the edge of the wall and the floor lying close to it, while the hole in the middle of the black has allowed the floor to remain relatively light instead of being dark all the way across.
-
How do you convert cartography conundrum map into useable image?
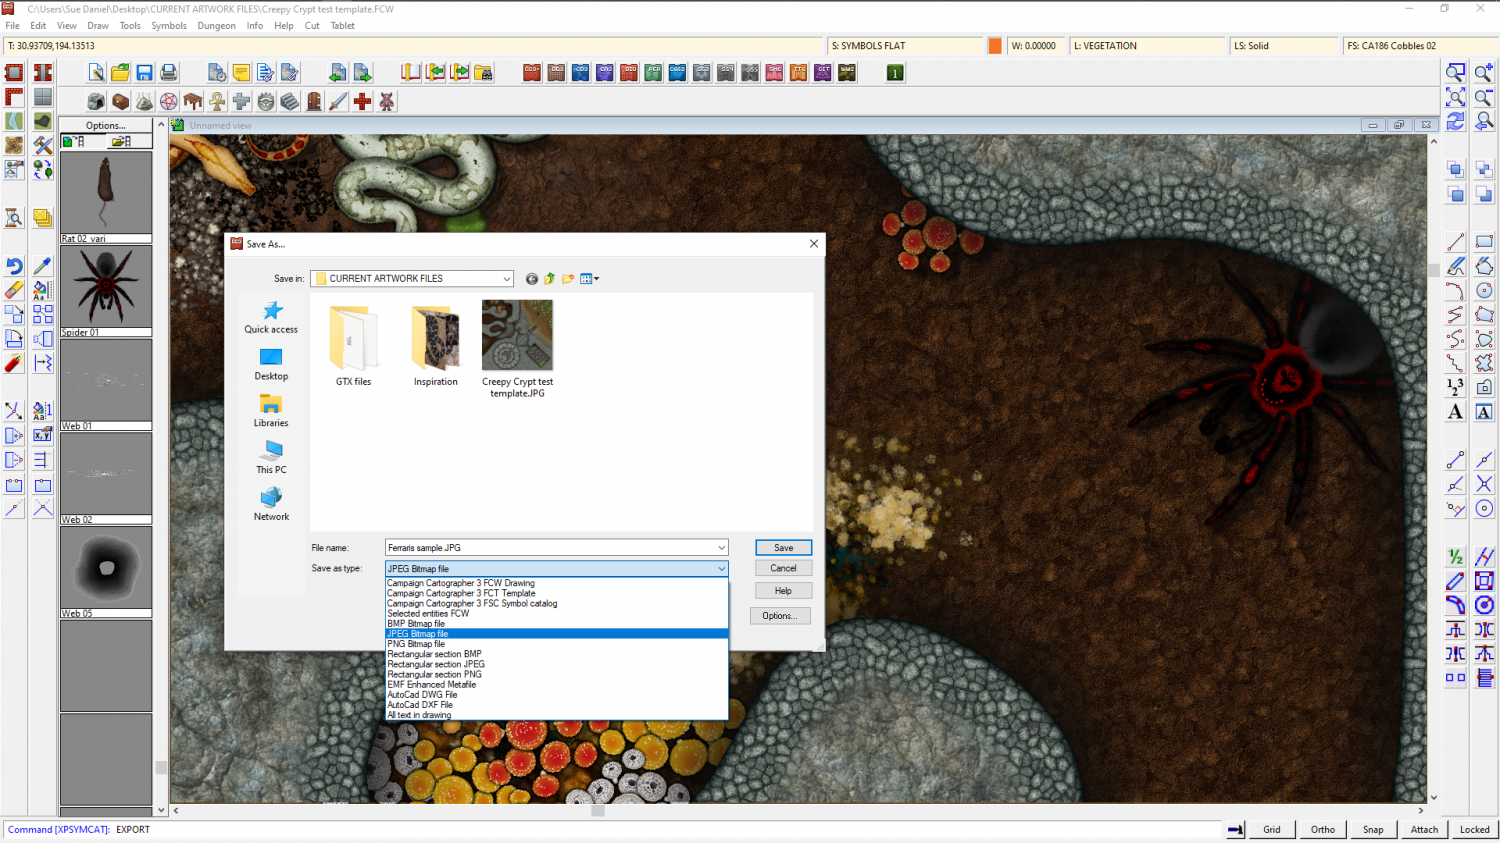
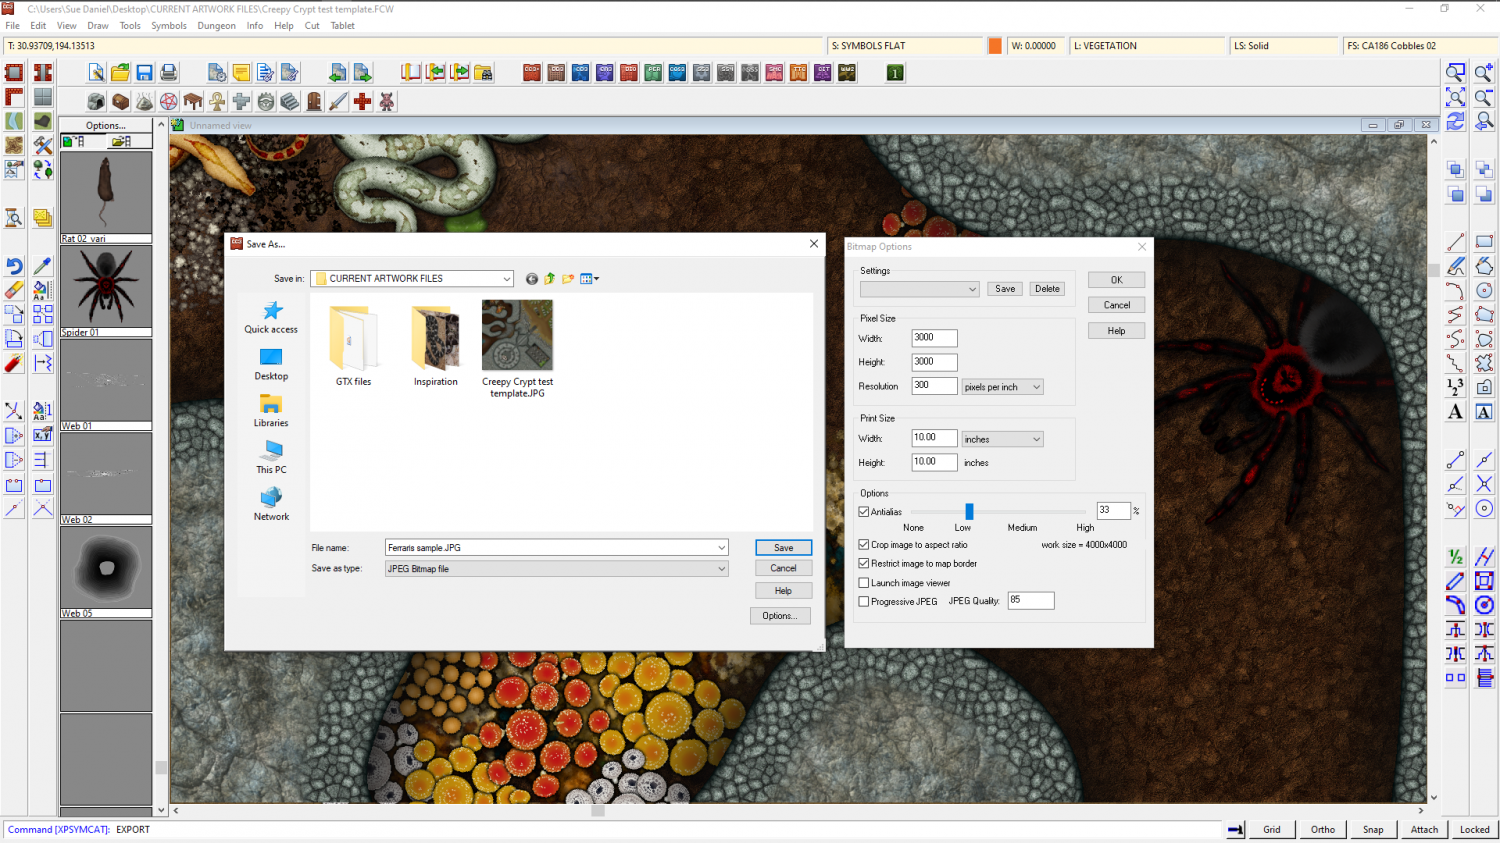
Jim means the File name: dropdown selection. Once you click one of the bitmap types the Options button gives you all the usual options - how large, how antialiased... etc.
These example settings will give you a neatly cropped map with the longest side being 3000 px long, and is a personal default size I use for example maps.

-
The Creepy Crypt project
This is partly true, Dalton. Though a lot of what a symbol looks like is controlled by what the artist does inside the artwork. On the left is the current boa symbol, while on the left is the one I'm working on in light of the flatness issue.
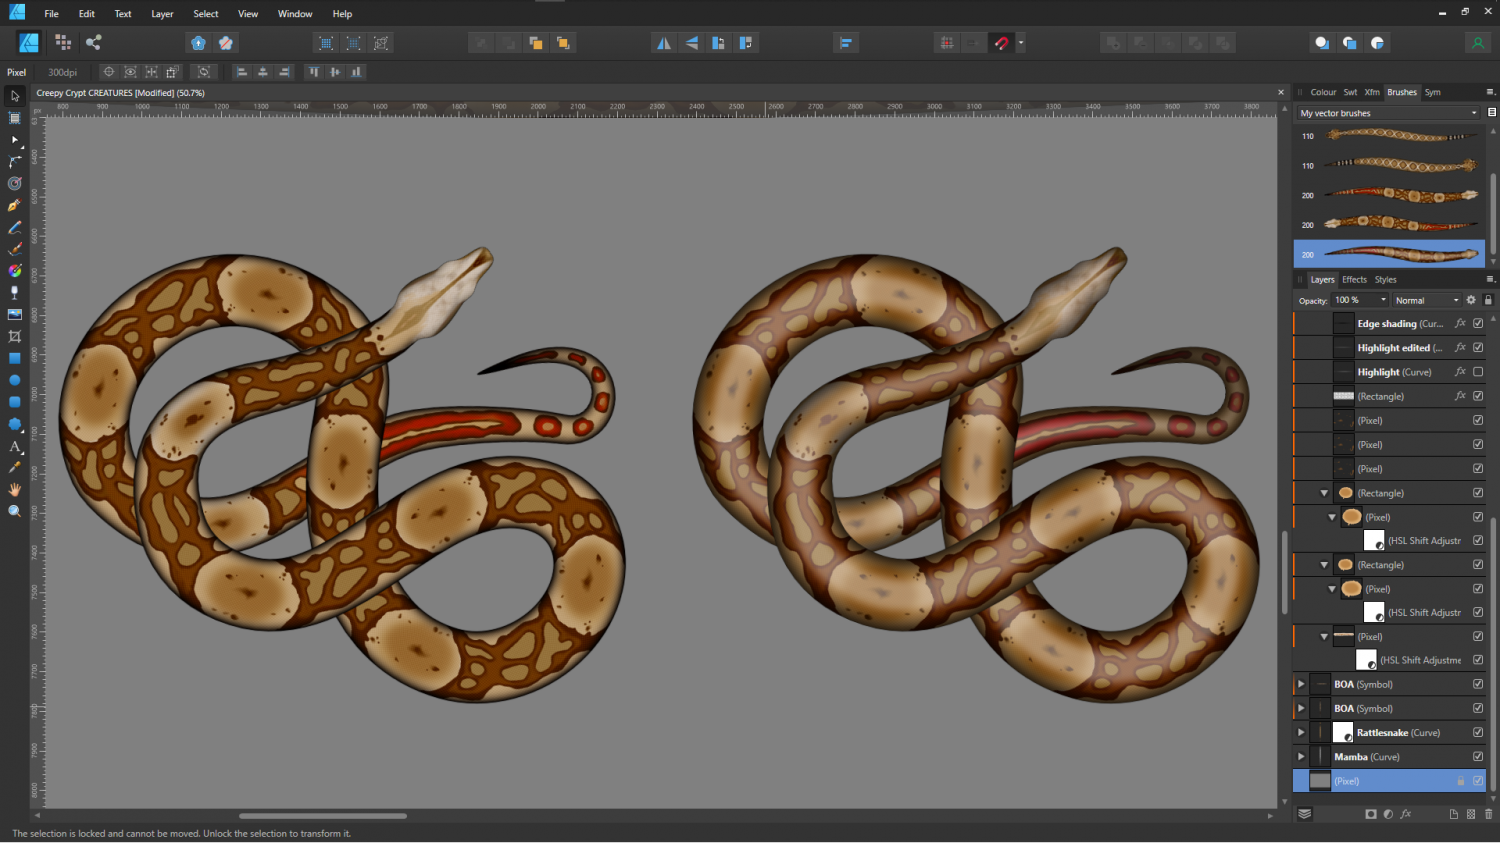
The rattlesnakes will be a slightly bigger problem, since they are really quite rough-skinned, so they don't have a glow down the back like a boa does.
Incidentally, if anyone is wondering how these things are made with a view to making their own snake symbols, check out the brushes top right in this shot. Affinity allows me to draw a perfectly straight snake (which looks really odd considering they never lie in a dead straight line), and then convert that image into a brush. So once the initial drawing is done I can draw the shape and apply the image to that shape.
These are the original dead straight boas used to create the snake brushes.
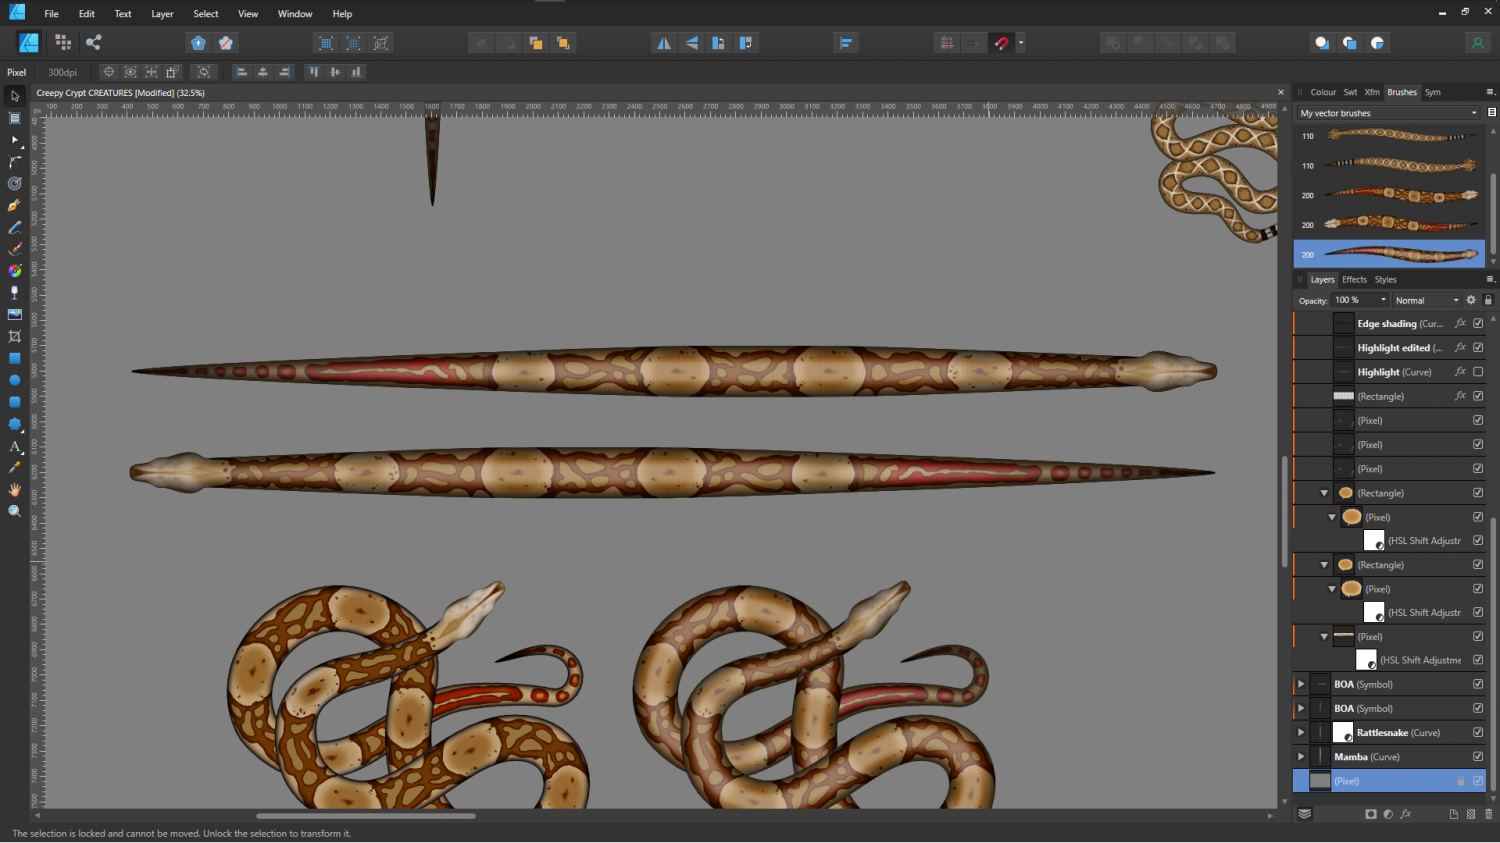
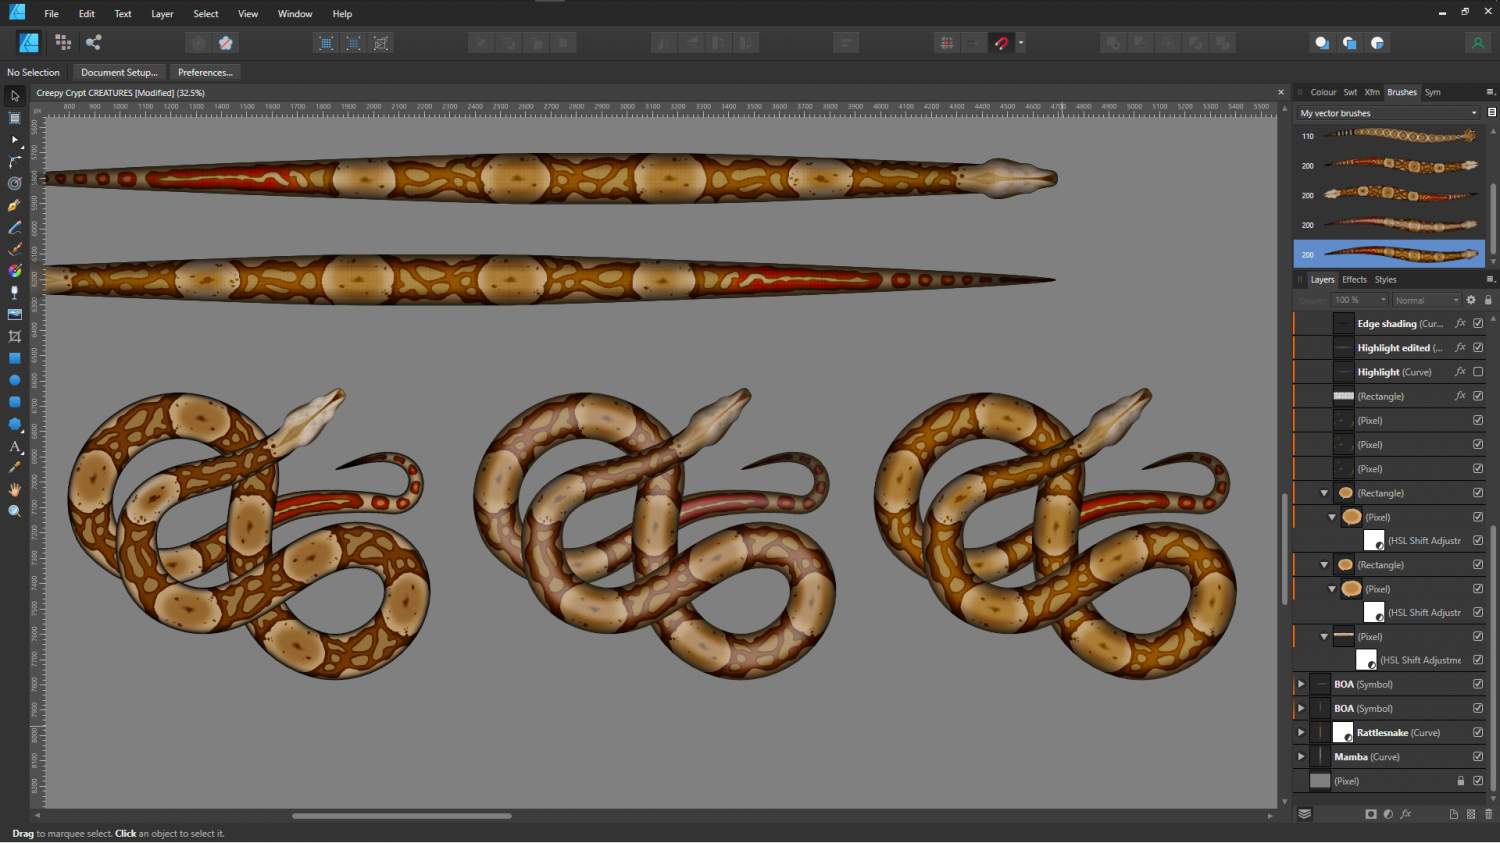
It works a bit like a cross between symbols along and a connecting symbol, with the central section of the snake repeated as many times as necessary to generate the length.
I think the second option is a bit too plastic looking, so I'll probably use the third version below.
![[Deleted User]](https://secure.gravatar.com/avatar/c75d9a245b74d9c59be0999ea81ca541/?default=https%3A%2F%2Fvanillicon.com%2F92add7f8c954488718110edc4896ad39_200.png&rating=g&size=200)

