


Loopysue
Loopysue
About
- Username
- Loopysue
- Joined
- Visits
- 9,987
- Last Active
- Roles
- Member, ProFantasy
- Points
- 9,864
- Birthday
- June 29, 1966
- Location
- Dorset, England, UK
- Real Name
- Sue Daniel (aka 'Mouse')
- Rank
- Cartographer
- Badges
- 27
Latest Images


-
The Swamp Rat - Playing around with Lighting
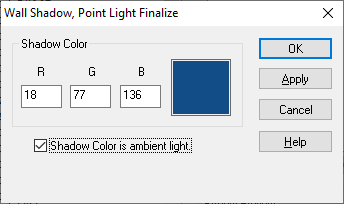
Right click the hourglass and pick Global Sun from the menu. The two settings that affect the way lighting works are in the Activate lighting panel. You can adjust the blur on the shadows cast by your lights, and how intense the shadows themselves are.
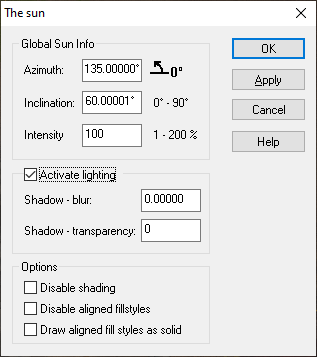
In the 'Wall shadow, Point Light Finalize' sheet effect there is also an option to make the shadows a colour other than black, called 'Shadow Color is ambient light' Have a play with that as well. You will need to change the colour in the Shadow Color panel to see any difference. The default is black.


-
[WIP] Lighting Strike
I would enter it, Jeff :)

-
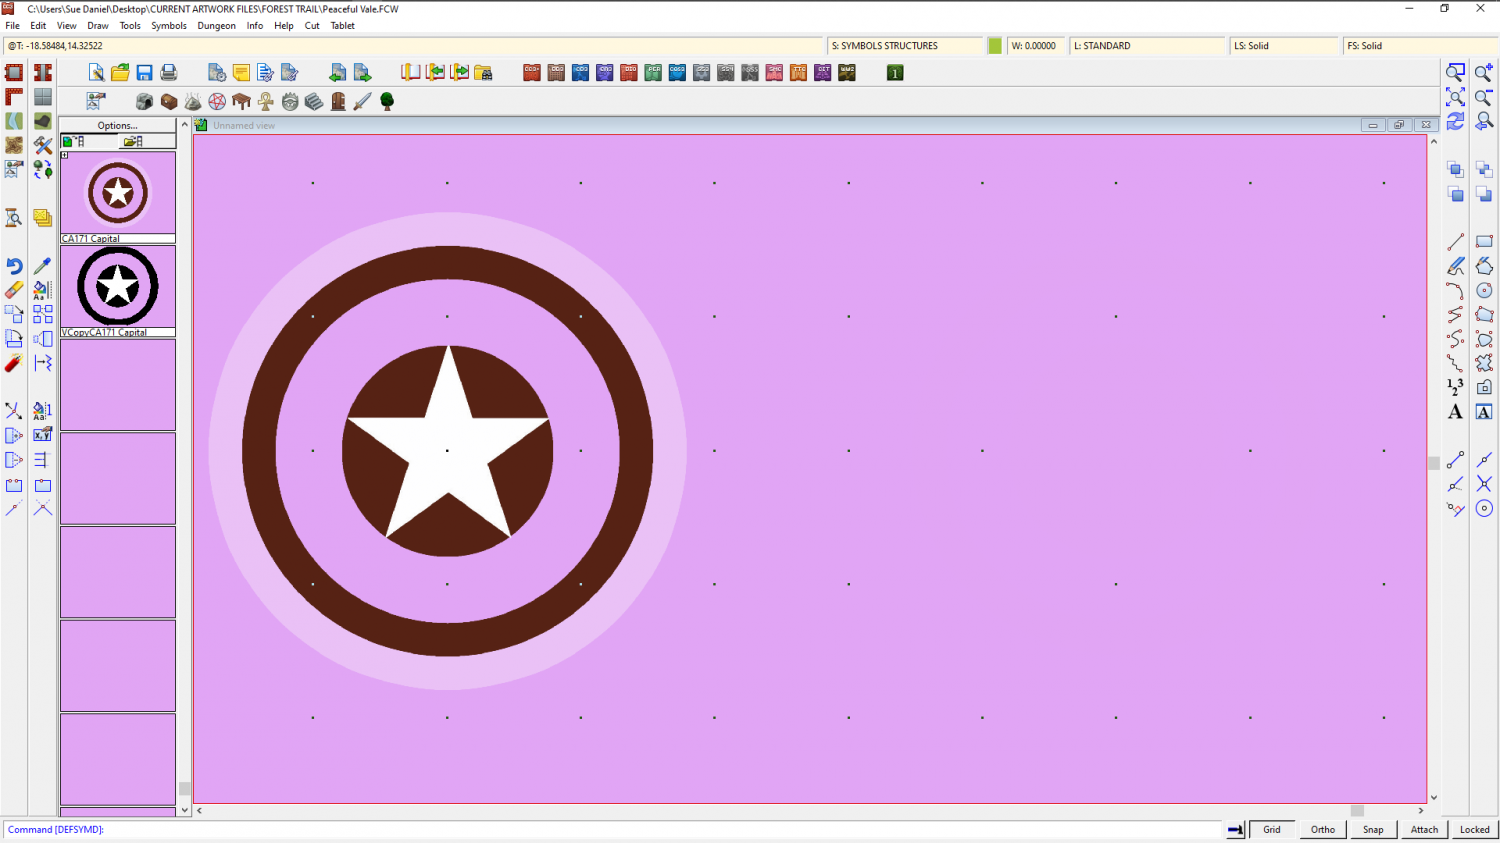
Capital City Symbol
Hi hsv :)
Here is a show and tell thing I was working on when Remy posted above. I had taken a bit of time, so I decided to post it anyway.
I also realised when I checked the Tome reference that I had made a couple of mistakes. You are supposed to draw the drawing on the COMMON sheet, and the SYMBOL DEFINITION layer, rather than drawing it on random sheets and layers as I did.)
...
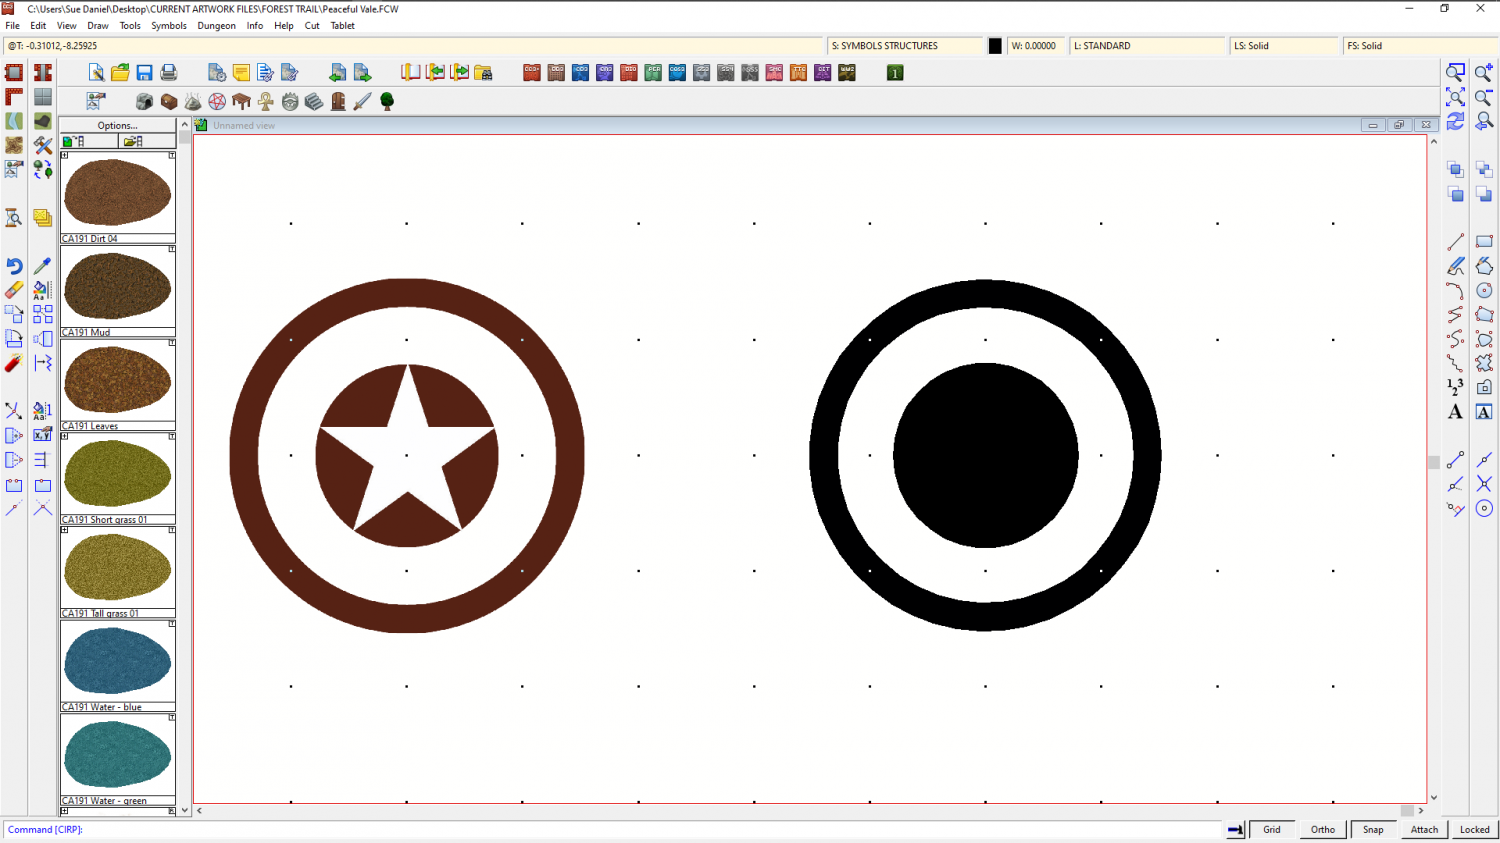
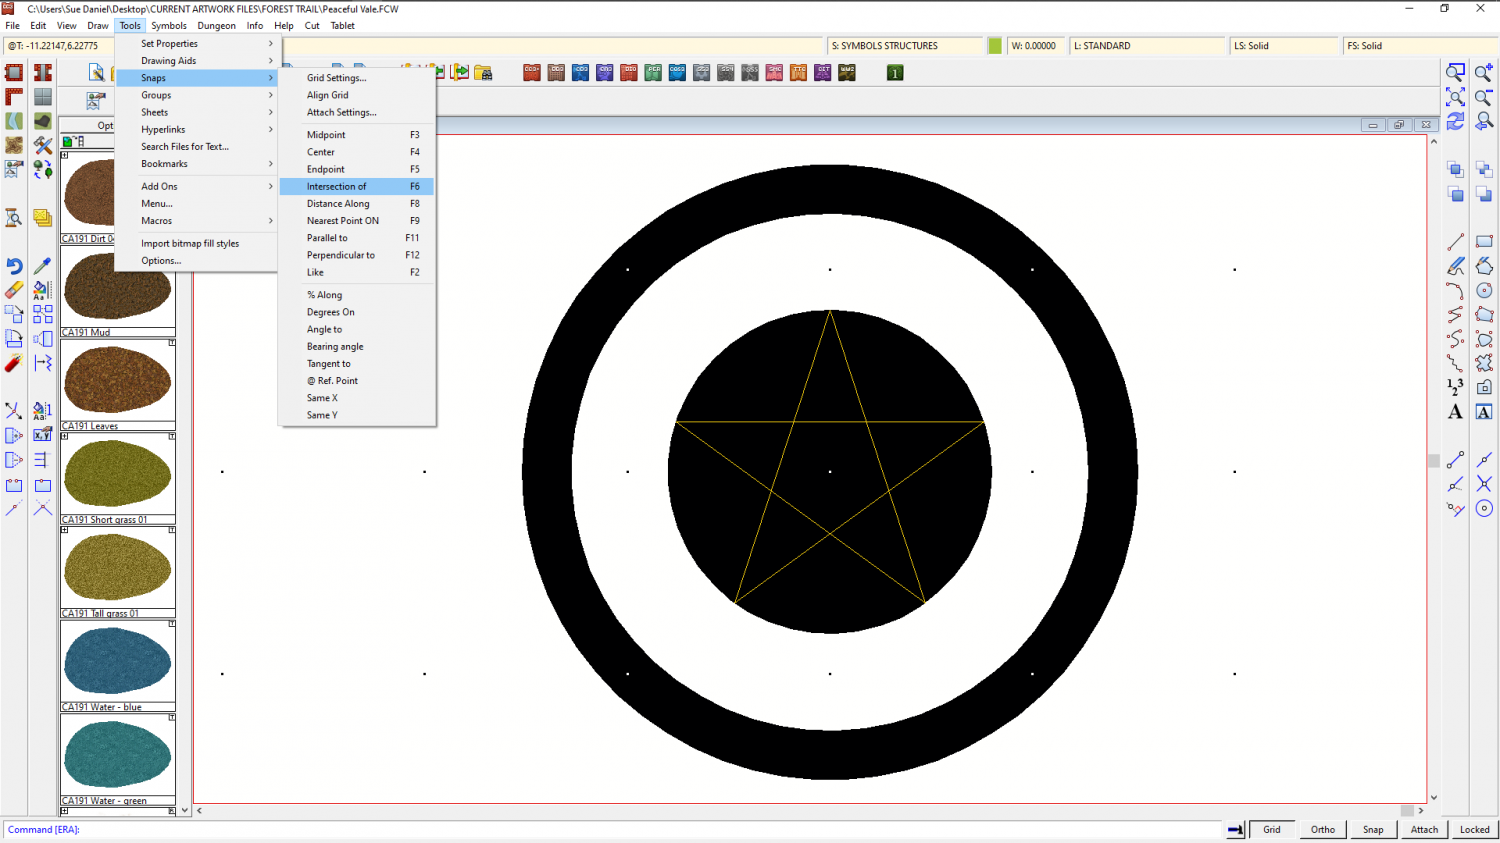
Turn the snap grid on, place the symbol to copy, and draw the inner circle in black.
Set a line width greater than zero (but not too large) and draw the outer circle.
Right click the polygon tool and pick the Regular Polygon option. Set the number of sides to 5 and use an alternative colour and the same centre point to draw a pentagon in the inner circle. Release the Snap option and turn on Attach. Use a third colour to draw the star in the middle by attaching the points to the corners of the pentagon.
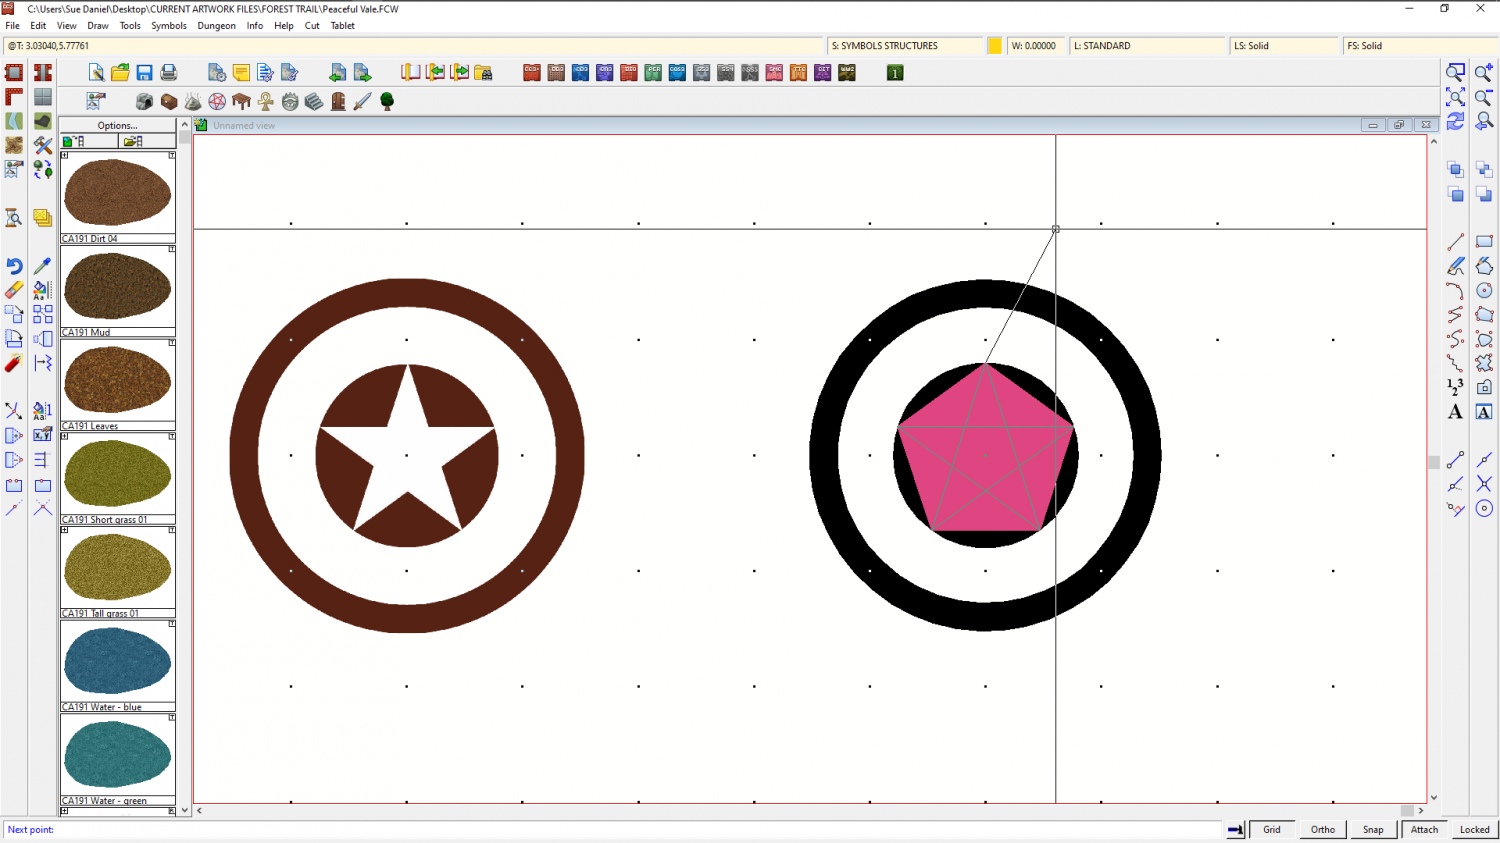
This will leave you with more of a pattern than a star, but you can use this as a guide to make the star.
The easiest way is to delete the pentagon, explode the star, and use the resulting set of 5 separate lines and the F5 and F6 snaps to draw the star.
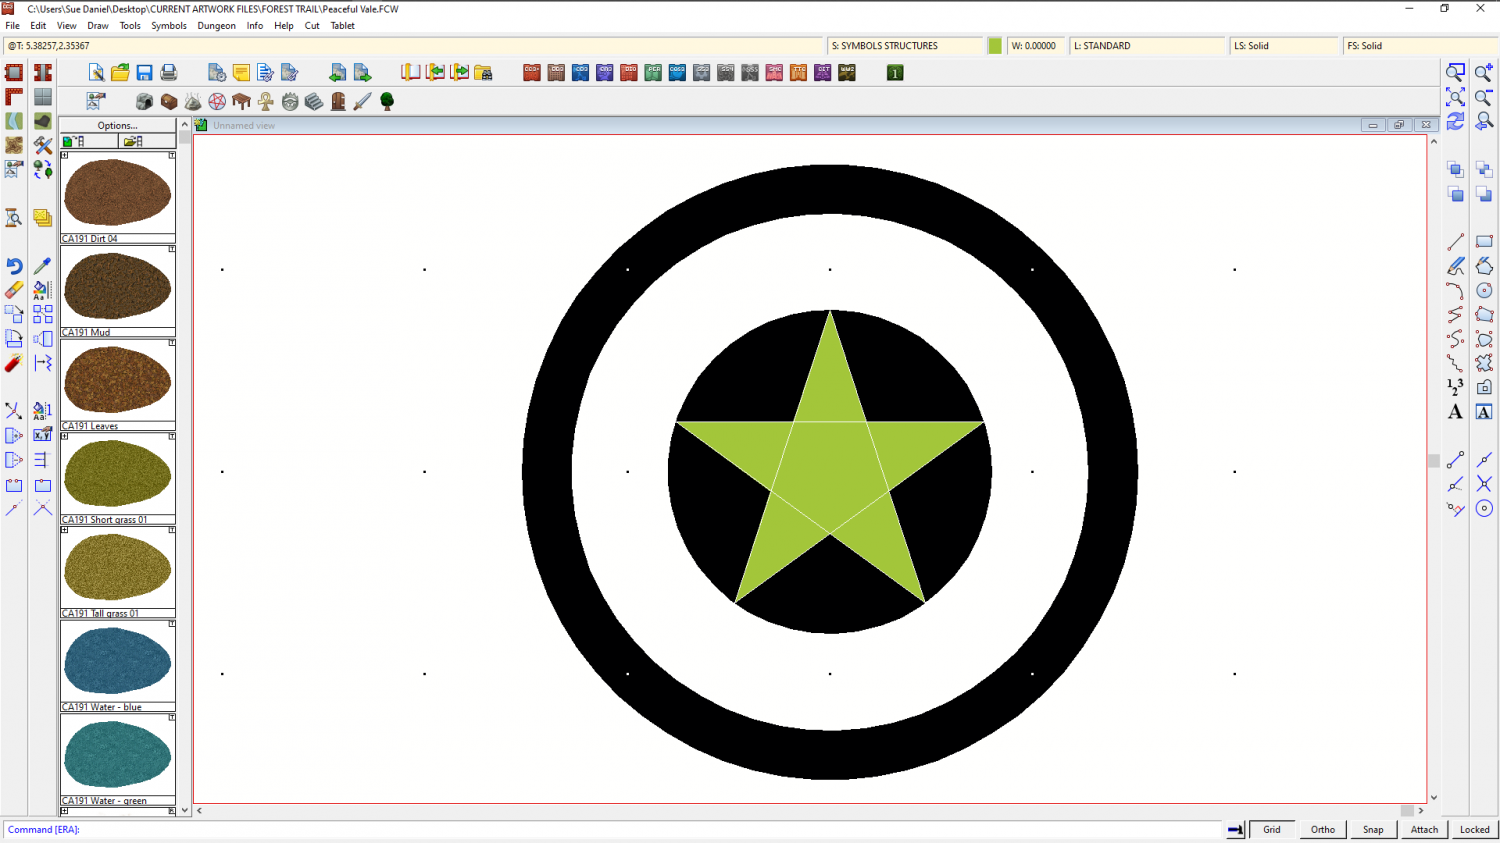
You can see where to pick and delete the guidelines from under the newly drawn star where the white lines are in the last image. This was just after I had deleted mine and before refreshed the screen. Change the star to white, and then you have something similar to the original symbol, though it will lack the translucent white outer ring.
To turn this into a vector symbol pick Define Symbol from the Symbol Manager menu, select the new drawing and D for do it.
(I've turned my window a random colour so I can see what I'm doing a bit better here. That's an option in the View menu, but you will have to turn it back to white when you are done - colour 15).
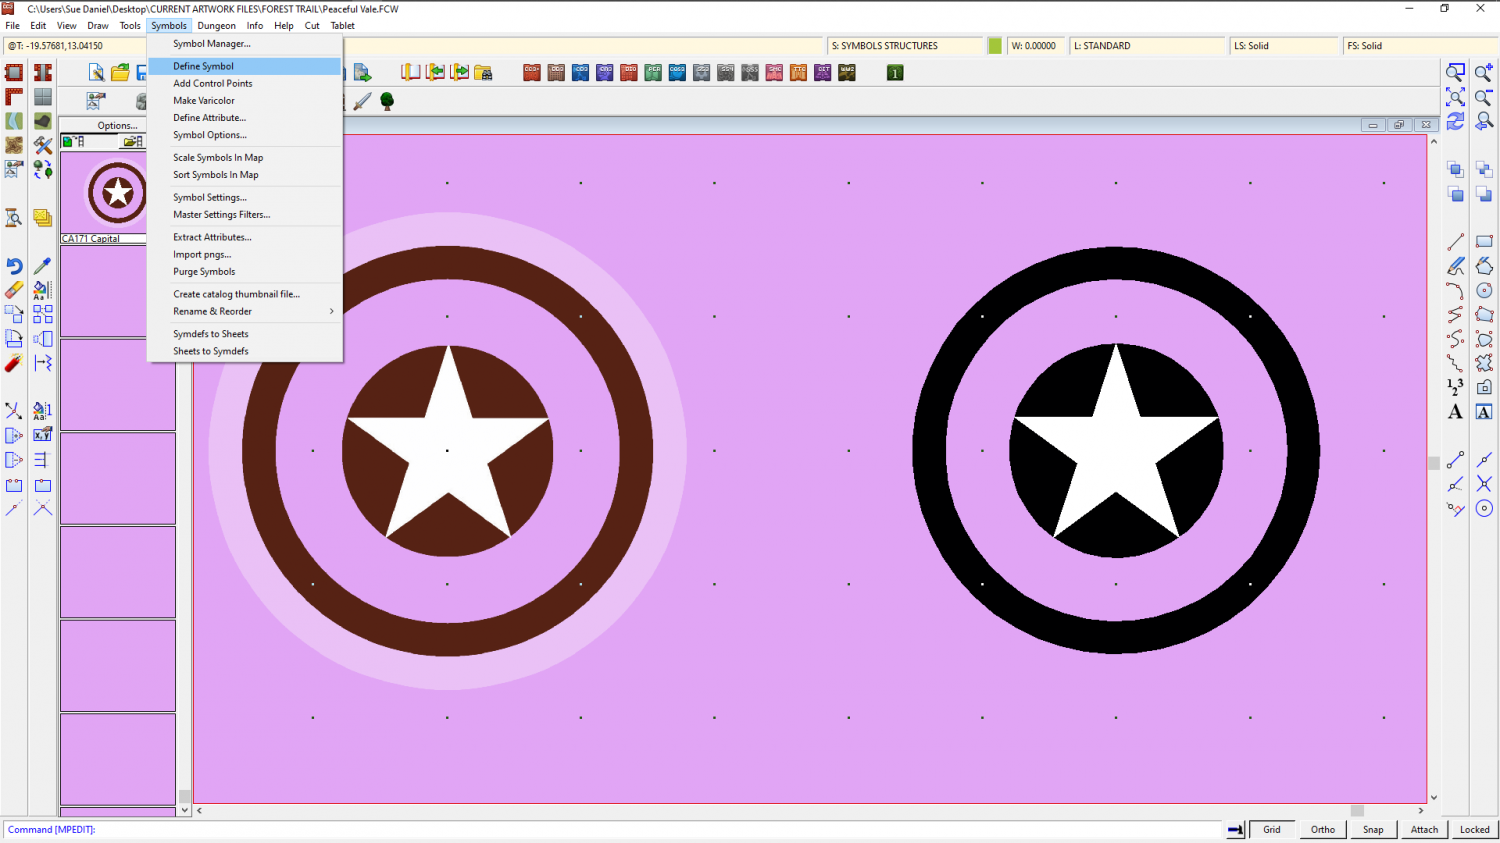
Also notice above that I have clicked the Symbols In Map button on the left beneath the Options... button in the catalogue panel to show the symbols used in the map. This is where the newly created symbol will appear when it's done.
When you hit D for Do It, you will get this dialog. Leave the settings as they are and give it a name. I usually stick pretty close to the original while also making it clear this is a vector drawing copy.

When you OK this dialog both it and the drawing you just made will vanish. Don't panic. Just click the Symbols in Map button again and scroll down to where you will find the new symbol you just made.
Then you will be able to pick the symbol and paste it wherever you like.
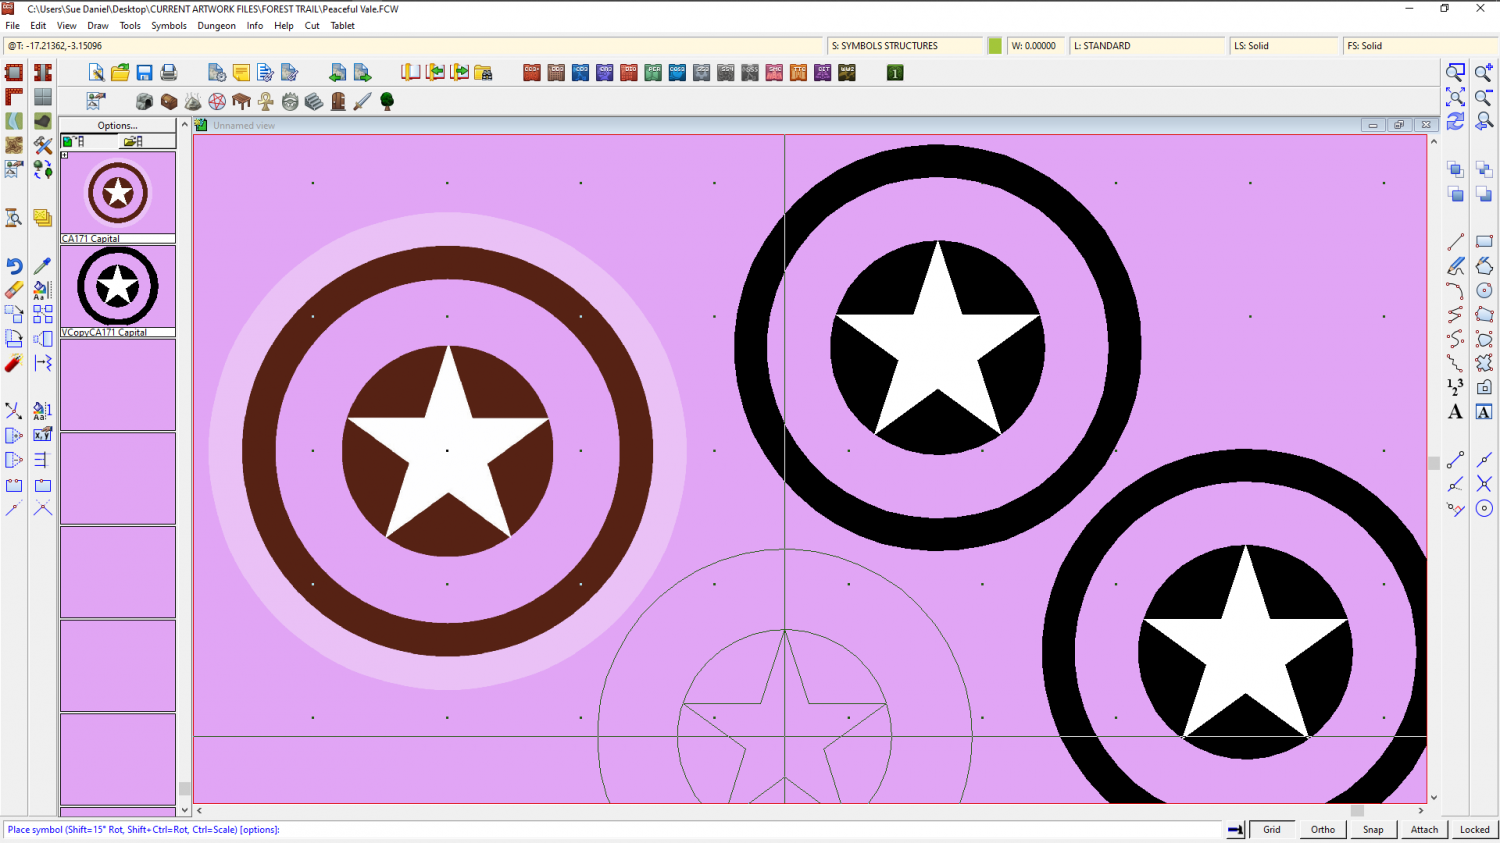
A newly created vector symbol like this one can be saved in a catalogue to make it available in other maps. I recommend saving it in a new catalogue next to all the other catalogues in the style's Symbols subfolder. Like this.

I hope that helps.
![[Deleted User]](https://secure.gravatar.com/avatar/c75d9a245b74d9c59be0999ea81ca541/?default=https%3A%2F%2Fvanillicon.com%2F92add7f8c954488718110edc4896ad39_200.png&rating=g&size=200)


-
Community Atlas - Berenur - Urtrah Desert
Ah, yes, the shadows are in the right direction, but being automatic they are peeping out where they shouldn't on the flat top of the outcrop like here.
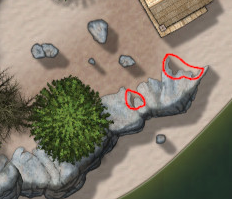
That is the flat top part of the outcrop and shouldn't really be casting a shadow. In the original style there were sheets designed to draw the shadows as black polygons.
To set one up for yourself, leave the shadow effect on whichever sheet the cliffs are one so you have a pattern to draw from, then make a new sheet underneath that one with a blur effect, followed by a Blend Mode effect. Set the blend mode to about 20% opacity. You will have to adjust the blur once you can see what looks right and what doesn't. On this new sheet pick the smooth polygon tool on the right, solid fill and black, then draw roughly the shape of the shadow, excluding the bits you don't want. Tuck the polygon well underneath the outcrops so that the blur doesn't separate the shadow from the outcrops. When you have done that you can switch off the shadow effect on the outcrop sheet.
If there are other things on the same sheet you may need to create a separate sheet for the cliffs that has no effects on it.
The sheet effects in CC3 are pretty good, but there are times when hand drawn is better.

-
How do I break an entity (trying to seperate a single landmass into an island and mainland)
There are several ways of varying complexity - each has a 'best use' scenario. In this situation, since the outline is clear of anything else in the vicinity and relatively simple, I would use the Extract Properties tool |CC2KEEP| to set the active properties to match the land, and then break that polygon open by snipping a small piece out of each side of that neck using the break tool |CC2BREAK|. Then I would right click the Fractalise tool |CC2FRX| and use "Path to Polygon" from the menu to convert both the resulting bits of polygon back into separate polygons - one at a time.
