


Wyvern
Wyvern
About
- Username
- Wyvern
- Joined
- Visits
- 3,237
- Last Active
- Roles
- Member
- Points
- 5,515
- Rank
- Cartographer
- Badges
- 24
Latest Images


-
Community Atlas: Temple of Nidag, Stormwatch, Emerald Crown Forest, Alarius
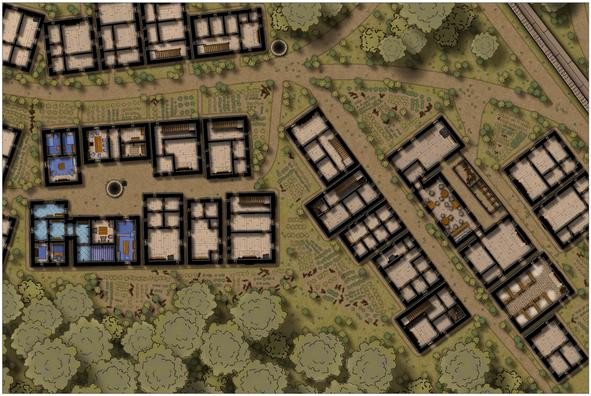
First task on resuming mapping was to complete the structural building interiors and gardens:

However, while I was "digging" the gardens, it became clear the vague not-path from the road to the back of the inn wasn't clear enough. At first, I tried adding patches to cover the hard-line road edges, and tweaking the effects that created those lines too, but it didn't improve, so ultimately, I redrew the connecting area as a full stretch of the road-style dirt pathway, while retaining its funnel-like appearance as seen from above. Doing this though also made me think further about these roadways, so I also added some more of those little "weed clumps" along all the roads, notably at the junctions, in the places where wheels, hoofs and feet would be less likely to pass frequently, all to make the roads look a bit less maintained. They are beyond the main settlement's boundary wall, after all.
Plus we can see how that mid-property fireplace worked out in the end - a fireplace on one side, a cooking range in the narrow, galley-like kitchen on the other.
With this completed, it was time to begin detailing the internal contents of the central properties, those belonging to the temple and its ancillary elements. Temple access hall and priests' quarters first:
Followed by the dwellings of the lesser clergy and higher-ranked followers:
After which came the rest of the inn:

There were a few other changes made here as well. I wanted some water troughs for the stable block, which were simply drawn using fill polygons, as there aren't any suitable symbols in this style (although I did repurpose some stretched versions of the unlit braziers for the wall-mounted hay baskets in the separate stalls - likely too small to see at this res). It then occurred to me that other troughs could be positioned elsewhere, so I put a couple more in by the main crossroads, not far from the well there, and added a few cauldrons resized as buckets nearby, as already done elsewhere.
In addition, I changed the sheets for some of the larger furnishings, to give them a bit more shadow, and thus presence, when viewing the whole map, as I discovered I'd already done that for the bar furniture at the inn earlier. Not sure now if that was by accident or design though!
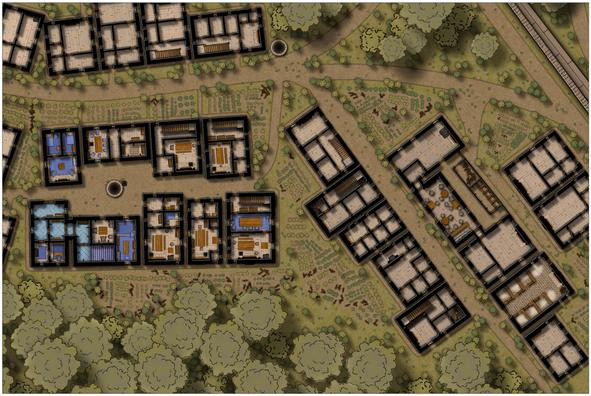
Finally, the last row of properties could have their interiors completed:

I did think of furnishing all the buildings, but felt that would draw attention too much away from the more central properties linked to the subterranean map. This does also leave open the possibility to install player-characters in one or other of these should they wish to spy on the temple and its congregation at some point. Plus it was common practice in many of the earliest D&D maps to show no roofs, just walls, stairs, doorways and windows, for surface buildings.
That just left the labelling, for which I chose the default font that comes with the Naomi Van Doren mapping style, the awkwardly-named IM FELL DW Pica PRO. Names for most of the items were predetermined using tables in Mythmere Games' "Nomicon", as noted in the first post above here, and allocated where appropriate. Thus we reach this completed first map, or at least its surface view, now at full Forum res, no less:
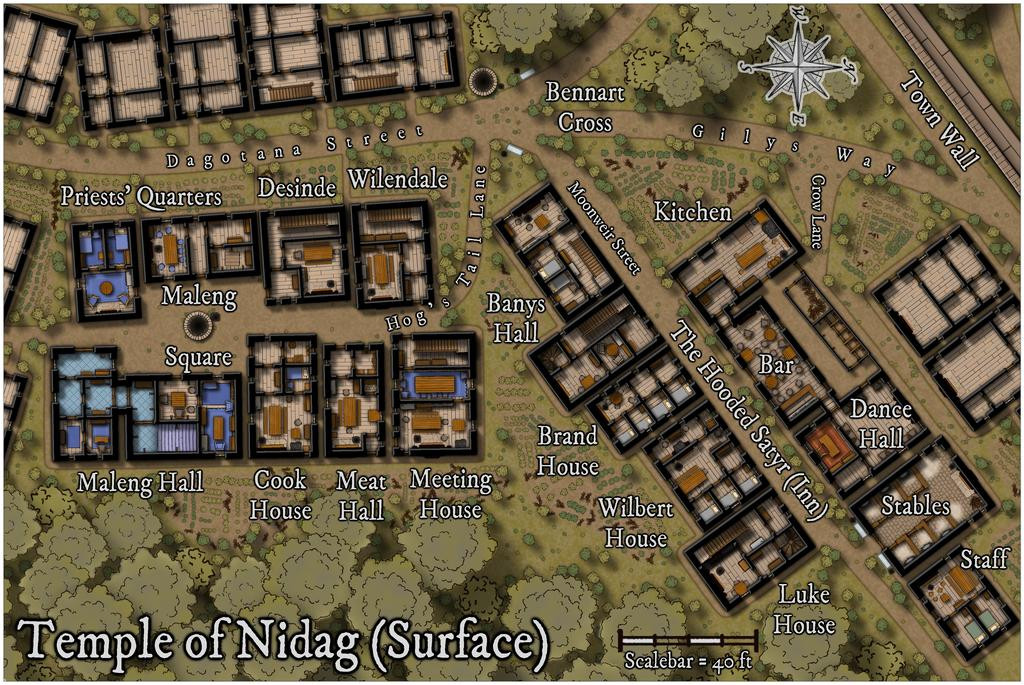
I'll spare you details of how much effort went into tweaking the effects, sizing, colouring and placement of the labels, compass rose and scalebar; suffice to say, it was almost a session in itself.
Next will be designing the upper floors of the properties here that have stairs, which may explain how that Banys Hall label applies to what are apparently two separate buildings at present...


-
Richard Baker's World Builder's Guide Map Templates
It should be fine if you replace "sourcemaps" in the URL with "profantasy". We had a similar problem recently for another of these old Library maps, and Monsen came up with this solution!
[EDIT: Just did a quick test download, and it works fine.]

-
Community Atlas: Temple of Nidag, Stormwatch, Emerald Crown Forest, Alarius
With testing completed, the next stage could begin. My original thought was to use the Pär Lindström Horror House Annual mapping style to fit the overall unsettling theme, and because I thought a simpler drawing style would be interesting to use here. Ultimately, this was changed, but this was where I began. First, the hand-drawn dice design was imported:
Then a copied version of the outlinings plus the town wall segment was pasted onto a second BITMAP Sheet, whose placement was adjusted until it approximated to a fit over the dice design:
This view shows the extent of the mapped zone, and how far beyond it other items had been picked to ensure full coverage of the key area. It also indicates that the dice design barely fits the edges of any of the structures from Stormwatch. However, it also finally allowed the choice of area to be shown on the full Stormwatch map, by copying and pasting an amended version of the map border rectangle over to the Stormwatch map (as in the penultimate image from my first post here).
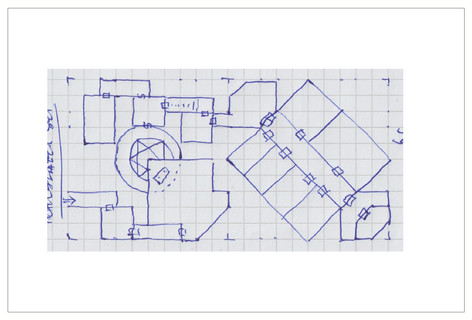
With this complete, I then drew an outline version of the dungeon design's layout, amended to fit the buildings better (at least as far as the nearer- and above-surface parts of the maps were concerned):
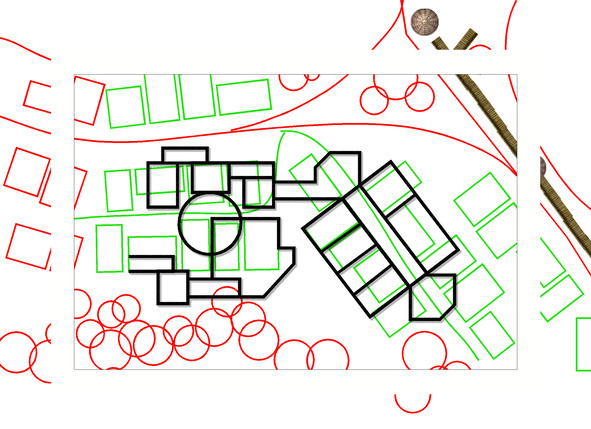
That was about the point I realised the surface map (or maybe maps) needed to be drawn in a different style, because the Horror House one doesn't have any vegetation symbols. While some could have been re-used from others, I thought it preferable to stick with a single style, if possible. Which turned out to be the Naomi Van Doren Fantasy Floorplans one. While not monochrome, it is a nice, fairly clean-drawn style, with a limited colour palette, which seemed appropriate for this high-northern (Stormwatch is at about 58°N latitude), somewhat creepy, setting. As we'll see next time.
[Had it been available when I started drawing this map last month, I might have been tempted to make use of Ralf's new Hand-drawn Dungeon Annual style. Actually, it might match quite well with Naomi's style, so you never know...😊]


-
Community Atlas: Temple of Nidag, Stormwatch, Emerald Crown Forest, Alarius
For the next map in my ongoing Atlas project, I thought it might be interesting to try another work-in-progress topic, to show some of the developments as they happened along the way. It's been a while since I last tried this, and I do tend to forget to record progress while mapping, but we'll see how it goes! The initial posts below, over the coming days, will outline what's happened to get this map underway during the last couple of months, and only the subsequent notes will start to become rather more immediate.
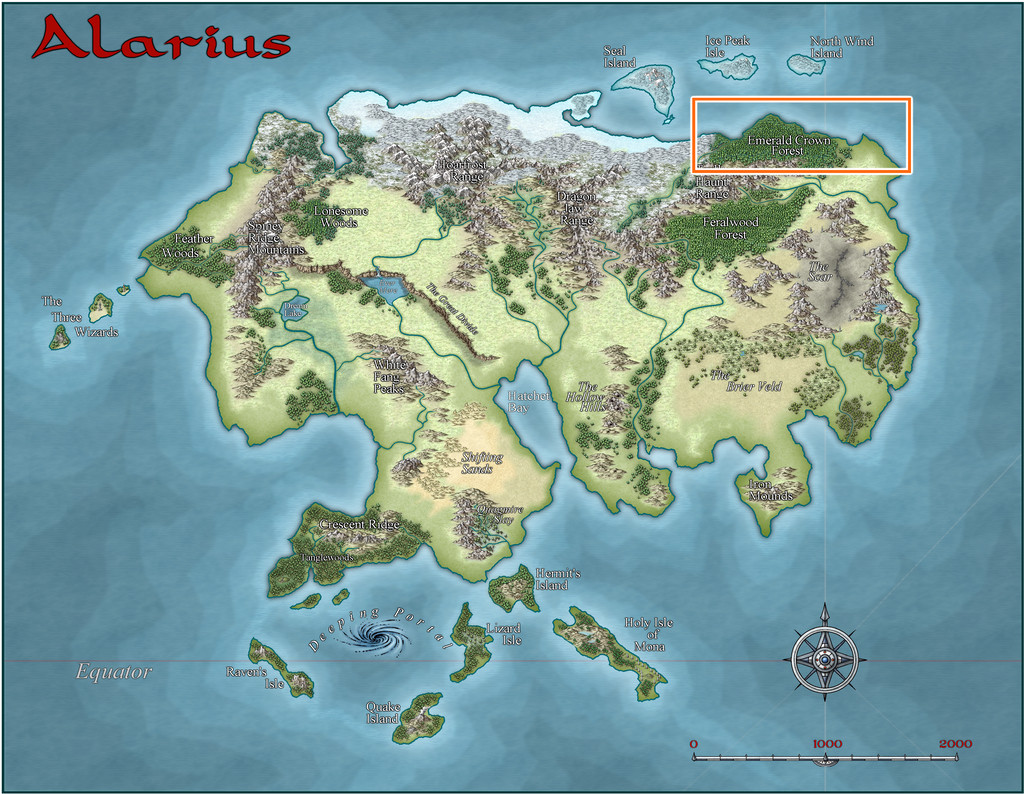
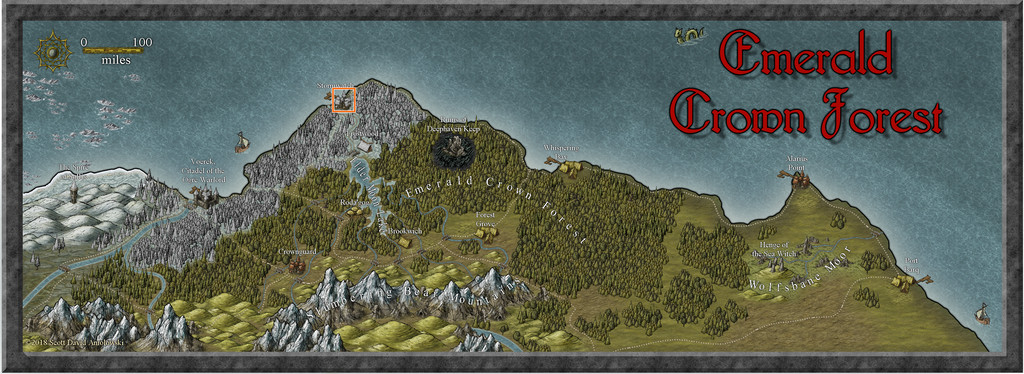
Said map was intended for somewhere in the Emerald Crown Forest region of northeastern Alarius, here:
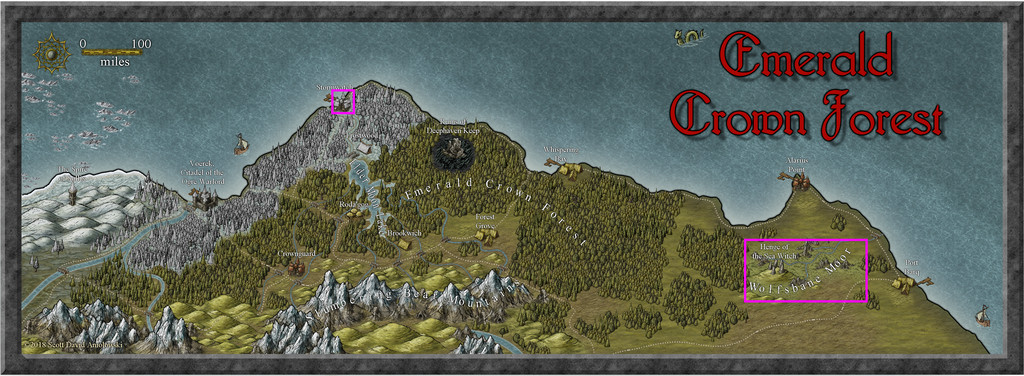
Zooming-in to the next map already in the Atlas, there were a couple of additional places already mapped (highlighted in pink), along with some equally intriguing unmapped spots:
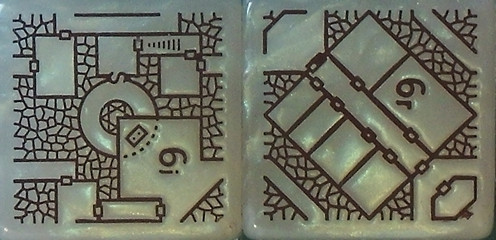
As usual, the development of each new map in this project is an organic process, in that while thinking about where the map's to go, I'm also looking at the dungeon design, and identifying ideas for what its contents and purpose might be. In this case, the design was from two Inkwell Ideas Dungeonmorph Dice in the Trailblazer set:
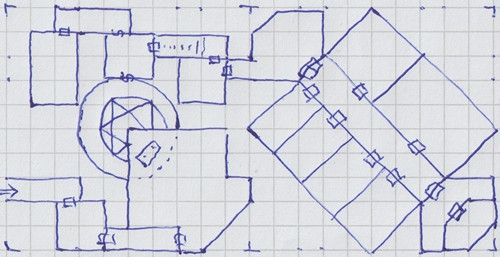
These translated into my hand-scrawled version, with the unconnected/extraneous passages and areas either removed or adapted, thus:
Looking through the Inkwell book that accompanies the dice for this pair of designs, the 6i one is from the Incantations/Magic Areas die, whose main-idea notes suggested this to be a temple masquerading as for a good/neutral deity, but which was actually for another less pleasant one - so that altar above the circular room drops victims down into it, for use in summoning an avatar of the deity, for instance.
The 6r die's main notes (for Rooms/General Areas), proposed it as part of the private quarters for some royalty, with a kitchen, dining room, and guards, while one of the alternative suggestions was for it to be an inn, possibly one with several vertical levels. In combination, these suggested a temple complex (replacing royalty with priests and inner-cabal followers), partly above ground, partly below. That suggested a larger population would be needed to both support and conceal such a place, as well as to provide victims for use in the summoning chamber.
Turning then to a couple of further books for inspiration, the "Tome of Adventure Design", and the very recently-released "Nomicon", both published by Mythmere Games, provided Maleng, Herald of the Seasons as the beneficent nature deity for the temple, with the congregation ostensibly calling themselves The Fellowship of Maleng, although they're really The Fellowship of Nidag, The Blind Slayer (the deity who's not so pleasant).
Looking at settlements in the Emerald Crown Forest area after this naturally pushed my thoughts towards the larger towns, and likely towards those on the coast, as probably having sizeable itinerant populations, where people chosen as victims would be less missed. Which eventually brought me to the pre-mapped town of Stormwatch:
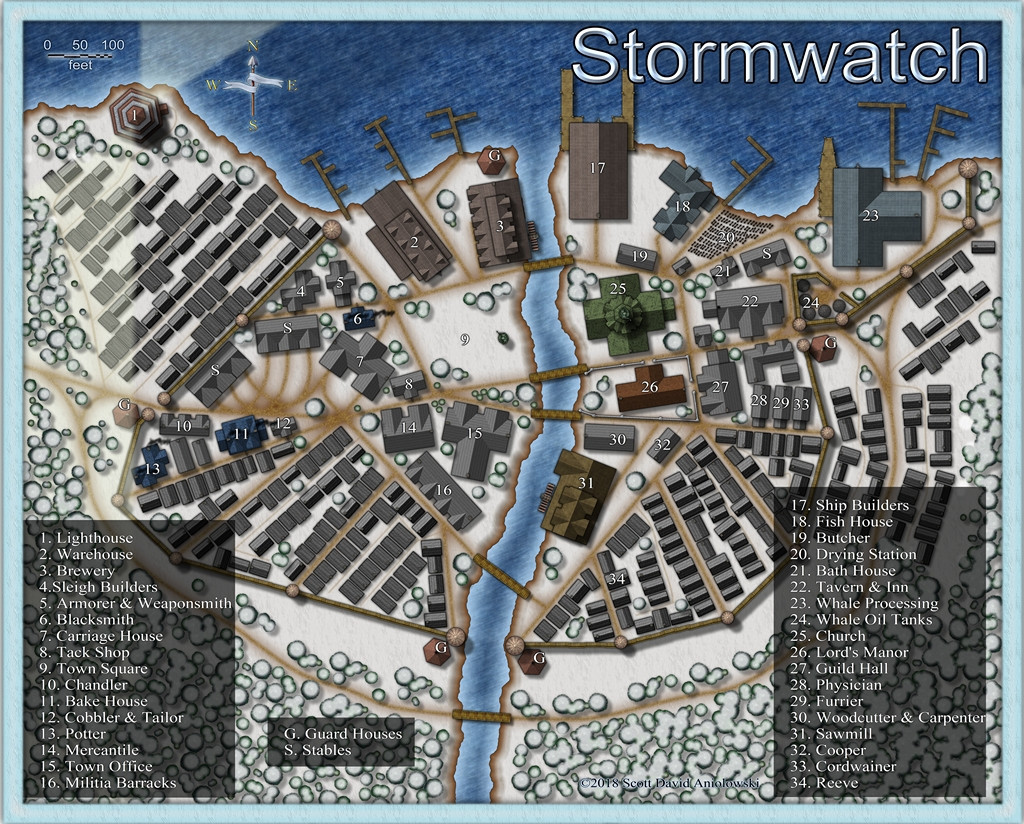
It's probably not hard to see what drew me here - there are lots of anonymous groups of houses of the right size and rough orientation to fit the dungeon dice designs quite well. Finally, I picked a spot on the eastern edge of the map, outside the town walls, here:
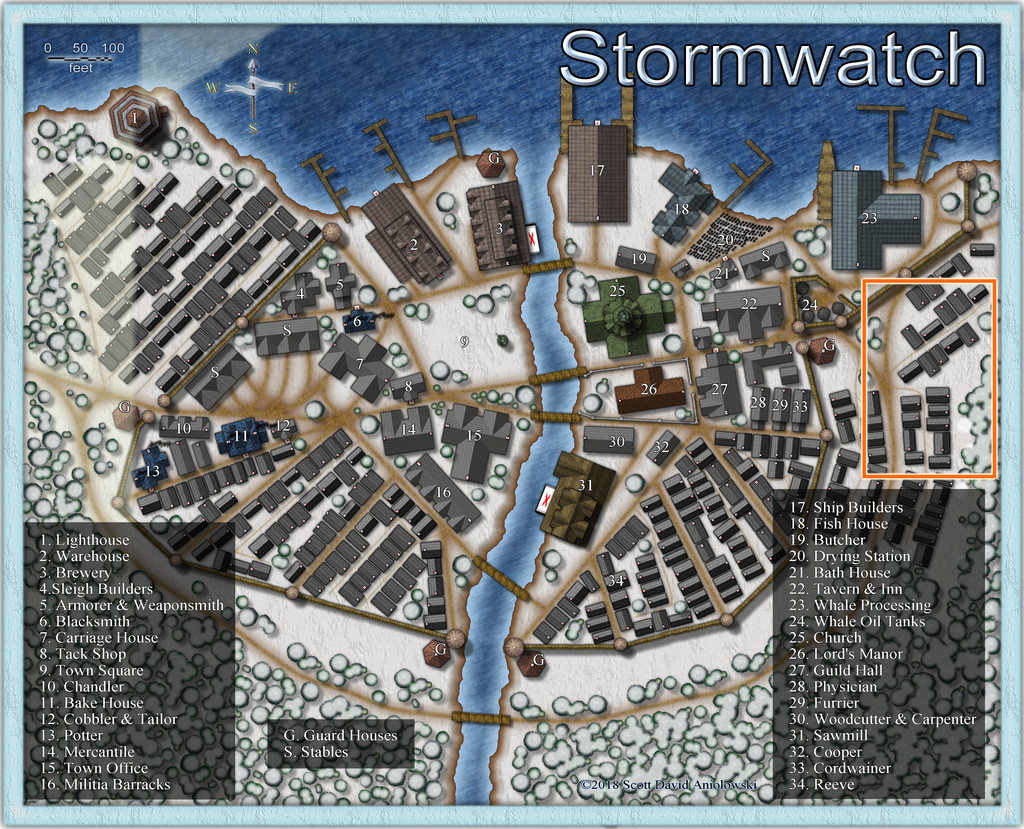
At which point we discover I was missing a few small symbols (probably from the free, non-ProFantasy, sets usable in the Atlas) - for the inn signs, chimneys and waterwheels - hence the red Xs in places (the previous shot of Stormwatch was taken from the hi-res Atlas version).
Choosing that area wasn't straightforward, however, because a swift test-trial of my hand-drawn dice design showed the fit wasn't going to be exact, either from the placement and sizes of the various buildings, or the angle between the two main parts of the design. This wasn't unexpected, and after checking several potential alternatives, the orange rectangle on the image just above was picked as the closer fit. Even then, that area wasn't properly defined at this point.
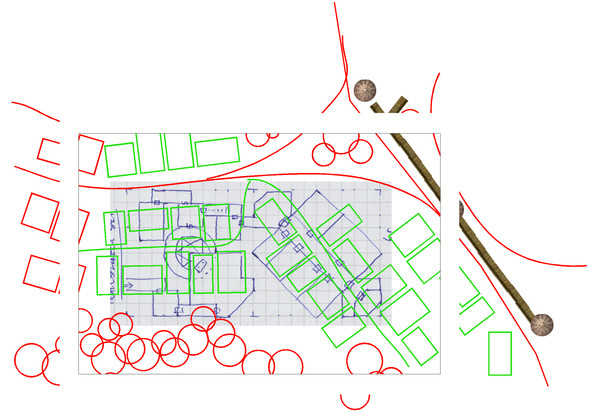
I narrowed the spot down by setting-up a basic line drawing in CC3+, where I could compare the exact shapes, sizes and orientations of the Stormwatch buildings with the dice design draft map. This began by extracting those forms from the Stormwatch map thus:
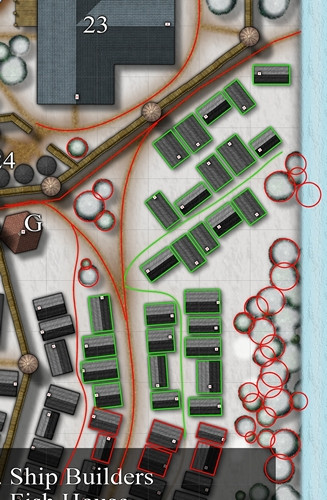
The building outlines were generated more or less automatically, by simply copying the buildings to a new sheet and layer, and changing their properties (possible only because they were originally created using the CD3 house-drawing tool), while the tree circles and road lines were all hand-drawn. The two colours are because the original test-fitting was done just with the green-outlined buildings, and took several attempts. The red outlining was to make sure all the features in the final rectangular map area would be covered too, once the final "green" selection was made. Next time, pinning-down that rectangle.


-
Community Atlas: Hopes Lost, Lampoteuo Region, Artemisia
Meanwhile, back at the topic in-hand...
Hunting for a potential Lower Level design meant checking through those unused from the Trailblazer dice, leading to one with suitable architecture and features being semi-randomly decided-upon, and mapped:

As a one-dice design, it did leave a bit of space around it, so picking the four elementals from the first Token Treasury set seemed an obvious decorative addition here. This time, I also opted to use the usual square-tile bitmap fill design for the chequered marble, now with that greyscale RGB Matrix Process effect I'd decided against for the Upper Level, because here, it IS the entire floor covering, so there's no unhelpful comparisons to be made with the "real" B&W marble textures. The Inkwell notes stated the design was diamond-form, and while I experimented with copy-and-pasted strips of my hand-drawn B&W marble chequer floor from the Upper Level, their sizing wouldn't fit evenly to the layout here. I then tried using the standard check fill for just the passageways and rooms, but trying to get those angled-by-edge to a neat 45° proved impossible for the shapes involved. So in the end, I just drew a large rectangle, rotated it, and then changed the design with angle-by-edge (and got rid of the roof shading look too, naturally).
This does lose the mild glow effect on the floor edges where they ordinarily meet the walls, although as I'd already left some pale shadow effects on the Upper Level walls anyway (which began as I wanted the external cliffs to have shadows on the outside), that shadowing, with the wall glows, seemed to work sufficiently well anyway. I don't often use shadows for dungeon maps, but in this case, they seemed to help everywhere.
Of course, there are elementals here, and the "pools" can be opened as scrying devices to their linked planes, as well as gates into them. If you look closely at the Elemental Grand Mage's Quarters (probably easiest on the Gallery version), you'll find how my attempt at making the view of a "roofless" four-poster bed turned out, as mentioned elsewhere on the Forum a few weeks ago.
Next time, it's back to northern Alarius, to find a spot somewhere in the Emerald Crown Forest region...
