
Monsen
Monsen
About
- Username
- Monsen
- Joined
- Visits
- 663
- Last Active
- Roles
- Administrator
- Points
- 8,865
- Birthday
- May 14, 1976
- Location
- Bergen, Norway
- Website
- https://atlas.monsen.cc
- Real Name
- Remy Monsen
- Rank
- Cartographer
- Badges
- 27
Latest Images
-
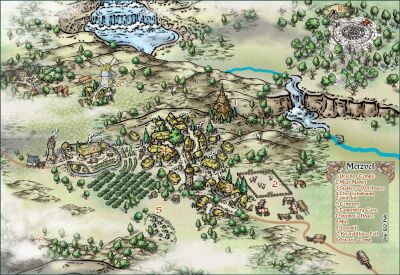
CC3+ Going back to the basics-Overland.
Notice that this behavior can indeed be automatic with the drawing tool, and it is that behaviour the instructions was written against, but it seems that most drawing tools doesn't use it. But if you edit a drawing tool, you'll see it has a setting labeled attach mode, which can be current settings, on or off. Current setting refers to the global attach option, the button down in the lower right of the main gui. On or off is just forcing it to be always on or off. Right click the attach button in the lower right to select exactly which attach option to use, I think endpoint is the default. (The drawing tool can unfortunately not specify which attach option to use, only if it should be used or not)


-
CC3+ Connecting nodes (to connect passages)
This is one of the situations where it isn't that difficult to do, but the explanation may look a bit involved at first. This is a bit extra complicated because I see you are using a custom version of the drawing tool, but you haven't set the sheet and layer settings for the outline properly.
Connecting it will require a bit of manual work since you cannot use the edit feature of the drawing tool, since that will just extend it from one side, but not connect the other. There is also the complication that regular polygons cannot have holes in them, but connecting it up will end you up with a hole in your floor poly immediately to the left of where you are connecting up. There are a couple of ways to do this, but some node editing and a multipoly is probably the way to end up at the desired result here. Keep in mind that a multipoly isn't editable with the drawing tools edit features, so this should be done when you are done drawing the system.
First, keep in mind that the wall line is a separate entity. We'll start by editing this one. To avoid editing the floors instead (easy to do when two entities overlap), start by hiding the BACKGROUND (FLOOR 1) layer, this should leave you with just the wall entity.
Use change properties to move your wall entities to the WALLS sheet and the WALLS layer. If you find yourself unable to select it at this point, it is because it is on the HEX/SQUARE GRID layer, and that layer may be frozen. If so, you must first enter the layers dialog and unfreeze that layer.
Then use :CC2BREAK: on the wall to create a gap in both the upper and lower section where approximately where you want the joining segment to meet up. (When selecting an entity to break, the point you used to first select it on defines the part of the entity to keep)
Now, right click :CC2EXPLODE: and pick Path to Poly. You're going to use this twice, first on the small wall that goes around that little "hole" to the left of your marked area, then on the main wall going around the rest. This should leave you with two walls, one outer and one inner. If you are unhappy with the straight connecting lines, you can add some detail by using :CC2INSNODE: to add a few more nodes in the walls.
Now, show the floors again by unhiding BACKGROUND (FLOORS 1). The existing floors are of no use to us, so we are going to erase them but let us just pick up their settings first, so use :CC2KEEP: on it first, then :CC2ERASE: it.
Now, right click :CC2COPY: and pick Copy to Sheet. Use this to copy both your wall lines to the FLOORS sheet.
Hide the walls sheet. The walls you see now are the copies on the FLOORS sheet. Use :CC2MCHANGE: on the large outer one, and just hit OK. The default values in change properties is the current properties, which we got from the old floors when we used extract properties on it earlier. The large polygon should now look like your floors
Finally, to make the hole, use :CC2MPOLY2: to combine the floor poly with the smaller wall segment. The wall segment may be hidden below the floor poly at this point, but you know where it is, and should be able to pick it up using a selection rectangle even if you cannot see it. You'll see that you have succeeded when the selection counter tells you that you have two entities selected. Be vary of the grid, you don't want to select that.
Now all that remains is to show the WALLS sheet again, and you should have both your floor and the walls.

-
a mountain of work ahead of me
So if I understand you correctly, the effect you're after is a path snaking it's way upward on a mountainside, similar to what I did with Corgin.
In that map I relied heavily on the cliff texture from SS2, as I found it works really well. I also gradually darkened the path by using the Solid 10 Fill style, basically by drawing larger and larger polygons, so that the lower part basically has more layers, darkening it more. Since Solid 10 is almost transparent, the edges between the different amount of layers is practically invisible. I also drew in some polygons manually to serve as shadows from the cliffside.
-
Configuring CC3+
If you are running a recent (less than 10 years old) 64-bit version of Windows, you don't need to do anything.

-
Fractal Terrains 3 world generation
You can't set it at generation, but you can set them via the global operations afterwards. (Tools -> Global Set)