


Royal Scribe
Royal Scribe
About
- Username
- Royal Scribe
- Joined
- Visits
- 9,531
- Last Active
- Roles
- Member
- Points
- 3,353
- Birthday
- February 5, 1968
- Location
- San Francisco, California
- Website
- https://legacy.drivethrurpg.com/browse/pub/31814/Royal-Scribe-Imaginarium
- Real Name
- Kevin
- Rank
- Mapmaker
- Badges
- 16
Latest Images
Reactions
-
Middan'ord: The Realmdom of Thwendar
I love it. And I personally never get sick of seeing iterations of the same map. I love seeing how they evolve.

-
[WIP] Lumadair - Hand-Drawn Fantasy (CA221)
Can confirm that all four of the Forest tools now work properly. It was easier to delete the mysterious lines than to redraw the forests, but at least future maps won't have that issue.
When I brought the land over from the Fractal Terrains export, they were all locked together as a multipoly. I decided to explode them so that I could use the "Change Like Draw Tool" function with the green land for Lumadair and the default brown for the other continents.
Also, the multipoly sea contours from Fractal Terrains have the darker sea as the base with lighter contours on top. When I copied over the sea contours, I just copied a light one and then used the "Change Like Draw Tool" to change it to the lighter contour of the Hand-Drawn Fantasy style, and then manually drew in the darker contours. Not bad for a map that took me less than an hour for the initial map.


-
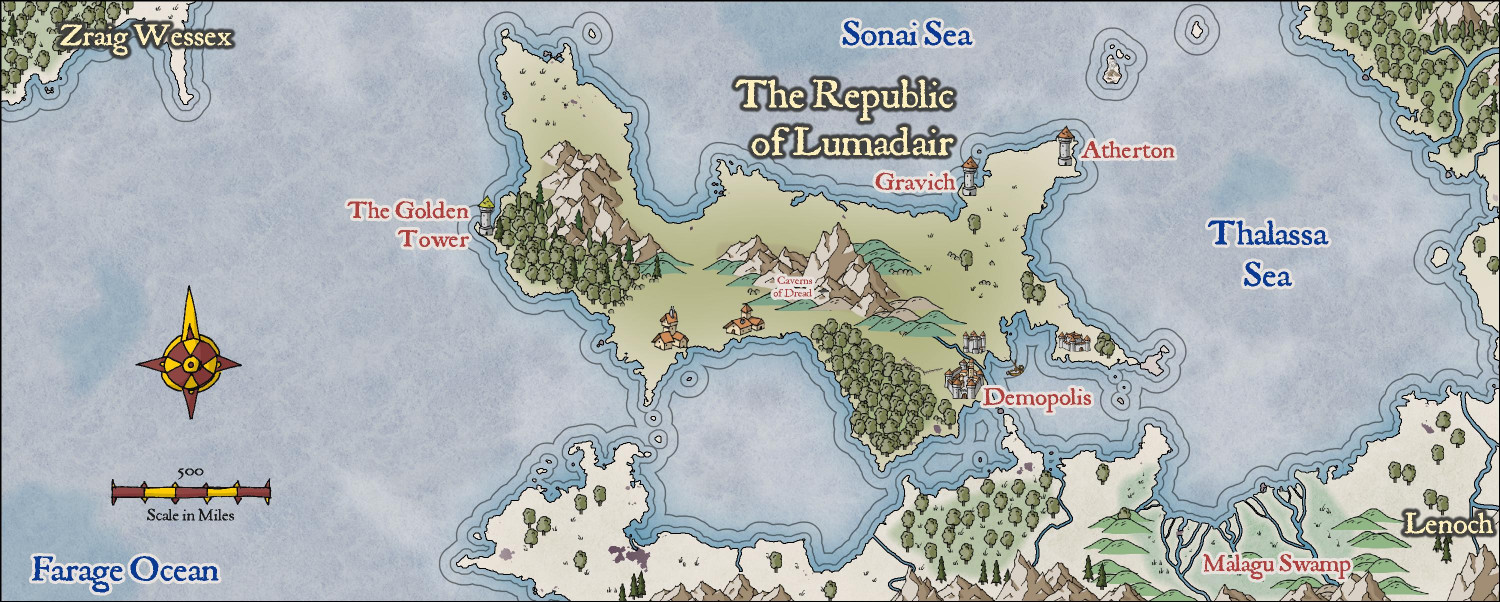
[WIP] Lumadair - Hand-Drawn Fantasy (CA221)
Usually I wait until Ralf has had a chance to demo new annuals in the Live sessions, but since there was no Live today because of the May Day holiday, I decided to dive in anyway. Here's my tried-and-true, oft-mapped Republic of Lumadair in the new "Hand-Drawn Fantasy" style.
I used the cutout approach for the rivers. But rather than drawing the swamp terrain around the rivers, I added the Color Key effect to the Swamp Terrain sheet and then copied my magenta rivers to that sheet as well.
It's funny how much I've mapped Lumadair, given that it isn't even intended to be the main location for my campaign world. But it is a conveniently-sized area, and once I did one map of it, I found it useful to do other styles for the same location as a convenient way of comparing them.


-
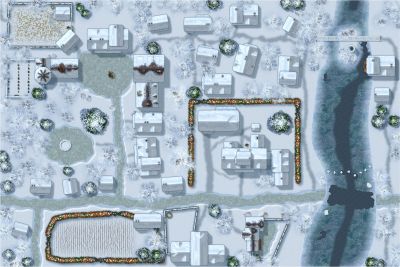
Atlas Submission: Doriant - Gold Coast - Tyr Alomere
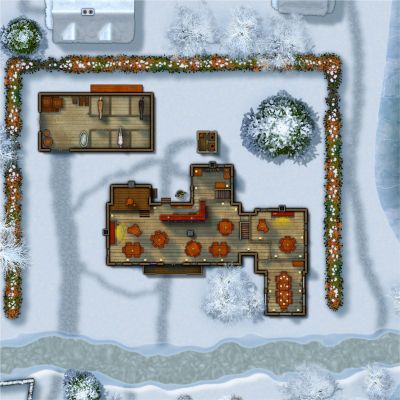
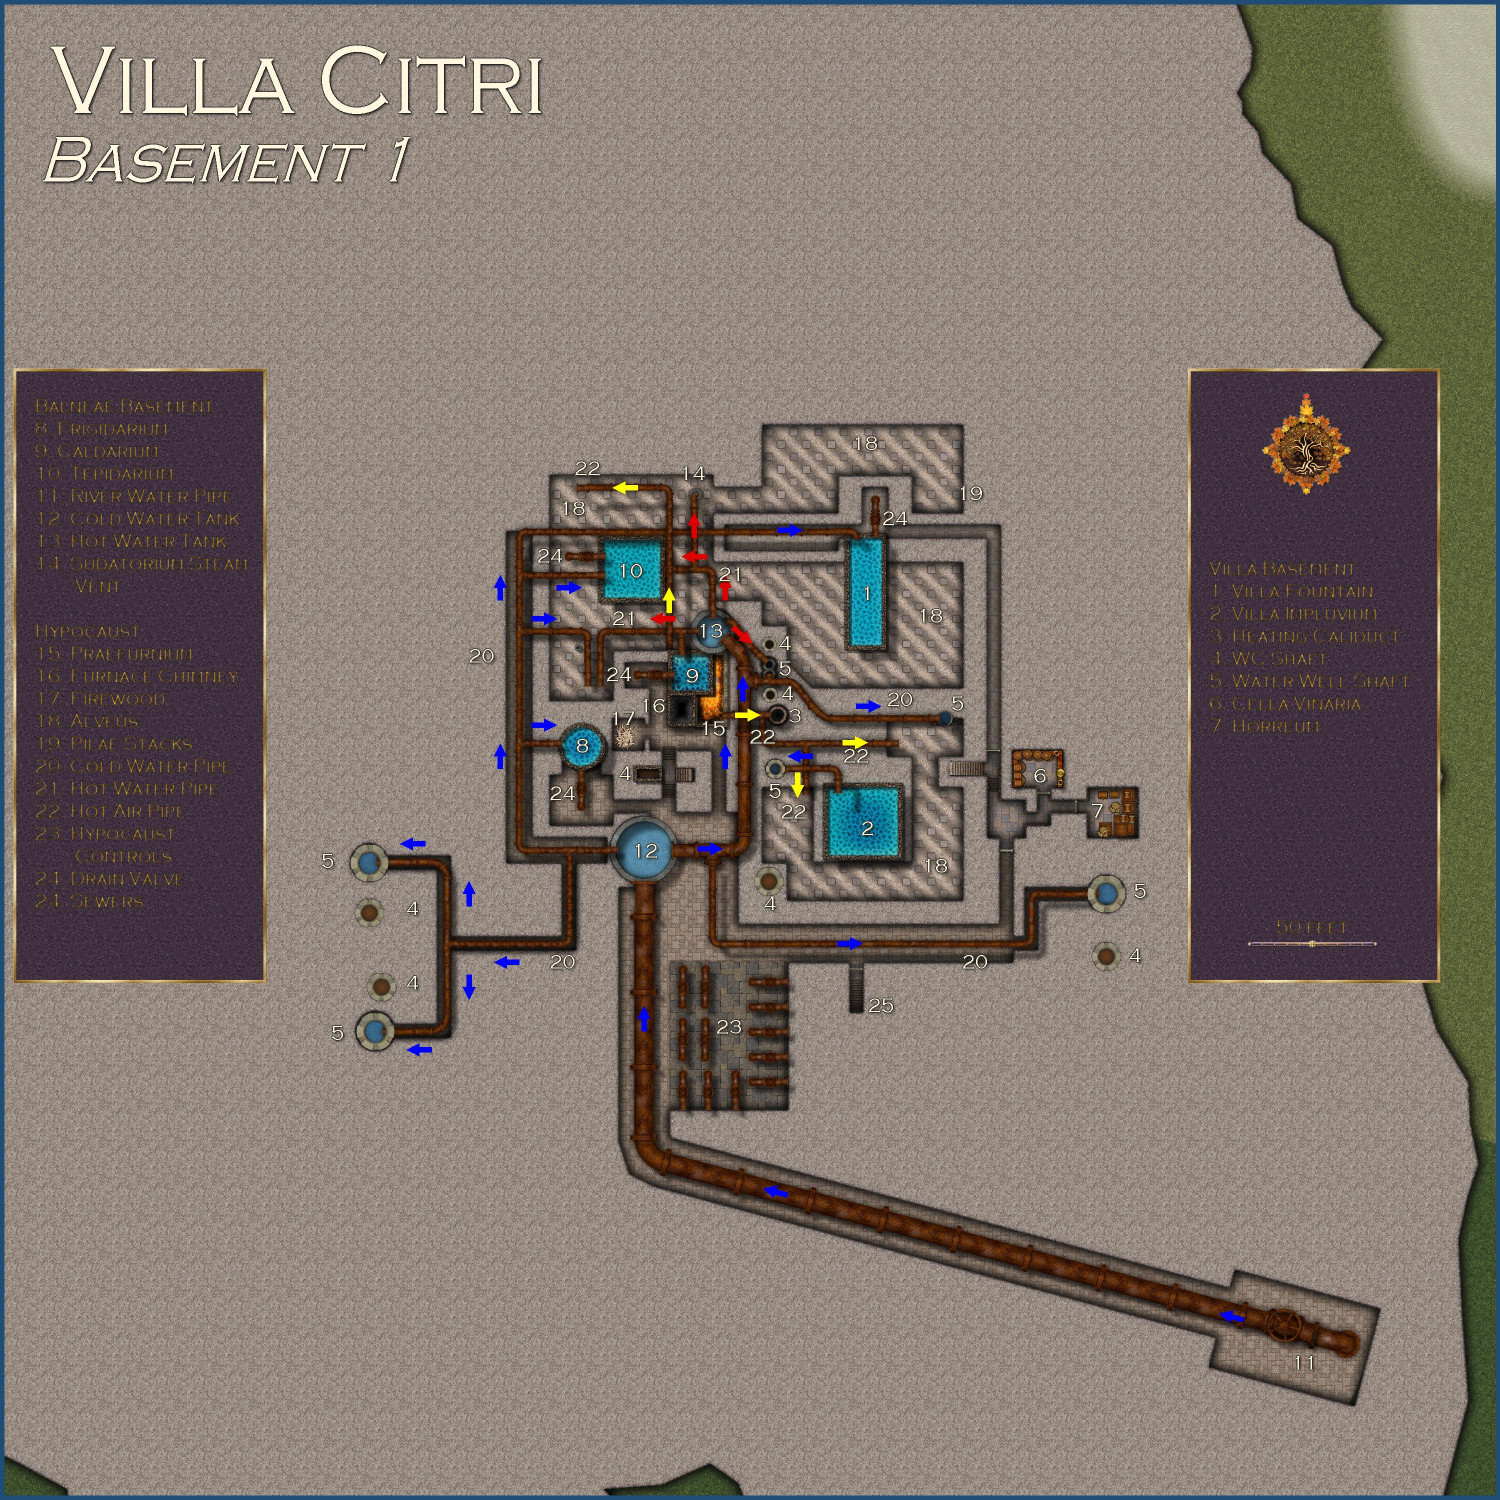
The basement of the villa.
Toggles
FURNACE ROOF layer to hide/display the roof over the furnace
FLOW ARROWS layer to hide/display arrows showing direction of hot water, cold water, and warm air
PARCHMENT layer to hide/reveal the layer of parchment that provides a sort of sepia filter over the outdoor areas.
TEXT LABELS (NUMBERS) layer to hide/display the numbered labels.
TEXT LABELS layer to hide/display the legends describing the labeled numbers.
Files
Description
The basement of the Villa Citri and its estate.
Villa Basement
1. Villa Fountain
The base of the fountain in the villa’s peristylium courtyard, with water pipes to keep it filled even in the dry months, and a drain valve to empty the fountain for maintenance.
2. Villa Impluvium
The base of the villa’s impluvium.
3. Heating Caliduct
Heat vent brings hot air from the hypocaust to the upper levels of the villa.
4. WC Shaft
Shaft brings waste from the lavatories to the sewers.
5. Water Well Shaft
Pipes bring river water to the upper floors of the villa.
6. Cella Vinaria
The villa’s wine cellar.
7. Horreum
A storage room.
Balneae Basement
8. Frigidarium
The lower portion of the cold-water pool, with the pipes to bring water in and the release valves to drain it when necessary.
9. Caldarium
The lower portion of the hot-water pool, with the pipes to bring water in and the release valves to drain it when necessary.
10. Tepidarium
The lower portion of the warm-water pool, with the pipes to bring water in and the release valves to drain it when necessary.
11. River Water Pipe
Water piped in from the river.
12. Cold Water Tank
River water is piped to this massive tank to provide water for all of the villa’s operations.
13. Hot Water Tank
River water heated by the hypocaust is stored here to provide the villa and bathhouse’s hot water needs.
14. Sudatorium Steam Vent
This vent provides hot steam to the steam sauna above.
Hypocaust
15. Praefurnium
The wood-burning furnace used to provide hot air and water for the villa and the bathhouse.
16. Furnace Chimney
The chimney to vent the hypocaust’s smoke.
17. Firewood
The hypocaust naturally needs an endless supply of firewood to keep air and water hot.
18. Alveus
The hollow space beneath the building's floor, where hot air from the hypocaust circulates.
19. Pilae Stacks
These are the small pillars of tiles that support the raised floor above the hypocaust, creating the space for hot air to circulate.
20. Cold Water Pipe
Pipes bring cold water throughout the bathhouse and villa.
21. Hot Water Pipe
Water heated by the hypocaust.
22. Hot Air Pipe
Hot air from the hypocaust used to heat the bathhouse and the villa.
23. Hypocaust Controls
A complex series of controls allows water pipes and heating caliducts to be opened or shut as needed, either for maintenance or when warmer weather precludes the need for heated floors.
24. Drain Valve
Used to drain water from pools directly into the sewers.
25. Sewers
Stairs that descend into the portion of the municipal sewers that services the villa.
-
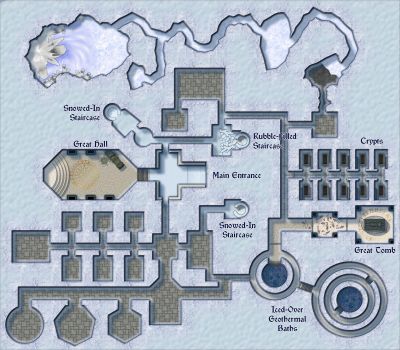
[WIP] Villa Citri (Roman-style villa)
I finished the basement with the hypocaust. This level required extensive plotting to make sure the pipes went to the right places.
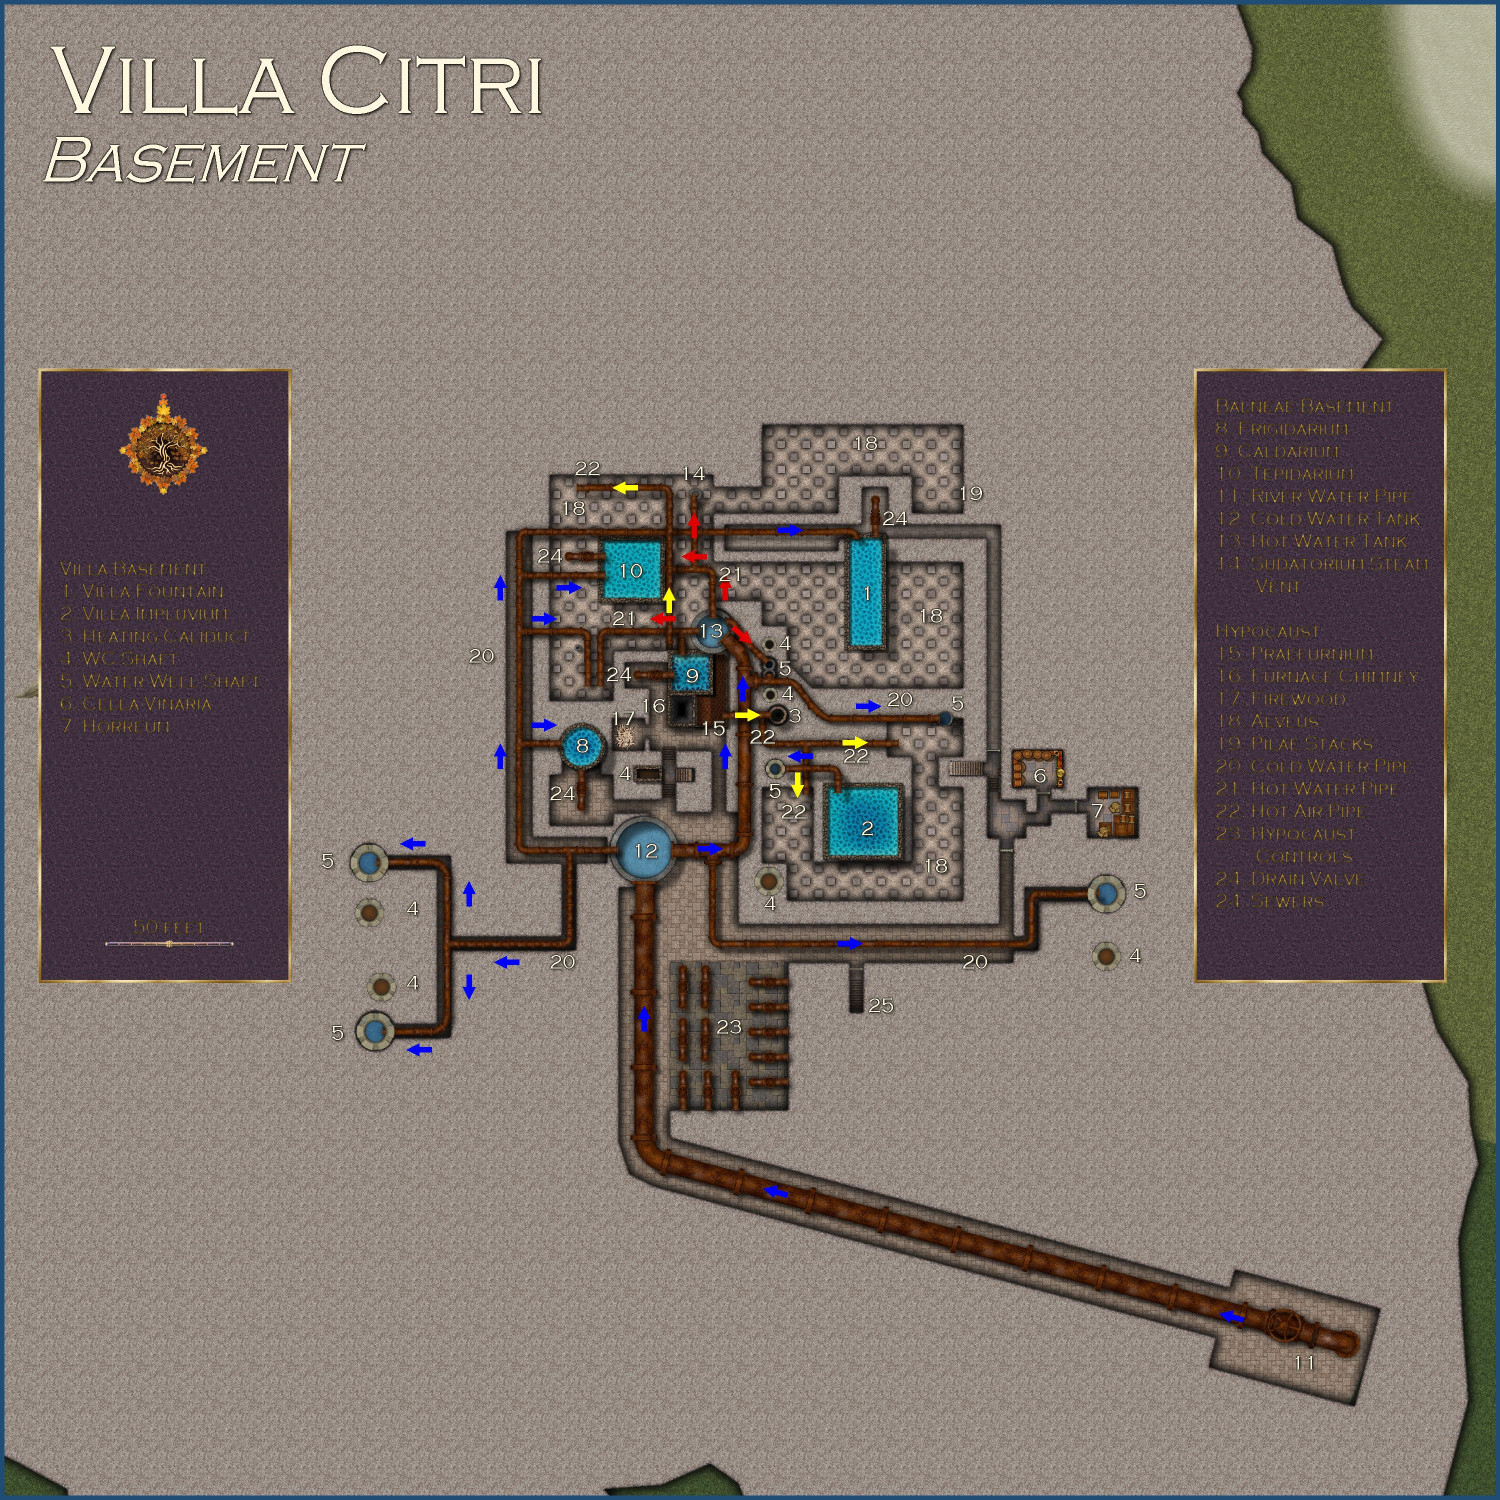
First, here it is unlabeled so you can actually see everything, because there are a lot of labels. Note that the pools are supposed to be elevated (hence the drop shadows on them), as this is the lower portion of the pools where water is piped in and drained out.
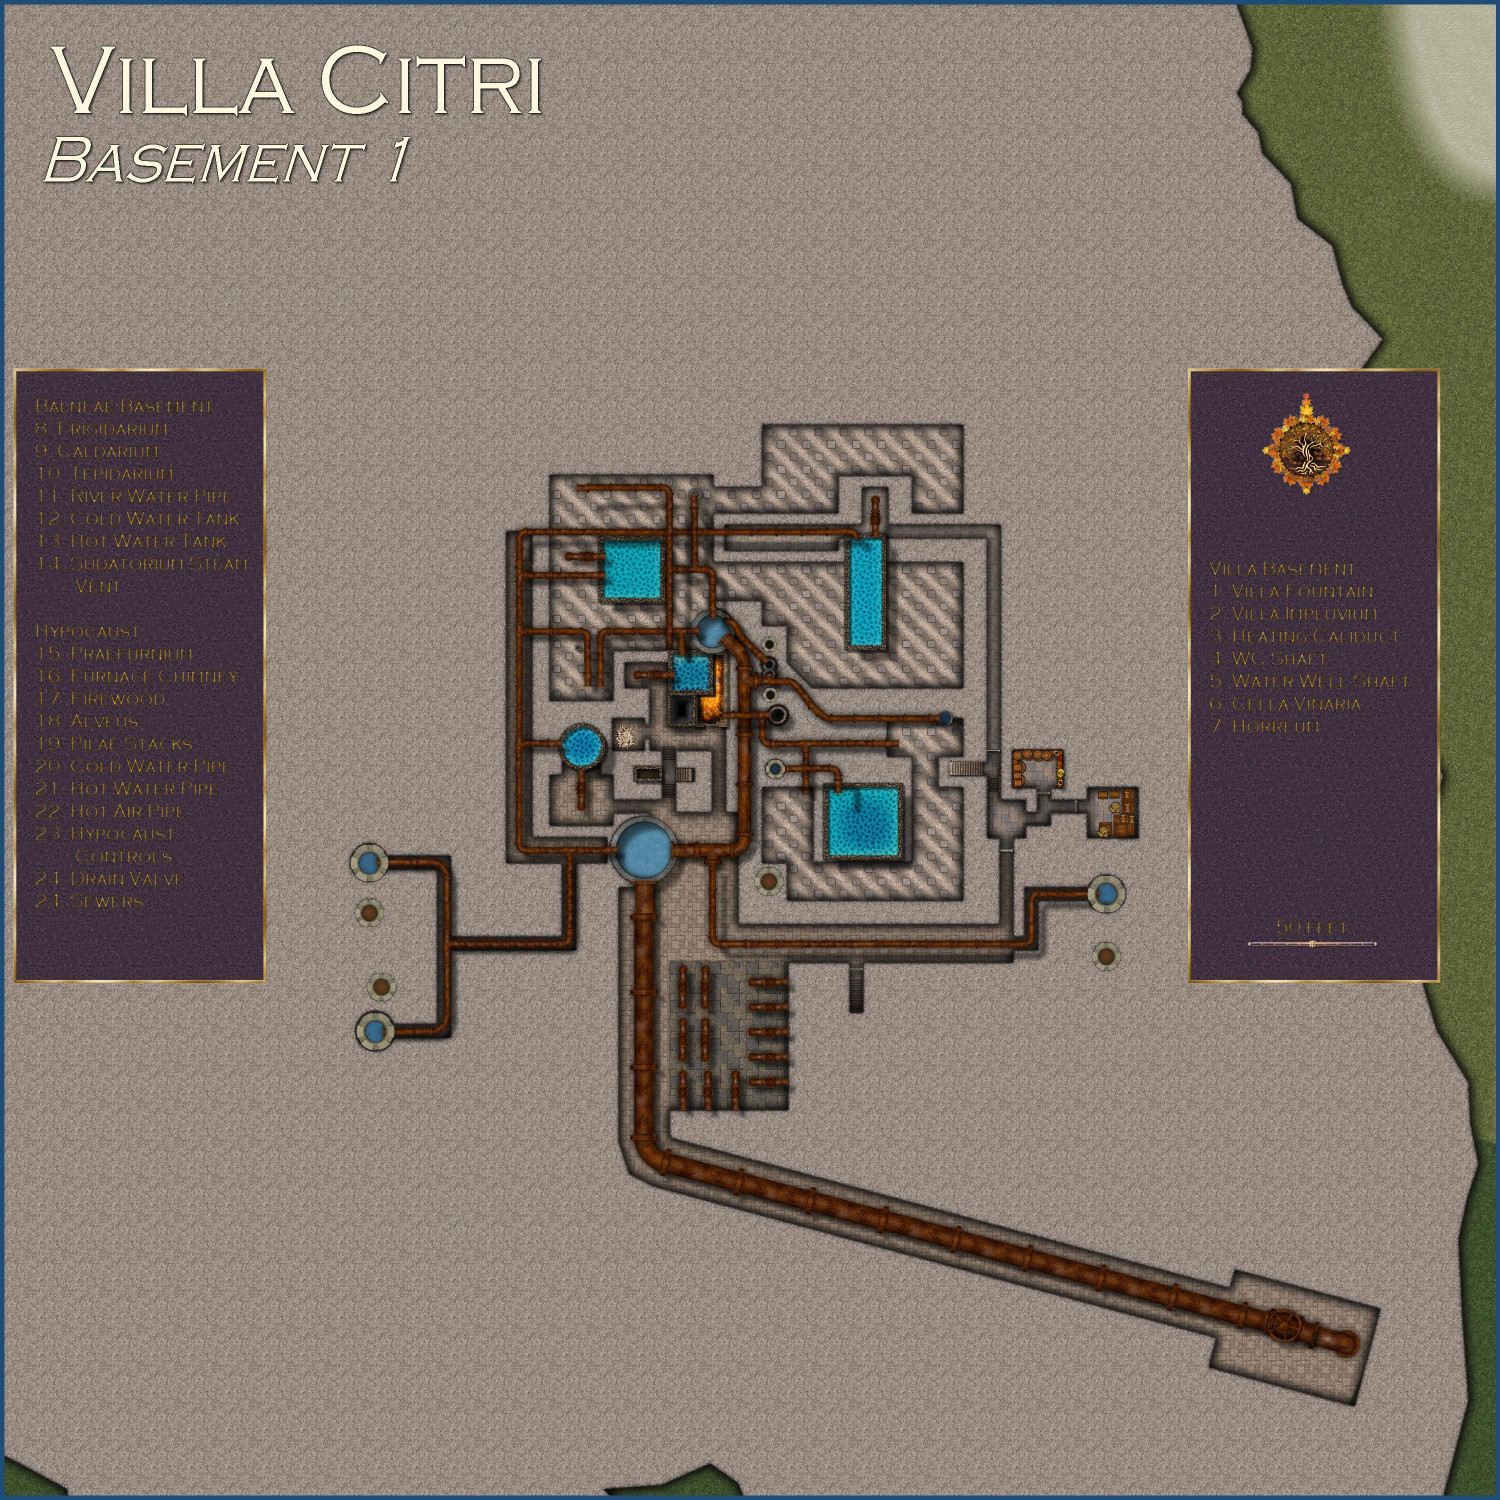
And here it is labeled. The labels include arrows indicating flow: blue for cold water, red for hot water, and yellow for warm air. The labels and the arrows are on separate layers to allow them to be independently hidden or revealed.
A giant furnace (called a Praefurnium) is used to heat water and air. Here it is covered, and then uncovered.
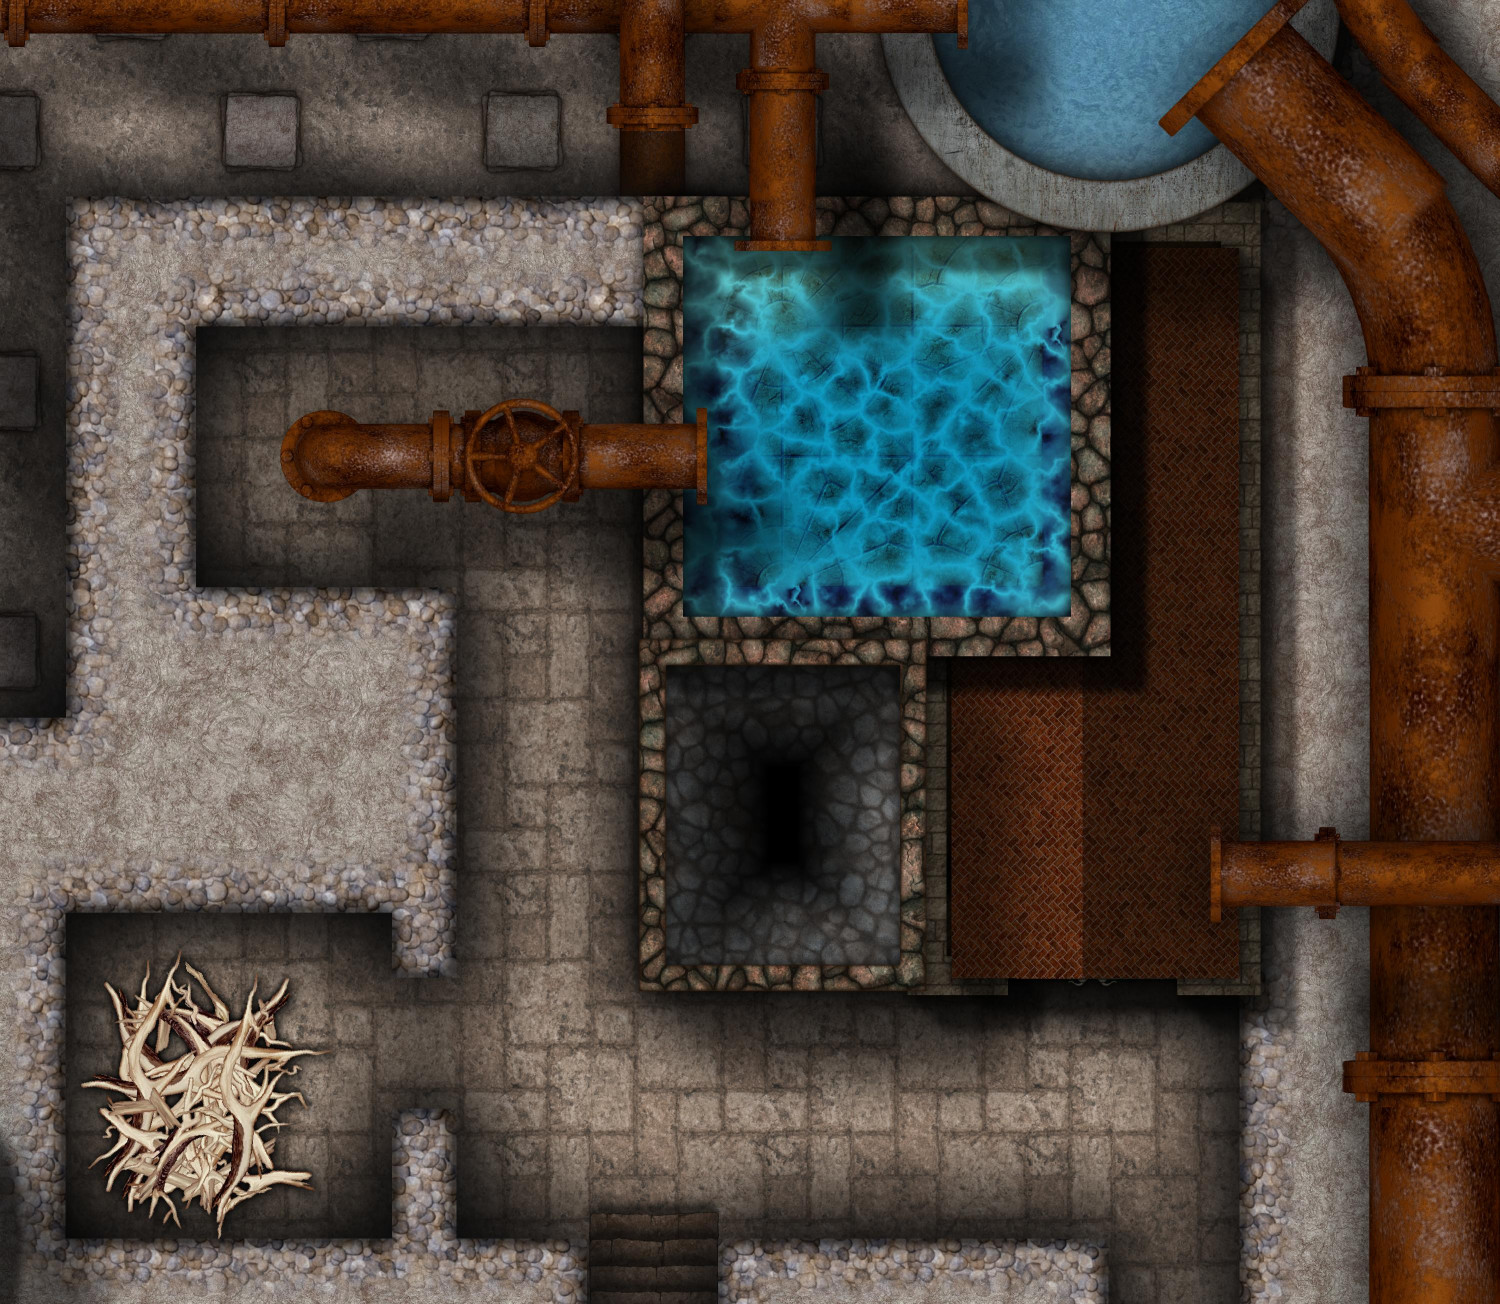
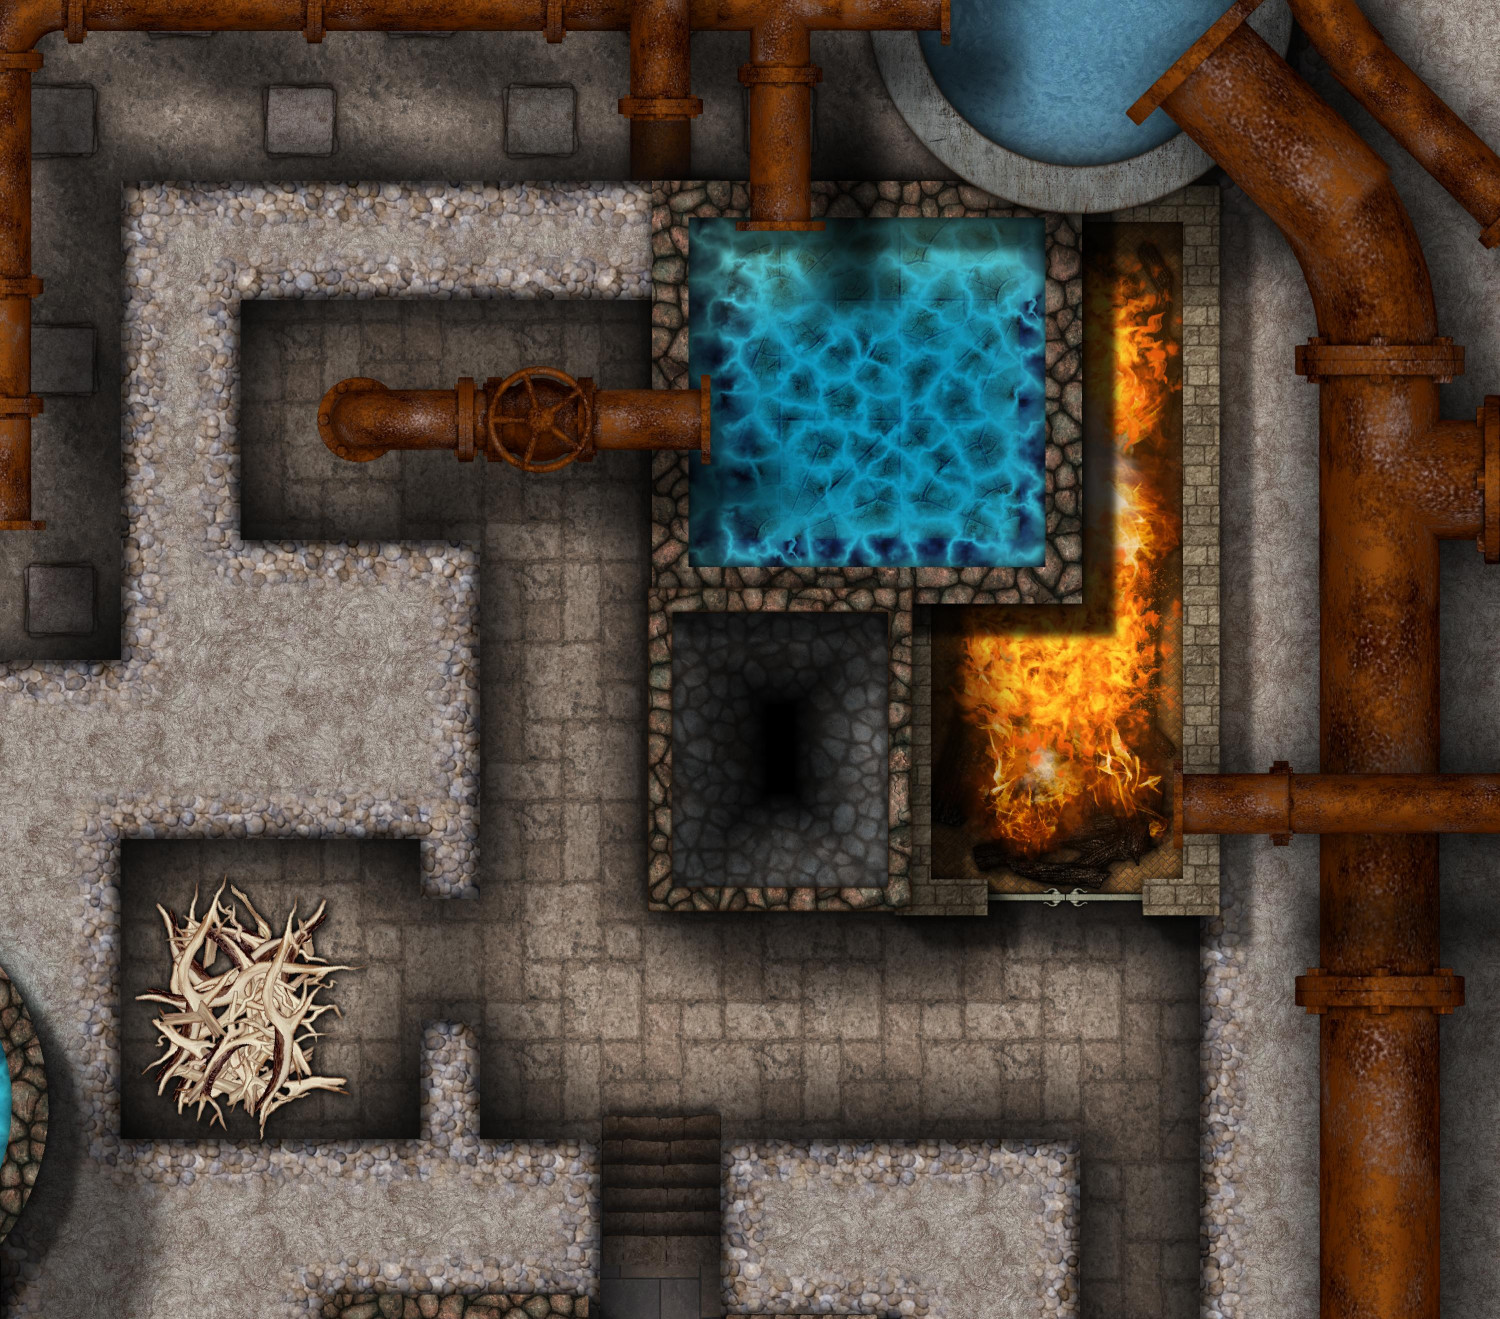
The hypocaust itself is basically a series of chambers through which hot air can flow, warming the floors for the level above, with vents that can bring warm air up to the upper stories of multistory buildings. These chambers are called Alveus. Within these chambers are stacked tiles made into pillars, called Pilae or Pilae Stacks, used to support the roof of the hypocaust as well as to conduct heat to the floors above. (This screengrab also illustrates the technique I used for the subterranean walls, using the cutout effects that Sue developed for Creepy Crypts, but using the stone and pebble fills she developed for Marine Dungeons.)
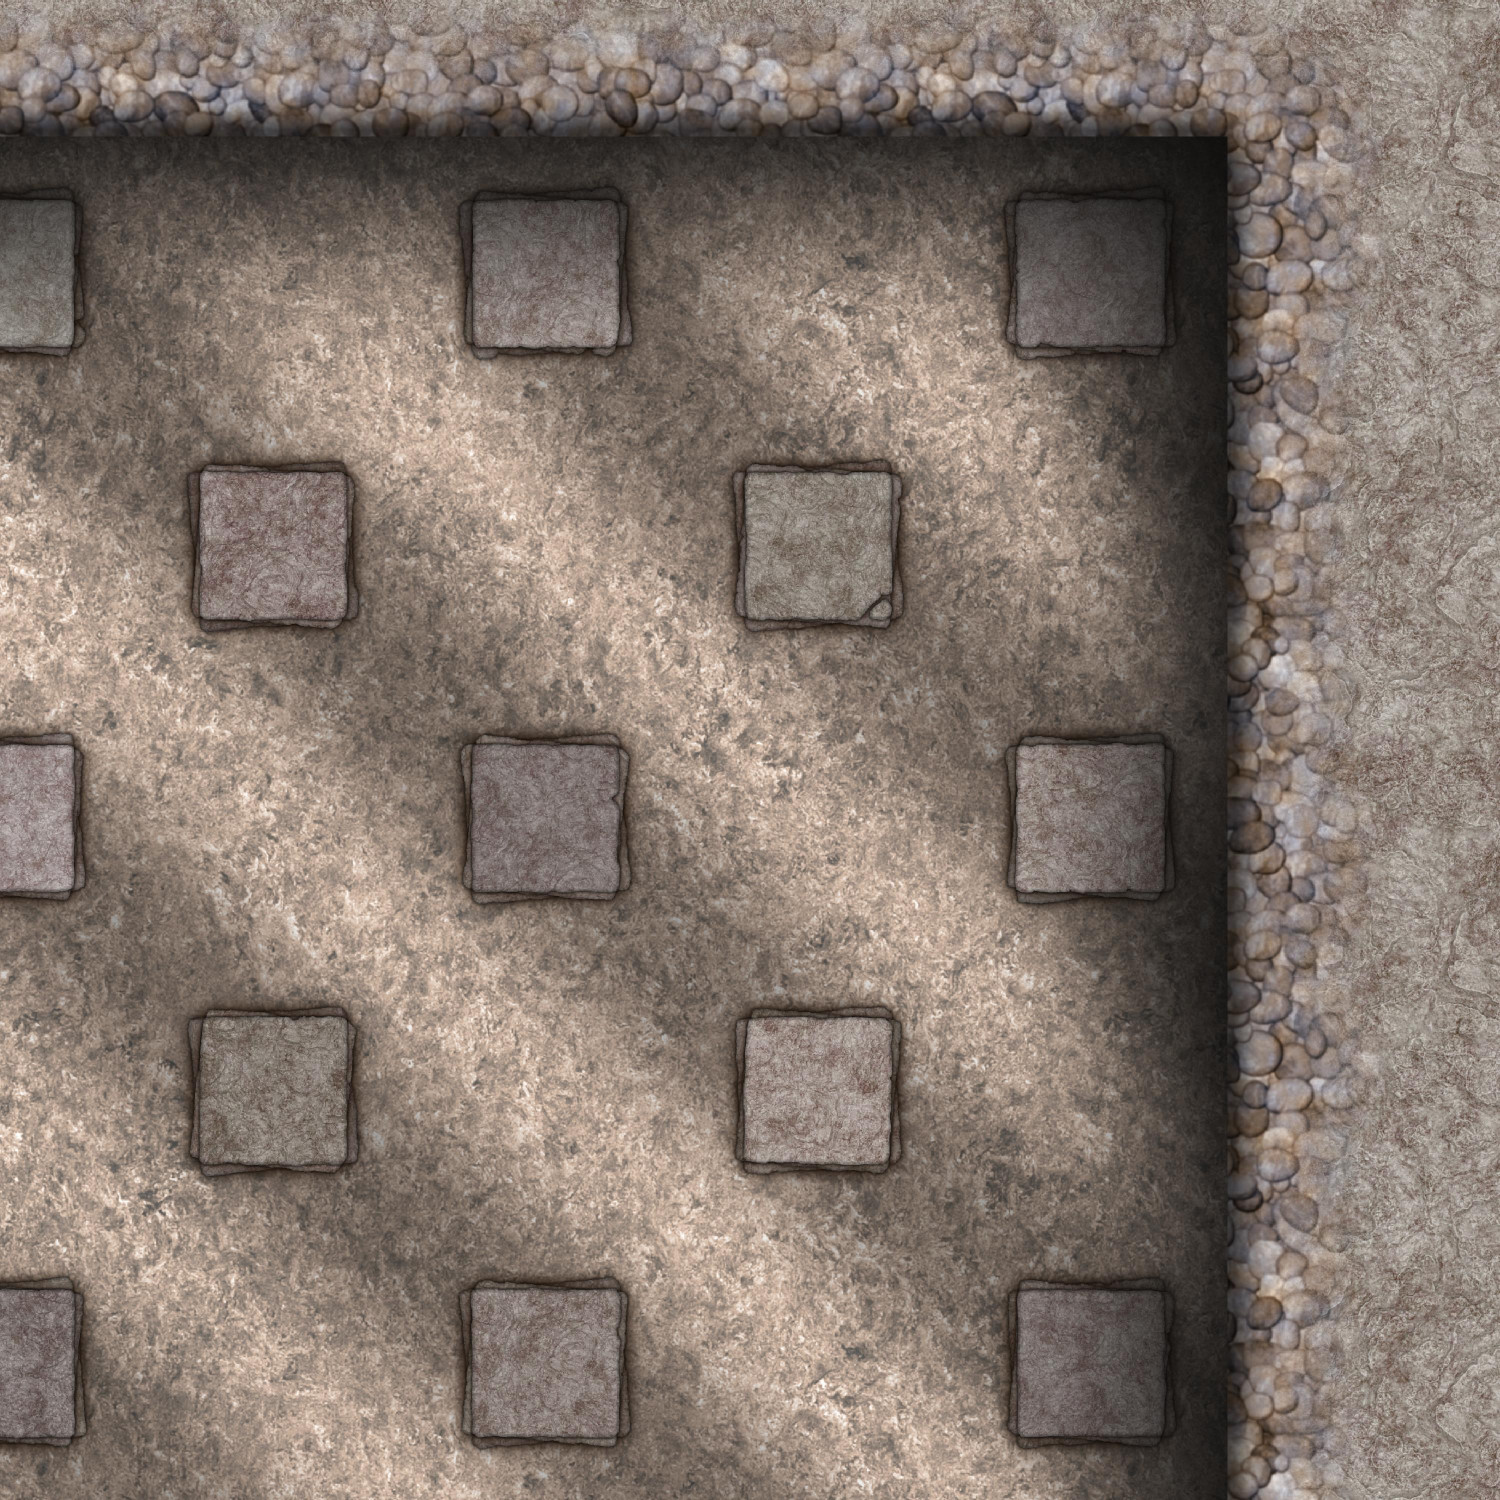
The Pilae Stacks have a wall shadow on them, but I guess it would make more sense to use an outer glow instead since they're underground.
When I was about 10 or 11, I first read about hypocausts from Mary Stewart's The Crystal Cave, the first in her Merlin-focused Arthurian novels. Young Merlin used the abandoned hypocaust on his family's estate as a hideout, inadvertently eavesdropping on adult conversations in the process. I'm delighted to finally be able to design one.

