


Royal Scribe
Royal Scribe
About
- Username
- Royal Scribe
- Joined
- Visits
- 9,530
- Last Active
- Roles
- Member
- Points
- 3,353
- Birthday
- February 5, 1968
- Location
- San Francisco, California
- Website
- https://legacy.drivethrurpg.com/browse/pub/31814/Royal-Scribe-Imaginarium
- Real Name
- Kevin
- Rank
- Mapmaker
- Badges
- 16
Latest Images
Reactions
-
Show us your map collection!
I have a coffee table book of his maps. His name is Isaac Dushku and his website is Lord of Maps.

-
Smokey Hollow, PA
I have a feeling that like Chekhov's Gun, that "eccentric 'world's largest operational Jeep'" is going to come into play in the story at some point. An escape vehicle? A mobile battering ram? I'm dying to know!

-
Issue with beach on Spectrum Overland
One other thing just occurred to me. See where it has a Blur Radius of 7? If you want bigger beaches, increase that number.
-
Drawing lakes over forests and mountains sheets with 2023 MonkeyFrog Overland style
So, it looks like your lake is drawn on the LAKES sheet, but you want it to cut all the way down to the sea?
You have a couple of choices.
Option 1: Don't have your lake cut down to the sea. Instead, change it to a blue color, or the same fill as the sea, and let it sit on top of the other terrain.
Option 2: If you want it to cut through, you will need to:
- Add the COLOR KEY effect to the LAKES sheet and move it to be the first effect.
- Change the color of your drawn lake to be the magenta color (#6)
- Make sure all of the other sheets between the lake and the sea also have the Color Key effect added as the first effect.
- And then, copy that magenta lake to all of the other sheets.
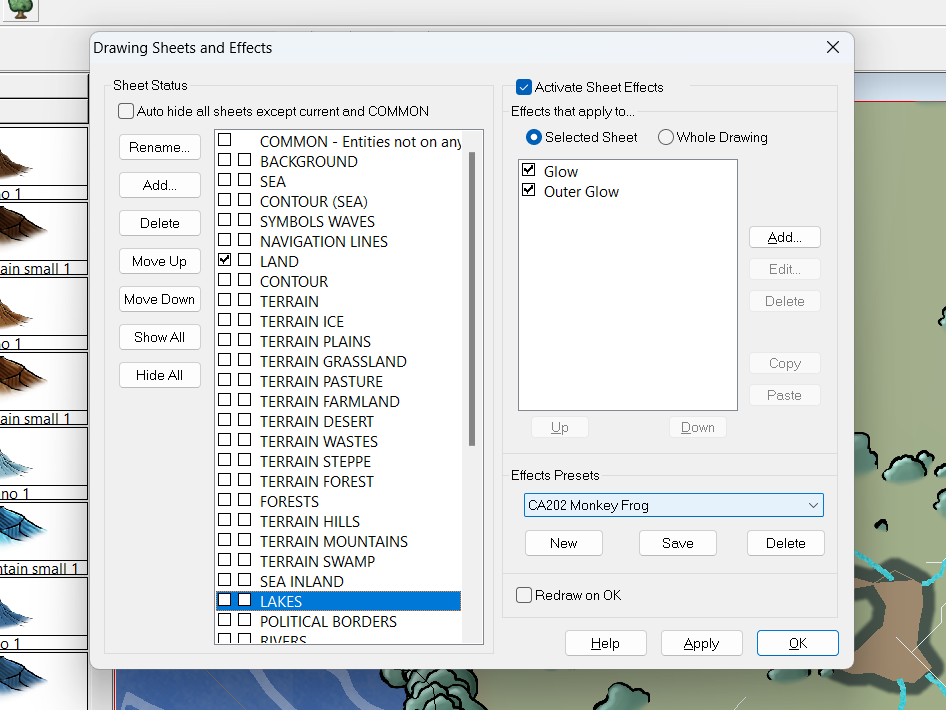
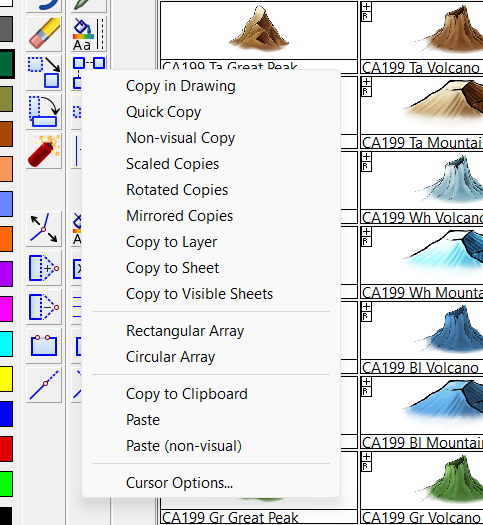
If you want to copy it to all of the intervening terrain sheets, the easiest way is to hide all sheets, then unhide the LAKES sheet and everything between it and the SEA, and then use the Copy to All Visible Sheets option (found by right-clicking on the Copy icon) to simultaneously copy it on all of those terrain sheets.
Please let me know if this is unclear, and I can try to do more screencaptures.

-
Can't seem to draw backgrounds
Here’s a tutorial video focused on Trace. I haven’t had a chance to watch it yet myself. It’s older but if it’s just focused on the Trace command, hopefully it won’t be out of date.


