


Monsen
Monsen
About
- Username
- Monsen
- Joined
- Visits
- 660
- Last Active
- Roles
- Administrator
- Points
- 8,858
- Birthday
- May 14, 1976
- Location
- Bergen, Norway
- Website
- https://atlas.monsen.cc
- Real Name
- Remy Monsen
- Rank
- Cartographer
- Badges
- 27
Latest Images
-
Drawing a perfect spiral?
I have a macro that draws one here, if you can use that as a base:


-
Help: Change Cursor Type?
If you press Ctrl+T you toggle between the crosshair cursor and the arrow cursor. This can be done mid-command based on your needs. Note that it doesn't apply to the first point of each command (don't know why it's like that), but to all subsequent points, so if you're drawing a path, the initial node will always be placed using the crosshair cursor, but you can toggle for all the subsequent ones.
Also note that if you use it in the middle of a drawing tool that has the trace capability (like the landmass tool), the shortcuts conflict, so it then asks you for "entity to trace" but you can just right click at this point to go back to the drawing instead of tracing. To avoid it, you can use the menu option (Tools -> Drawing Aids -> Toggle Crosshairs) instead of the shortcut key.

-
Cosmographer Deckplan issues
The tools are all set up with a mirror line of 0 degrees as default which results in the ship being mirrored along the X-axis
If you wish to draw a ship withe the nose pointing up, right click :COSHULL:, look for the tool to use, note the name mentally, then hit the Advanced button and select the tool you wanted in the list to the left.
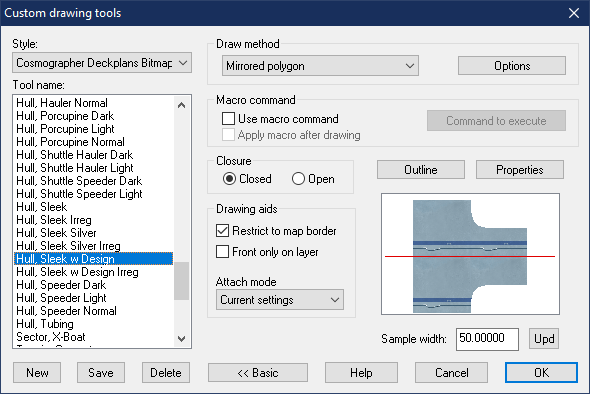
Now, hit the Options button, and set the mirror line angle to 90 degrees. (Obviosuly, this is only possible for tools that have Mirrored Polygon as the draw method)
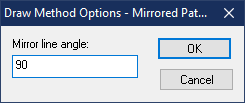
Hit OK, and then Hit OK again to start drawing. Say no when it asks you to save your changes, otherwise the tool will be permanently modified.
Then just draw your hull.


-
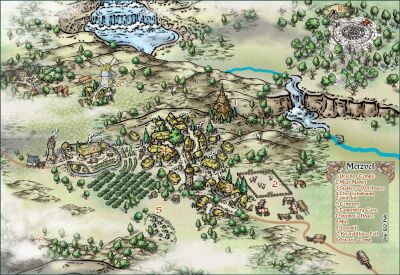
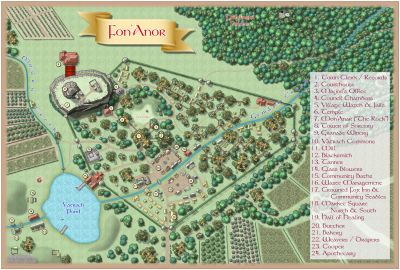
August Mapping Competition - The Results
And here's @Maidhc O Casain's entry added to the atlas:

-
HELP - My houses are a single color block, still pretty new
Your buildings have entities on the wrong layer. This is probably caused to how the random building/street command works. The correct layer is set when the symbol catalog is loaded, so if it changes after that, it can cause issues with this command. It can be worth checking that the correct layer is set every so often.
Fortunately, it is easy to fix.
To fix it for future placements, simply change the layer shown in the status bar to one of the city demographics layers; the ones named BLDNG (XXX).
To fix buildings already placed in the map, either simply delete and recreate them, or use the Change House Layer command found in the City menu on them. Note that after selecting the buildings and Do It, the command line will prompt for a layer. the easiest is to right click inside the map to get the layer dialog, then pick the appropriate demographic layer, hit OK, and when back in the map, hit the refresh button to update the display to actually see the change.
-
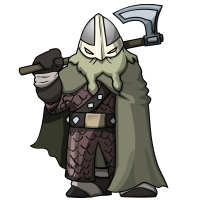
Free symbol pack - Tentacles
These packs can be used in community atlas maps. All of the downloads presented in that thread will be set up so that they will be easy to get a hold of and install (correctly) so everyone have the same setup.
-
Symbol challenge?
Knowing that people have different things going on in their lives, and while a week technically should be enough if one can dedicate all your time that week, most people won't be able to do that. My suggestion is just do a month, run the entire month of May for example. This means you can take a few days and think up a proper announcement post. Take the feedback gained here (perhaps more will come) and then write up a new topic, declaring the challenge and explain the rules (hint: try to be focued, but not overly strict. A common theme to give people ideas and compete in the same space is fine, but too strict rules scares people of (ref the usage discussion above)).
I can then give that topic a temporary sticky status for the duration of the challenge.

![[Deleted User]](https://secure.gravatar.com/avatar/c75d9a245b74d9c59be0999ea81ca541/?default=https%3A%2F%2Fvanillicon.com%2F92add7f8c954488718110edc4896ad39_200.png&rating=g&size=200)
-
How Do I Trim 2 Polygons?
Use :CC2BREAK: to remove the parts of them you don't need. Remember you can use the :CC2MODINT: modifier to get the exact points where they cross.
Breaking a polygon WILL turn it into a line, but just continue working with the line until it is correct, and then you can turn it pack into a poly when done by right clicking :CC2EXPLODE: and picking Path to Poly. If you removed a corner during the process (which you will likely do, you'll need to add in a new one using :CC2INSNODE: to avoid a missing portion of the poly in the corner.
To make the two polys line up exactly against the border of one of them, start by trimming the light poly to the points where it meets the dark one, then make a copy of the dark one, trim it down to just that path segment where they share a border, and use Combine Paths to merge that with the light one, this will result in them both having a border in that space.
Note that it might also be simpler to delete the lighter poly, and assuming it is drawn using a drawing tool, simply use the trace feature of the drawing tool to follow along the edge of the darker poly.
Edit: Beaten by a little mouse, but with a very different approach.

-
Live Mapping: The Silver Mine
This Thursday's session at 18:00 CET, Monsen will dig out SS4 and Munsons Mines and go dig a little silver mine into a mountain somewhere.
Find your local time and enable notifications by visiting the YouTube video below.


-
Help understanding map size and the grid tool
Looks like you have just drawn outside the map border instead of properly enlarging the map. This can cause some issues with certain tools that tries to operate within bounds.
Fortunately, this is easy to fix. If you hide all layers but MAP BORDER, you should see a set of 4 lines forming a rectangle (usually bright green). This is the actual map border. Simply move these, or erase and redraw them where you need them to be. They are just basic lines, on the MAP BORDER layer and BACKGROUND sheet.
(Feel free to unhide more sheets and layers when moving them, I just told you to hide everything to easily see them. You'll probably want to have most stuff hidden though, to make them a bit easier to manipulate without accidentally moving other stuff. Note also that the MAP BORDER layer is usually frozen, if so, it needs to be thawed before you can manipulate the entities on it)
If the lines are already correctly placed, it can also indicate that you have rogue entities on the MAP BORDER layer, ONLY the four lines forming this outline should be there, other entities will confuse the tools
Also note that for the grid in particular, you can also click on Select point in the dialog to place the grid manually to control exactly where it ends up.


