Royal Scribe
Royal Scribe
About
- Username
- Royal Scribe
- Joined
- Visits
- 9,533
- Last Active
- Roles
- Member
- Points
- 3,353
- Birthday
- February 5, 1968
- Location
- San Francisco, California
- Website
- https://legacy.drivethrurpg.com/browse/pub/31814/Royal-Scribe-Imaginarium
- Real Name
- Kevin
- Rank
- Mapmaker
- Badges
- 16
Latest Images
Reactions
-
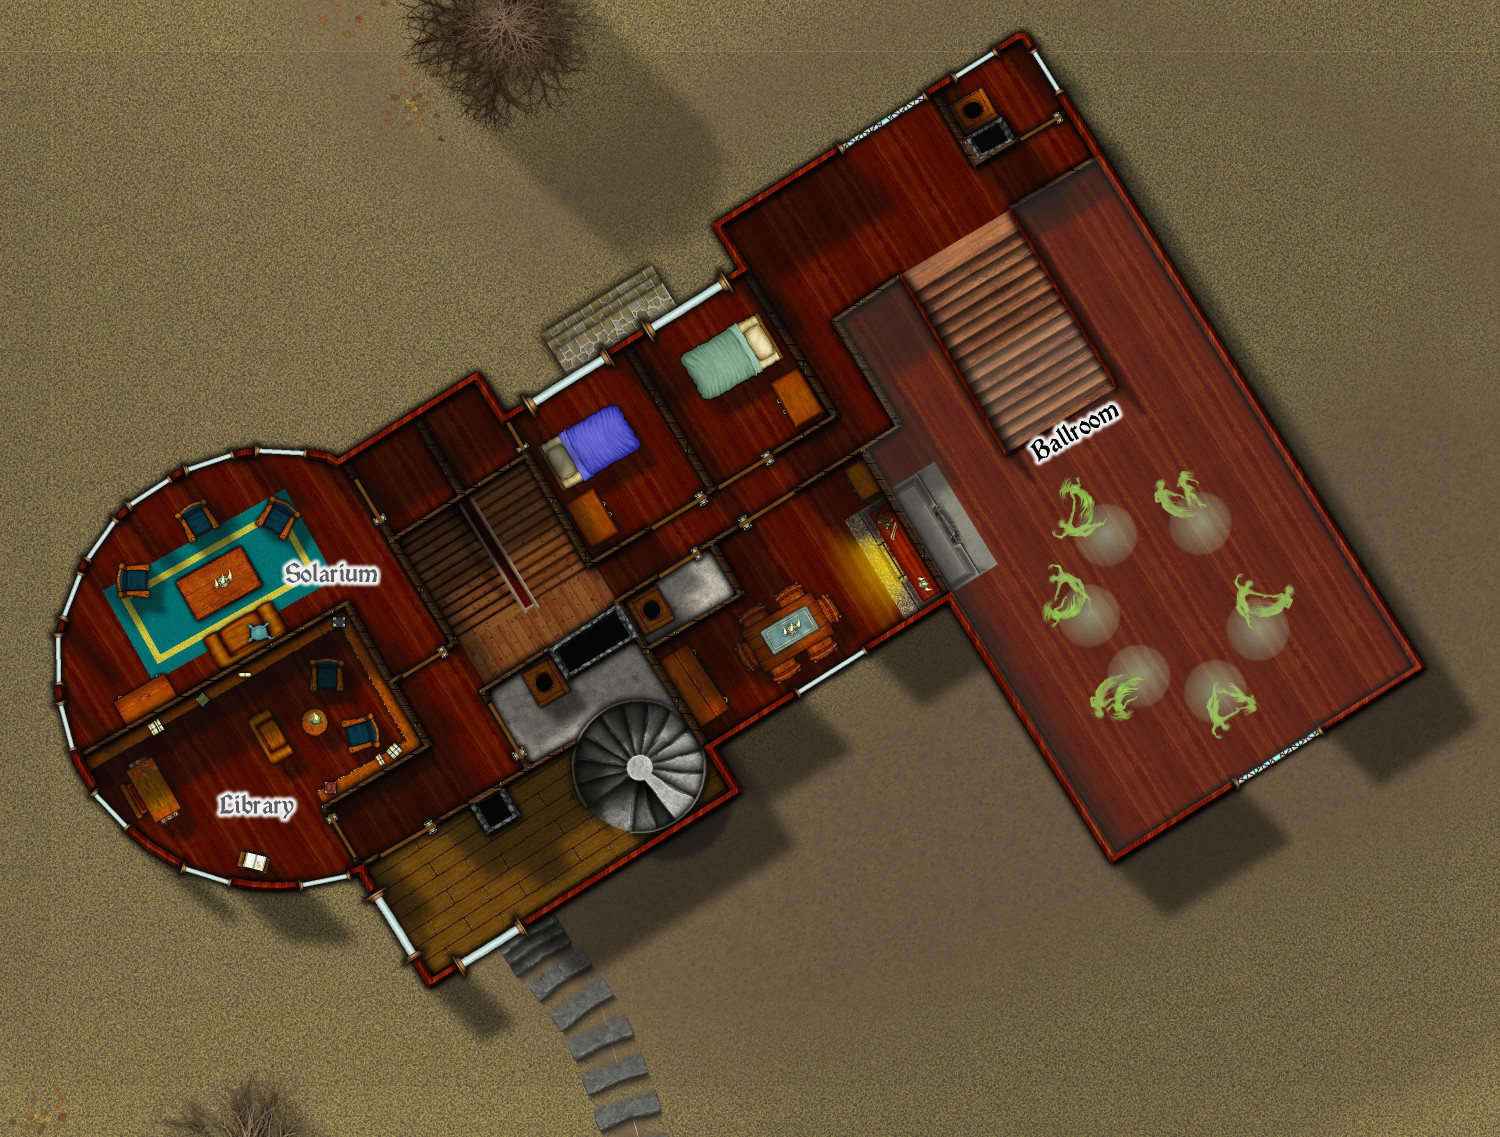
[WIP] Haunted Mansion
Made some tweaks to the second floor. I forgot that I planned to have a smaller family dining area on this floor. Ended up converting the office to a small dining room, as it has a nice fireplace and seemed cozier than the solarium. The head of household can do their books and office work in the library. Rearranged the appurtenant WC so that it's accessed from the hallway rather than the dining room. Still haven't figured out the white line with the paths (under the steps leading to the servants' area on the first floor).


-
[WIP] Haunted Mansion
Hi Cal,
I would be honored for you to use it. Eventually it will make its way into the Atlas when I find a home for it, but that could be a while. It's still a work in progress, but you're free to use these FCW files as well as the rest that I will post when they're ready.

-
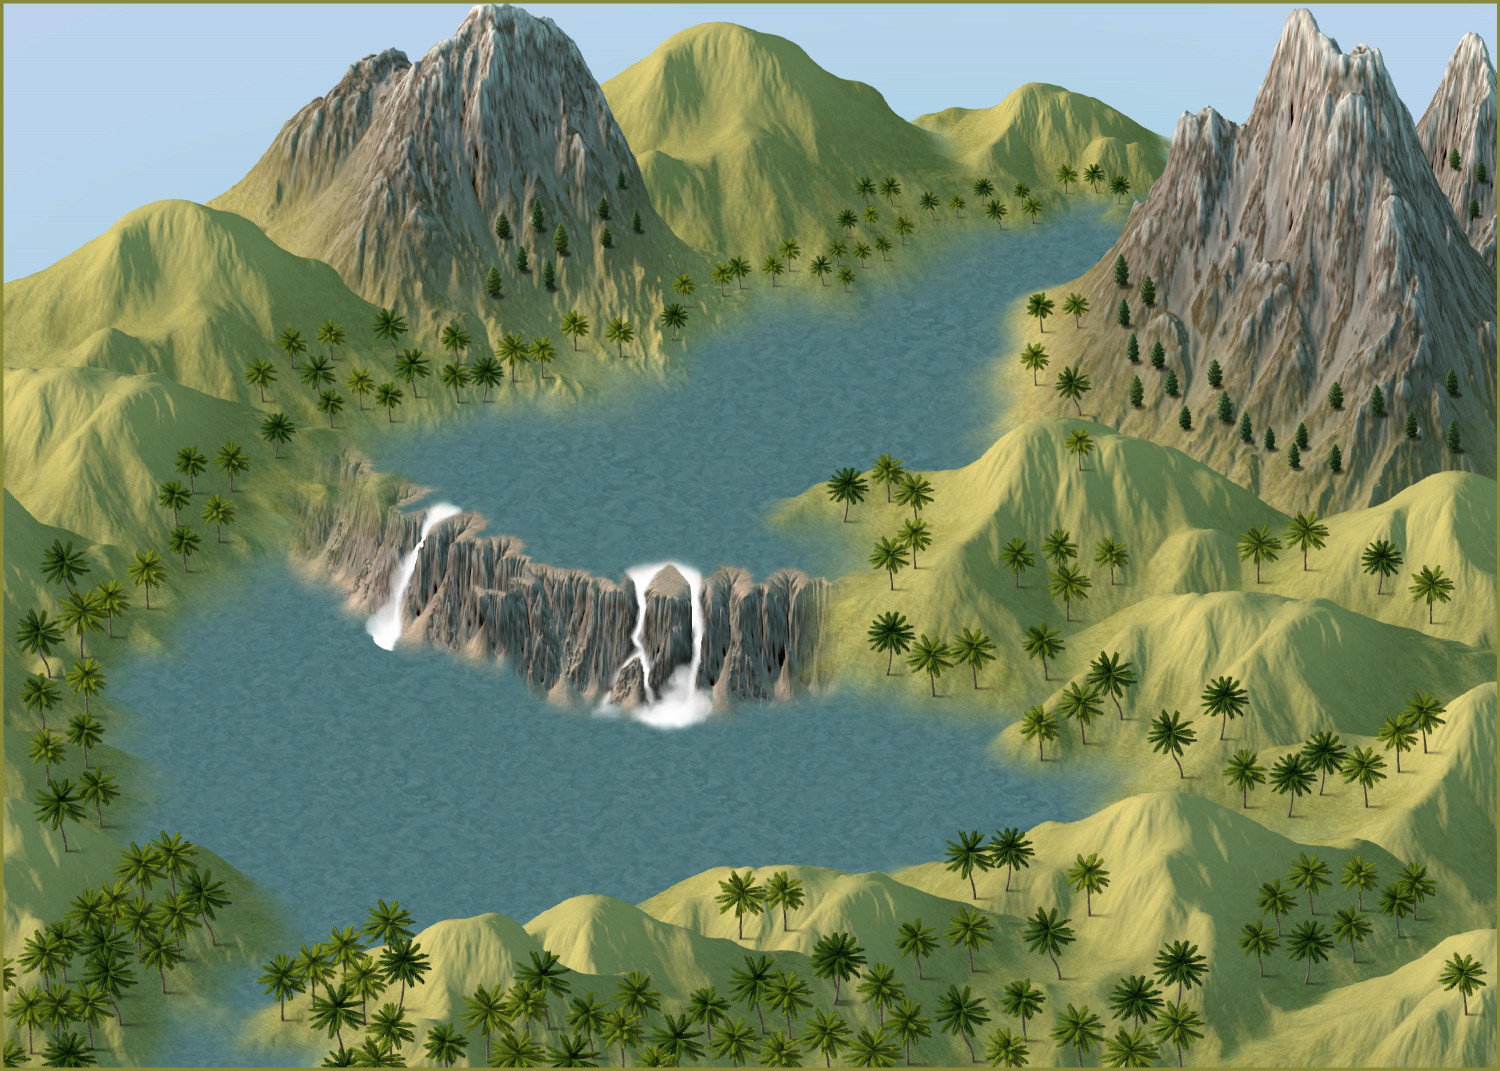
[WIP] Spectrum Overland Waterfalls x 2
Did another approach using Ricko's techniques. (Thank you!) Tried it where the waterline ended before the hills, so they had the sharper edges and edge effects. Then I redrew the water so the edges were under the hills. I rather like the softer effect of the water line. Thought about using the swamp trees but decided to stick with the palms (and a few conifers near the rocky peaks).


-
Community Atlas submissions: the Gold Coast (Doriant) and areas within it
I am going to use this thread to officially submit my maps for the Gold Coast region of Doriant. I will have separate Work-in-Progress threads for feedback on maps as I am working on them, and then will use this thread for the official submissions so they are easy for Remy to find. I know Remy isn't processing new submissions until the contest ends, but this will queue up my future submissions for later this fall or winter, and it also provides a home for some of the villages I want to submit for the contest.
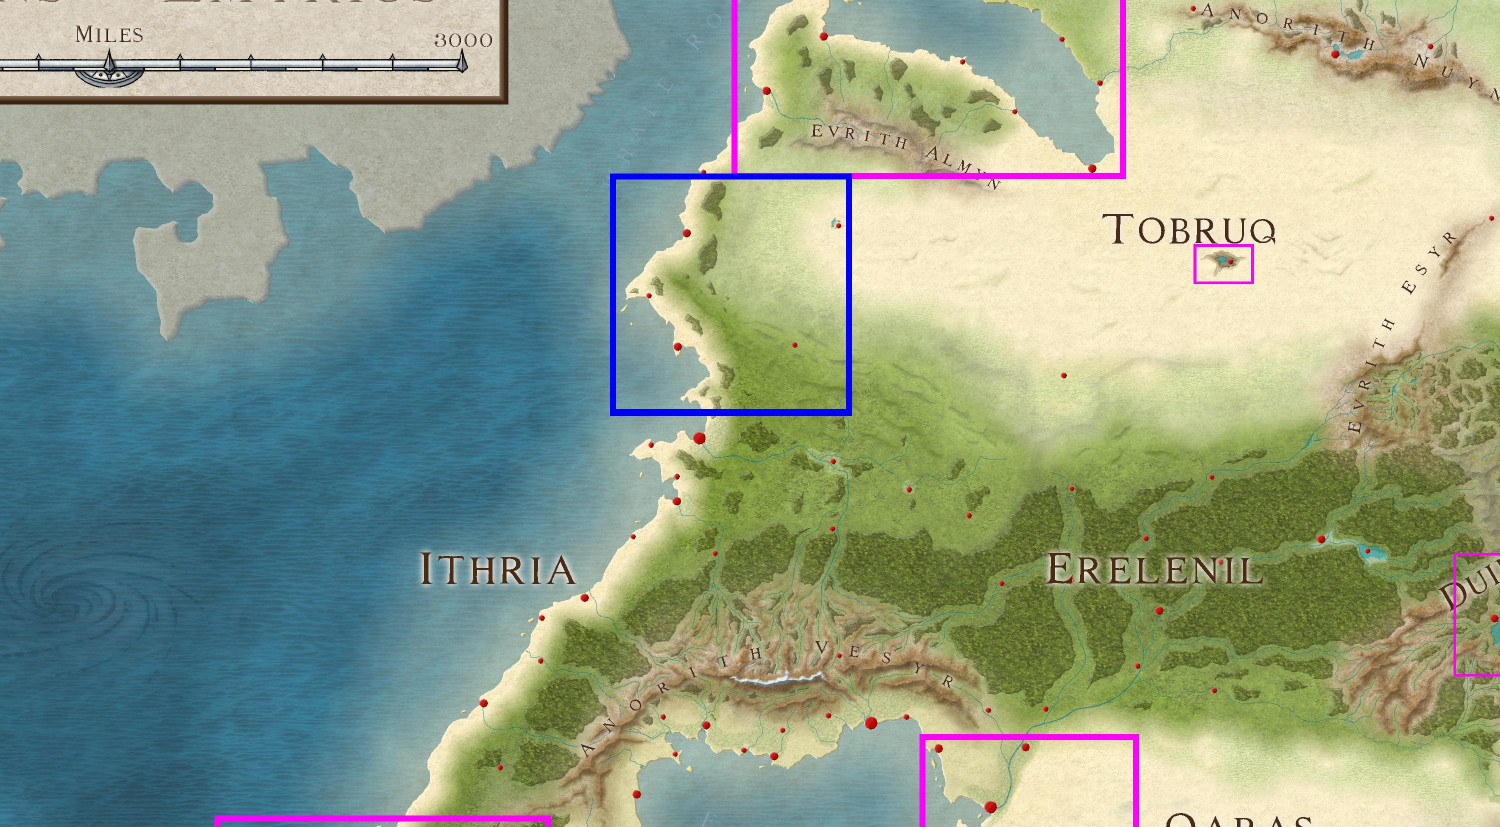
The first submission is ready! It's a 1000 x 1000 mile section on the western side of Doriant.
Here's a markup of the parent map to put it in context (the blue border represents the area I'm calling the Gold Coast.
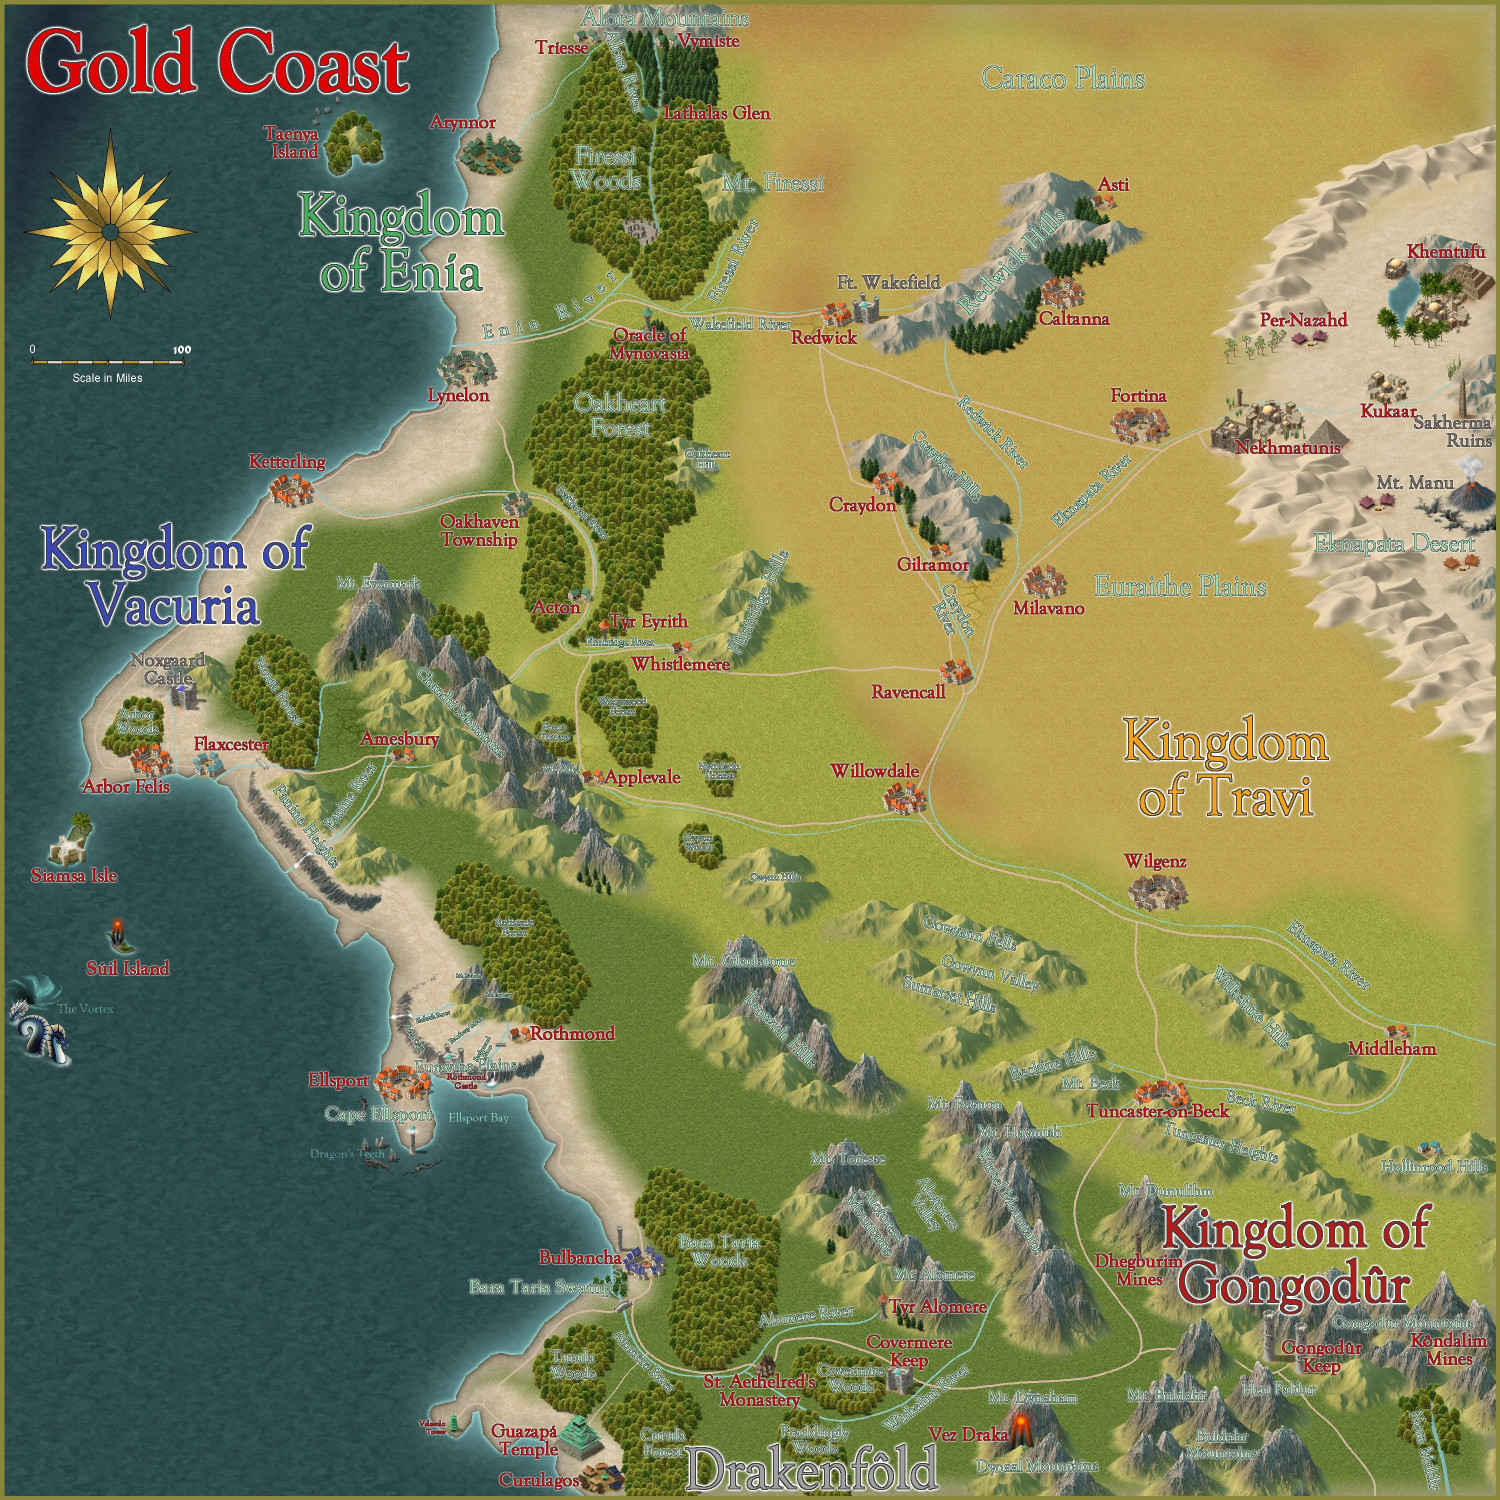
And here is the Gold Coast with all labels but without political borders shown:
Here is the FCW file, along with a PDF description and a plain text description. (I stripped out accents and special characters in the plain text file.)
Primary Style: Annual Spectrum Overland
Toggles: "Borders (Political)" sheet to turn display or hide the political borders within the region.
@Monsen, please let me know if I've messed up and need to fix anything, or if you'd prefer submissions to be handled in any other way. I have lots of other local area maps within this region that will be ready to submit soon.

-
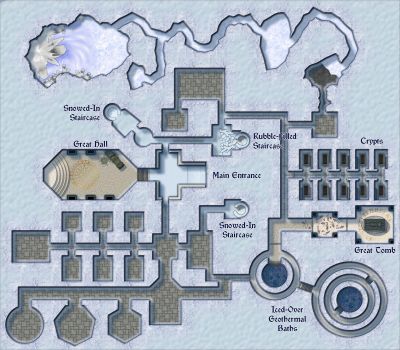
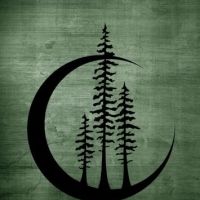
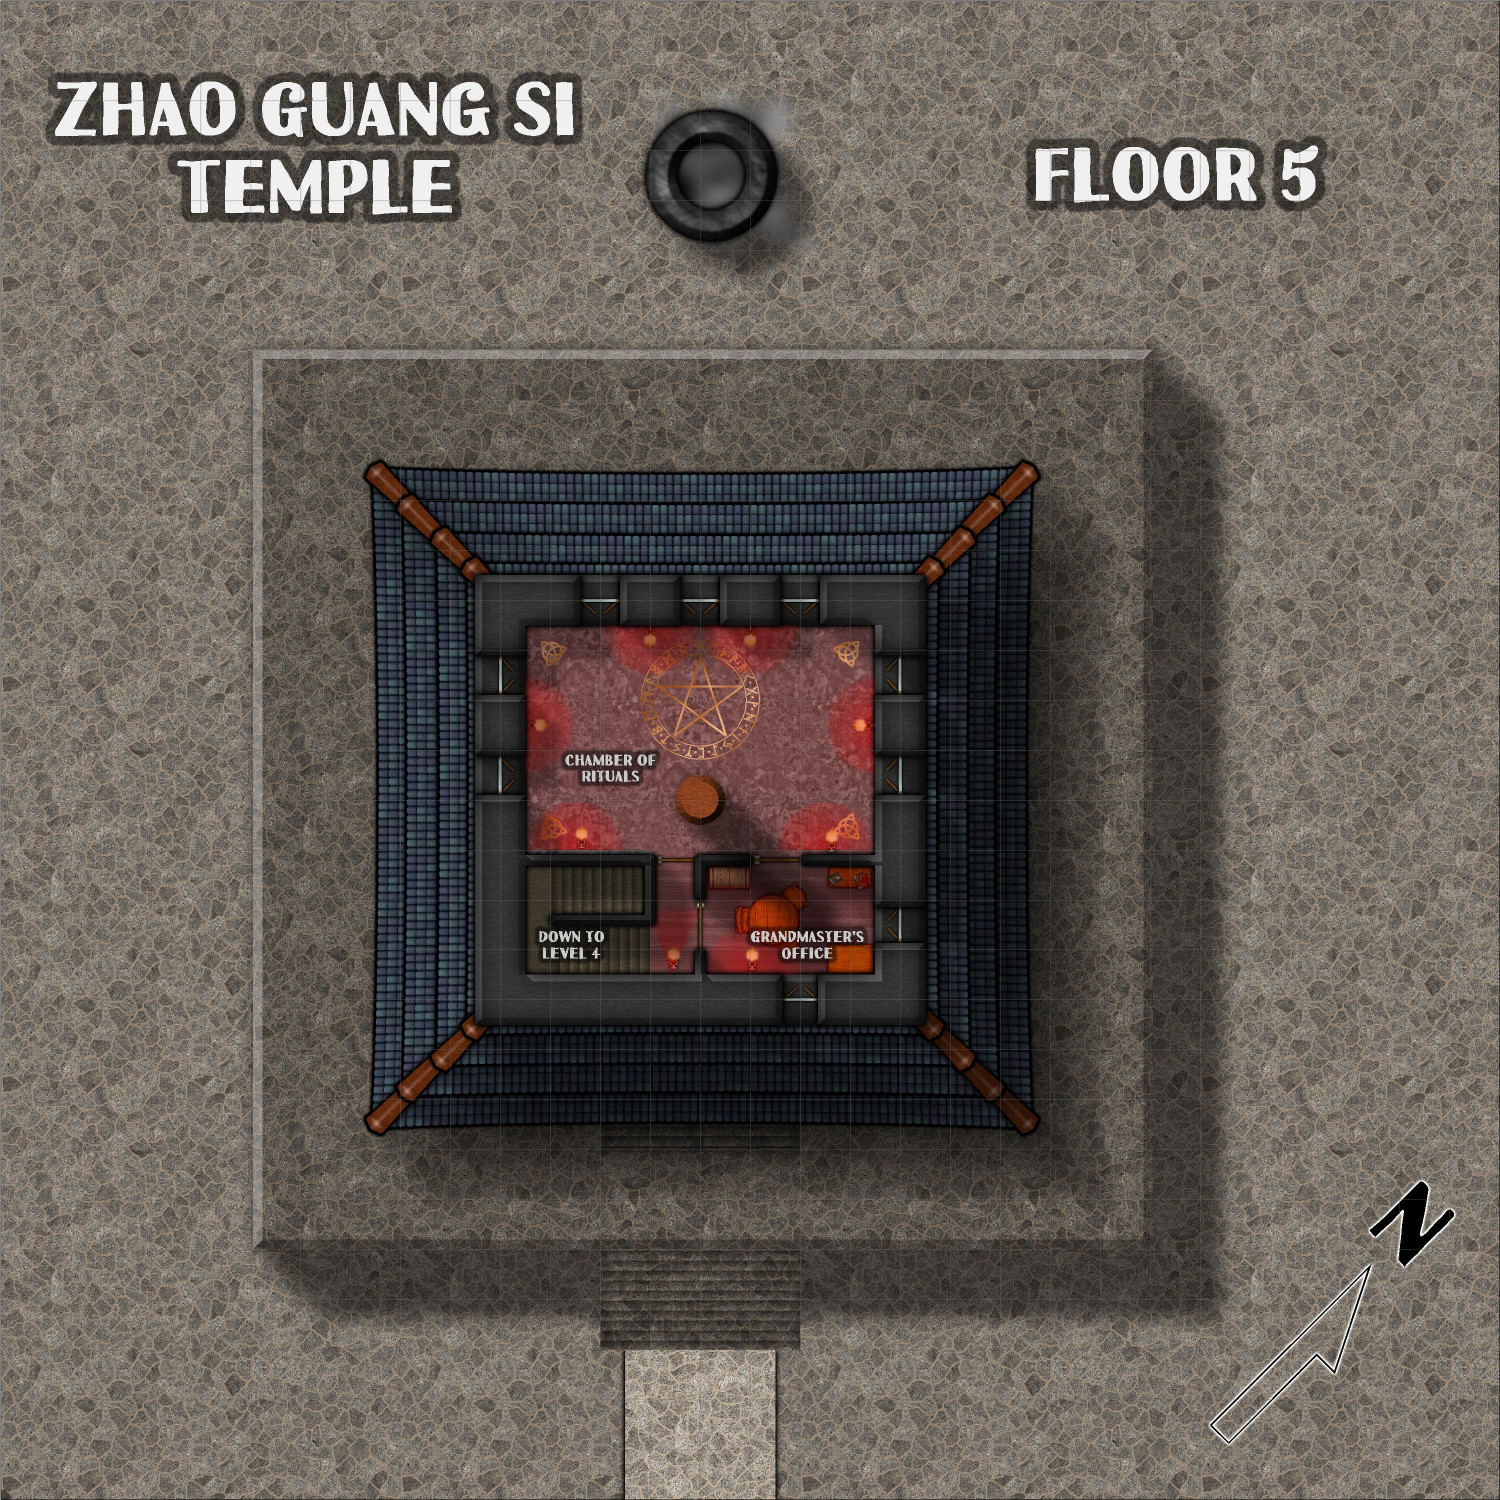
[WIP] Zhao Guang Si monastery
Here are the five above-ground levels of the temple. As the description notes, the lanterns are covered with a red gauze (except in the library), which gives everything an ominous red glow.
First Floor
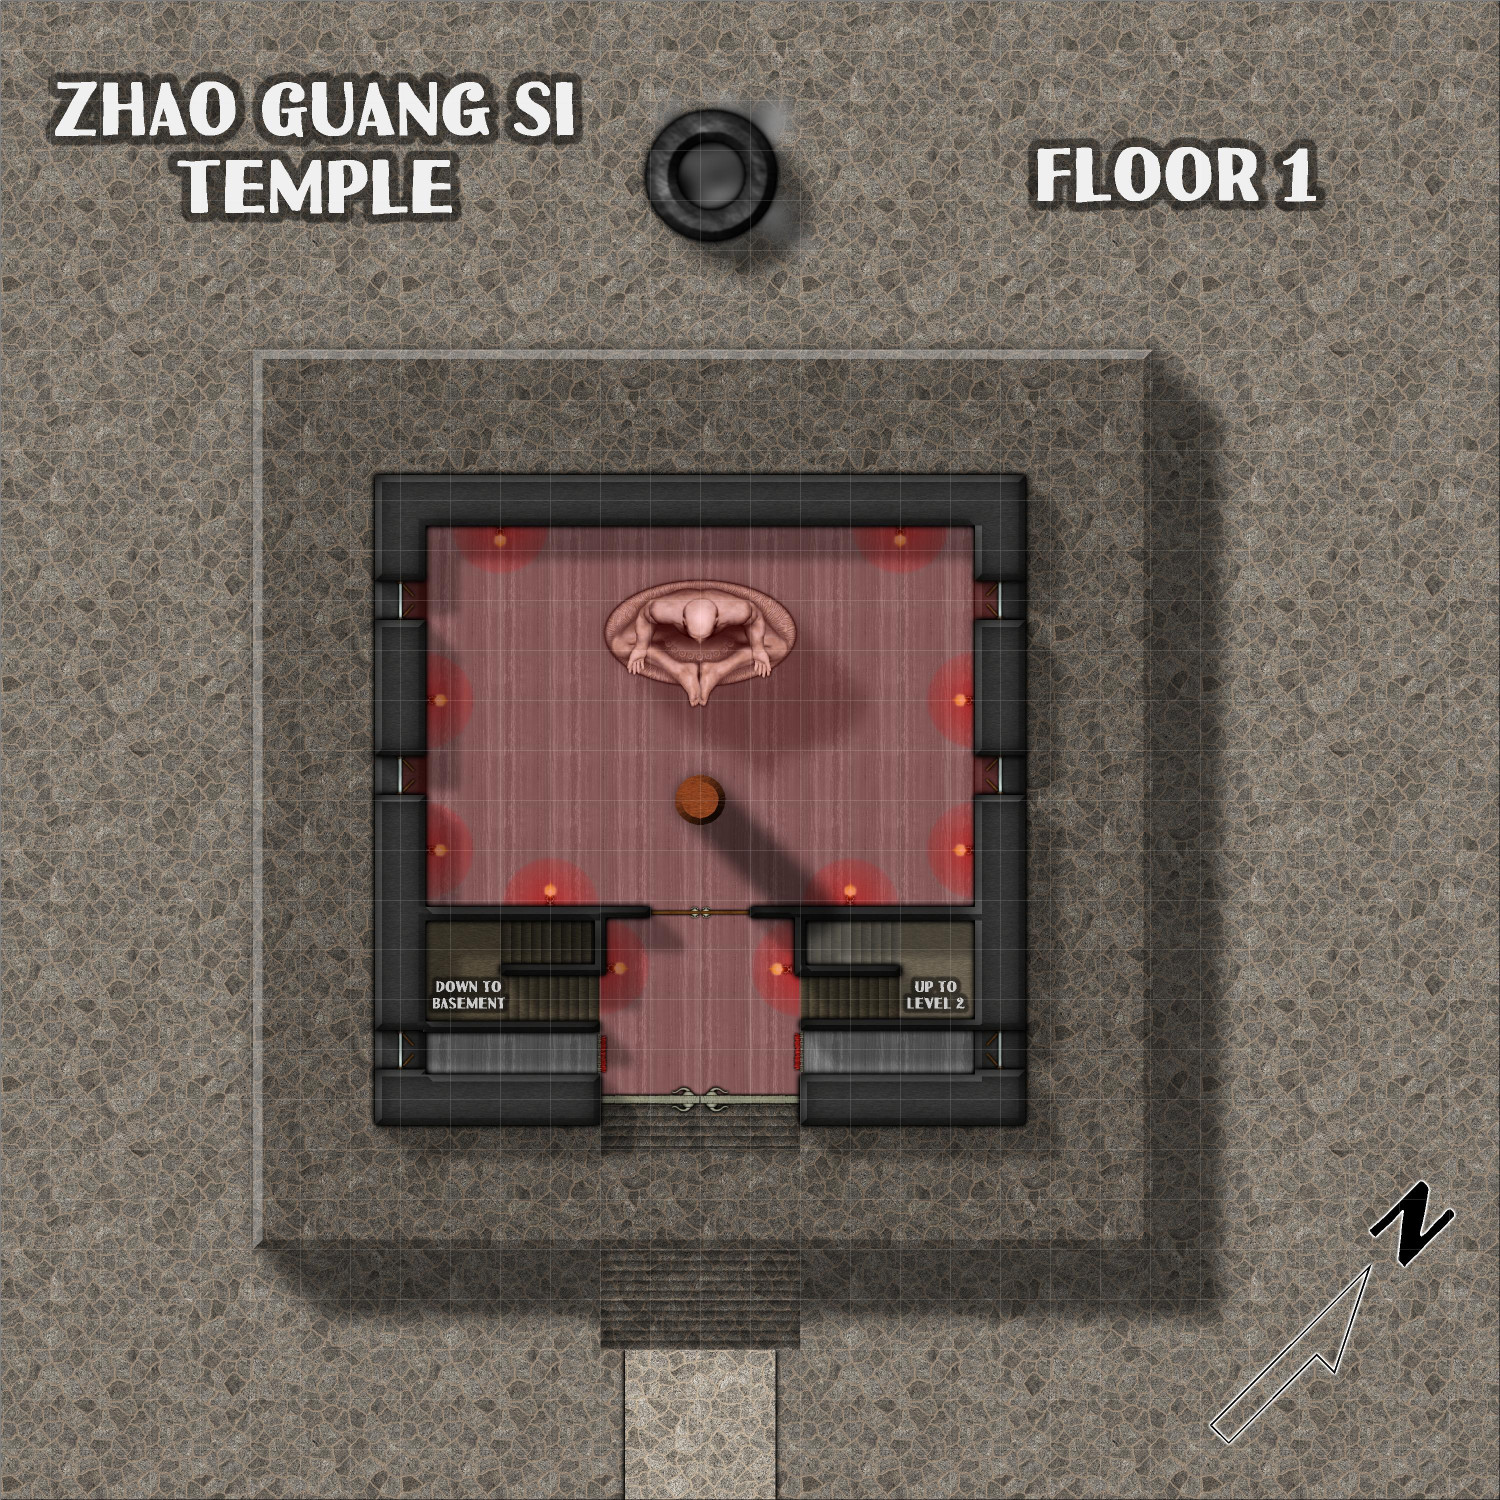
Second Floor
(Most of it is a balcony overlooking the statue on the first floor.)
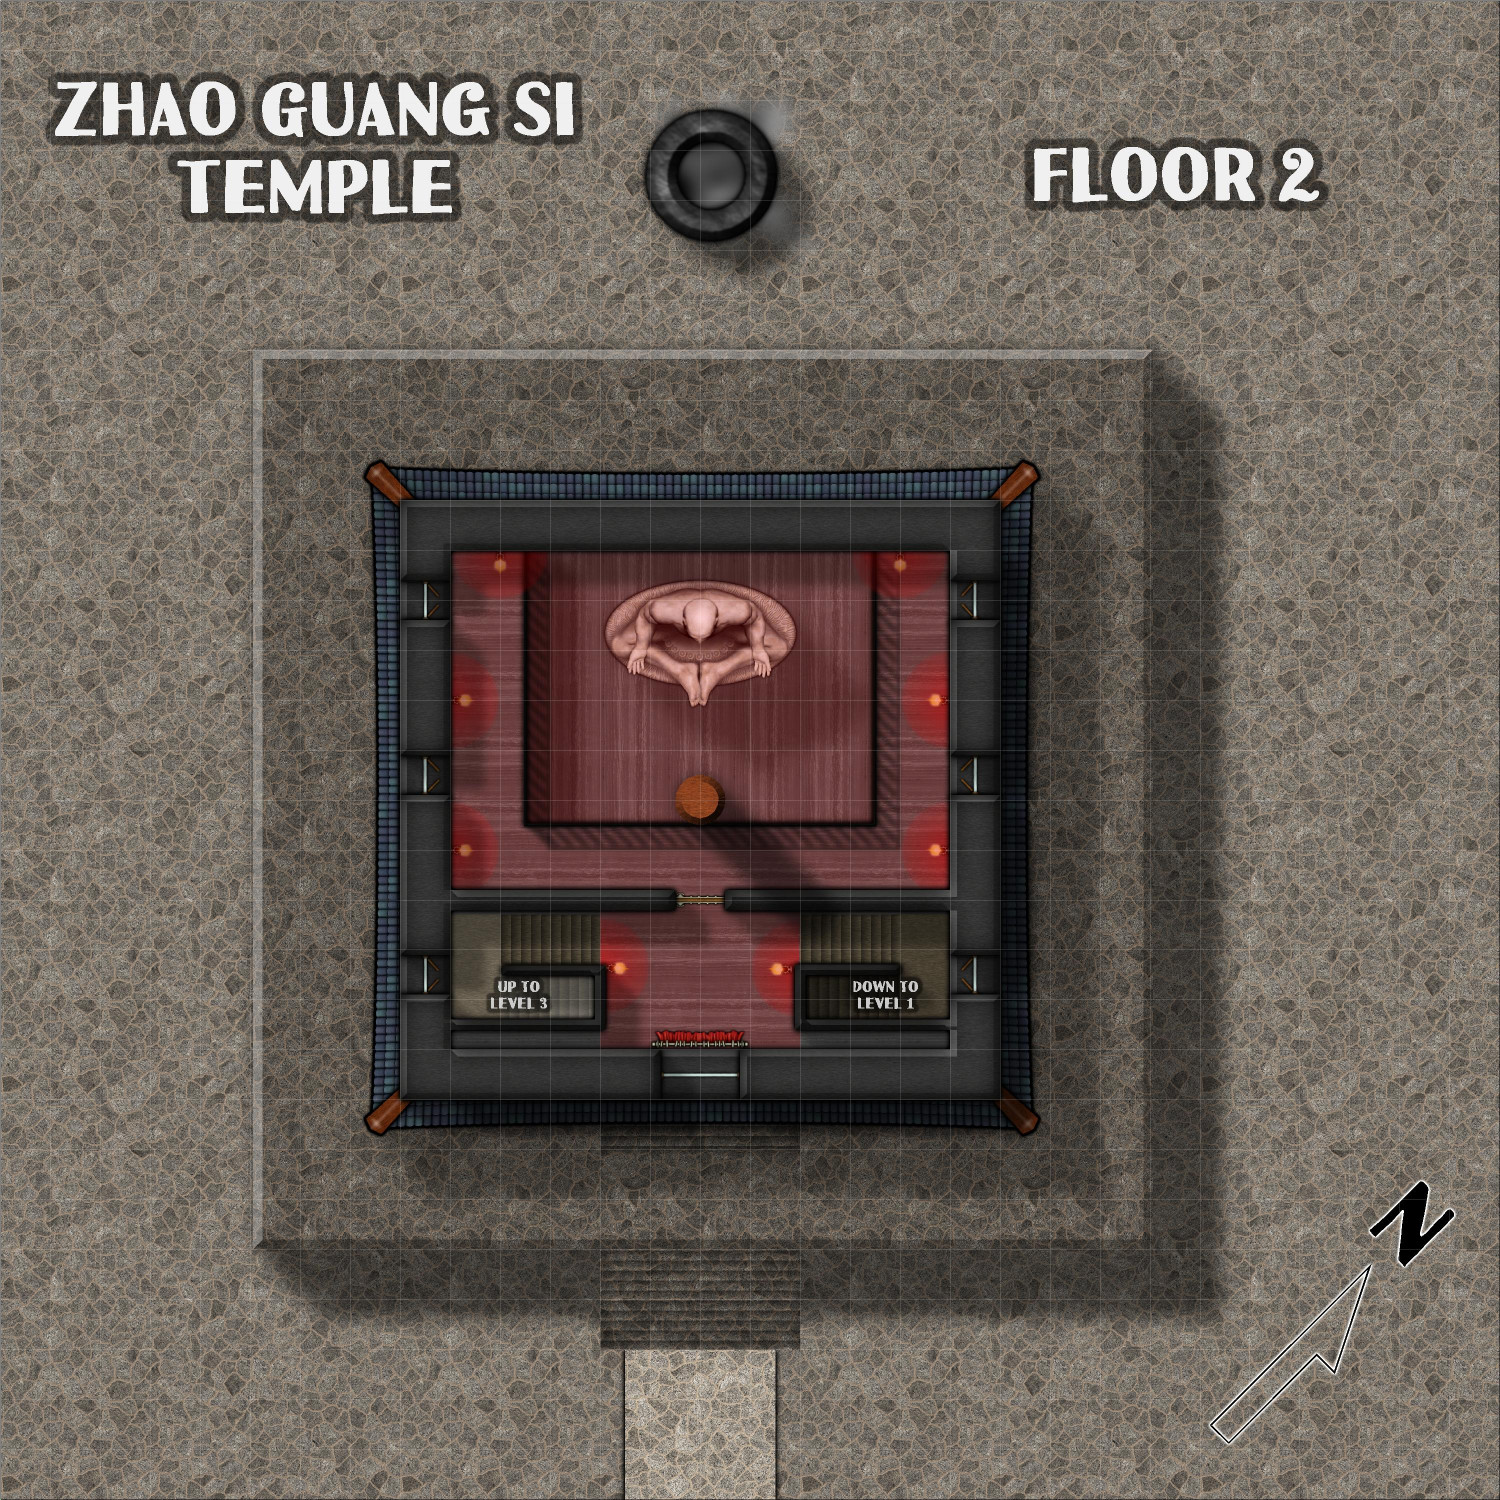
Third Floor
Fourth Floor

Fifth Floor


-
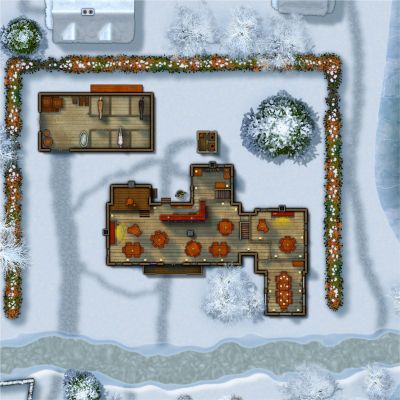
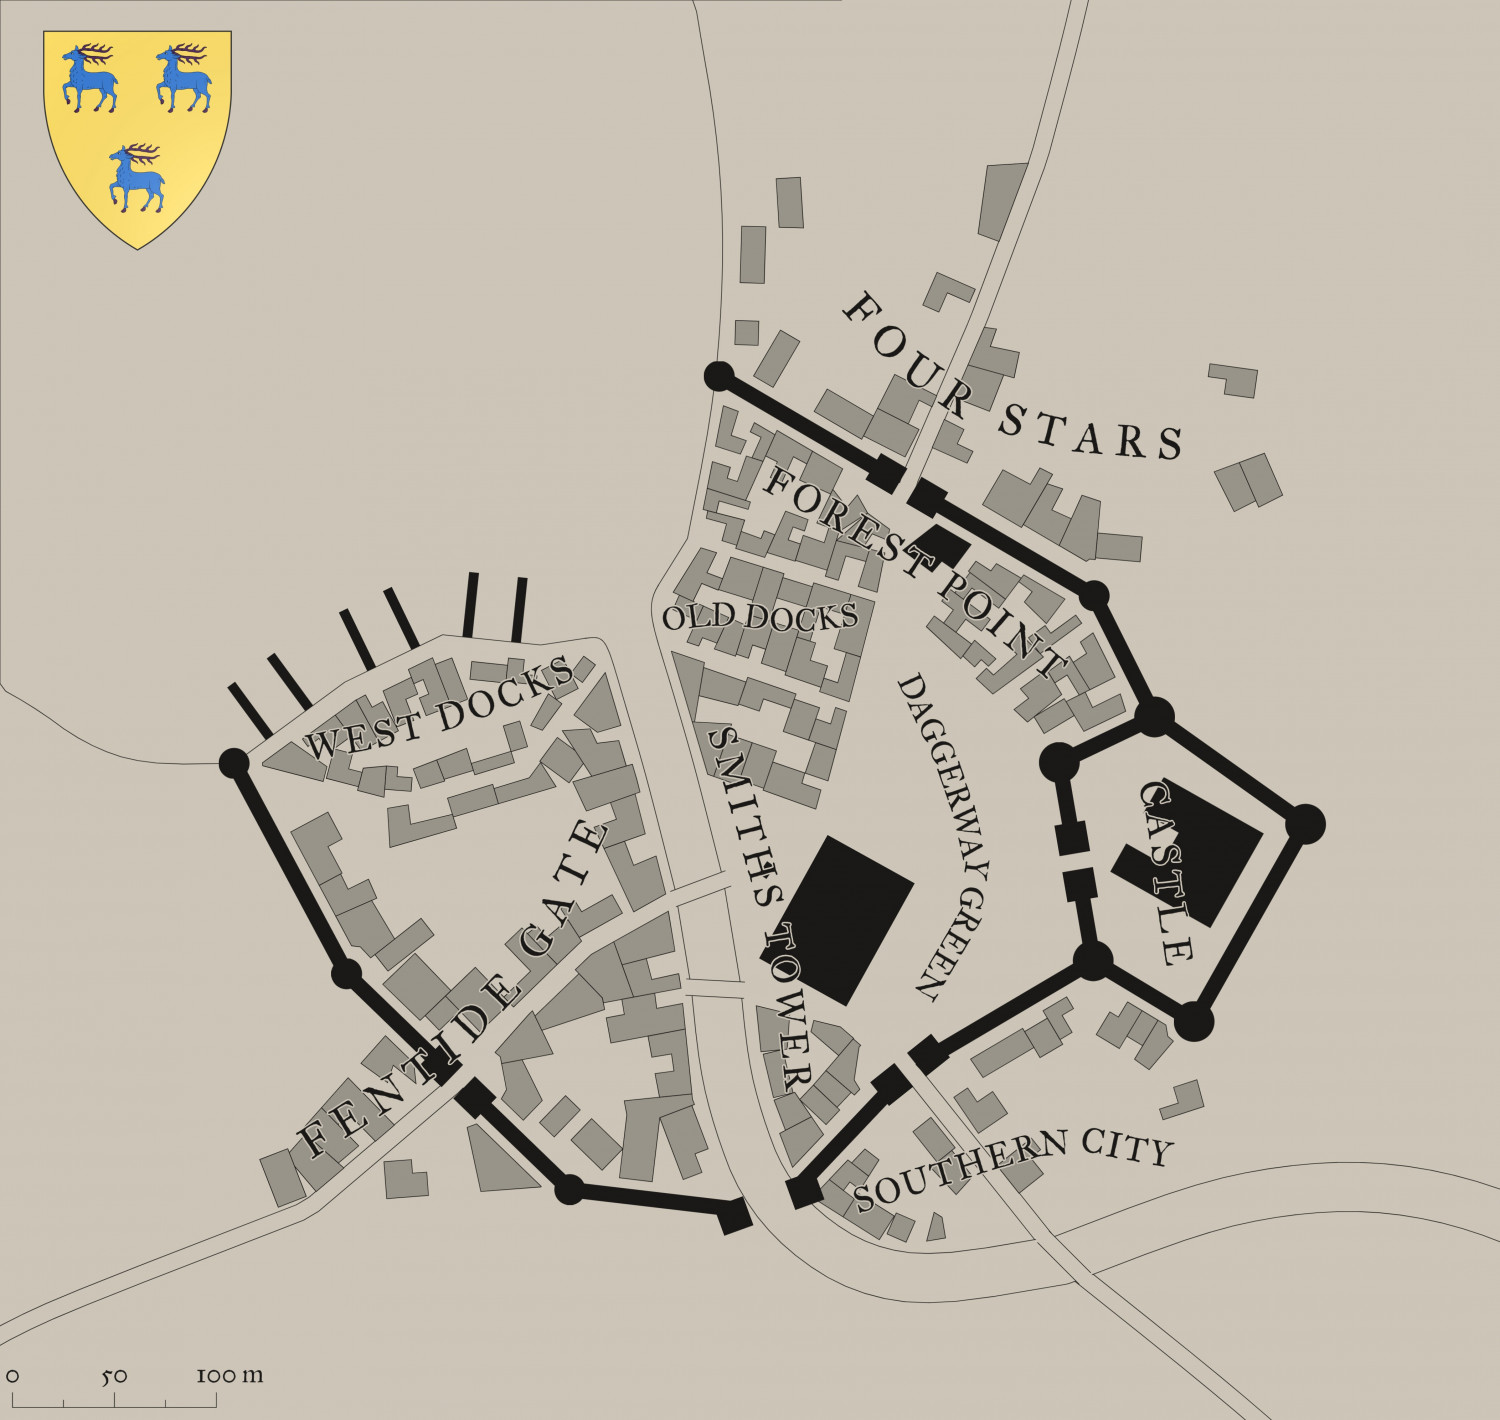
[WIP] Greenwood Falls (CA211 Watabou City Revisted)
I was a little intimidated to attempt this without seeing a Live demonstration first, but since I have the day off, I decided to dive in.
My first attempt was just a small village (152 buildings, population of 920), but I can see how a lot of the conversion goes quickly regardless whether you have a population of 500 or 5,000.
Here's what Watabou generated for me (converted from PNG to JPEG for size considerations):
And here's what I was able to create in a few hours:
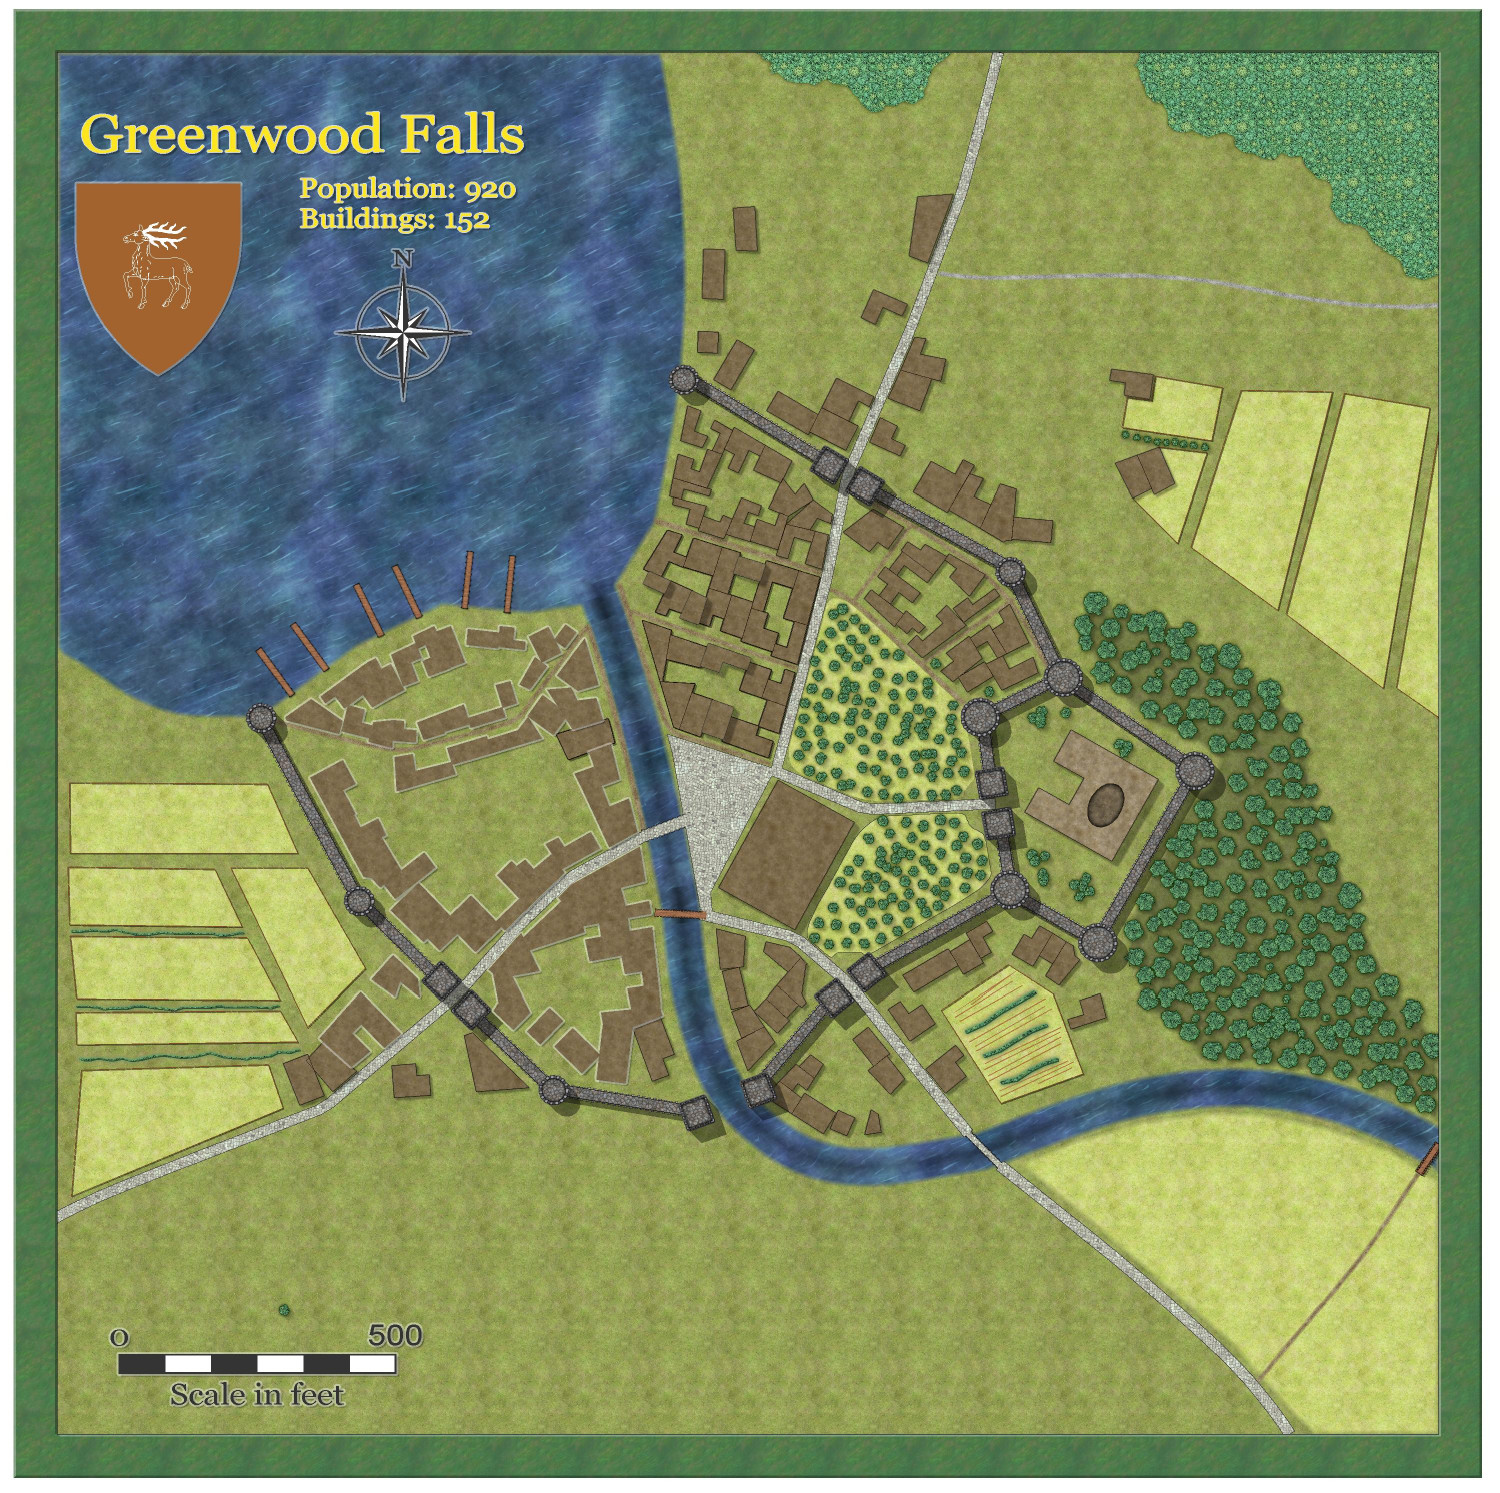
I didn't export the fields or the trees, just added them myself. Didn't do much in the way of adding furrows, etc., to spruce it up -- I can see why, even though it speeds up the process, I could still spend many hours adding lots of flourishes.
(One oddity from Watabou: The exported heraldic symbol that was exported ended up being different that what was shown, one deer instead of three, but no big deal.)
@Quenten and @Ralf, you did a magnificent job with this! What a tremendously helpful service you have done for Game Masters!

-
Treetop village?
Hello Mr. Red!
In addition to the top=down elven structurers that Ricko showed, Mike Schley also has isometric versions (like looking down at a 45 degree angle) in both his isometric cities (Symbol Set 6) and his overland symbols.
Here's some portions from a map I did using SS6:
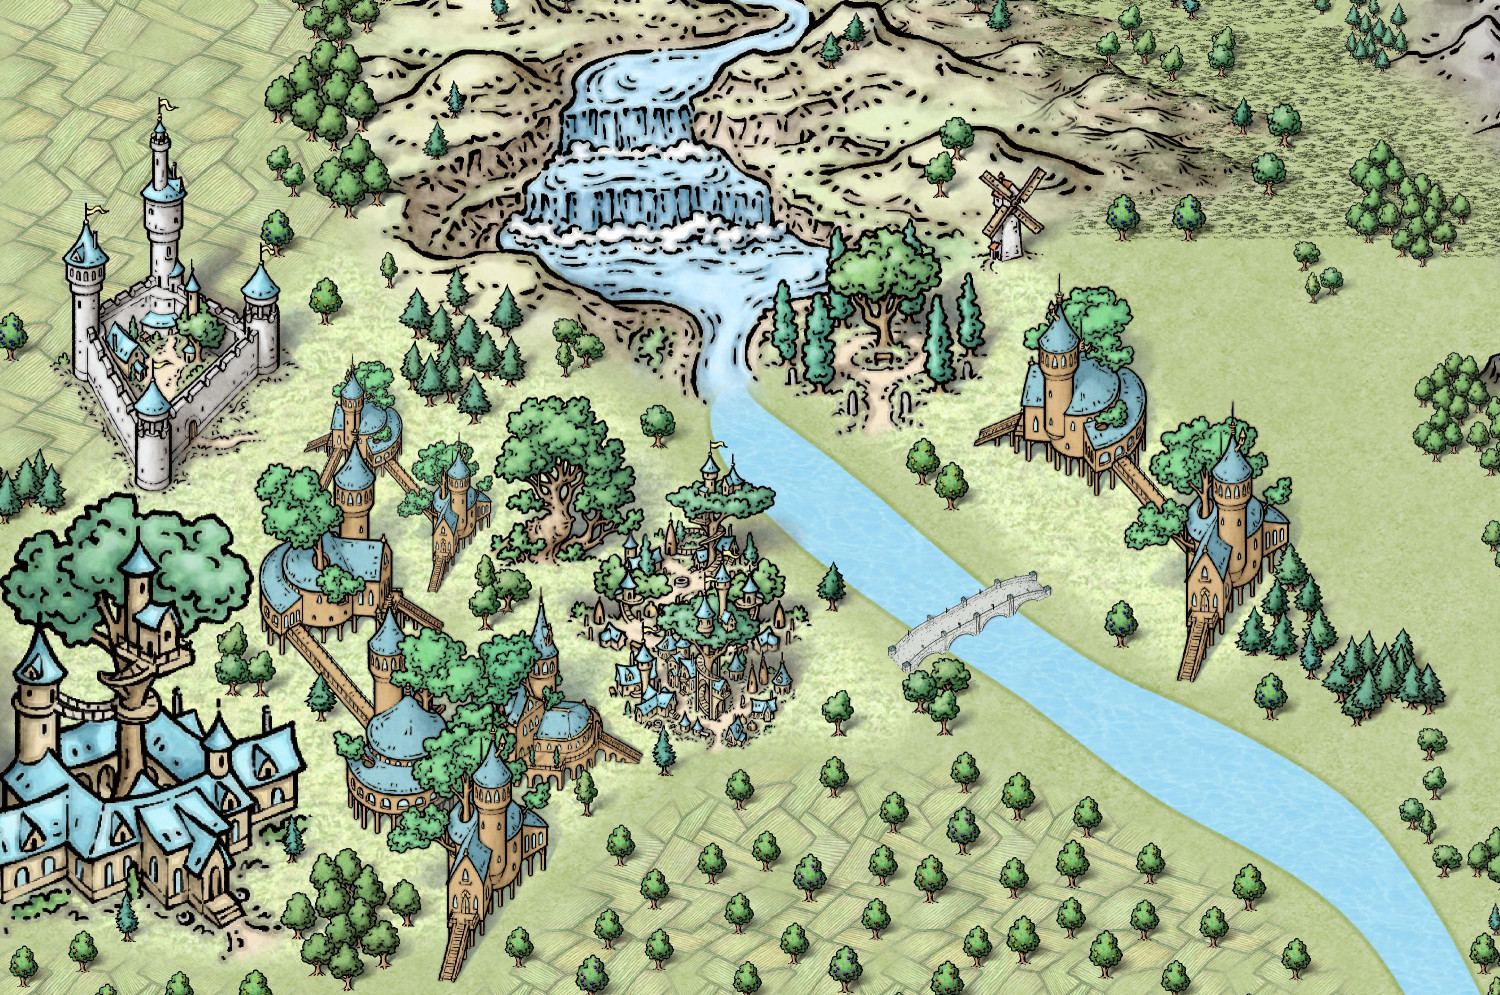
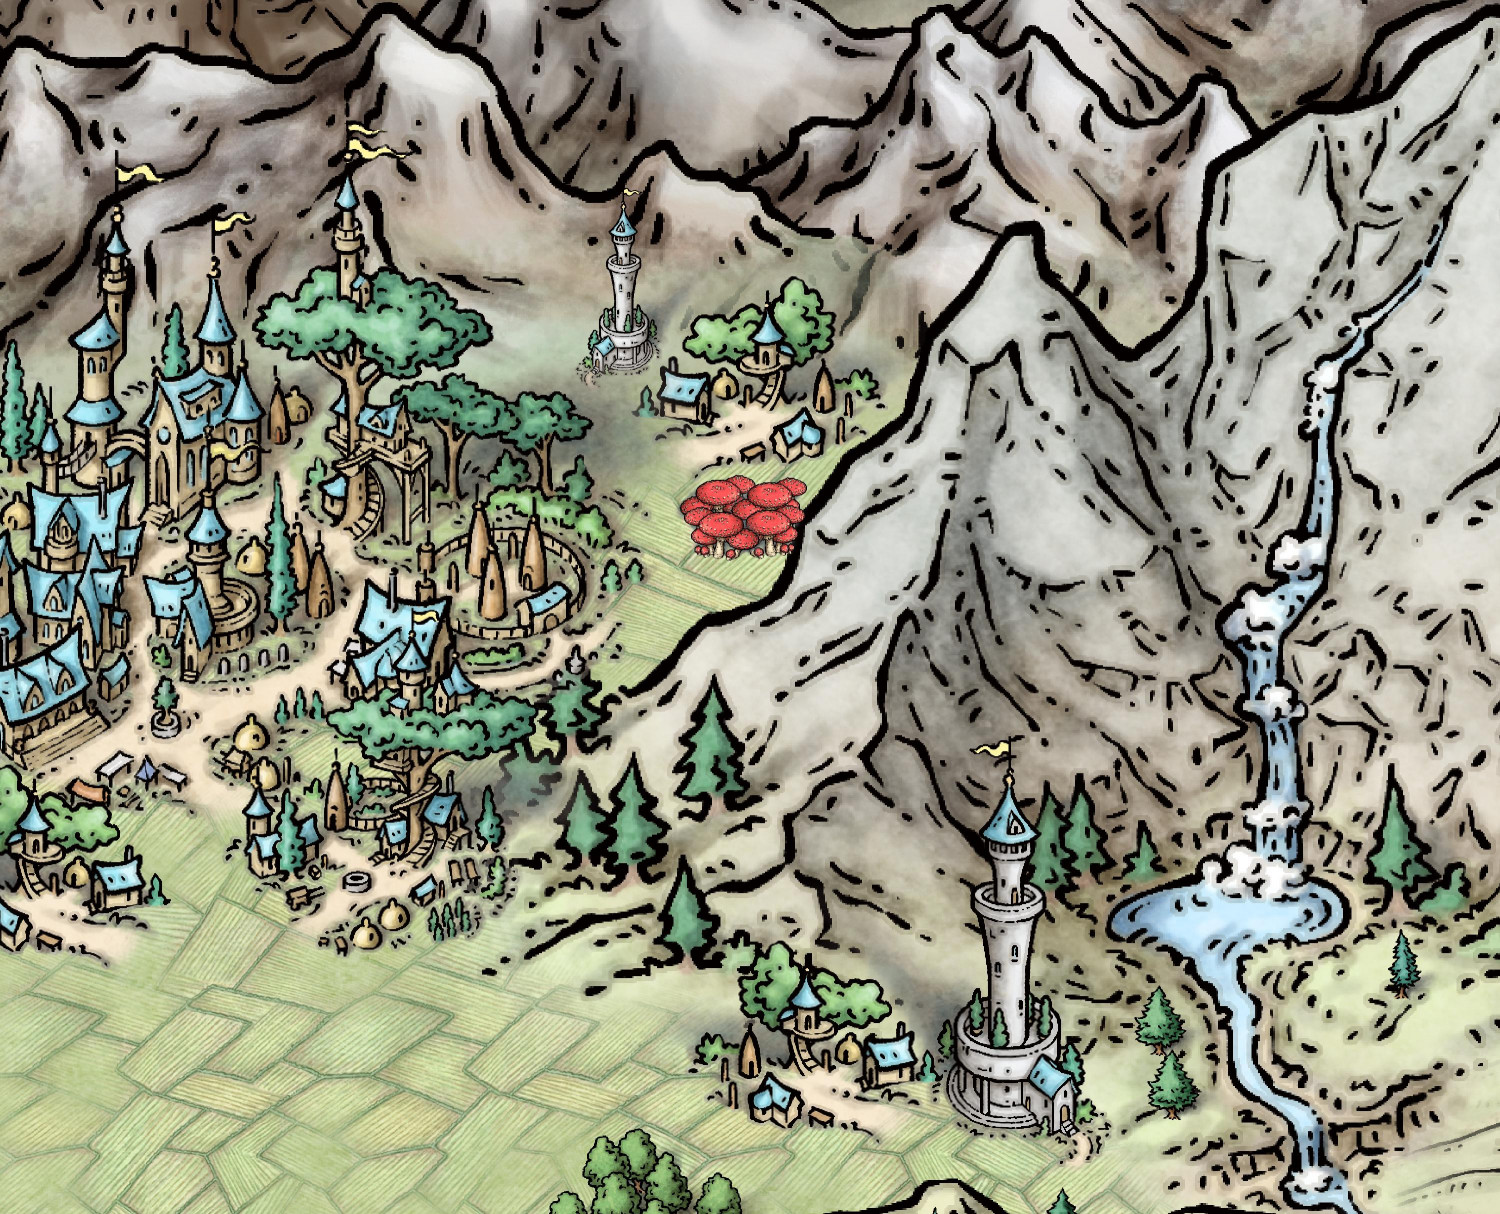
And here's a bit of an elven city using his overland symbols, which come with CC3+:
Here's an elven village using the top-down symbols that Ricko showed:
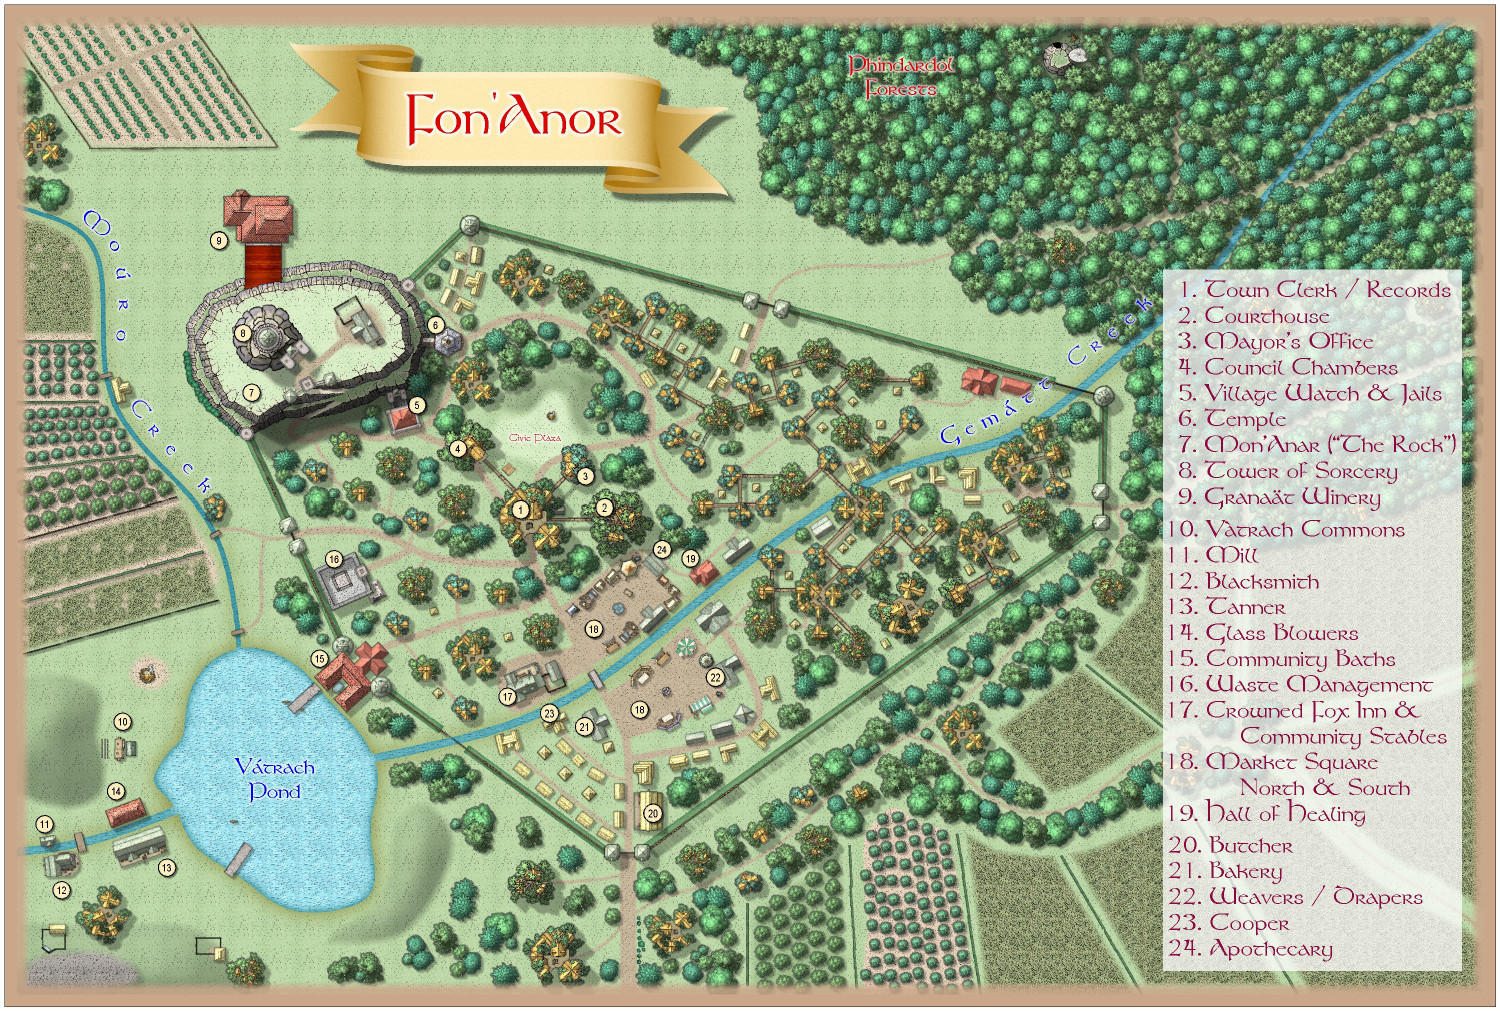
You can find that in the Atlas here:
https://atlas.monsen.cc/Maps/fon'anar
But I also did an elven village using Darklands City and Forest Trail, where I drew platforms in trees, placed thatched homes on those platforms, and then put more trees above the houses -- with trees above and below, they look like tree houses.
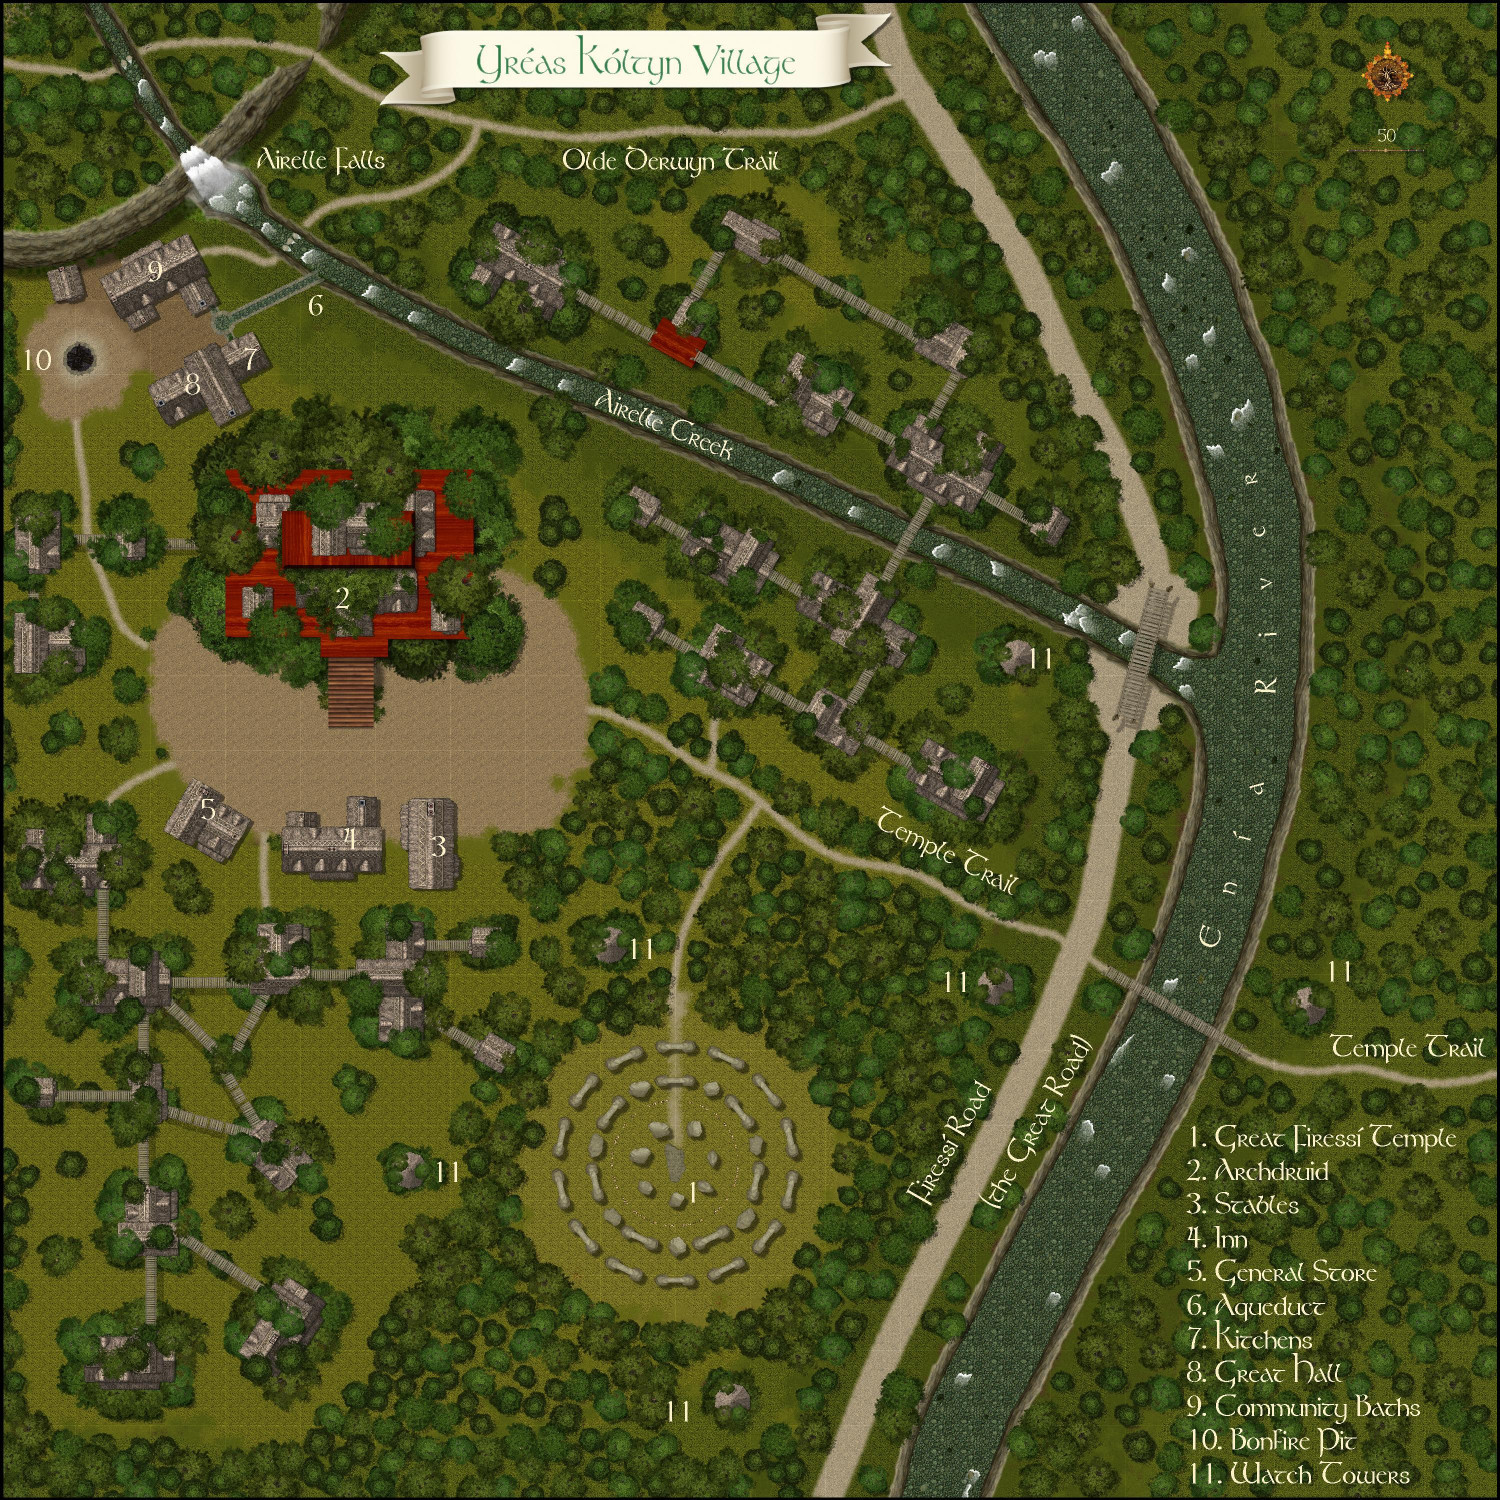
https://atlas.monsen.cc/Maps/yr%C3%A9as%20k%C3%B3ltyn%20village
You can download the full FCW file from the Atlas if you want to see how I did that.

-
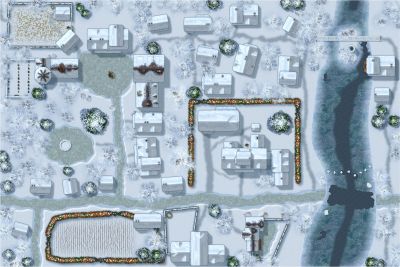
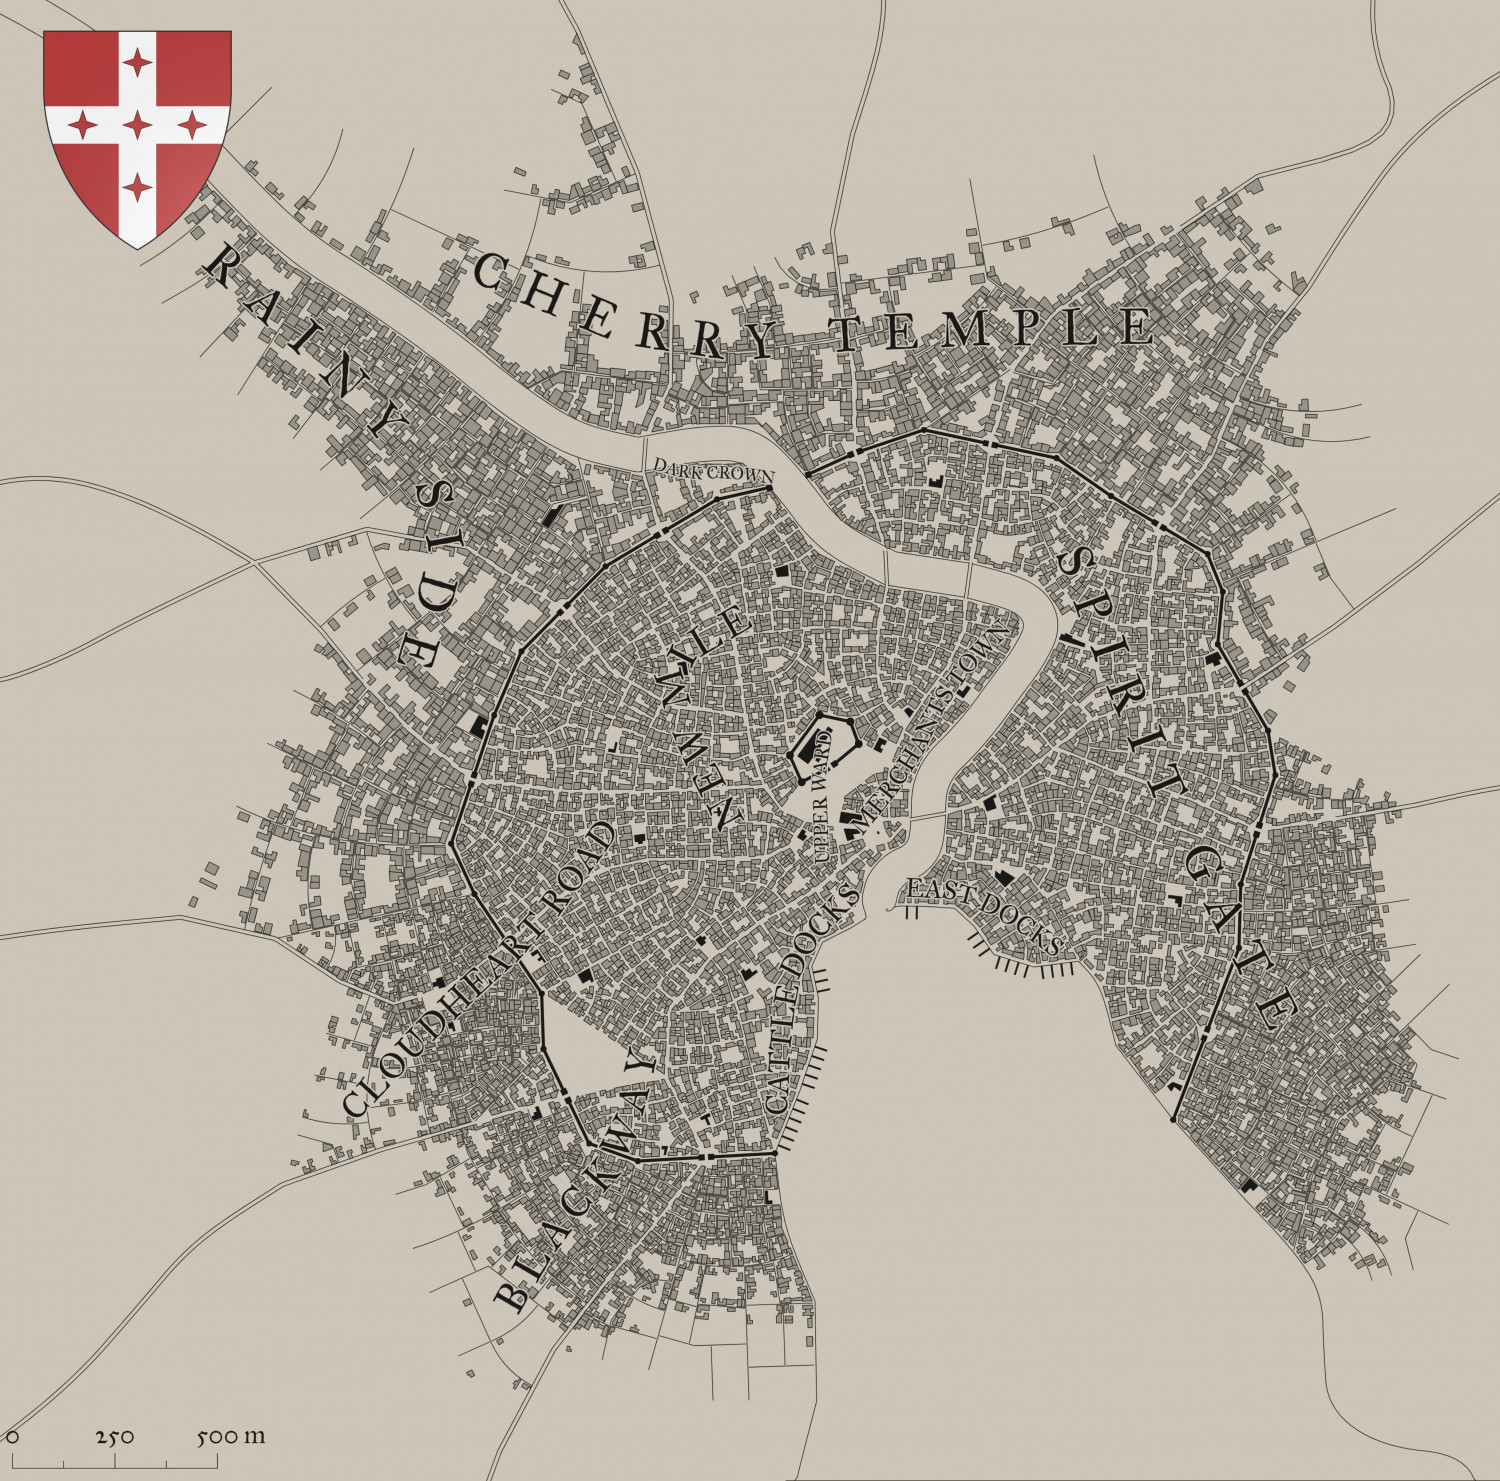
[WIP] City of Wolfwell Falls (CA211 Watabou City Revisited)
Following my test runs with the village of Greenwood Falls (population 920) and Redway Hill Township (population ~3,500), here's my attempt at a major city: Wolfwell Falls (population ~55,000).
This is what Watabou gave me to work with:
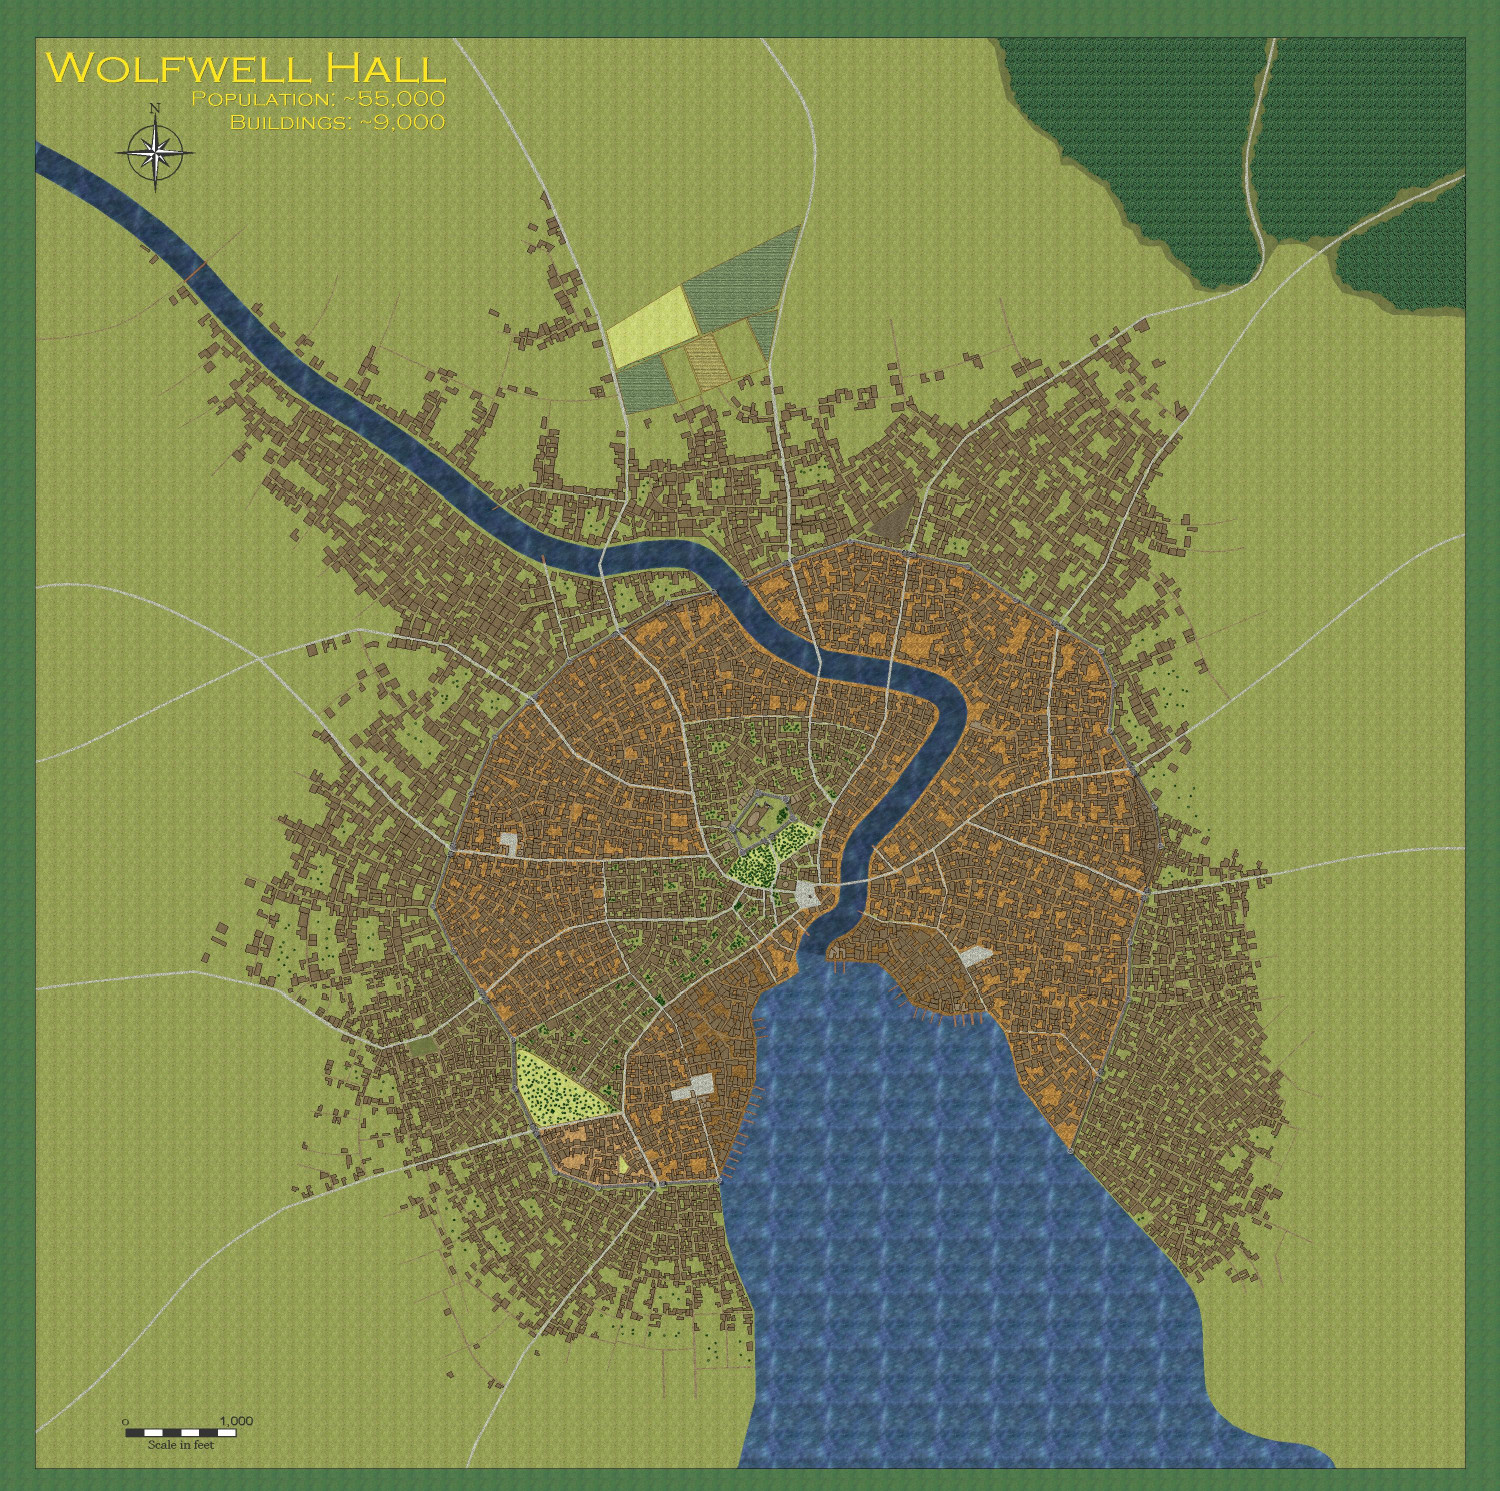
And this is what I came up with:
Here's a close-up of the Castle District, which I figure is a bit more upscale.
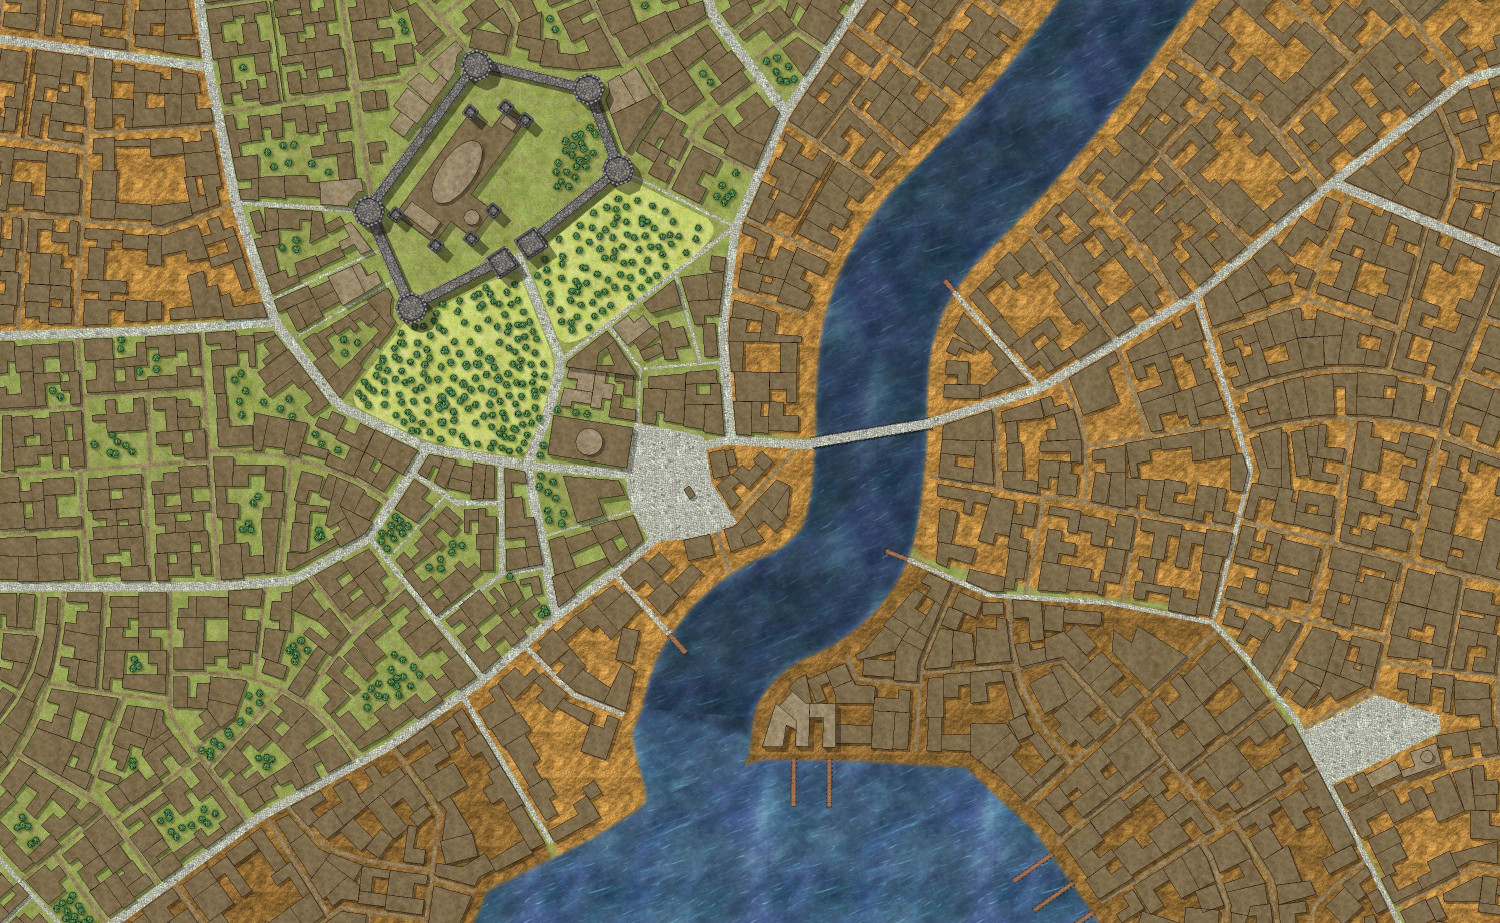
(I kind of messed up the river there. I when I did the "Change like drawing tool" command, I accidentally wasn't on the River/Water sheet, and I think when I fixed it I messed up the top layer or something.)
The nicer neighborhoods have a lot more greenery. Most neighborhoods have more dirt than greenery, and the area by the docks is muddier.
As predicted in the Redway Hill Towship thread, the longest part was redrawing the secondary roads. According to the Info: Count tool, there are 59 paved roads and 948 unpaved roads! I hope I successfully converted and/or deleted-and-redrew all of the roads. I had to do all of that, and also create a handful of special buildings, before being able to convert everything left to be the regular buildings. If you see any really weird buildings, it might be something I didn't properly convert to whatever it was supposed to be before turning it into a building.
I should draw a lot more fields -- the ones on the north side of the city won't be enough to sustain a city of 55,000 people! (Also, I just noticed that I call it "Wolfwell Hall" on the map instead of Wolfwell Falls. Gotta fix that.)
-
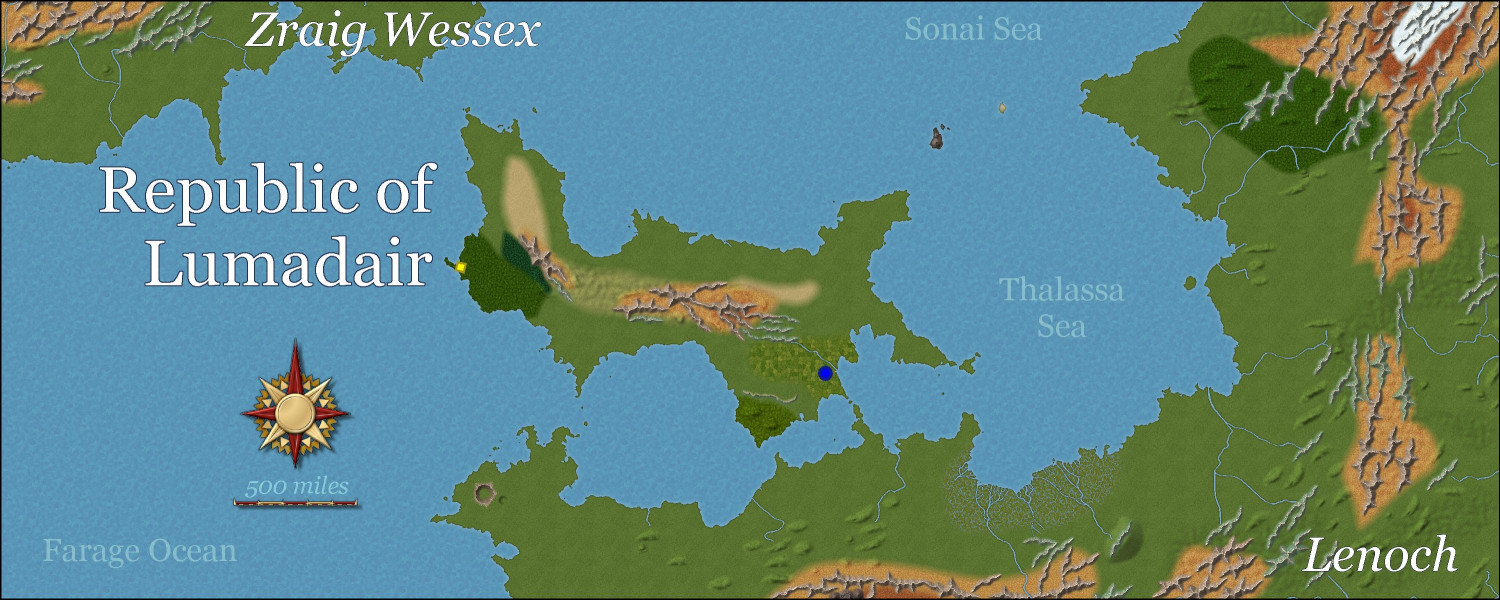
[WIP] - Lumadair: Birdseye Continental
Before attempting to do my entire Earth-sized world in the new Birdseye Continental style, I wanted to practice on a smaller bit of land, the tried-and-true Republic of Lumadair. I find it helpful to have the exact same FT export used for so many different styles -- I can toggle through JPGs of all of them while the coastlines remain identical, for better comparison.
I won't have time to do more work on it for several more hours (it's the start of my workday here on the Pacific coast), but I figured in the meantime I would seek feedback on my progress so far.
First, for perspective: Lumadair is in an equatorial climate. Very equatorial. Fractal Terrains tells me that the equator runs right through the middle of it. The latitude runs from -10 degrees on the southern side to +10 degrees on the northern side. Here it is circled on a map of my campaign world:
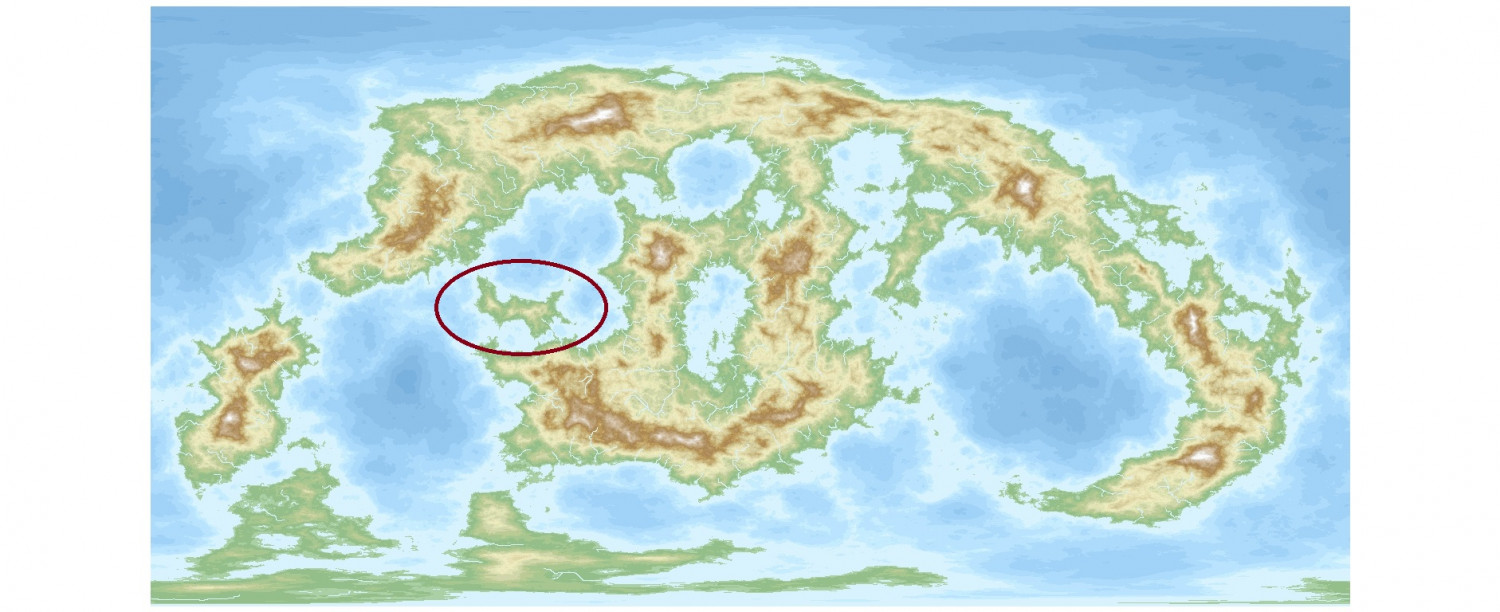
(After doing some terraforming to turn some landlocked great lakes into seas connected to the oceans, I made some adjustments to how it's viewed. I discovered that rotating the longitude perspective by 90 degrees allowed the main landmasses to all appear on the map without wrapping around. And I flipped it because I liked how it looked better that way, so FT will tell you that the top of the map has negative latitude numbers, with positive ones on the bottom half, but since that's not displayed, it's easy enough for me to mentally adjust.)
There are more images of Lumadair in my galleries if you want to see the terrain and symbols in other formats.
Here is Lumadair so far in Birdseye Continental. Haven't drawn most of the forests yet, nor water depths. I want to redo all of the mountain ridges and ripples to make them fit together a little better, and also be slightly less linear, even though they should still more or less be going in the same direction.
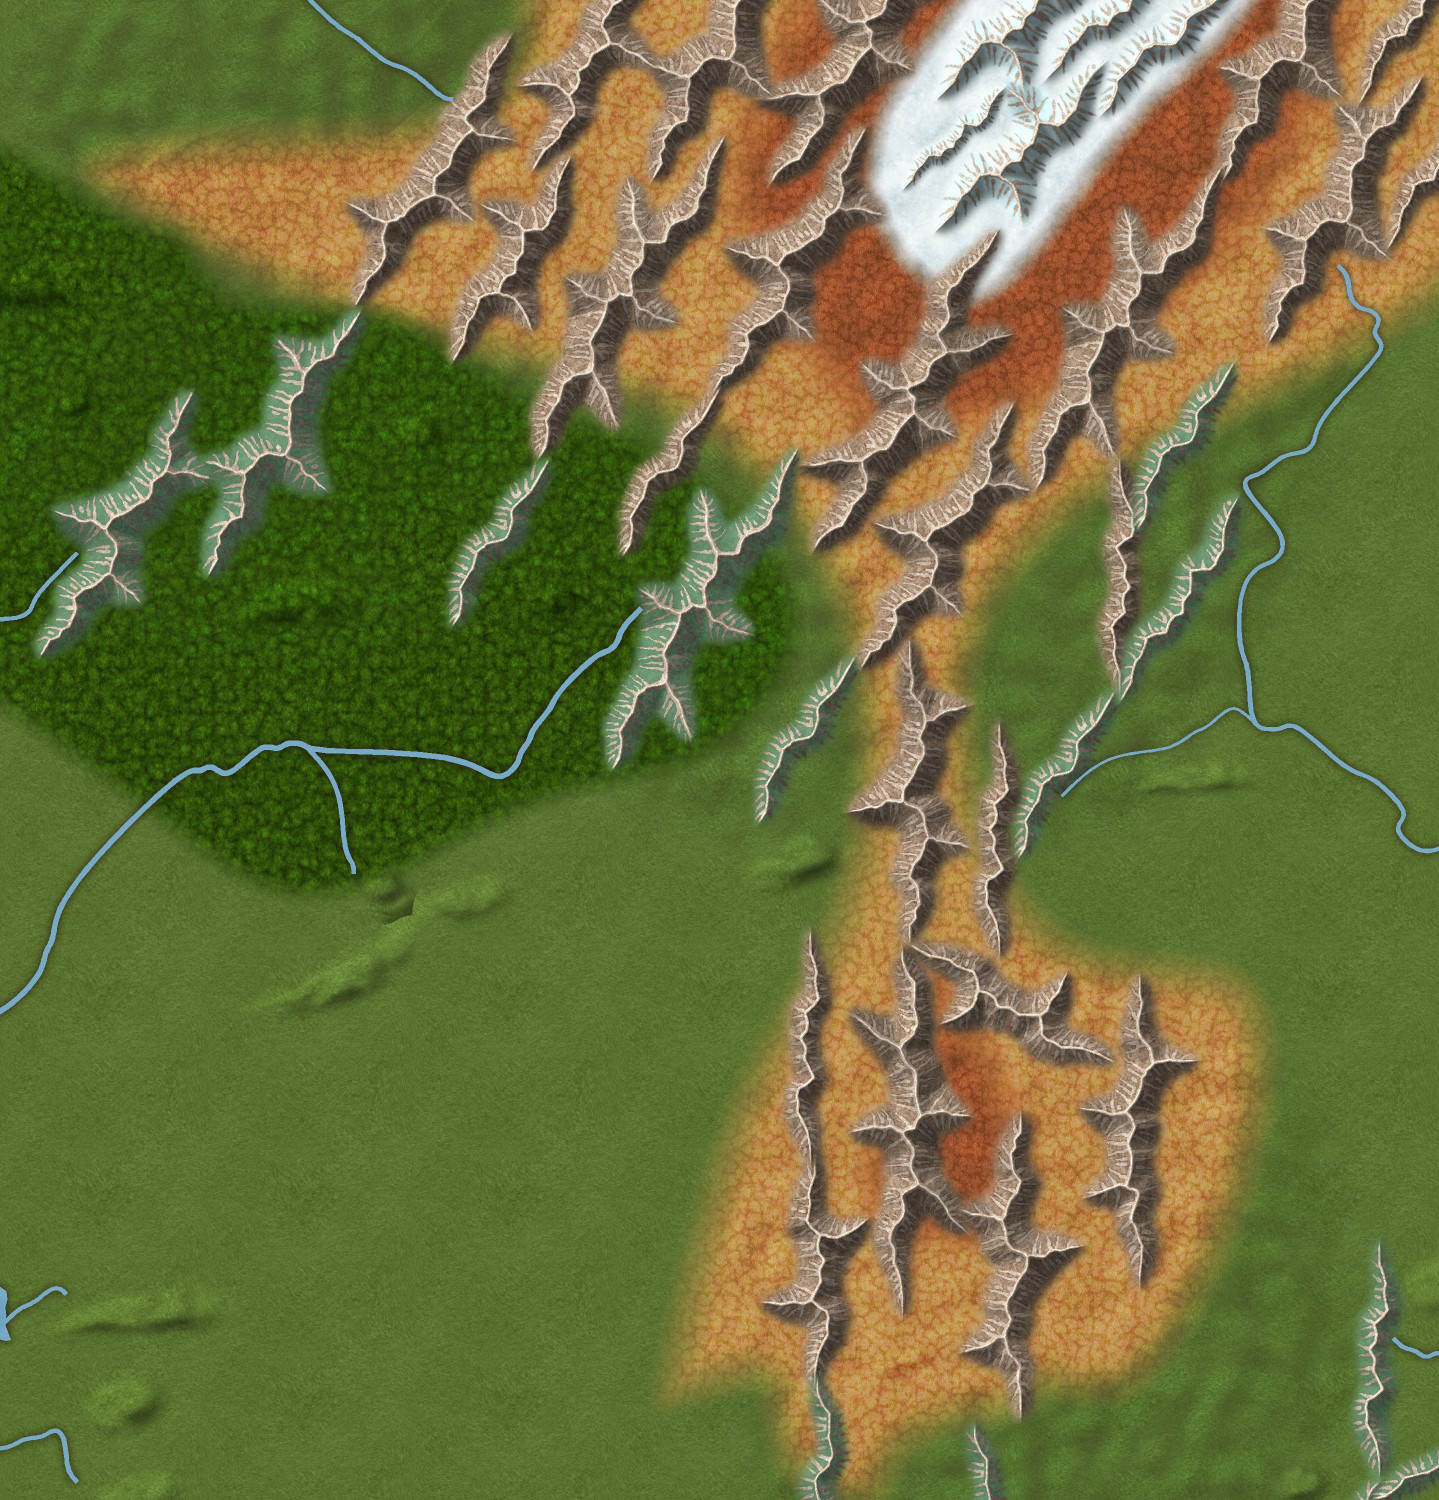
Here are the mountains in northeast corner up close. I tried to use varicolor green ridges to show lower mountains covered with trees, but I'm not sure how well that worked. I might experiment with adding a chameleon or drawn hill beneath them to give them more height. The snowy part is for a mountain that is so high that it is perpetually snow-covered. I think it's the third highest on my campaign world? I think the highest is about 30,000 feet and this one is around 25,000 feet. But I think I want to adjust the snow terrain to be a little tighter to the snowcapped ridges. Thoughts?
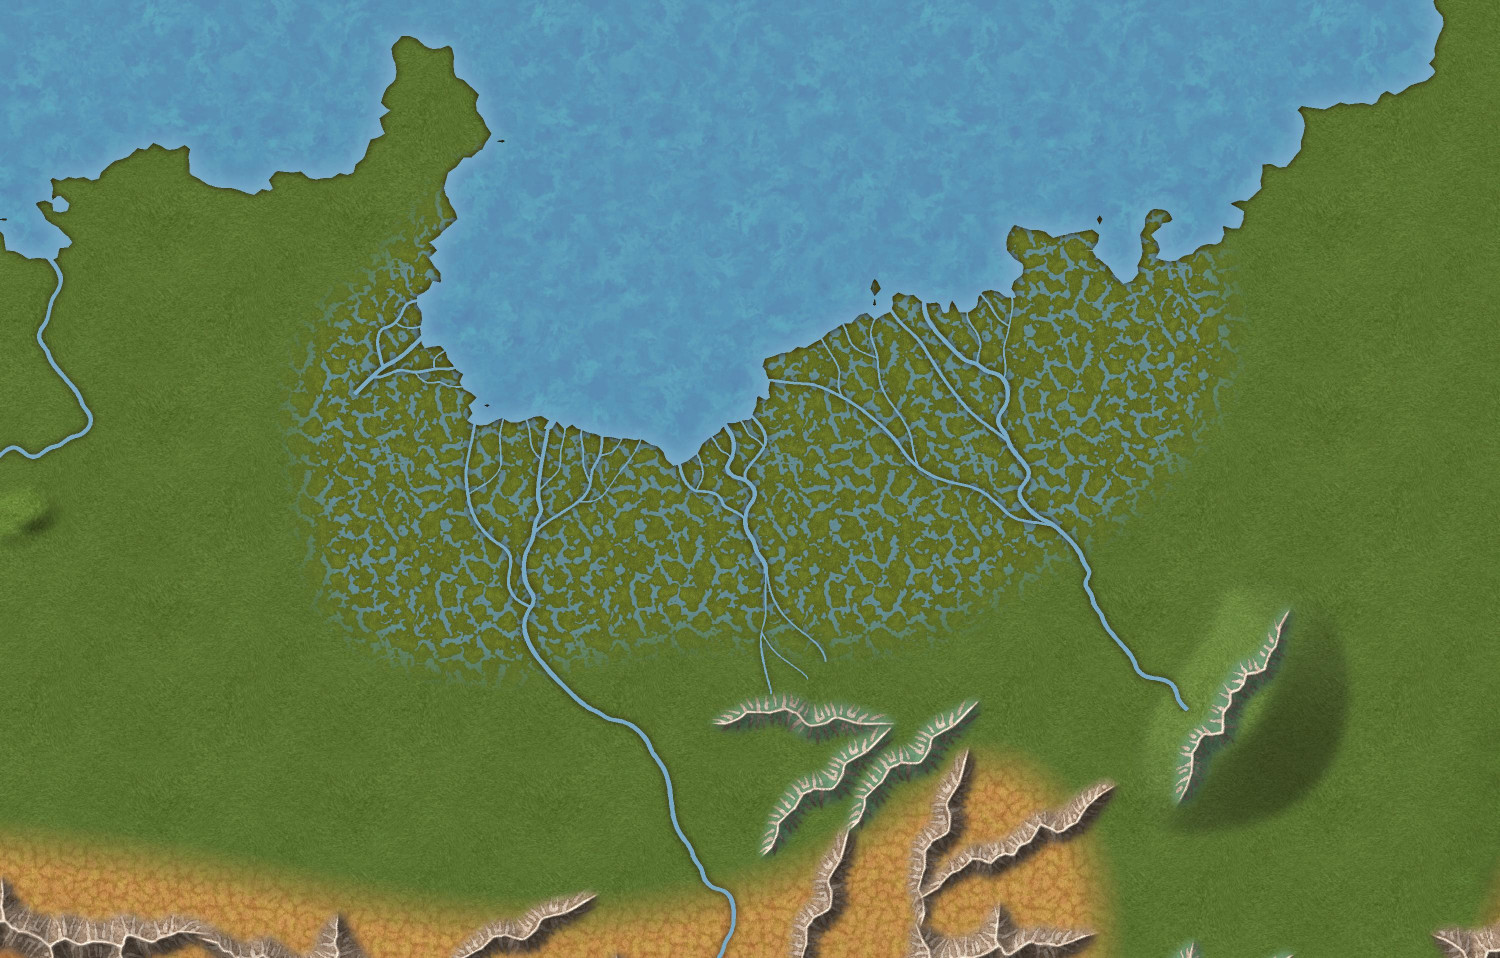
I do like how the swamp turned out. The main rivers have a default width of 3, but I added more branches with widths of 2 and 1. (This swamp map also shows an experimentation of putting a ridge on a chameleon hill.)
-
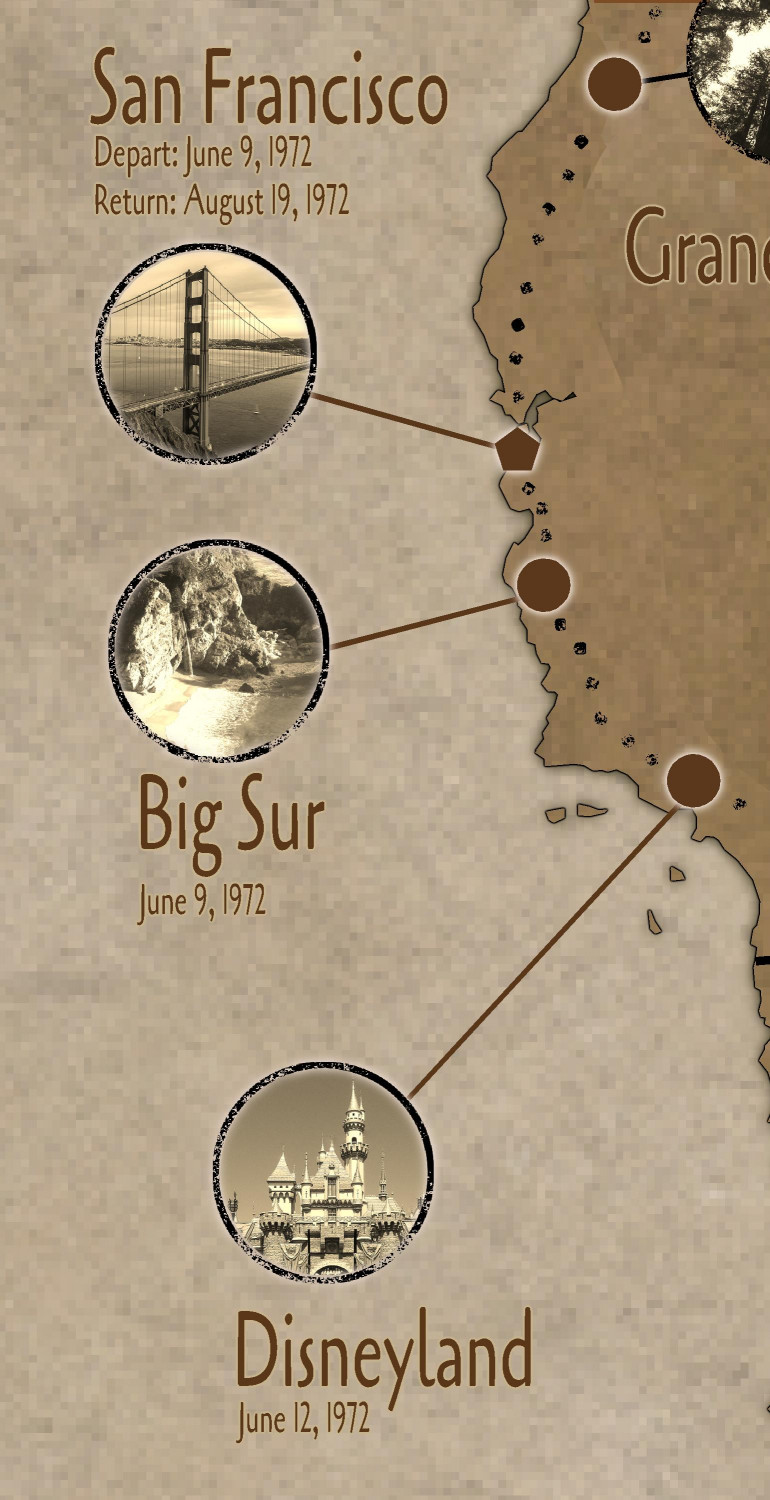
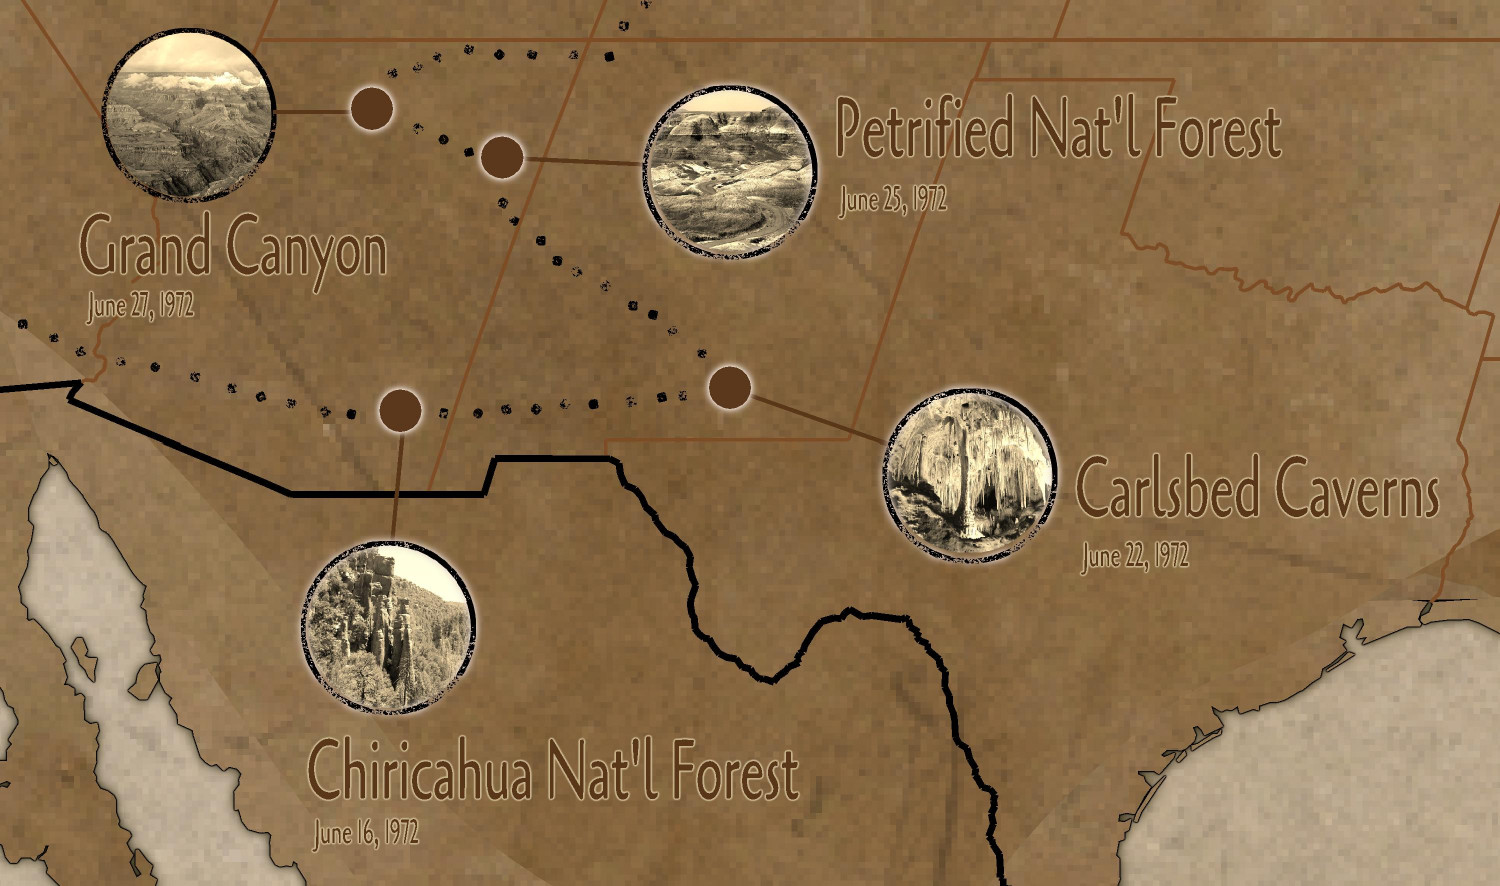
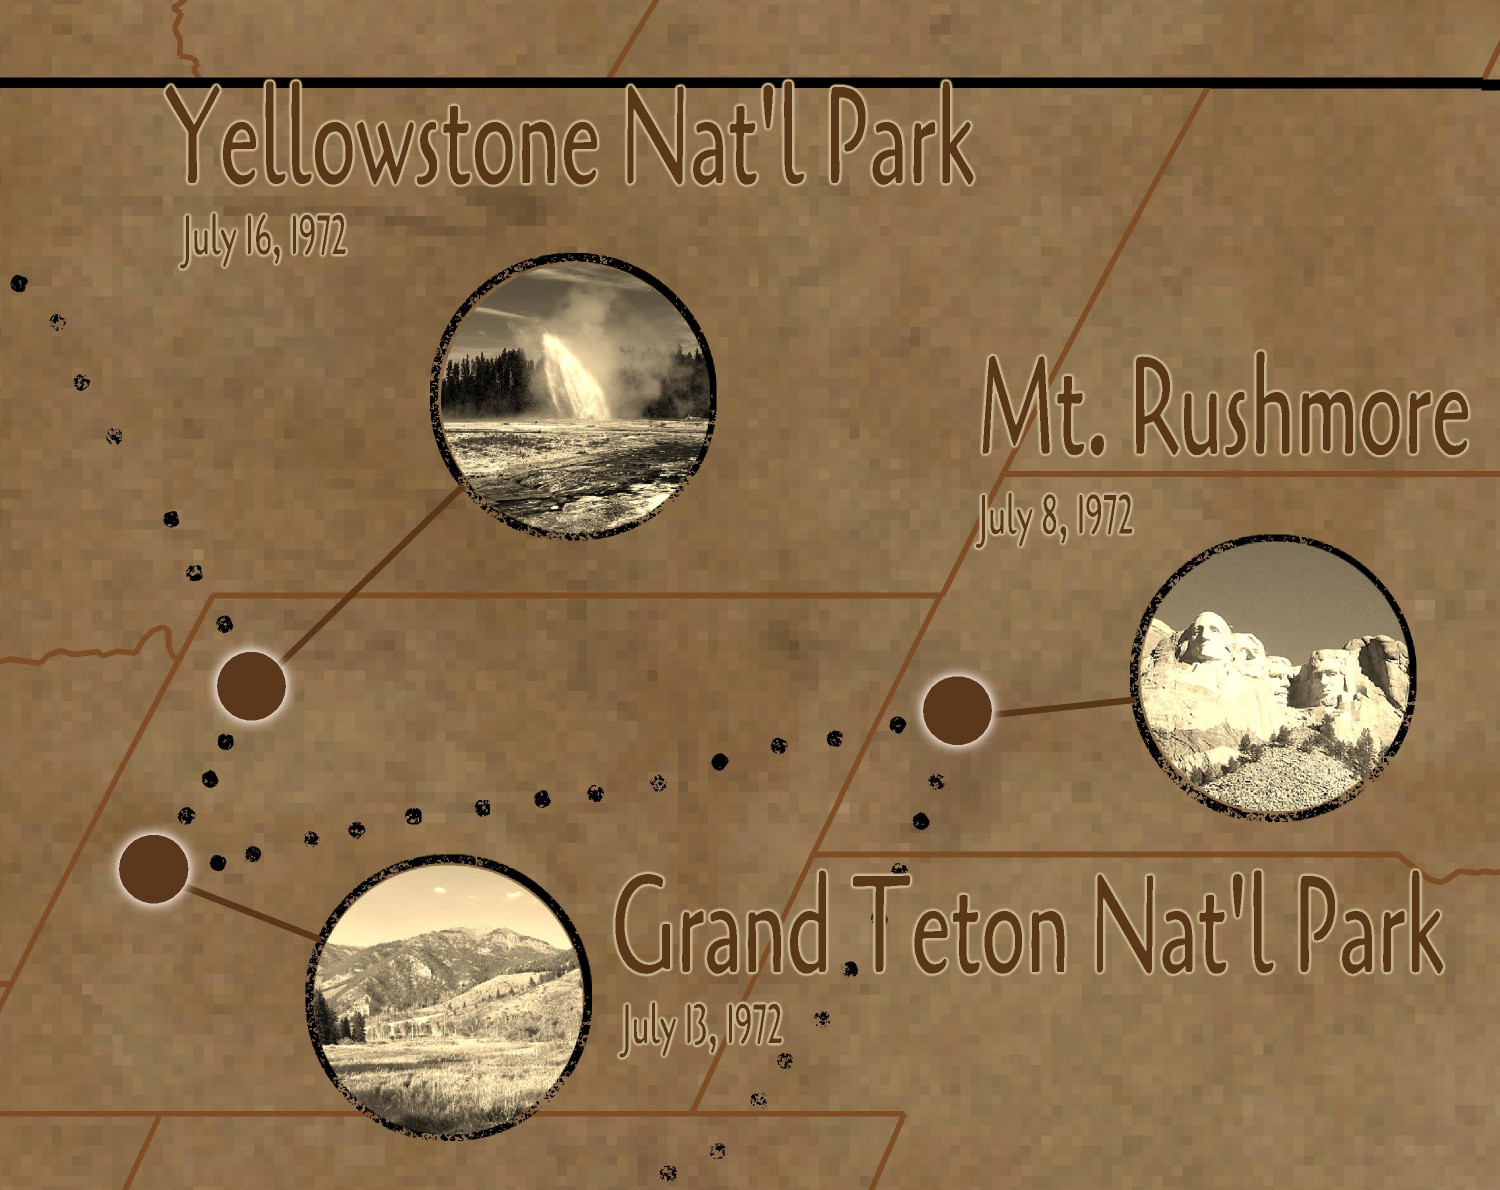
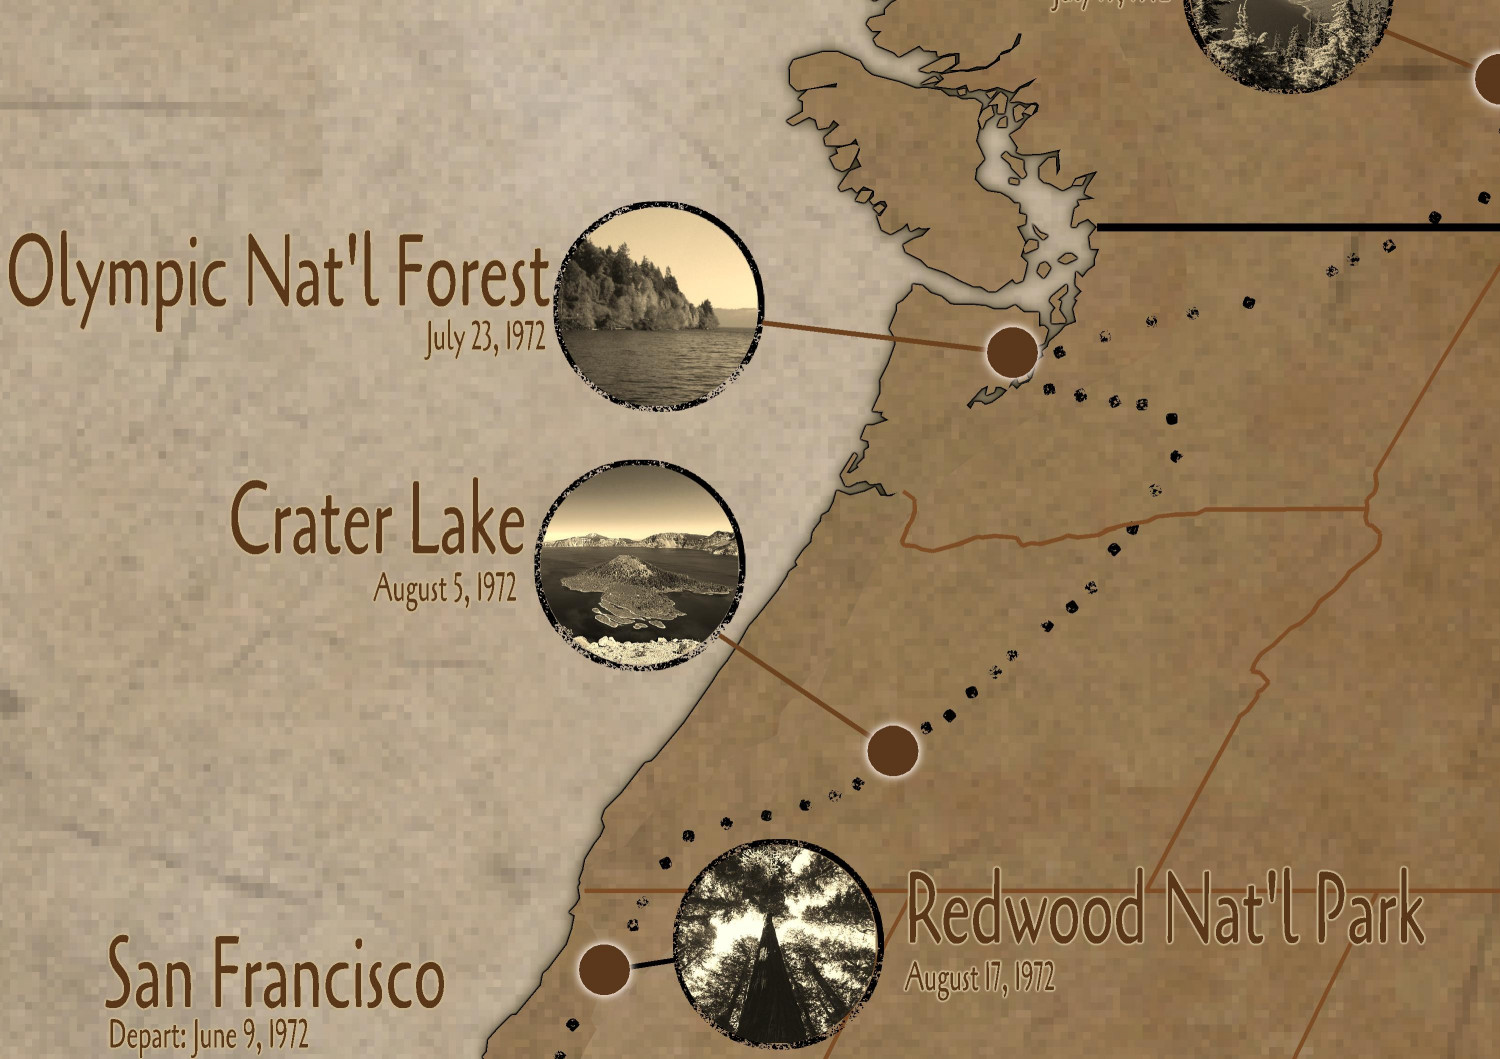
[WIP] 1972 Travelogue (CA93 Modern Journeys)
And here are some zoomed-in closeups: