

[WIP] Trying to design a barrel roof
 Royal Scribe
🖼️ 386 images Mapmaker
Royal Scribe
🖼️ 386 images Mapmaker
One of the projects I'm working on is an attempt to create a fortress loosely modeled after The Armory in San Francisco (here are some pix I took nearly a decade ago, so no copyright violation posting them):
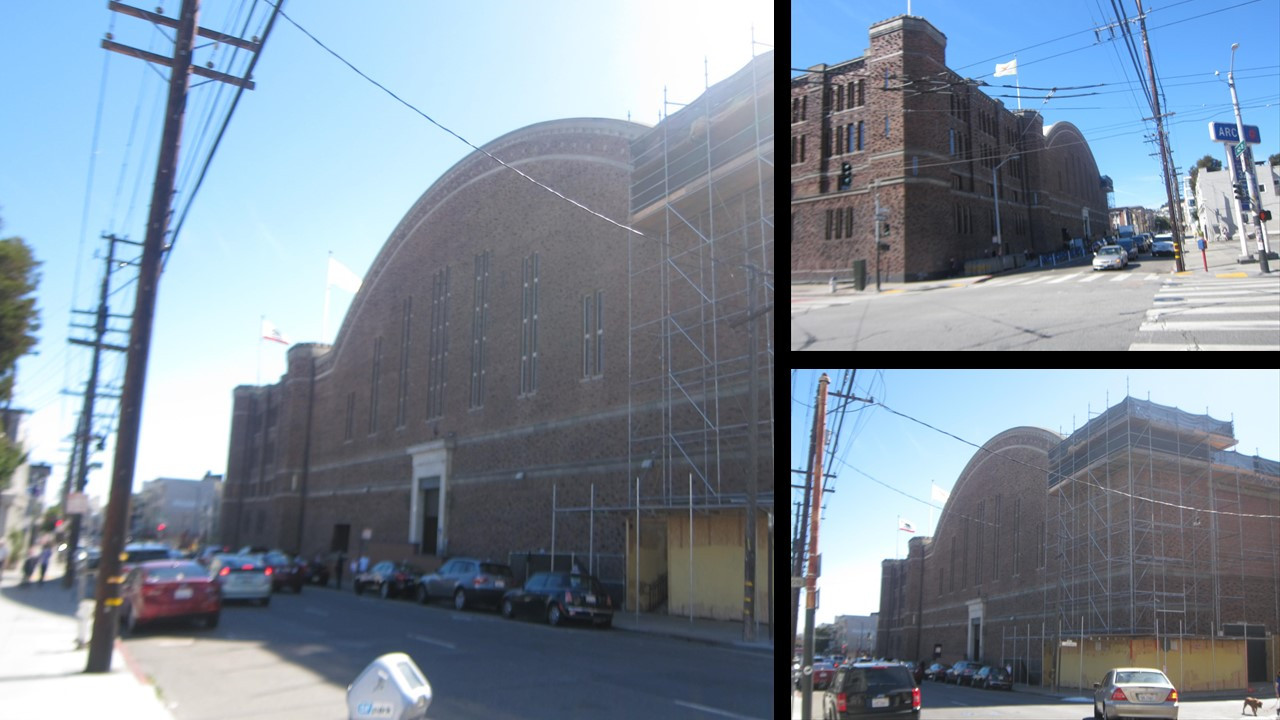
After a bit of research, I've learned that the dome-shaped part of the roof is actually called a barrel roof. In my version, the roof would be split in the center and retractable, allowing for flying creatures housed inside to be able to fly in and out when the roof is retracted.
I've been trying to create the barrel roof using a variety of techniques and effects, but I'm not super thrilled with all of my results. First, I tried taking domes from City Domes and enlarging with different XY values to make them oval. I like how it looks, but for a different project. Not the barrel roof I'm looking for.
I tried adding walls at the ends to chop off the ends, but it's still not a barrel roof.

Then I tried something totally different: going for two rectangular polygons with the Shaded Polygon (Angled by Edge) effects, as if going for a peaked roof, and then adding a series of Glow effects to suggest curvature. There are three Inner Glow effects on this, with a Blur of 4, 8, and 16 map units:
This is getting closer, but I would love any suggestions with effects or an entirely different approach to achieve a proper barrel roof. Here's the FCW for the latest attempt, if that helps.


Comments
You are almost there in your thinking towards the end.
Instead of drawing just two slabs how about drawing many strips along the length of the roof, using Shaded Polygon on all of them and then editing the pitch of the resulting strips. It's not as easy as I've just made it sound, but it's achievable. I made an onion dome out of shaded polygons once. You might pick up a few tips on how to do this barrel roof from the blog I wrote about it.
Oh! What a great idea. Thank you, I will try that.
Have you sought help from the experts?
It looks good! First I tried it with 10-foot wide, 10 degree pitch increments, with a 80 degree pitch at the edges, working up to a 10 degree pitch at the center. The transitions were a little sharp:
Then I redid it with a more gradual transition, 5-feet wide sheets with 5 degree pitch increments going from 85 degree pitch at the edges to 5 degrees at the center. That worked much better! Some fill styles worked better than others, of course -- though some that I didn't care for might be improved if I play with adjusting the scaling. Roof tiles didn't really work very well, but wood worked, as did different stone fills. Here are the top 50% of my experiments:
Thank you for the tip, Sue! I can play with fills (and the scaling of those fills), but I feel like I have something solid to work with here.
You're welcome :)
Here's an idea to solve the problem of the textures. Have you thought of turning them all a uniform solid grey colour and then using a Blend Mode to Soft Light them all onto a new underlying sheet with the actual roof textures on it in two nice and simple aligned slabs of tiles or whatever you prefer?
Second option is do two. Each at differing segment numbers. Put them on sheets above each other. Put a transparency on the upper one. Then they will have a nice blend.
I like Sue's option as well, but blur's really slow stuff down.
The 5 degree segs are pretty decent.
If have not thought about that because that sounds like Ph.D. level cartography. 😉 So the gray would be on these shaded roof polygons, and then the roof textures would be on separate sheets behind them (as in, higher in the list of sheets so it renders before the gray)? This isn't the texturize effect, right?
Thanks, Don. So to clarify, when you say different segment numbers, are you referring to different angles of pitch? Or different widths of the polygons (and therefore a different number of polygons)?
I will try both, though I have to get ready to go out so may not be able to do more until tomorrow. Appreciate everyone's help!
Different number of segments, that way the joints don't line up.
A Blend Mode effect is similar to the blend modes used in PS or other bitmap apps to apply effects between their layers, only in this case it's between sheets. If you turn all the polygons mid-grey their shading will create a relatively smooth 'arch' without the fizzy appearance of any texture. You can then blend this to a nice simple rectangular polygon of a roof texture of your choice on an underlying sheet using a Blend Mode set to 100% opacity and Soft Light. Soft Light is a Blend Mode that will shade and highlight the underlying roof texture according to the shade and light of the roof arch.
Votes Sue to do a video.
Maybe one day, but there are the other 99 things on my list of jobs to do first.
I'm not aware of any purpose made app that will do that, but I've always done mine using the method described in the Tome starting on page 407, where the instructions are given for how to do it in GIMP - a free bitmap editor.
In a nutshell the apparent pitch of the roof is dictated by the amount of blue in the map file, while the direction it faces is controlled by the amount of red. The combination of red and blue creates a strangely beautiful 'map' of the roof that CC3 uses to shade the otherwise flat bitmap image of the tiles, or thatch etc.
To create a barrel roof map file you would have to use a gradient for the blue, but once you understand how it works it's not impossible to make your own.
In this shot I took of a couple of the building symbols in Darklands City, you can see how the red factor of the purplish map files changes in a radial pattern from 0 red to 255 red in an anticlockwise fashion (RGB values). And you can also see that the corresponding roof bitmaps are flat as pancakes until they are combined with the map file in CC3.
All in all, for a one off barrel roof in a single map like this it might be too much time investment to go as far as making a proper bitmap symbol with a map file for shading, so shaded polygons can do a reasonably good job.
The result in CC3:
I haven't had a chance to try Don's recommendation, as that takes a bit more than changing the fill style for the part that's behind the gray shading for the dome, but I have tried Sue's approach and I'm really happy with it. Right now, there's not much on this demo, but once I add a full fortress, we'll see whether the blurs slow things down too much.
I won't post all of the examples I tried. I did a lot, using fills from both Dungeons and Cities of Schley, DD3, Beaumaris Castle, and even Cosmographer just to see what it would look like with concrete and metal fills.
Here it is with a few Schley fills (the second one wouldn't work because it doesn't look like construction, but it does show the effectiveness of the technique):
I found that the best-looking fills were ones that had enough texture to hide the banding from the dome bands, but not so much texture that the doming effect was obscured. For the banding issue, that can be mitigated by reducing the opacity, but at the expense of losing some of the doming effect. Trade-offs! Here's an example using a 95% opacity versus a 50% opacity.
And it works with tiles and wood planks, too -- not suitable for what I'm designing, but useful to remember for future projects.
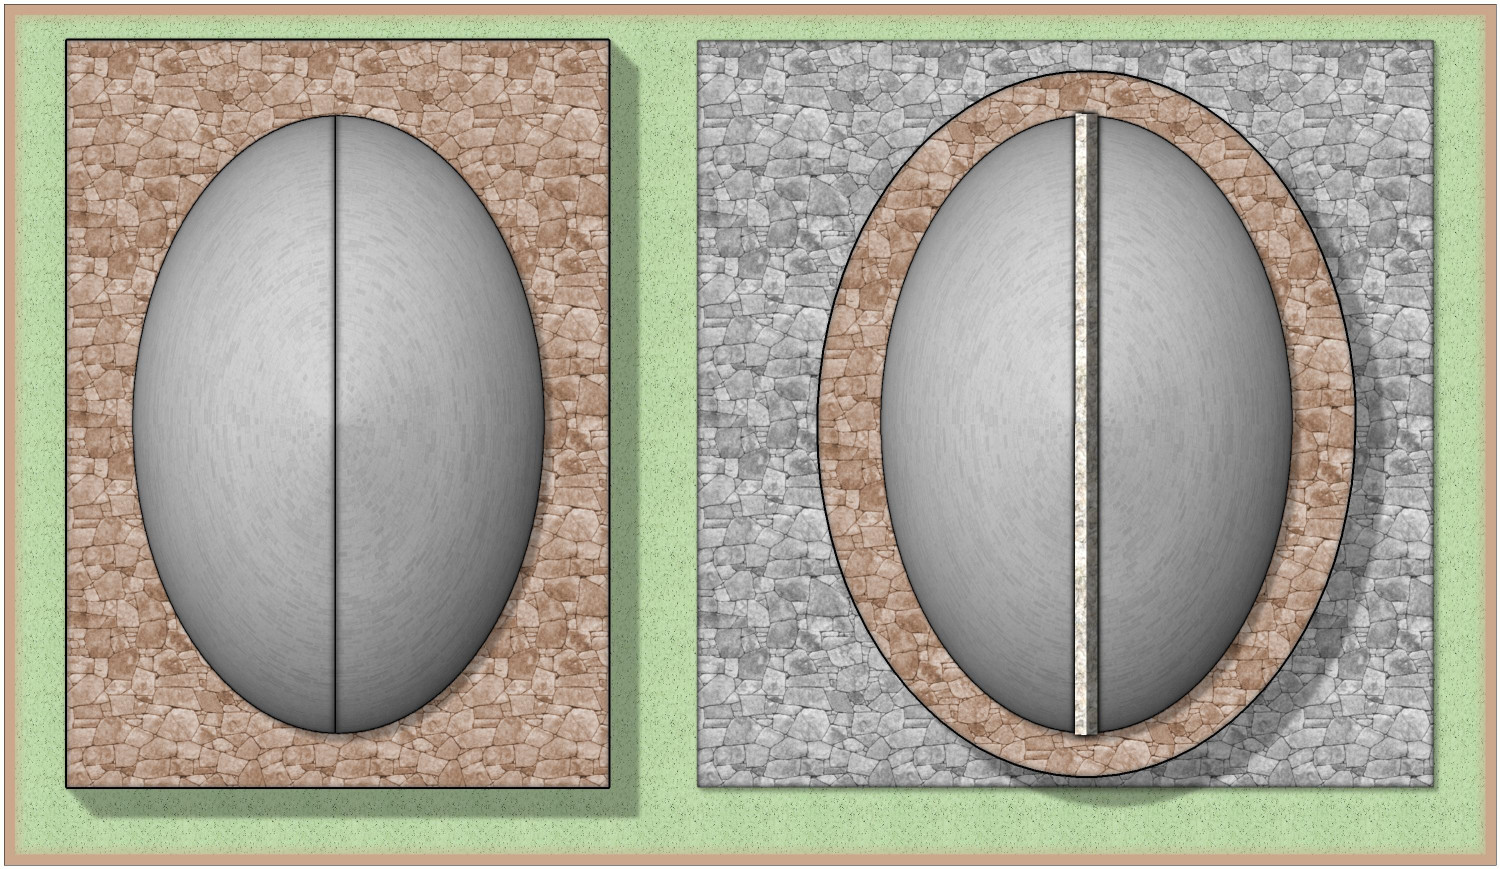
Here are my two favorites -- the second one isn't really suitable for this project, but looks really cool. Raw Granite, and Roof Lead, both from Beaumaris Castle.
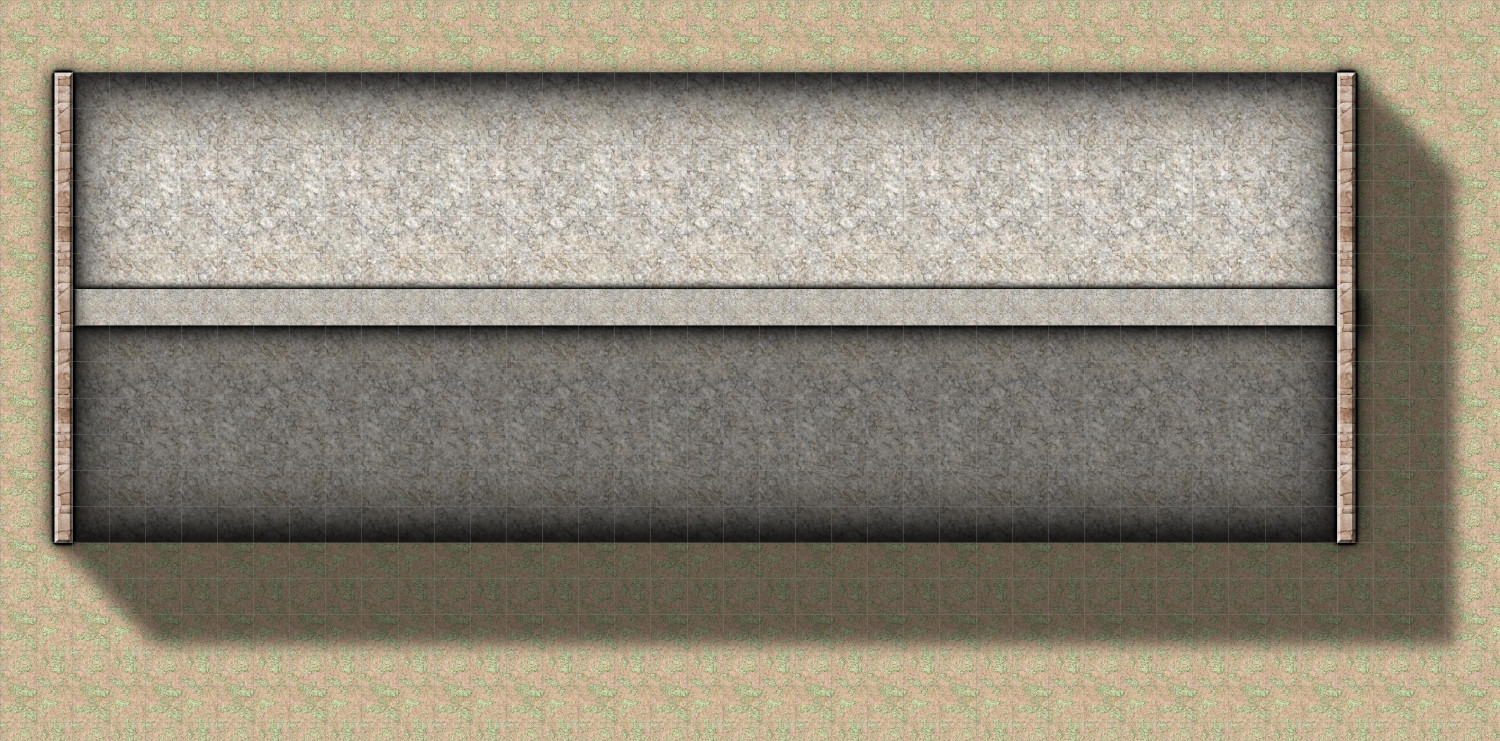
And here's a quick mockup of how it might look with the rest of the roof. I added strips of the Stone Paving Brown on the edges of the barrel dome, for the part of the façade if you look at the source inspiration. This is just a sample -- the full roof will have towers, crenellations, a line down the barrel dome to show it's retractable, and more.
Stone Brown Flat 95 opacity is the one I like the most in this context.
Good result :)
I would pick whichever one matches the rest of your map.
I’m still debating what style to use: Dungeons of Schley or the Beaumaris Castle style. I have a crazy idea of doing both by designing it without any style at all, using just the primary colors from the top two rows of the color palette, and then using dropping the template into one of the styles and changing the primary color fills to be an appropriate fill for the style. It would be an interesting test of being able to create the same thing in multiple styles. We’ll see. Maybe I’ll do it in one style to see how it works, then convert those fills to colors for recreating in other styles.