Fractal Terrain to Vue Infinite 2016
 argel1200
Traveler
This is going by memory as I did this about a month ago, but it came up in conversation. Looking at my file, I can piece a lot of it together.
- In FT get everything the way you want it -- altitude color map in particular.
- Export the image out to a PNG. Do *not* use the option to maintain the aspect ratio or match the view or whatever it is called. Mine was exported at 8192x4096. So you may need that 2:1 ratio to avoid gaps.
- Export again as a 16-bit heightmap
Then I mainly followed this tutorial: https://www.youtube.com/watch?v=FLJnhqZHSA4 (E-on software Tips and Tricks: Planet Creation) except I had to figure how to use the exported images from FT. And I just brute forced the clouds using actual cloud materials. Here are some screenshots of my settings that will hopefully help.
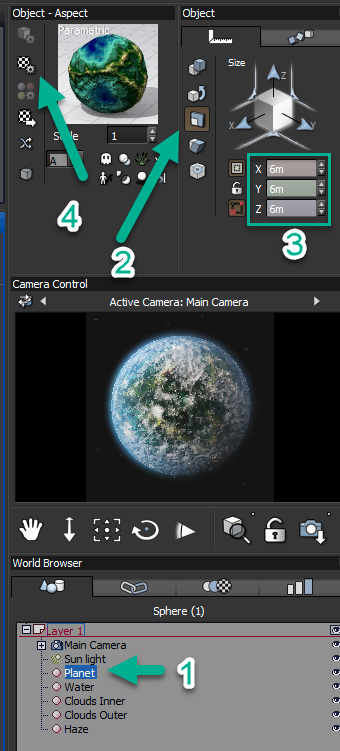
PLANET
Vue overview: Select the sphere, change the sacle (if desired), then Edit Material
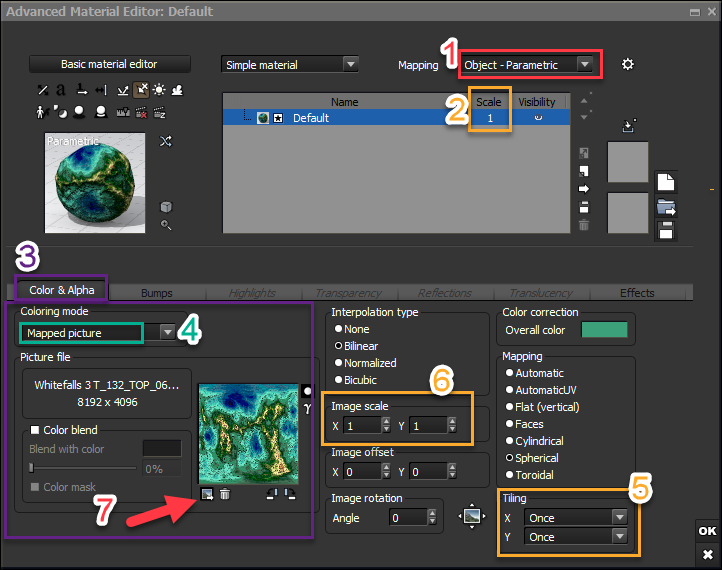
Planet Material Settings
- Set the Mapping to Object - Parametric
- Set the Scale to 1 if needed
- Go to the Color & Alpha tab
- Change the Coloring Mode to Mapped Picture
- If you can change the Tiling before you load your image do it now. Set both X and Y to Once.
- If needed, set the Image Scale to 1 for X and Y.
- Load your altitude export. Once the Vue loader comes up use the Browse option in the top right to find it.
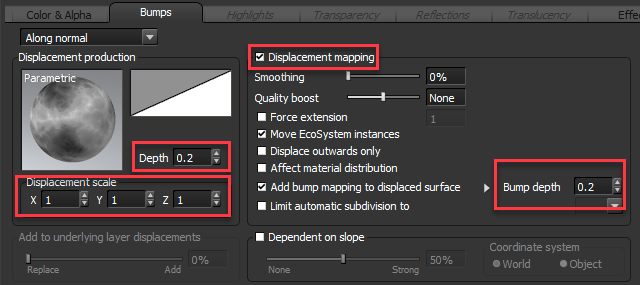
The Bump map/displacement is trickier.
- Set the options you can as per above.
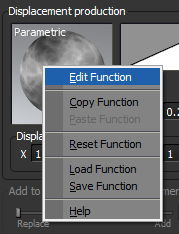
- Then right click on the sphere image and select Edit Function
You see a scary diagram and lose 2d4 sanity. ;)
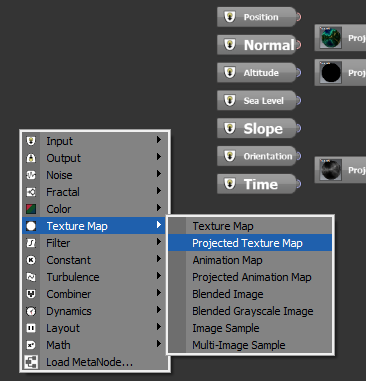
- Right click over an open area and Add a Texture Map -> Projected Texture Map
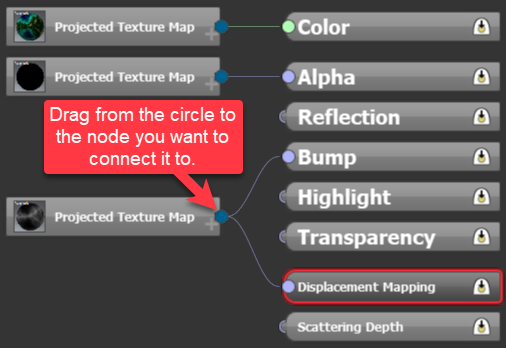
- Connect it to Bump and Displacement
Click on the Projected Texture Map you just connected to Bump and Displacement Mapping and configure it like so. Note: I don;t think the apsect ratio matters as much for the heigh map (the one I used is 8192x4266, not 4096).
- Set the tiling, though not sure if this is necessary (mine was fine with tiling, so it may be inheriting it from the color map).
- Load the 16-bit grayscale heighmap your exported from Fract Terrain earlier
If the top left you can click to get back to the advanced material editor. Or just Ok it and then Edit Material again.
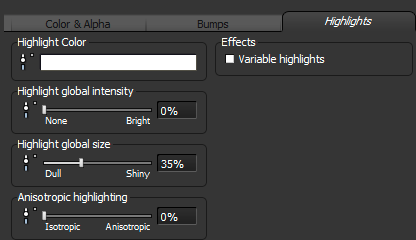
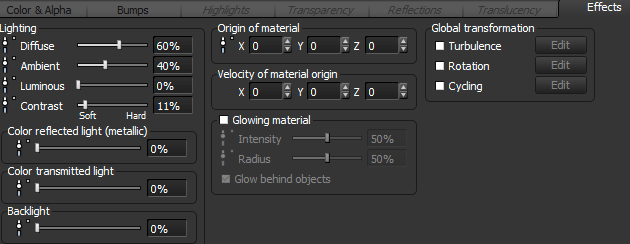
In case they matter, here are the rest of the settings:
In case it's rel;evant, I also have a black prkected texture map for my alpha channel. You'll need an all black image for this. A single pixel should work. Edit the Function and create a Projected Texture Map like above, except attach it to Alpha instead.
WATER
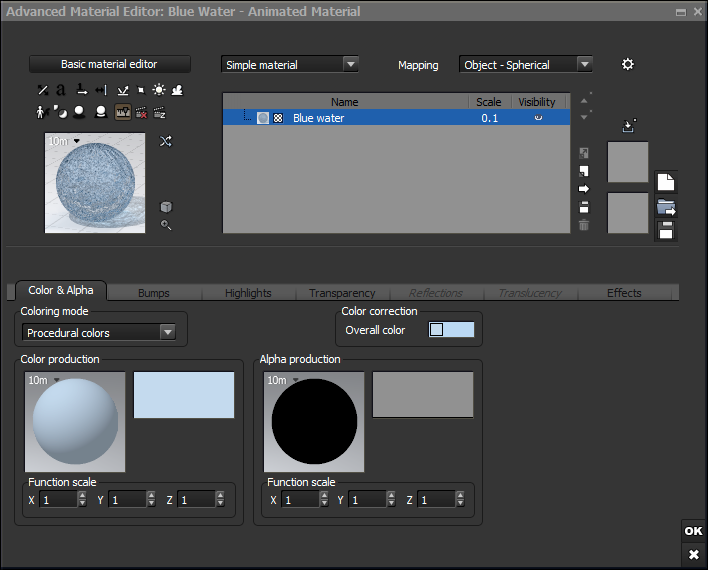
For the Water sphere, Fractal Terrain has already set sea level for us, so just use the same scale for the sphere (6m for this example). You can follow the video tutorial, just don't worry about scale too much. I just grabbed Water material I liked, set my Mapping to Object - Spherical and the scale to 0.1. I don't think I did much else with it.
ATMOSPHERE
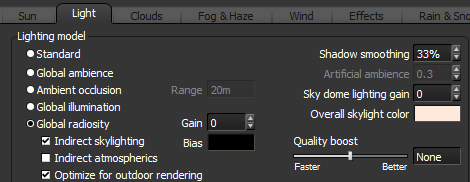
Do whatever atmosphere changes the tutorial I linked to does. Here are some (all?) of the relevant settings:
CLOUDS
I created two cloud spheres for some overlap. I just used cloud materials, not that map mentioned in the tutorial, though that may work better so you may want to hunt it down.
I set the scale of the inner cloud sphere to 6.24521m and the outer sphere to 6.38226m. You don't have to use two, it's just a matter of how much cloud cover you want and the variety in it.
INNER CLOUDS
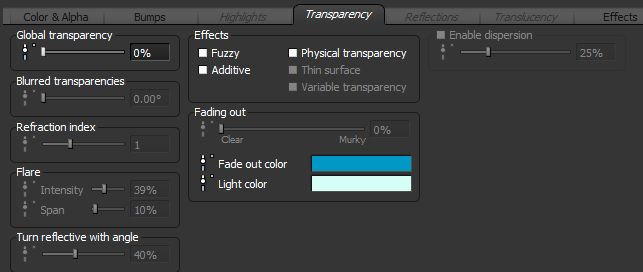
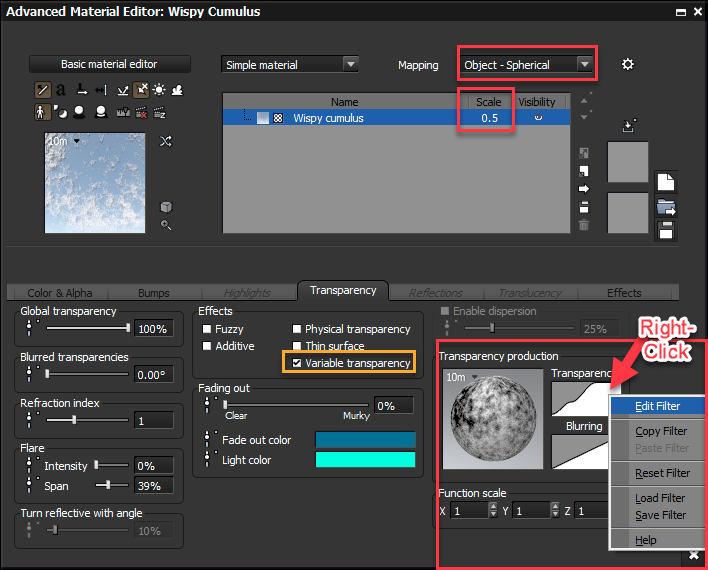
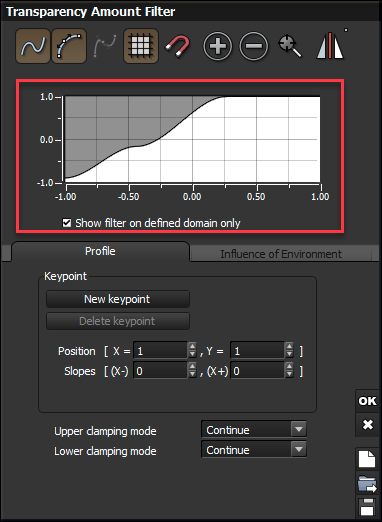
I used Wispy cumulus with a 0.5 scale. The Transparency is what you want to tweak. Make sure Variable Transparency is checked and then Right click on the Transparency graph and select Edit Filter to adjust it.
The top is more transparency and the bottom is less transparency.
OUTER CLOUDS
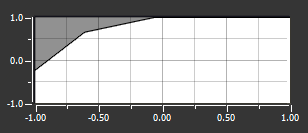
I used Dithered Cirrus #2 with a 0.1 scale and rinse and repeat. Here's the Filter I used:
HAZE
The Haze sphere's scale is 6.3695m in my example. Mainly follow the tutorial I linked to. To summarize it , you'll set the color to a blueish one, Edit Function, Create a Filter -> Filter and link it to Alpha. Then create Input -> Angle of Incidence and link it to your Filter. Edit your Filter's Filter to match the tutorial.
Hopefully this will help make that tutorial easier to follow.
//Russ












Comments
Thank you, very much :)
I used Vue a lot, right up to the point where I found out that I couldn't use any of the stuff I'd made commercially unless I bought the pro version, and I couldn't afford it.
Yeah, Vue is really geared more towards professional studios these days, though Creator is $200 a year, and that includes Plant Factory. The real power of Vue is with complex materials/ecosystems. There's a reason major movie FX studios use it.
Oh really? It's gone rental? That's a terrible shame.
If you were paying for annual maintenance on both products then it's cheaper now. Better deal for studios.