

Community Atlas: Mingjue Ruins, Xinxing Region, Kumarikandam
 Wyvern
🖼️ 293 images Cartographer
Wyvern
🖼️ 293 images Cartographer
As mentioned in my latest post regarding the Temple of Nidag maps in Alarius, the next maps in this series were going to be visited upon Kumarikandam, somewhere in the Xinxing Region on the great Tiantang Grasslands:
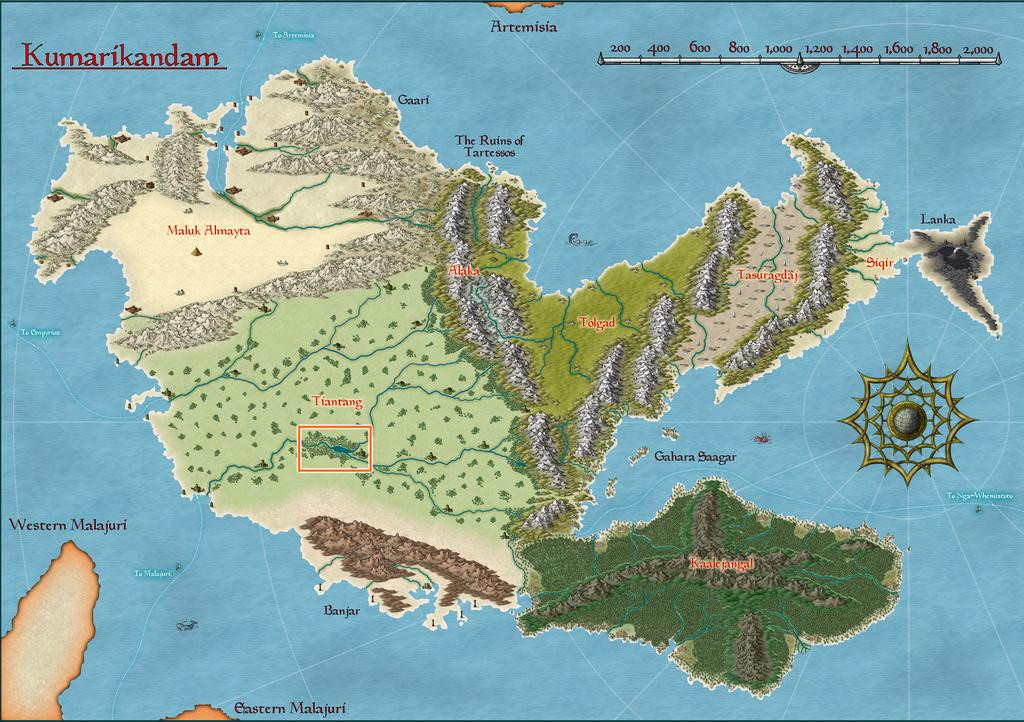
Looking over the extant Atlas mapping for this area showed a number of possibilities, as relatively little had been mapped in more detail here previously; essentially just the settlements of Shinsato and Ylangxi. Having already established, from adapted materials in the Inkwell Ideas book that accompanies the Trailblazer geomorphic dungeon designs I'd be using here, that this was going to be a combined maze and tomb, I wanted somewhere more out of the way to place it, and eventually settled on the Mingjue Ruins, next to the map's top edge:
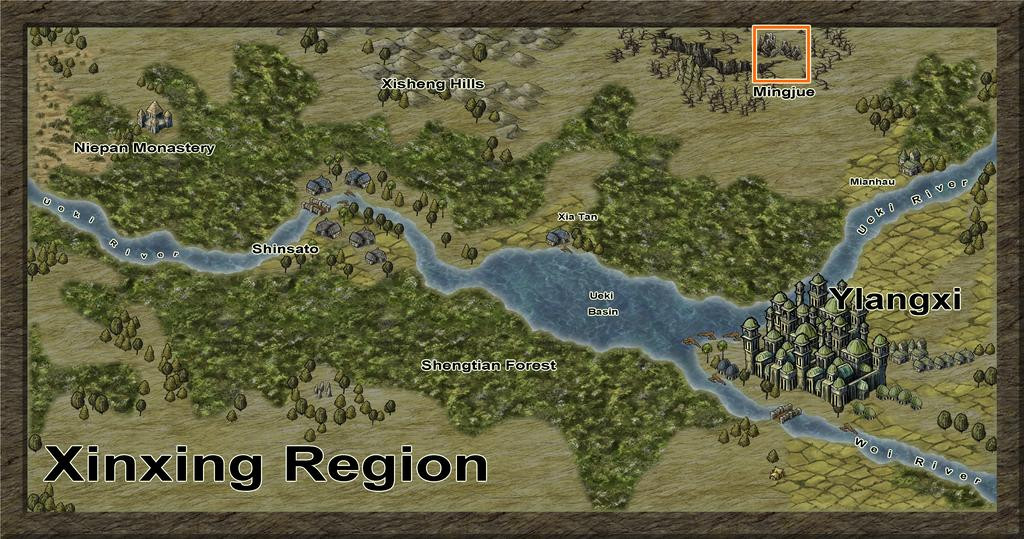
The various pictorial structures on this Xinxing map are, as so often, overscale, as that orange square outlining my selected place is actually 20 miles per side!
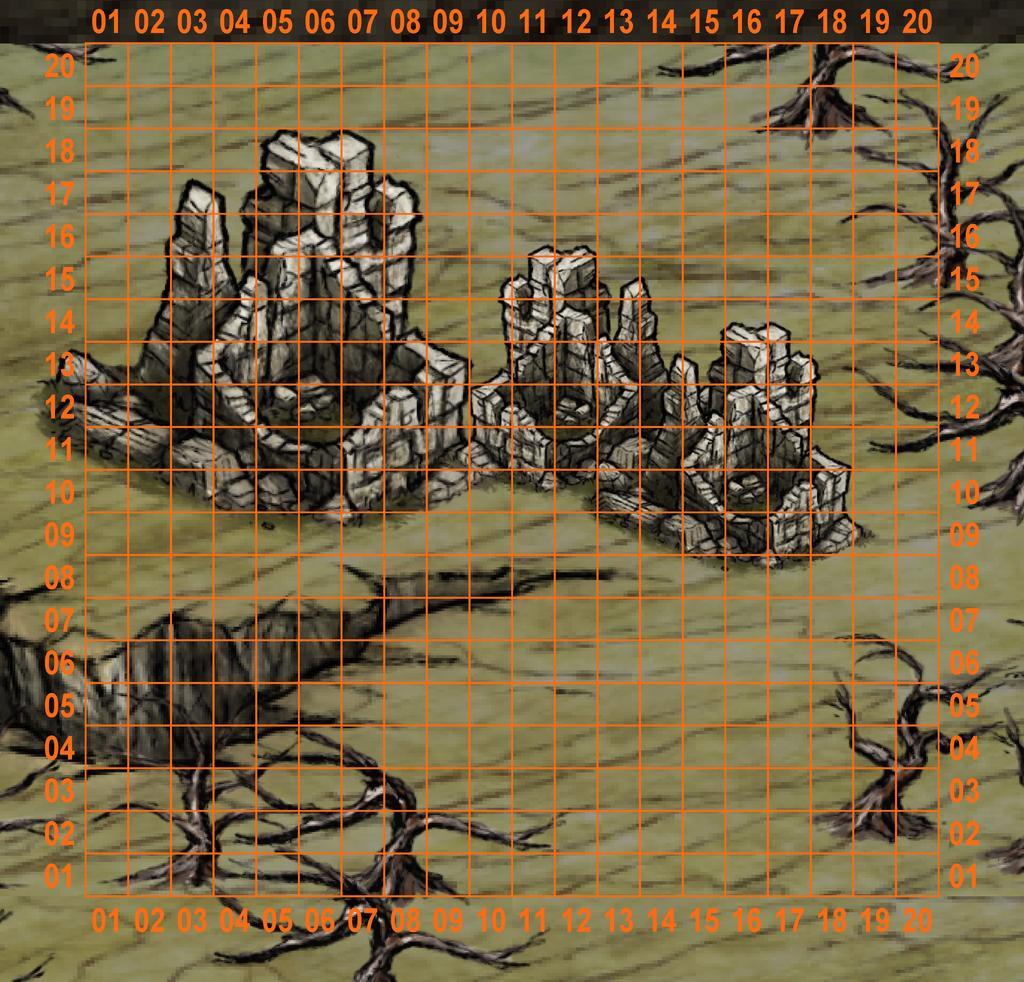
Thus, when zoomed-in to just that area, the ruins stretch almost right across the whole zone, here with the usual numerical grid added, with one-mile squares, so I can randomly place features of interest subsequently:
Preferring to try to work with what this showed, rather than simply reducing the region occupied by the ruins, I decided that something weird must have happened in the past to create the huge areas of dead forest all around that enormous chasm, and which was perhaps associated with why the ruins were here, and so seemingly extensive. Thus rather than all being structural ruins, I instead made the ground across the ruins area especially rough, with low, grassy hills and rockier tors, as well as some genuine old structures, given it's frequently hard to say modernly whether this or that grassy knoll or tor is really a natural feature, or an ancient ruin, without detailed investigation. Being in the tropics too, around 15°S latitude, the grasslands were set as having very tall grasses in season, to help further disguise the nature of the land here.
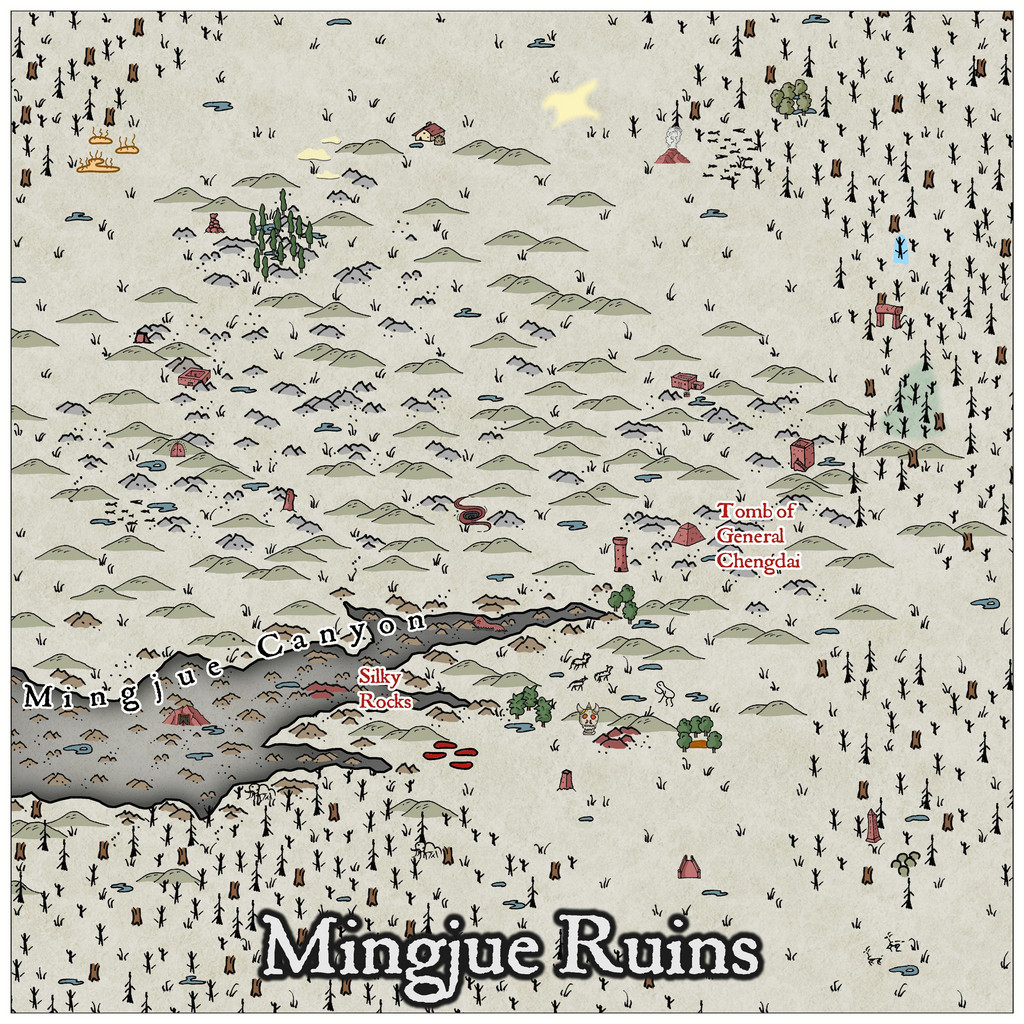
While I didn't prepare a series of WIP shots while preparing this map, I did a couple of test images to check if the symbol scaling I'd settled upon was working satisfactorily, which give an impression of what had been decided and where, all prepared using Ralf's new Hand-Drawn Fantasy style:
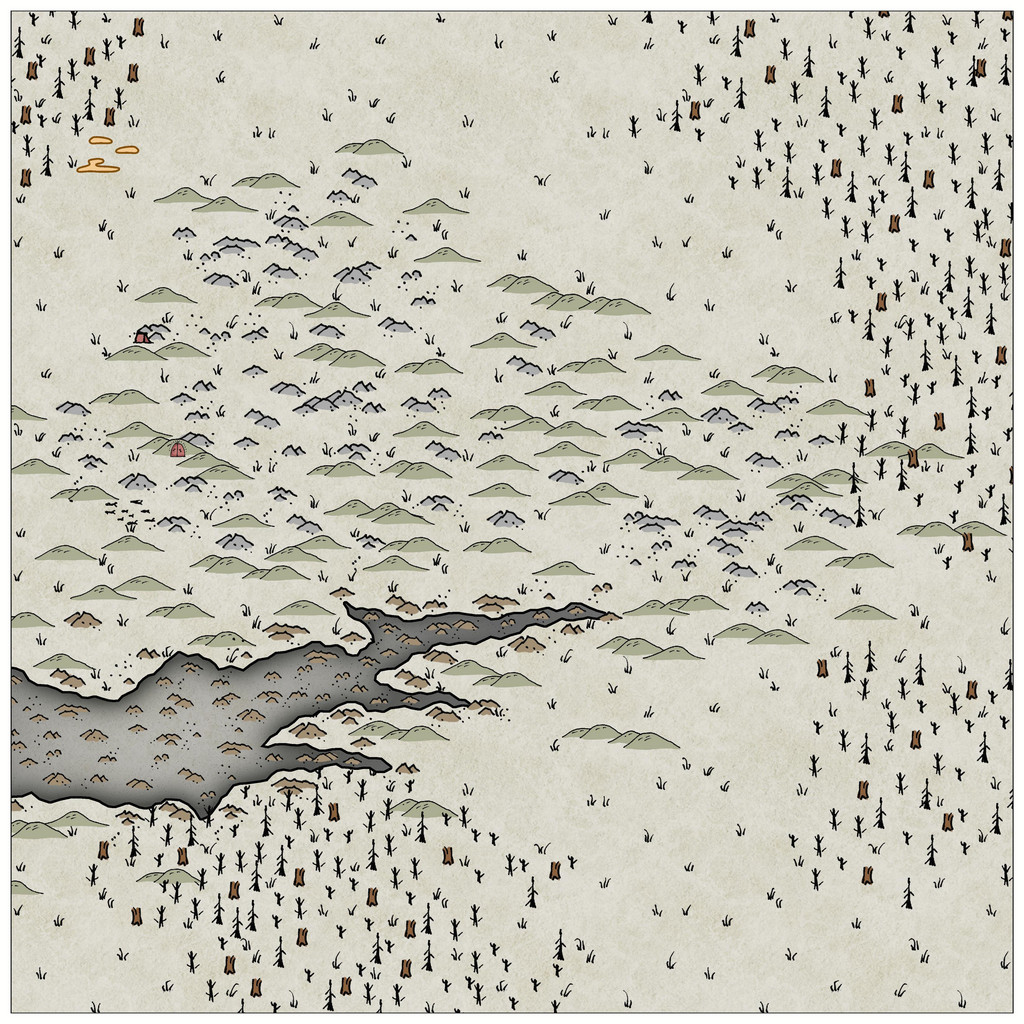
This one was very early in the process, with only a few features, beyond sketching-in much of the existing terrain, but it gives an idea of how I'd opted to lay-out the are-they-aren't-they ruins.
The following image was much further along in the mapping, and was done as a test to check the font sizing and effects as much as anything. The Tomb of General Chengdai, incidentally, is the site for the dungeon map here, hence why it's already been labelled:
A few further tweaks were necessary subsequently, of which perhaps the most major was swapping-out all those brown broken tree-trunk symbols for more of the simpler black-line dead trees, mostly because, having had doubts earlier, I realised it was a bit confusing/distracting for some of the smaller feature symbols. This was so even after I'd added the rest of the labels. Which brings us to the final version of the map:
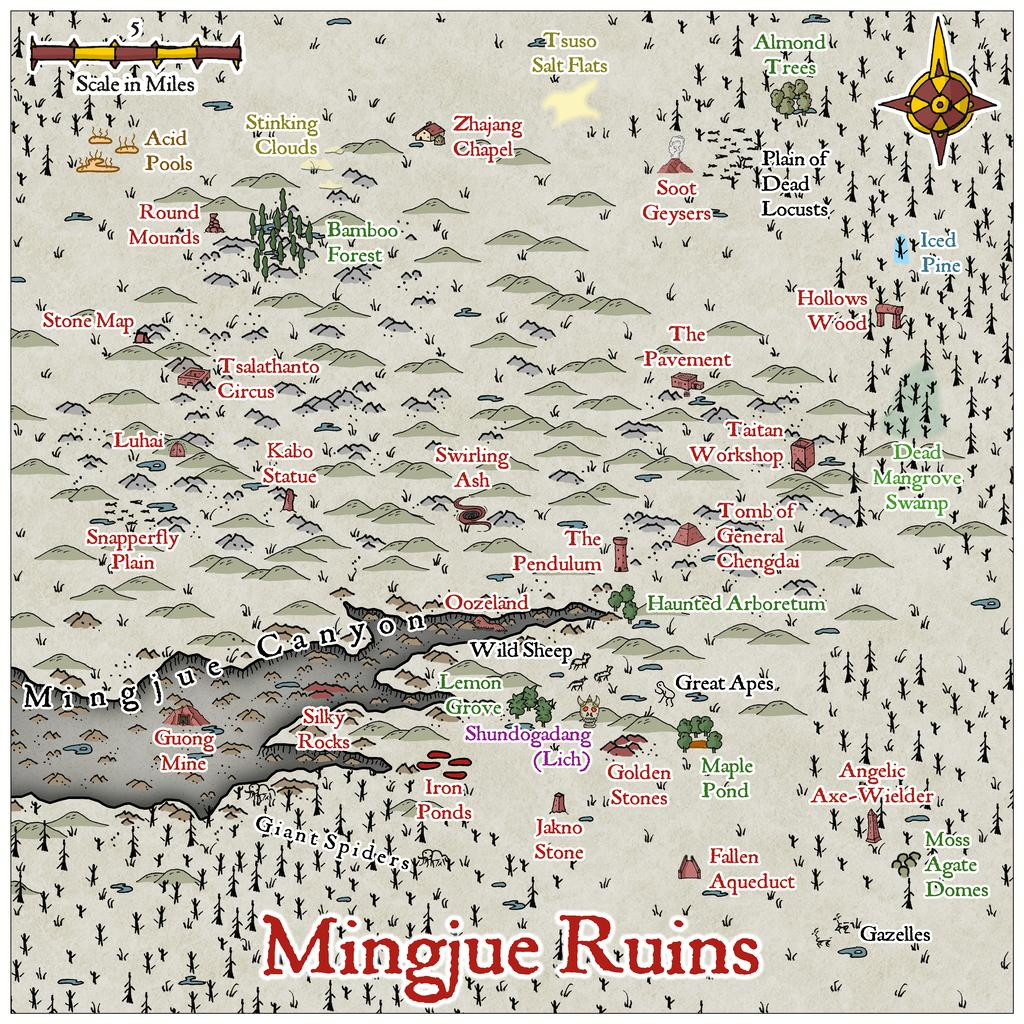
Options for what the various features were, were determined using random tables found throughout the "Knave" 2nd edition RPG rules, published by Jacob Hurst & Swordfish Islands LLC, with most of the names determined also randomly from tables in the "Nomicon", published by Mythmere Games.
I chose not to add any streams, just ponds, partly to sustain the overall feeling of ruination hereabouts, partly because I felt allowing GMs to add minor brooks wherever might seem interesting, was a better idea. I did add a comment about this in the PDF notes for the Atlas, as well as notes on the various labelled features.
There was one further very late change, following the publication of the latest free Hand-Drawn Fantasy monthly symbols for cliffs, in late January. I toyed momentarily with adding those new cliff symbols along the visible edges of the Canyon, but that proved unworkable, as the mapped edges were already drawn, and the symbols couldn't be easily fitted to them. Instead, I hand-drew some little vertical "cliff-lines" along those same visible edges, which seem to help enhance the existing darker effects shading around the Canyon edges. Many ended-up hidden by the Canyon's label, but at least I know they're there!
With this completed, it was time to head underground (next time)...


Comments
Naturally, I wanted to continue the overall hand-drawn theme here, now using Ralf's more recent Hand-Drawn Dungeon style:
I did think of adding a surface map too, but decided against that, and just showed a simple Entrance cave, which is open at ground level, leading down and inside. Rather than use another fill style here, I reused that for the inner section of the Tomb, with a scatter of small rocks, as the entryway is supposed to be half-buried and not that easy to access (noted in the PDF description).
The two main blocs underground were determined from lightly adapted versions of the notes in the Inkwell Ideas book that accompanies the "Trailblazer" geomorphic dice set, the "Dungeonmorph: Book of Modular Encounters - Delver, Trailblazer & Voyager Edition", with the names again provided via the "Nomicon". The Spectral Minotaur Maze layout was enlarged a little compared to the actual dice design, including a few extra doors, because although the dice-only version was good, it didn't feel quite "mazy" enough here, which changes also brought in the sliding walls concept, to further muddy the waters.
In the Atlas FCW file, with luck, there will be toggles to allow the five Sliding Walls to be switched individually from one position to their alternates. Here of course, I have to show five different illustrations, for all the changes in each are very slight, best-seen if you save copies of all six images and switch from one to the next as a slideshow.
The shot above is the default view. This shows the moved W1 wall:
This W2:
W3:
W4:
And W5:
There is, as noted on the map, an actual Spectral Minotaur, Javeng, to defend the Maze, plus six more that he's created over time from treasure-seeking adventurers. Like all the undead here, he's powerful and reforms even if destroyed, plus the strong magics that operate and maintain the complex mean none of the undead can be turned away by priestly characters, while unattended doors close on their own, and markers in the Maze vanish or are moved. The Minotaurs can't leave the Maze area at least, hence why the floors are so clearly differentiated.
The Tomb area is constructed around the square Spiral Descent Passage. I'd have been happier with stairs that didn't have that black "corner", as they can work less well on maps such as this, which show multiple levels on the same drawing. However, I preferred to use just the symbols currently available in the style, and they don't look as bad here as those which simply cut through and remove part of the lower stairs, making it seem they've crumbled away!
The Treasure Chamber should have a boat and a wagon in it, although as neither are present as symbols (yet!) in this style either, I made-do with what there is. There are also five skeletons there as well, but that looked a little too cluttered and "samey" with the current options, so the room contents overall are just a sketch-reminder version instead. The PDF notes say more, of course.
Deeper down, the Rock Trap triggers via the lowest step on the third staircase, hence the trap marker there. The whole wall section fronting the hidden room pivots to block the Descent Passage up, then the damaging rocks roll right down to the door to Tomb G. A short while later, magically, they all roll back up to the secret room to reset!
The General's Tomb (he's the only one here not undead; a legendarily masterful leader in life, famed for many great deeds) is floored and roofed with green marble, with a black marble platform for his large, brass sarcophagus, with illustration-engraved brass wall panels all around. No green marble available here, so I improvised with an RGB Matrix Process effect. And spent ages tweaking it to look reasonably OK! The platform is the varicolor closed pit symbol, stretched to become rectangular.
Lady Zhembo, yet another spectre, betrayed her lover, the General, to his death, was caught, executed and cursed to remain here, perpetually mourning him. High Priest Chetseng, the strongest spectre in the complex, who in life set the curse, is here to make sure she never leaves.
Next time, it's a return visit to Peredur, to find a suitable location in Ruma Helrevy there...
Maps are now in the atlas. Thanks for the contribution.