

How to build a circular dungeon?
 Solo4114
Newcomer
Solo4114
Newcomer
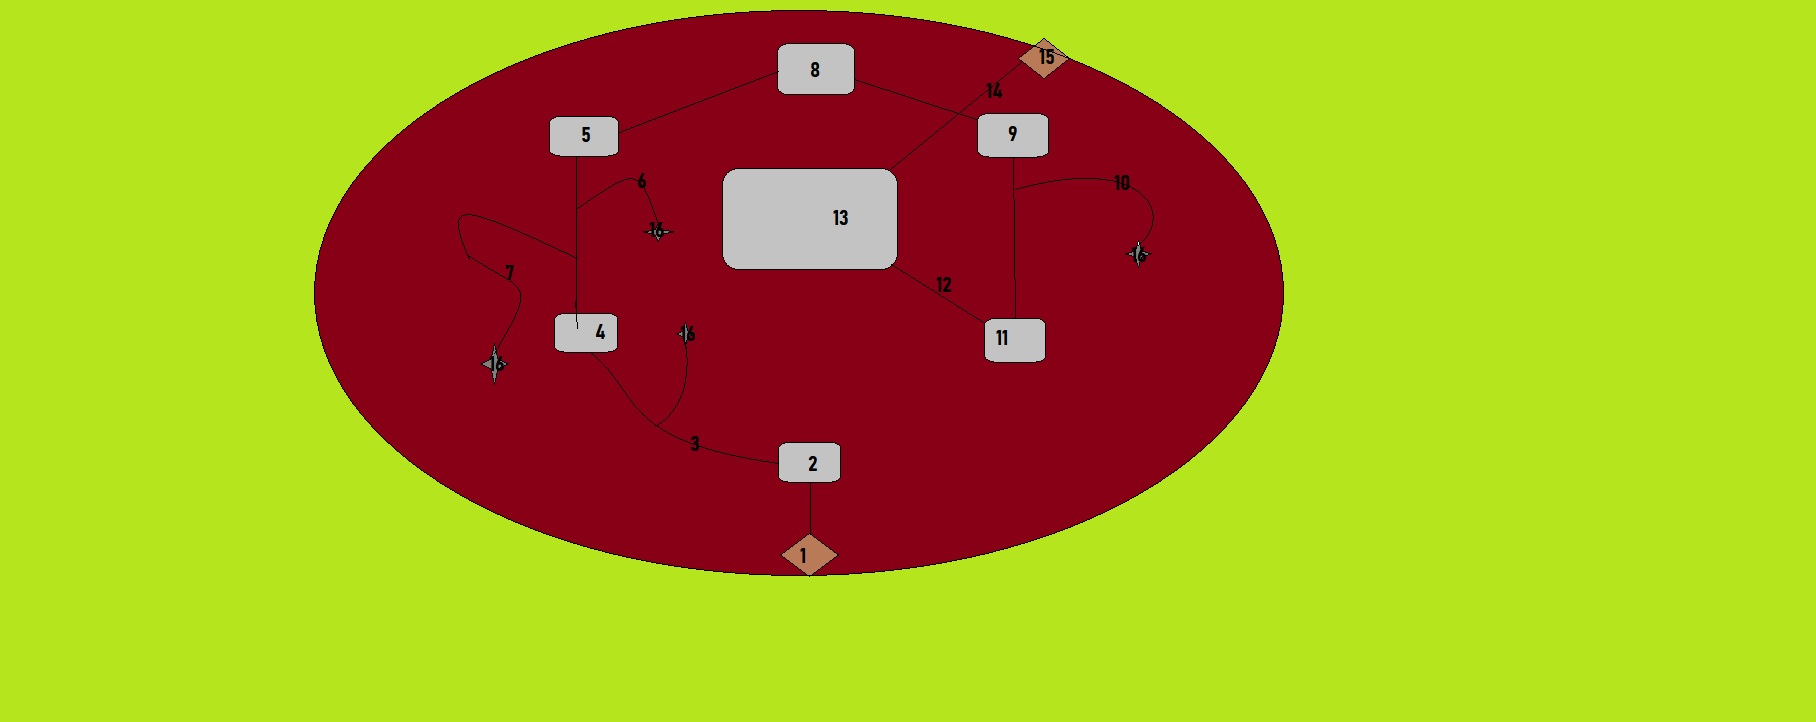
So, here's what I'm trying to do in DD3+. Basically, I'm trying to build a barrow mound which, itself, will have interior hallways and chambers, but where those hallways and chambers will reside within the dirt/rock hill that makes the rest of the barrow. In addition, some of those hallways will have ruined walls and rough tunnels running off from them. I've attached a copy of the rough map that I'm trying to create. The polygons are rooms, the straight lines are tile-lined hallways connecting the rooms, and the curved lines coming off of the tile hallways that lead to those four-pointed "star" shapes are where the walls have crumbled and lead to rough tunnels inhabited by various critters (the star shapes at the ends are smaller rough rooms). The diamond shapes are the entrances/exits to the wilderness.
There would also be a door at the main entrance which would exit to the wilderness, and a second exit that's been dug as an escape tunnel for the necromancer occupying the barrow.
I've tried using the circular dungeon tool, but that hasn't really worked for me so well. I'm honestly not even sure how to begin approaching this. Can anyone offer suggestions or a video tutorial or something?
Comments
If you want to organise everything in a perfect six-pointed star shape, the easiest thing to do is add a temporary sheet and draw a regular hexagon on it (right click the polygon tool for that option and watch the command line as you work). Then you can use Attach (button on the bottom right) to position everything on the points of that hexagon.
The rounded rectangles don't exist in ready-made form, but are relatively easy to do.
Draw an ordinary rectangle of the right size and shape, then explode it so that each side is a separate piece, using the Explode tool.
From the Edit menu, pick Trims at the bottom of the list, and then pick Fillet and Trim. The command line will ask you for the first entity. Pick one of the four separate lines you have just created by exploding the rectangle. Then it will ask you for a second entity. Pick the line next to it. Then it will ask you for the Fillet Radius, which is the size of the bend you want to join them together with at the corner. The default is 1, but you can change that by entering another number. Press enter, and the rounded corner will automatically draw itself.
Do the same for all adjacent lines, and you will end up with a rounded rectangle.
For generally curved passageways the smooth line drawing tool can be used to define them. Once they are drawn, and as long as you have made sure that all the ends meet by moving the end nodes of each section and snapping them together using Attach, you can select all the lines and convert to path by right clicking the Fractalize tool and picking Line to Path. This will convert them to paths, but it will also join the ends together to make several sections into one line where possible.
The curved line at the bottom of the image here started life as 3 separate sections. I turned on Attach and moved the end nodes so that they snapped to each other, and converted all three at once to a path.