

Scale flooring bitmaps to create depth?

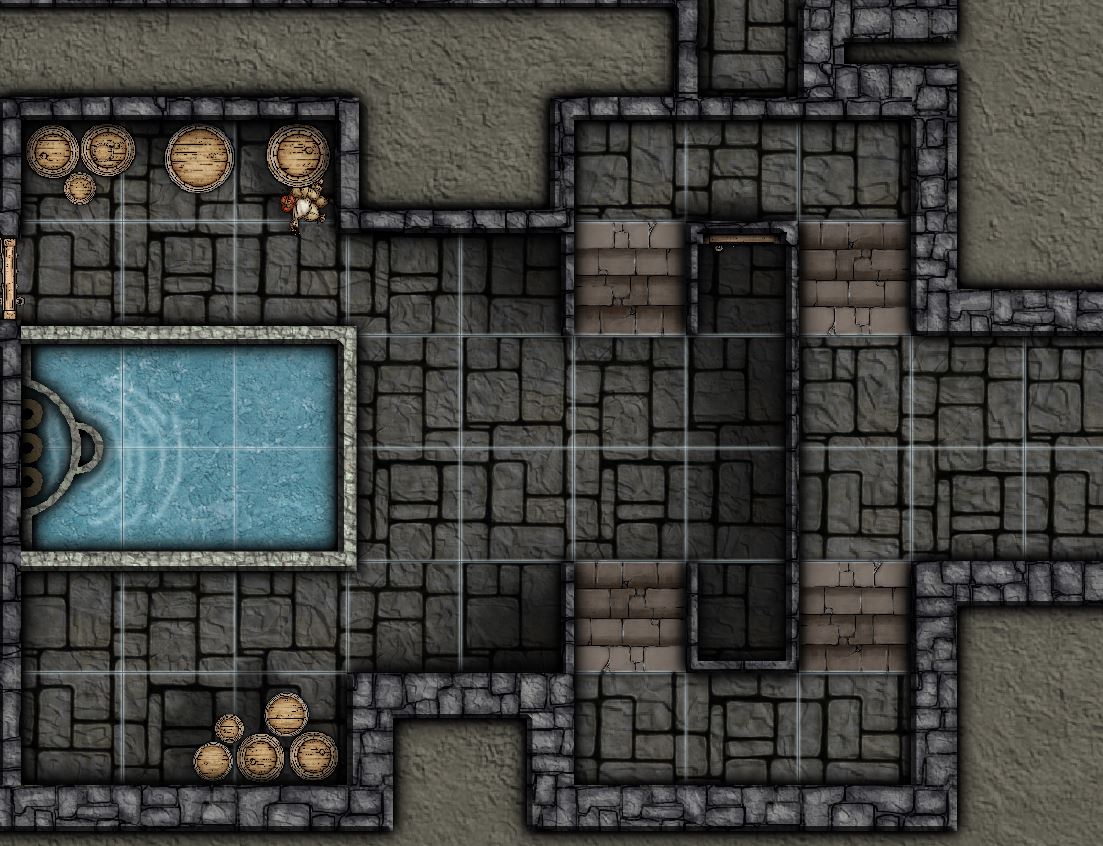
Hello. I am working on a new battlemap for lost mines of Phandelver D&D adventure. It is in a basement in an abandoned manor. Players can come in on a landing from the right side of the map and then go down two separate flights of stairs to get to the first room. Attached is my current effort which works ok but I think it would look a lot better if I could make the floor paving stones on the landing slightly bigger than those on the main room to create a bit more depth. Thinking larger paving stones on the landing would make that level look higher than the floor in the room. I could even have three different sizes if I got really carried away.
Is this doable? I have done a quick hunt through the forums and could not find a similar question, but apologies if this has been talked to death before.
Also, second question, I applied a texture to the floor and tried to apply the same texture to the symbols of the stairs but nothing changes on the stairs. I'm assuming from this that that effect cannot be applied to symbols? If so, any ideas on how to make the stairs blend in a bit better with the flooring? I changed their colour but definite room for improvement I think.
Cheers
Mappy.
Comments
Cheers,
~Dogtag
For a start, two tips:
1: Make sure the areas of floor you want to change are separate pieces of flooring to the rest of the flooring on the map. They can be on the same sheet, no worries there; they just have to be different entities.
2: If they will be sitting on top of other pieces of floor, the areas may be hard to tell apart if they are the same flooring pattern. So for now if you make new pieces, use a different flooring pattern to the rest of floor so they are easy to find and select when you go to change their properties later.
The idea is to find the bitmap of the floor pattern you want to change, make a copy of it, rename it then change the width and height values of it (make them smaller to make the floor look smaller, larger to look larger).
Righto, here goes:
Click on the Fill Style bar on top right of screen:
[Image_3735]
and this window appears
[Image_3736]
Click on the “bitmap files” tab then click on the down arrow icon at the end of the “Fill Style Name:” box and scroll down the list until you find the bitmap pattern you want to change the size of.
Click “New” to make a copy of that fill and give it a new name. You are limited with how many characters you can use, and how many characters of the names of all the existing bitmaps are visible, hopefully this will be expanded a bit for CC3+ so you can see the full name? Anyways change the name, to something meaningful for you.
Now make sure the tick box beside “Scaled” (bottom left of window) is ticked then change the width and height values to make it smaller or larger. If the original scale of the bitmap was Width: 10, Height:10, to make it larger than that, increase those values, or to make it smaller decrease those values. You can see the changes in the preview pane. If the preview is zoomed in too much or out too far, change the value in the “Sample width:” box.
Once you are happy with the new width and height values, click OK.
Now to apply this new bitmap to your floor pieces, we will use the “Change Properties“ tool
[Image_3737]
Left click Change Properties icon,
Left click on the edges of the pieces of floor you want to change to select them,
Right click then left click “Do it”
Click the down arrow on the "Fill Style" box and scroll down the list until you find the new bitmap file you have just created, select that and click OK.
And if I have described this correctly, you should now have a nice new piece of rescaled flooring.
One neat thing I found, is if after all this you might think “hmmmm this could still be a little smaller"..... No drama, all you have to do is click on the Fill Style bar on top right of screen again, scroll down to find the bitmap you created (if it is not actually already there) then change the width and height values again, click OK and you can see on your map the scale of the bitmap pattern changing on your floor immediately.
Dangerous bit of knowledge this. For the above map I ended up creating four different scaled "heights" of the flagstones; could easily get out of control.....
Anyways, hope people can understand this, let me know if I could make anything clearer.
Cheers.
Changing the size of the fill, strong shadows given off by the higher levels, and the thin wall to show that it drops off all come together very effectively to show height.
Thank you for sharing your invention.
Cheers,
~Dogtag