

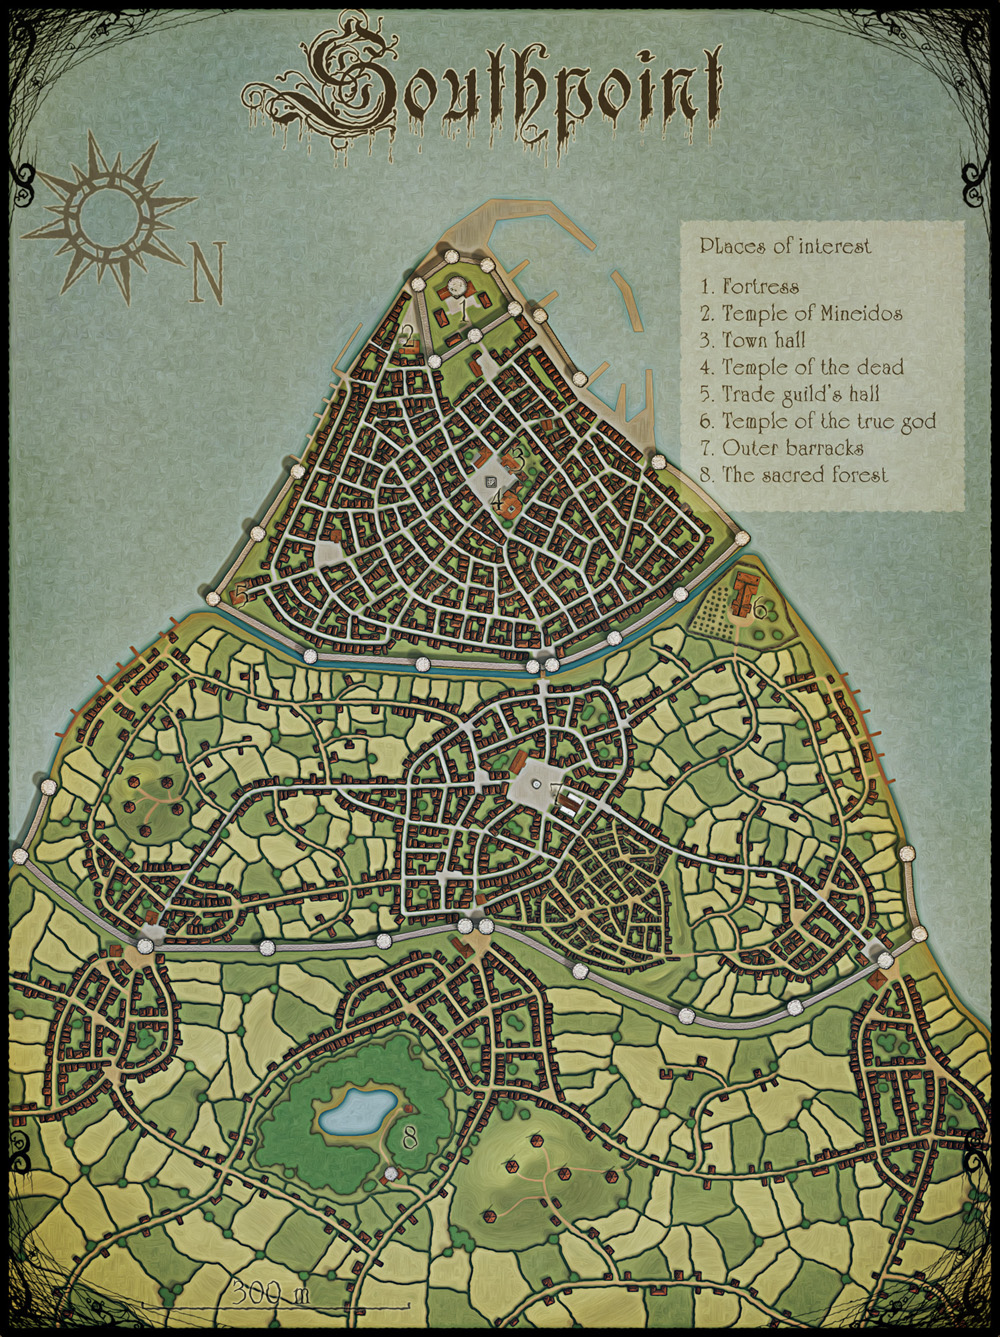
Southpoint - city made with CD3
 Clercon
Betatester Traveler
Clercon
Betatester Traveler
After having finished my Littlebridge map I decided to try to make a bigger city. So I started mapping Southpoint.
A bit of the story:
Southpint a city in the southern part of Armadien. It used to be a free city with close connections to Ankh-Bathor further south. But the King of Armadien couldn't accept it's freedom (well he obviously wanted part of the money). After some short battles and long negotiations Southpoint agreed to be a part of the Armadien kingdom and pays a yearly tax from it's vast trading income. A lot of very influential people in the city (mainly traders) don't like this and want there freedom back. With support from Ankh-Bathor they are plotting against the king. Unfortunately some are also looking for help in the shadows and nightmares where seldom good deals are done.
The map is done in CD3 from profantasy, and edited in photoshop (mainly colours and painting effects).
Comments
5 STARS...And don't forget to tip your waiter!!!!
Here is also a pre Photoshop picture of the map for Simon :-). As you can see on the map all fields are green. I also have a map with all fields yellow. For me it was quicker to combine them in PS to get mixed fields then to do it in CD3. So this is the export with the fields hidden. Unfortunately I can't show you a picture where you see the fields combined, cause I accidently lost it in a save
The effects I've used on the map is mainly two things. First I've used the painting effect I described in my Littlebridge map here on the forum. But this time I wanted more muted colours. So I copied the "painting" layer so I had two identical layers of the map. Then I used Hue/saturation in colourize mode to make the top layer Sepia coloured. Then I changed the opacity settings on the Sepia layer to get the colour I wanted. Quite simple actually. I've also made some areas lighter/darker with curves.
Hope this explains it a bit.
Any many thanks for your explanations of the process here and in the blog. I just have one more question...
If you look at the final map, at the right of number 8 there is a hill (others are scattered in the map). How did you produce this effect? I think it's absolutely great.
Also a short answer to your question Erior, I made the hills in Photoshop. To do it you add a new layer with a layer mask to it. Make sure the whole layermask is black. That means nothing in the layer is shown. I filled the layer with a brown colour. Add the Bevel and emboss layer style to the layer. Draw with a white pencil with low opacity on the black layer mask(somewhere around 20%) and the hills will show up. Make sure that you get the shadows on the right side of the hills (or you end up with them on the wrong side like me :-) (I've fixed that now though)).
To view the settings I used see the picture below.